Do you find yourself spending an excessive amount of time manually copying and pasting data from one document to another? This repetitive and monotonous task can be a significant drain on your time and resources, taking away from more critical tasks. Fortunately, with the advancements in no-code process automation and AI, you can automate this process, saving you time and effort. This simple step-by-step tutorial will show you how to automatically extract data from a PDF and store it in Google Sheets with zenphi.
Zenphi is the only no-code process automation tool built specifically for Google Workspace apps like Forms, Drive, Docs, Sheets, Slides, and more.
Video Guide — How To Extract Data From PDF To Sheets, Using Gemini AI Model
How To Extract Data From PDF To Sheets Using One Of Zenphi's AI Models — Step-By-Step Guide
Step 1: Create a Zenphi account
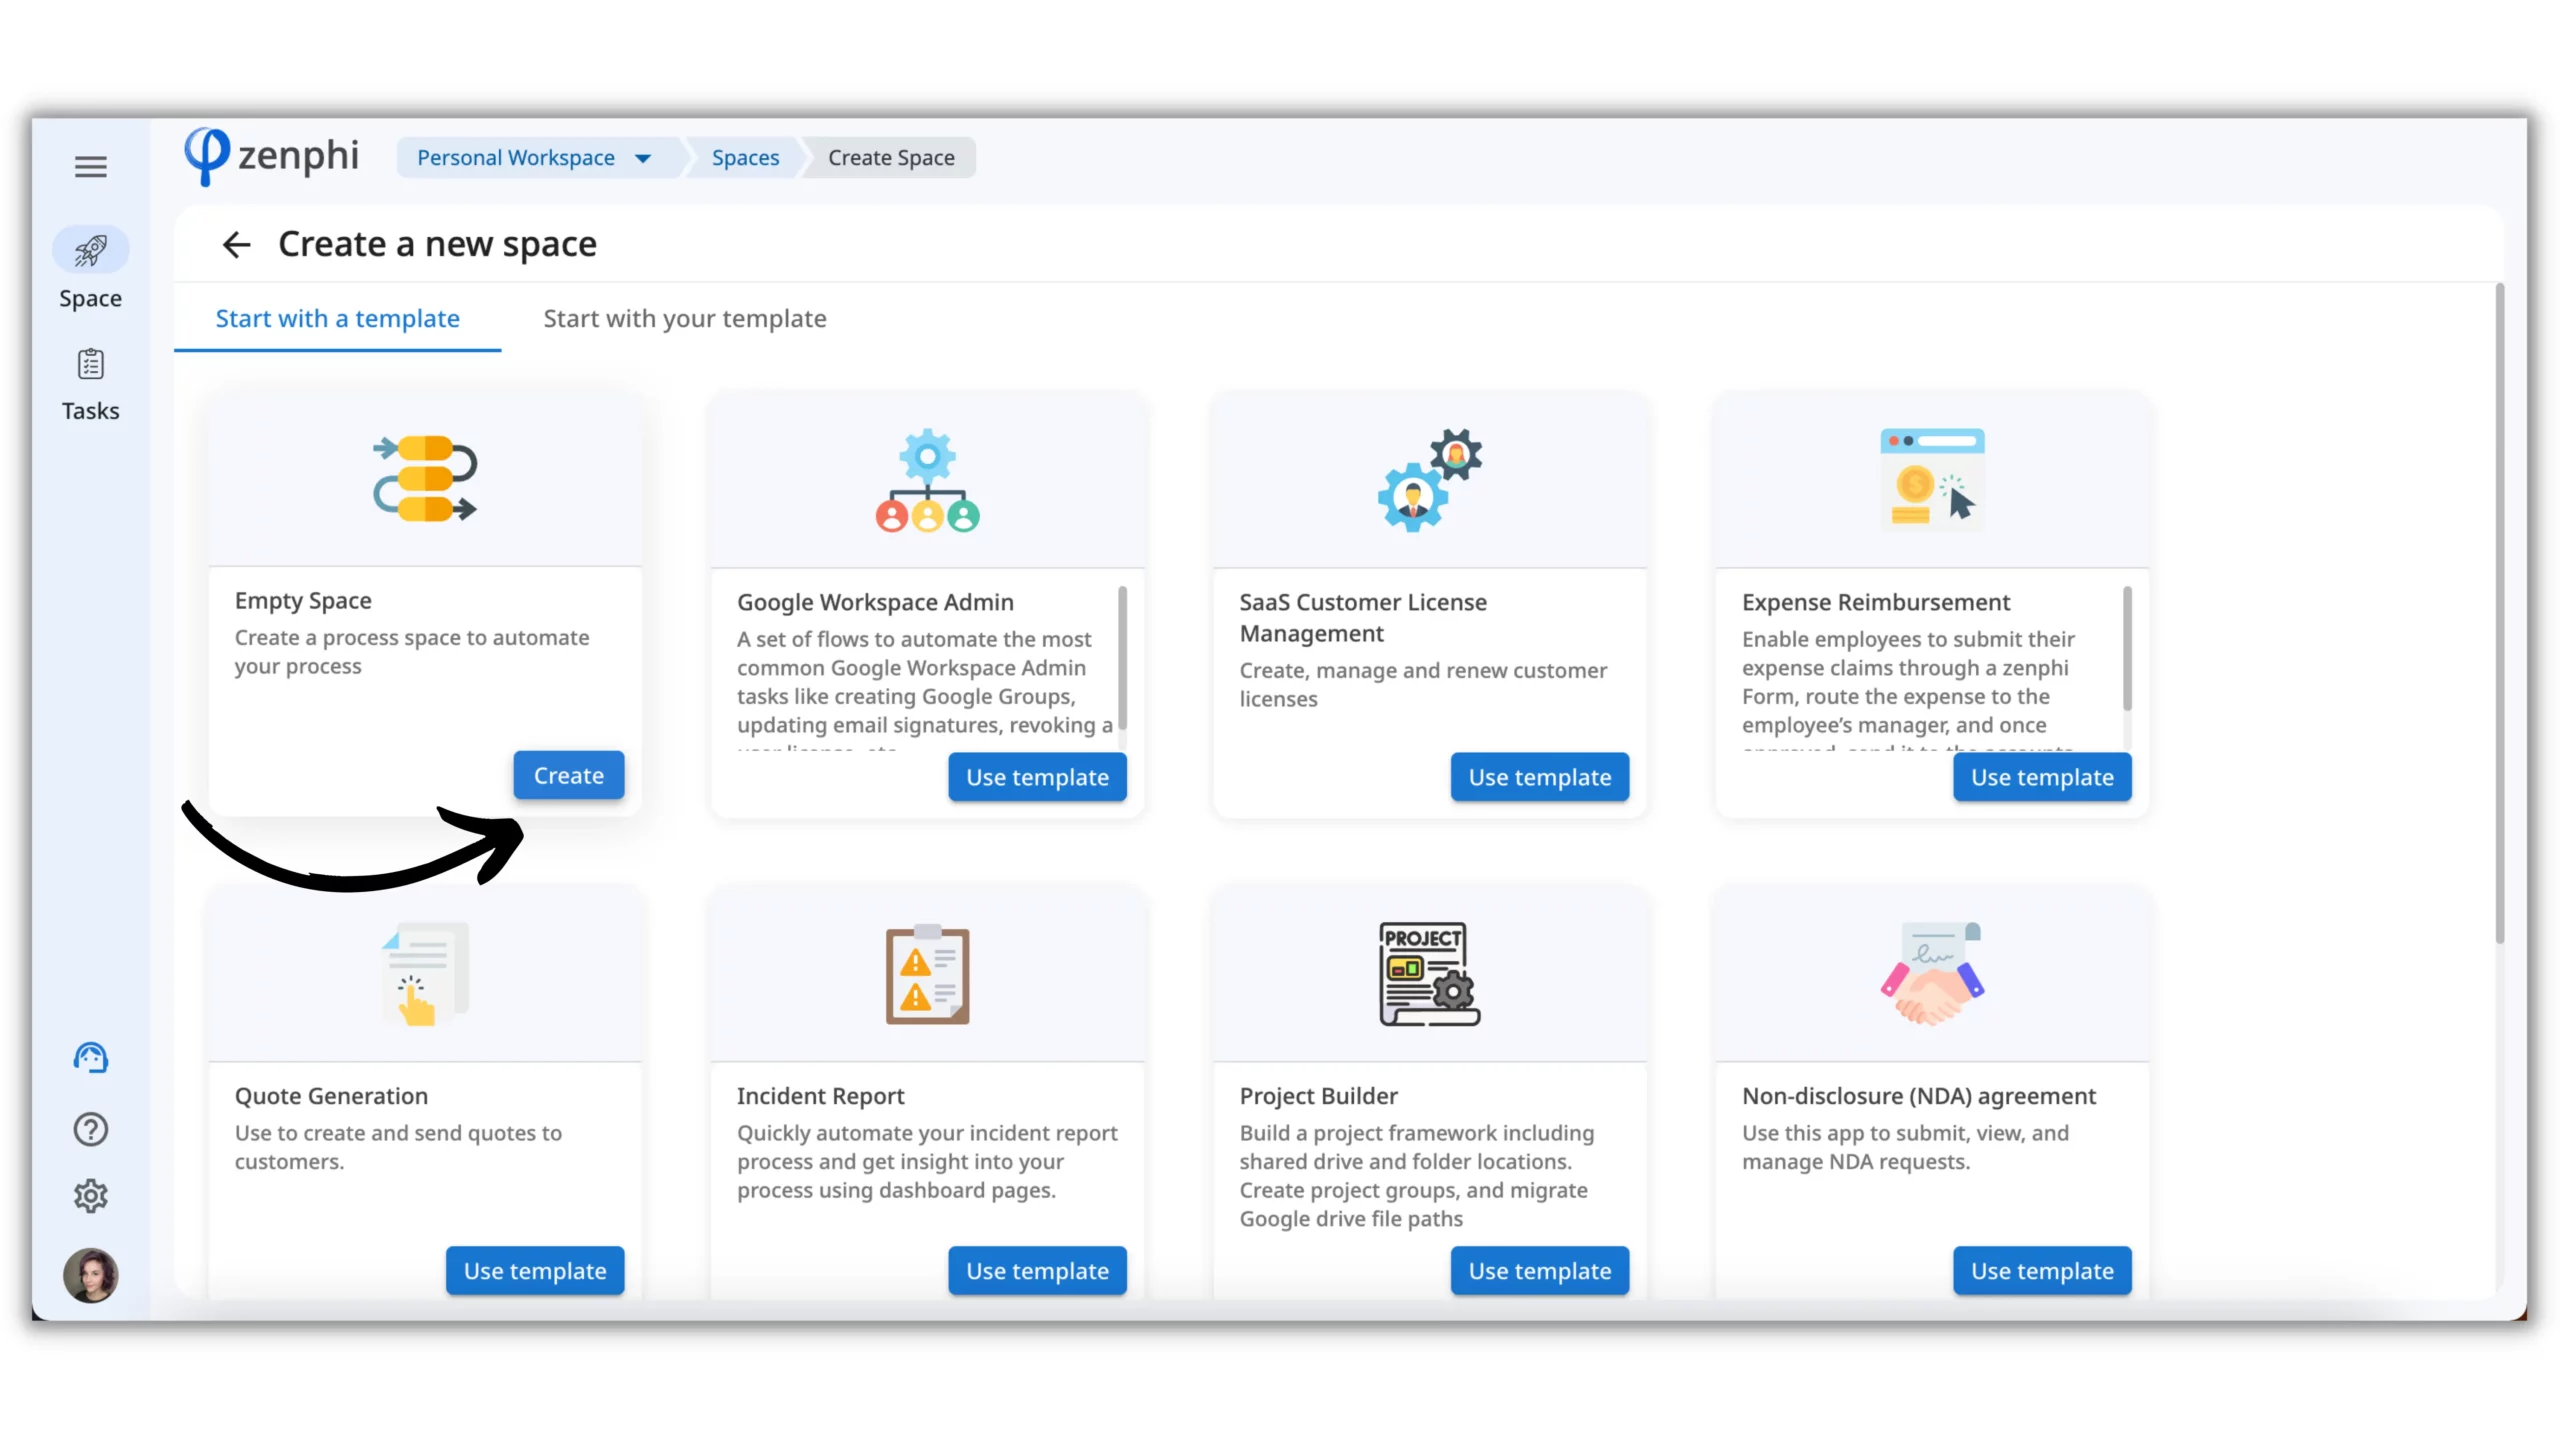
To get started, go to the zenphi website and sign up for a free account. Once you’re in, create a new Space and select an Empty Space. You can think of Space as a container where you’ll manage all the assets related to your automation.
Step 2: Create an AI model to extract data from a PDF
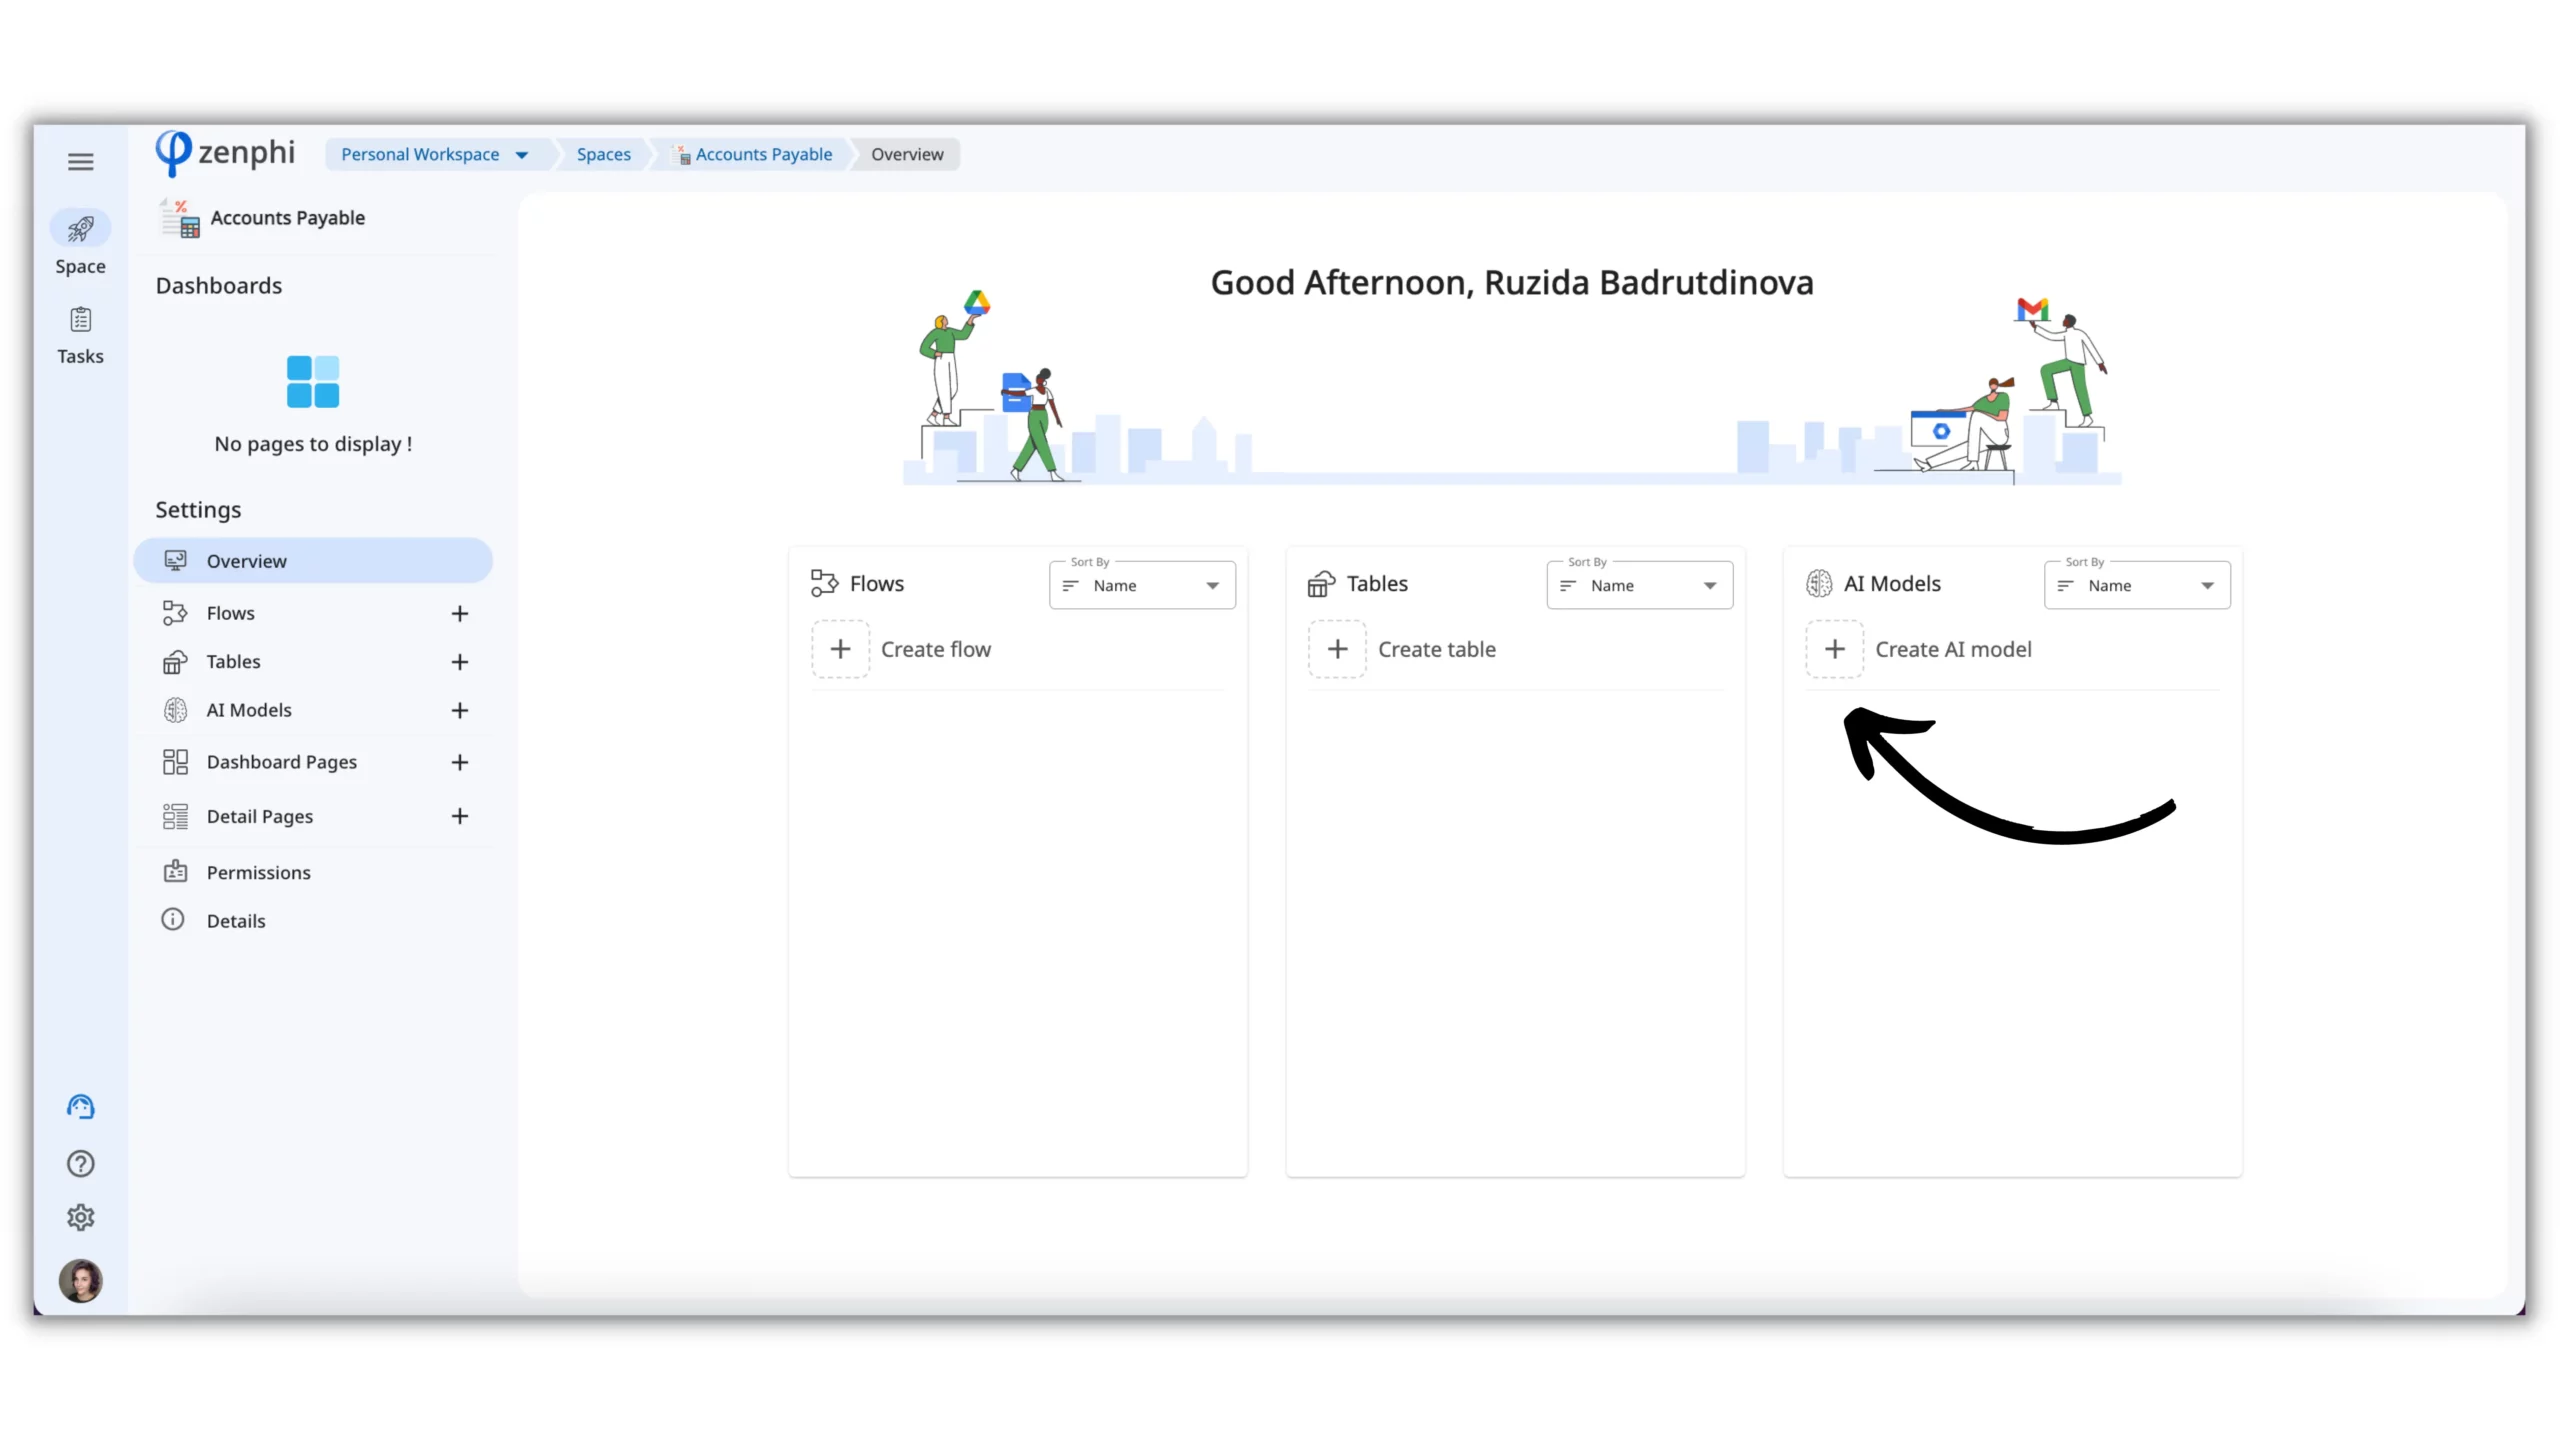
AI Model allows you to automatically extract data from all kinds of documents like invoices, utility bills, forms, etc., and transfer this data to other systems to use further in the process. Zenphi can help you process data from any document and image format, including PDFs. In this example, we’ll review the Invoice Parser.
Invoice Parser extracts key information from invoices such as invoice number, supplier name, invoice amount, tax amount, invoice date, due date, and more.
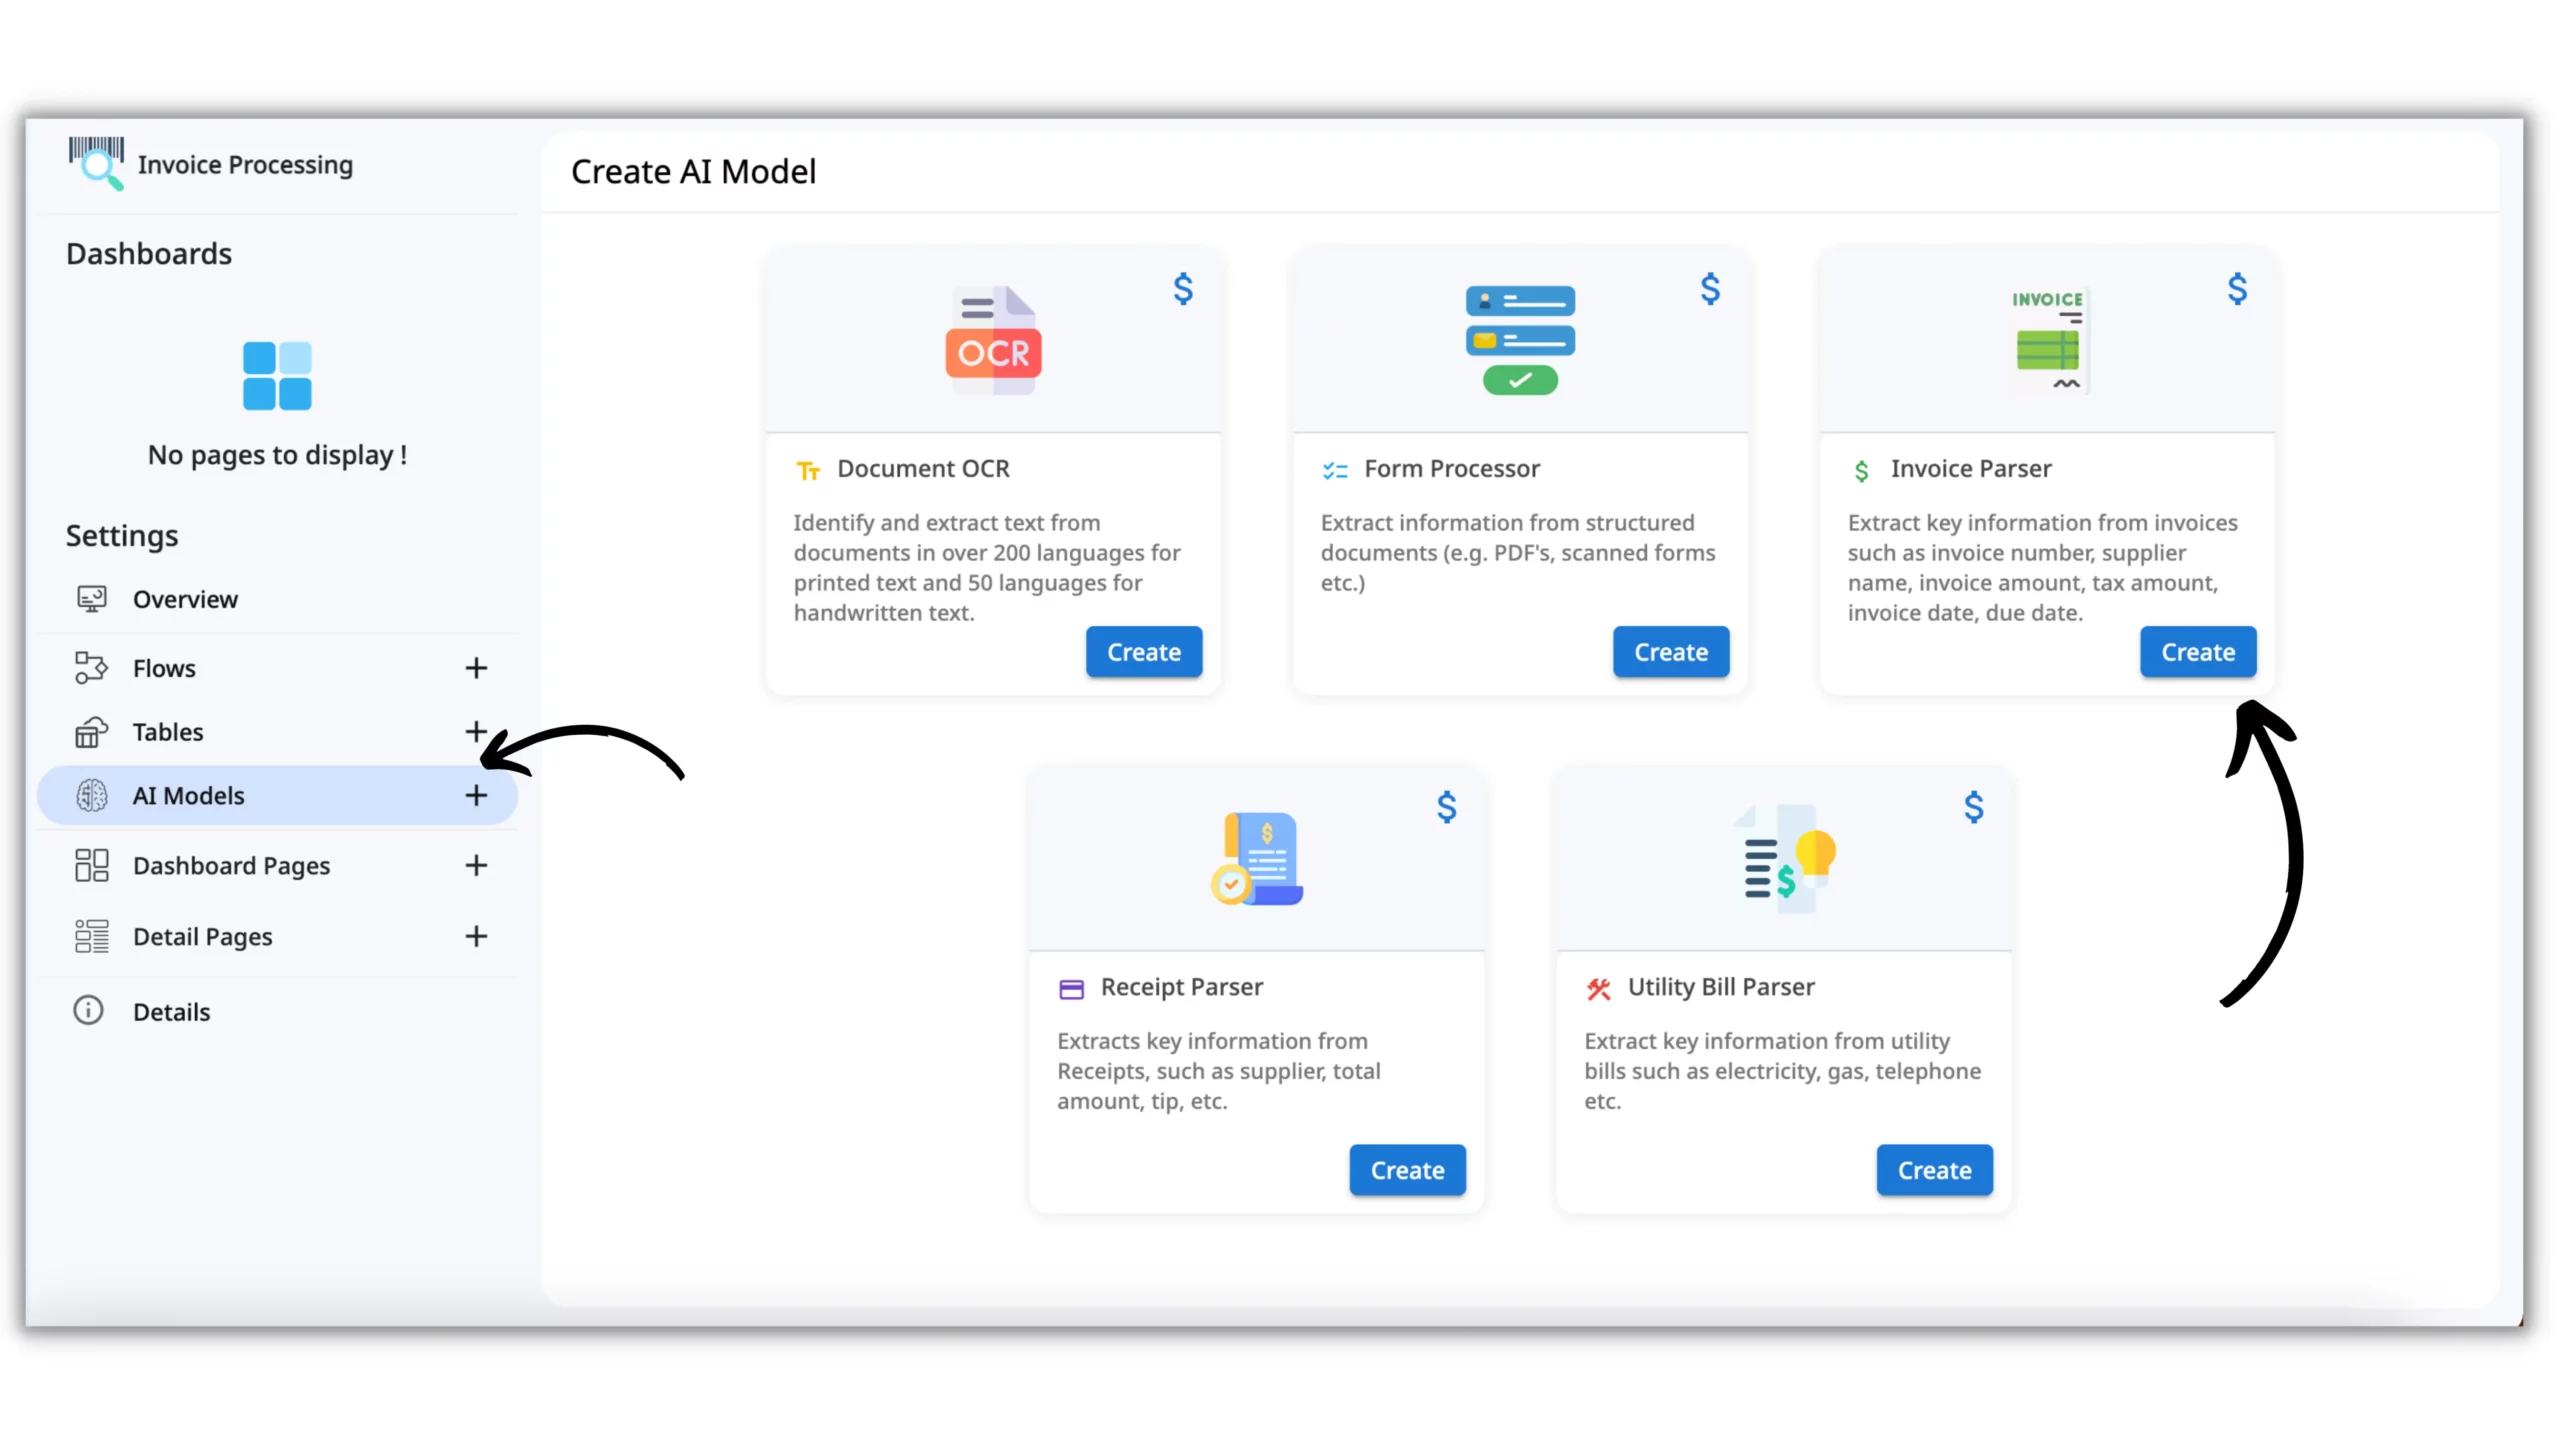
2.1 Create an Invoice Parser and teach an AI model to extract data from a PDF
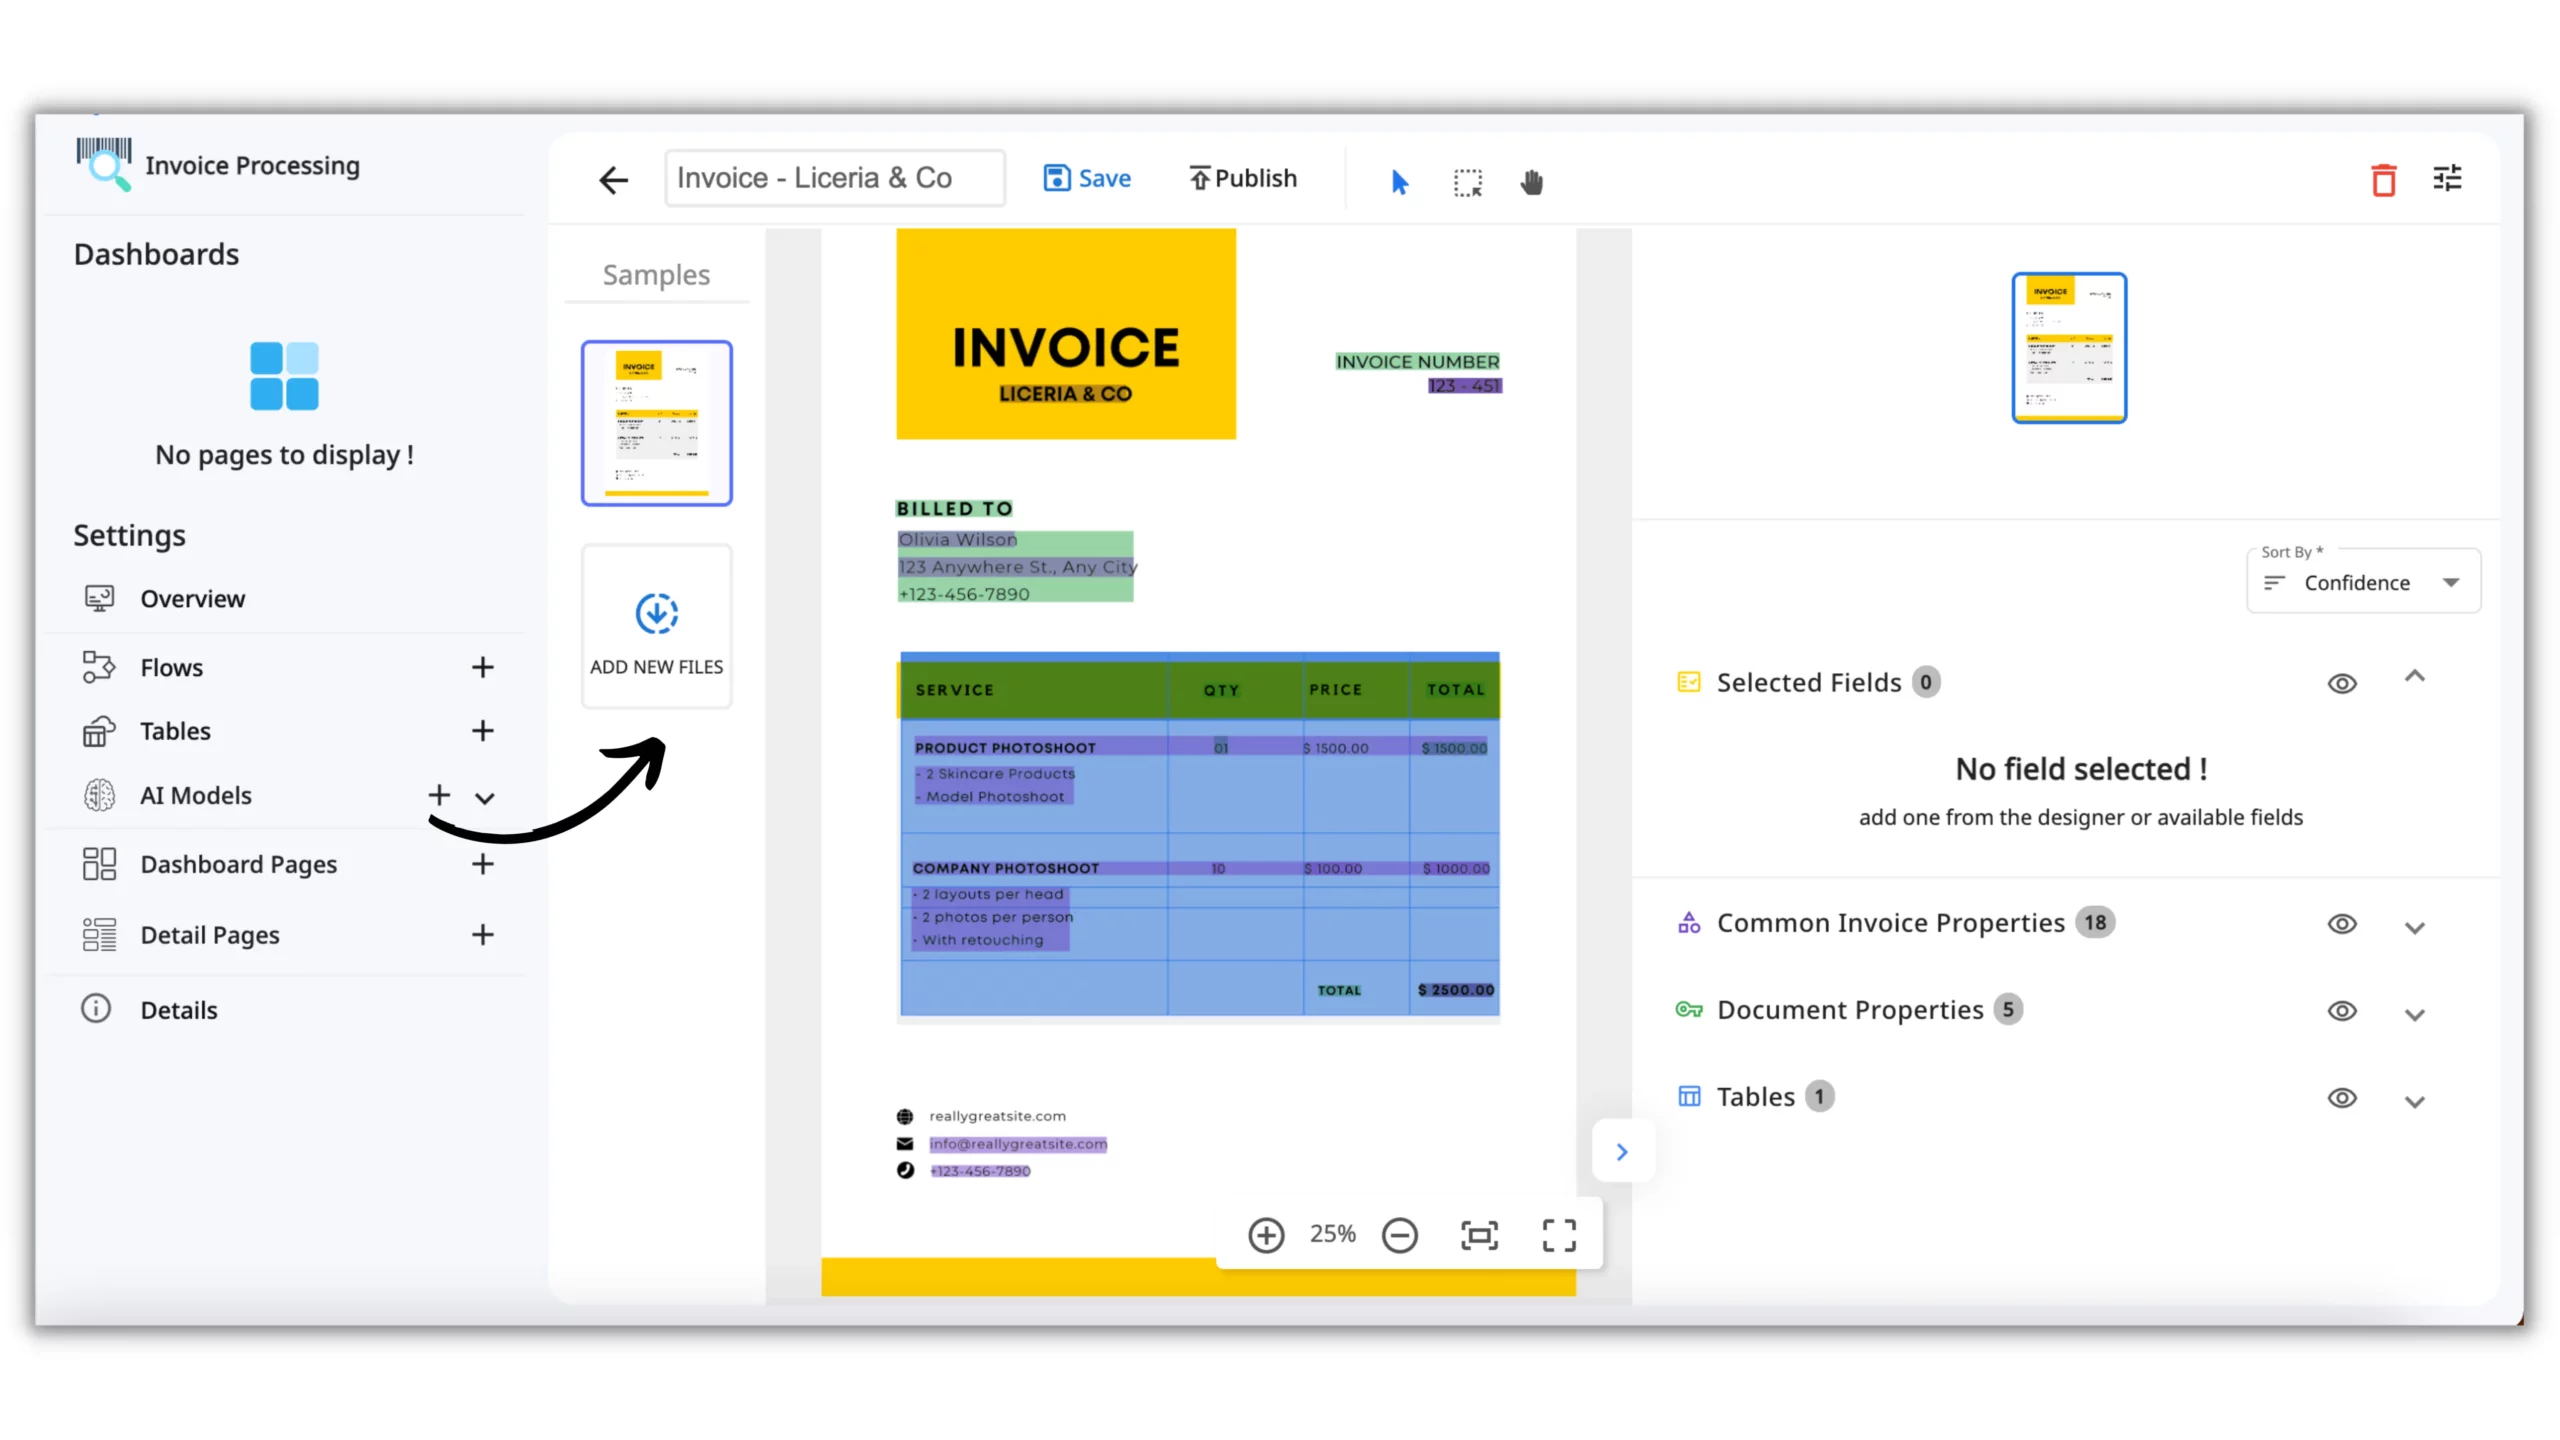
Upload a sample of the invoice that you want to process via the “Add new files” button (if you have more examples of the same invoice, upload as many of them as possible to increase the accuracy of the extracted data).
2.2 Select the data fields that you want to extract from a PDF
Once you upload the file, zenphi will read the data from the document, and display it on the right panel.
Common Invoice Properties
Zenphi will automatically suggest the Common Invoice Properties (like Invoice ID, Total amount, etc.) and find them in your document.
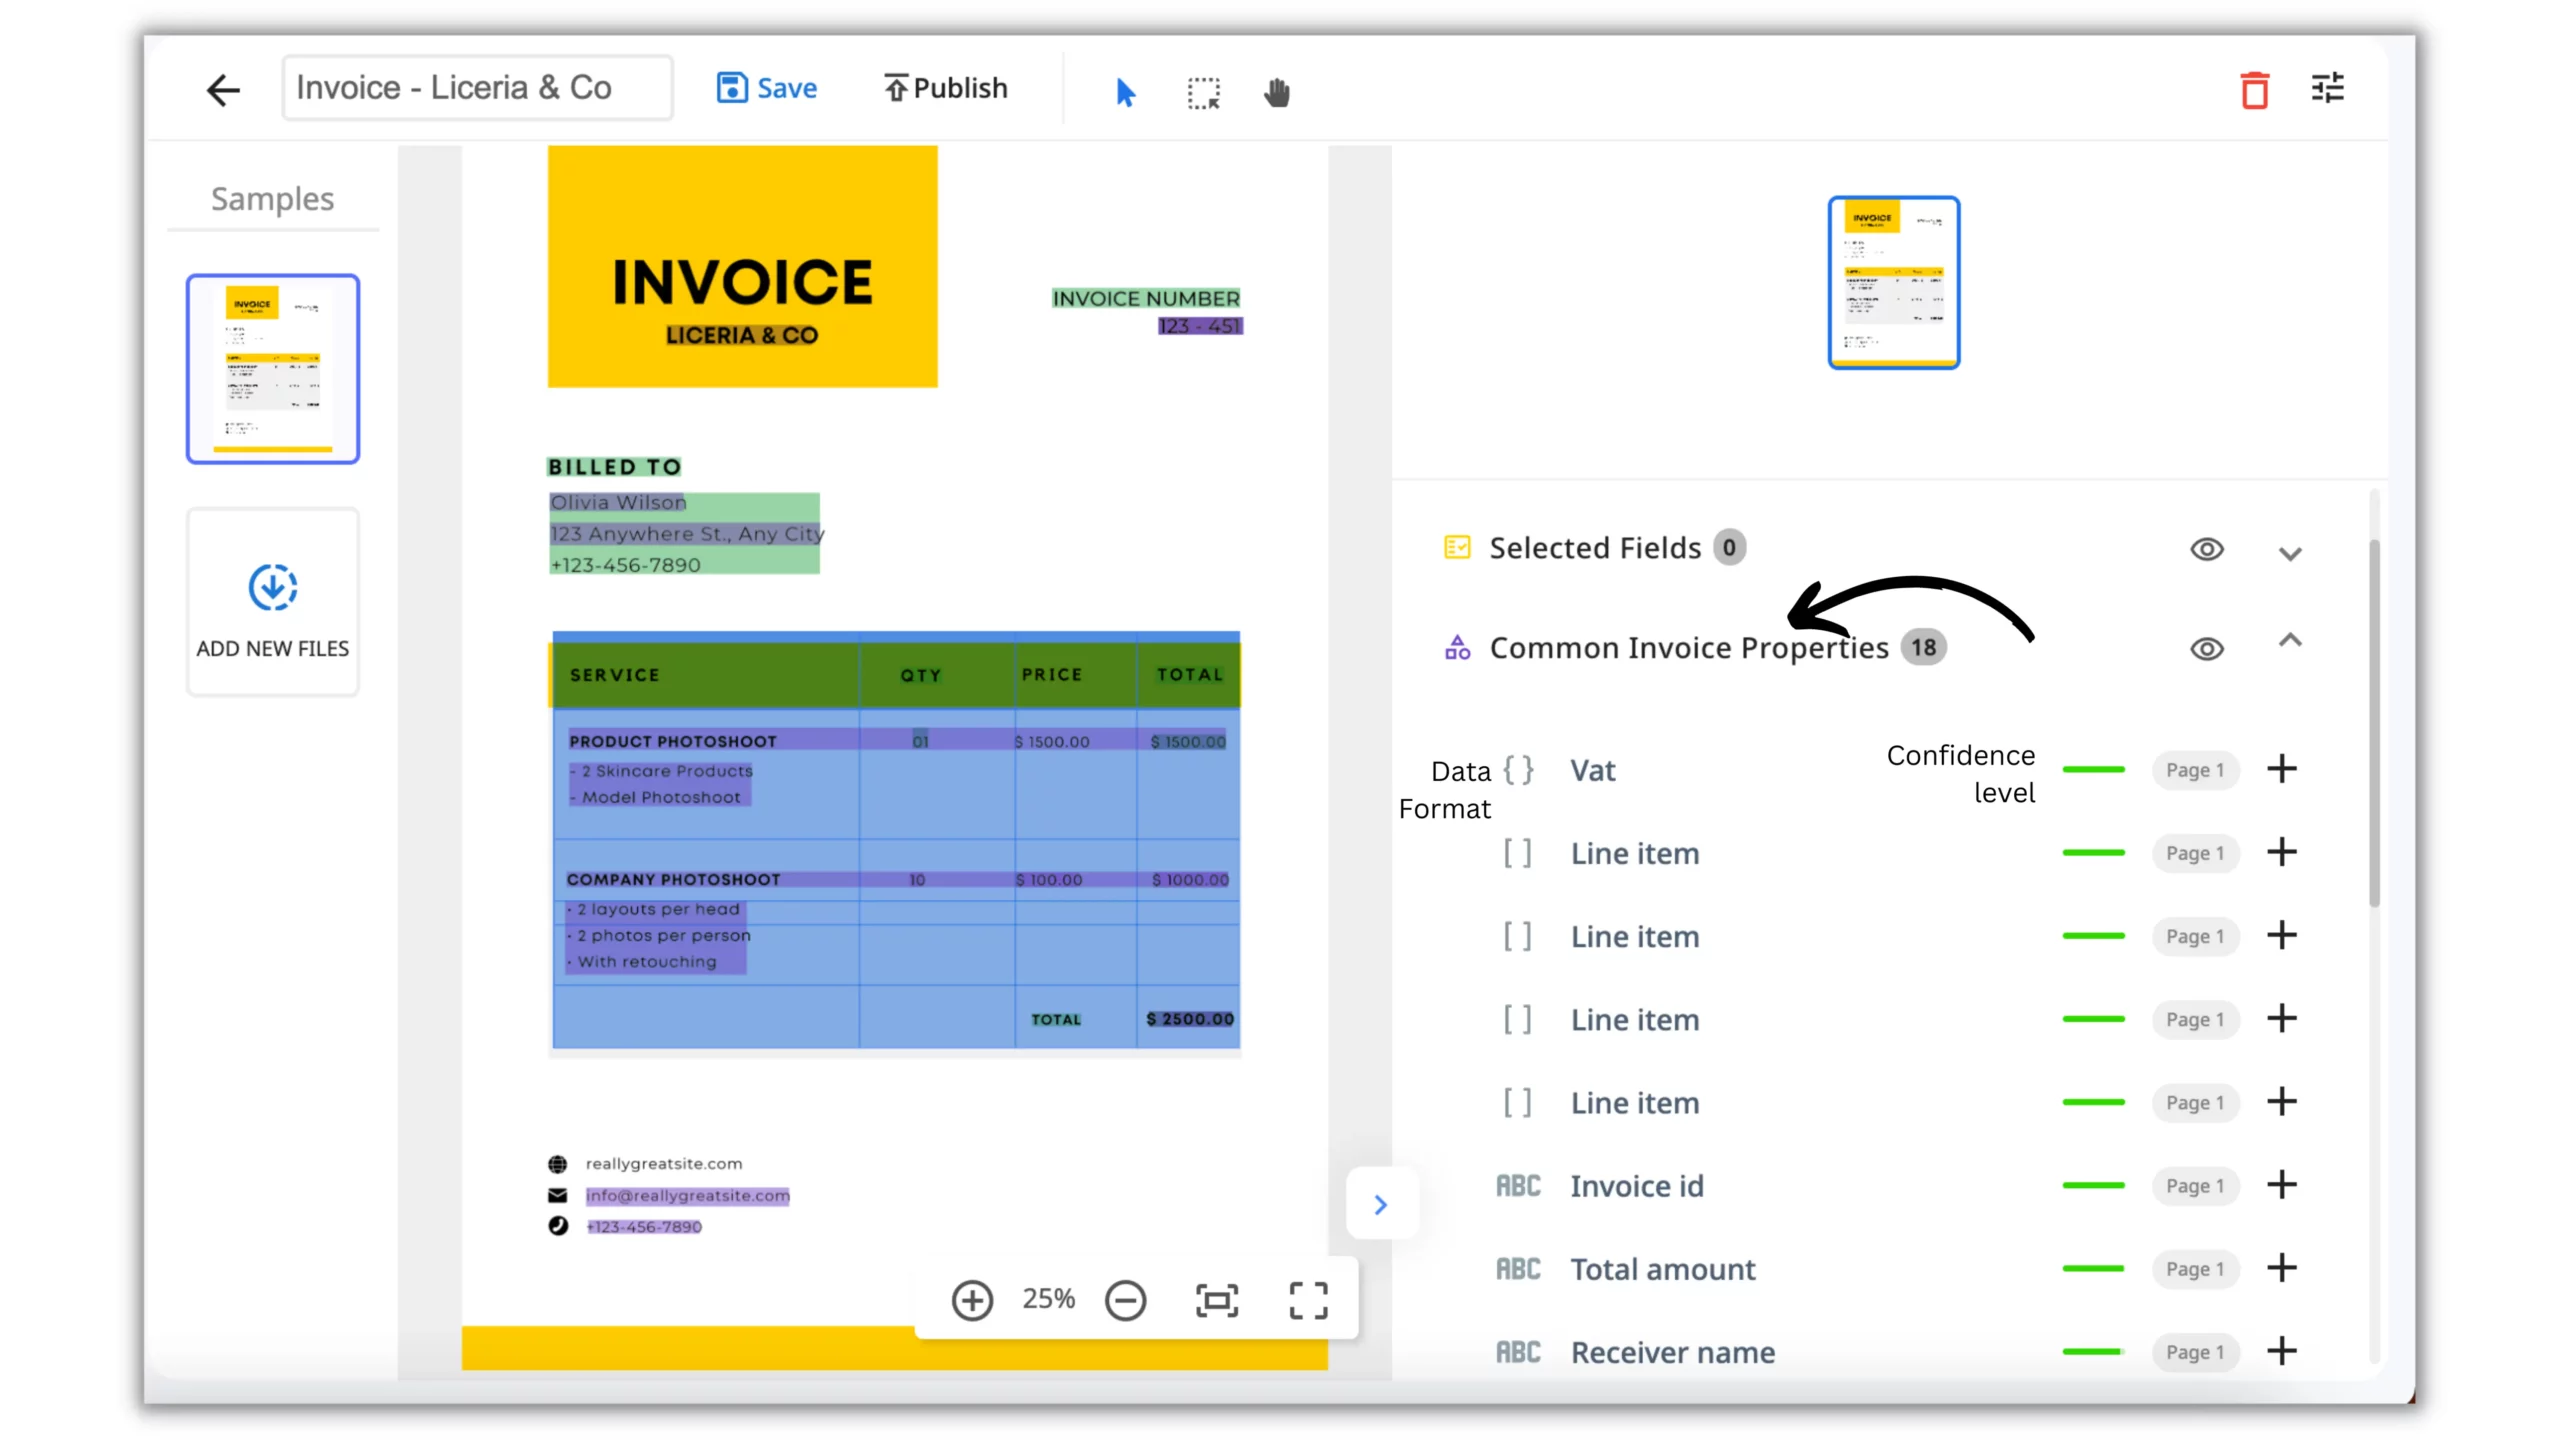
Near each field, you’ll also see the Data Format (it can be text, collection, etc.) and Confidence Level (of the data accuracy extracted).
Document Properties
Besides the Common Invoice Properties, zenphi will display the Document Properties – the fields that zenphi read from the uploaded document directly.
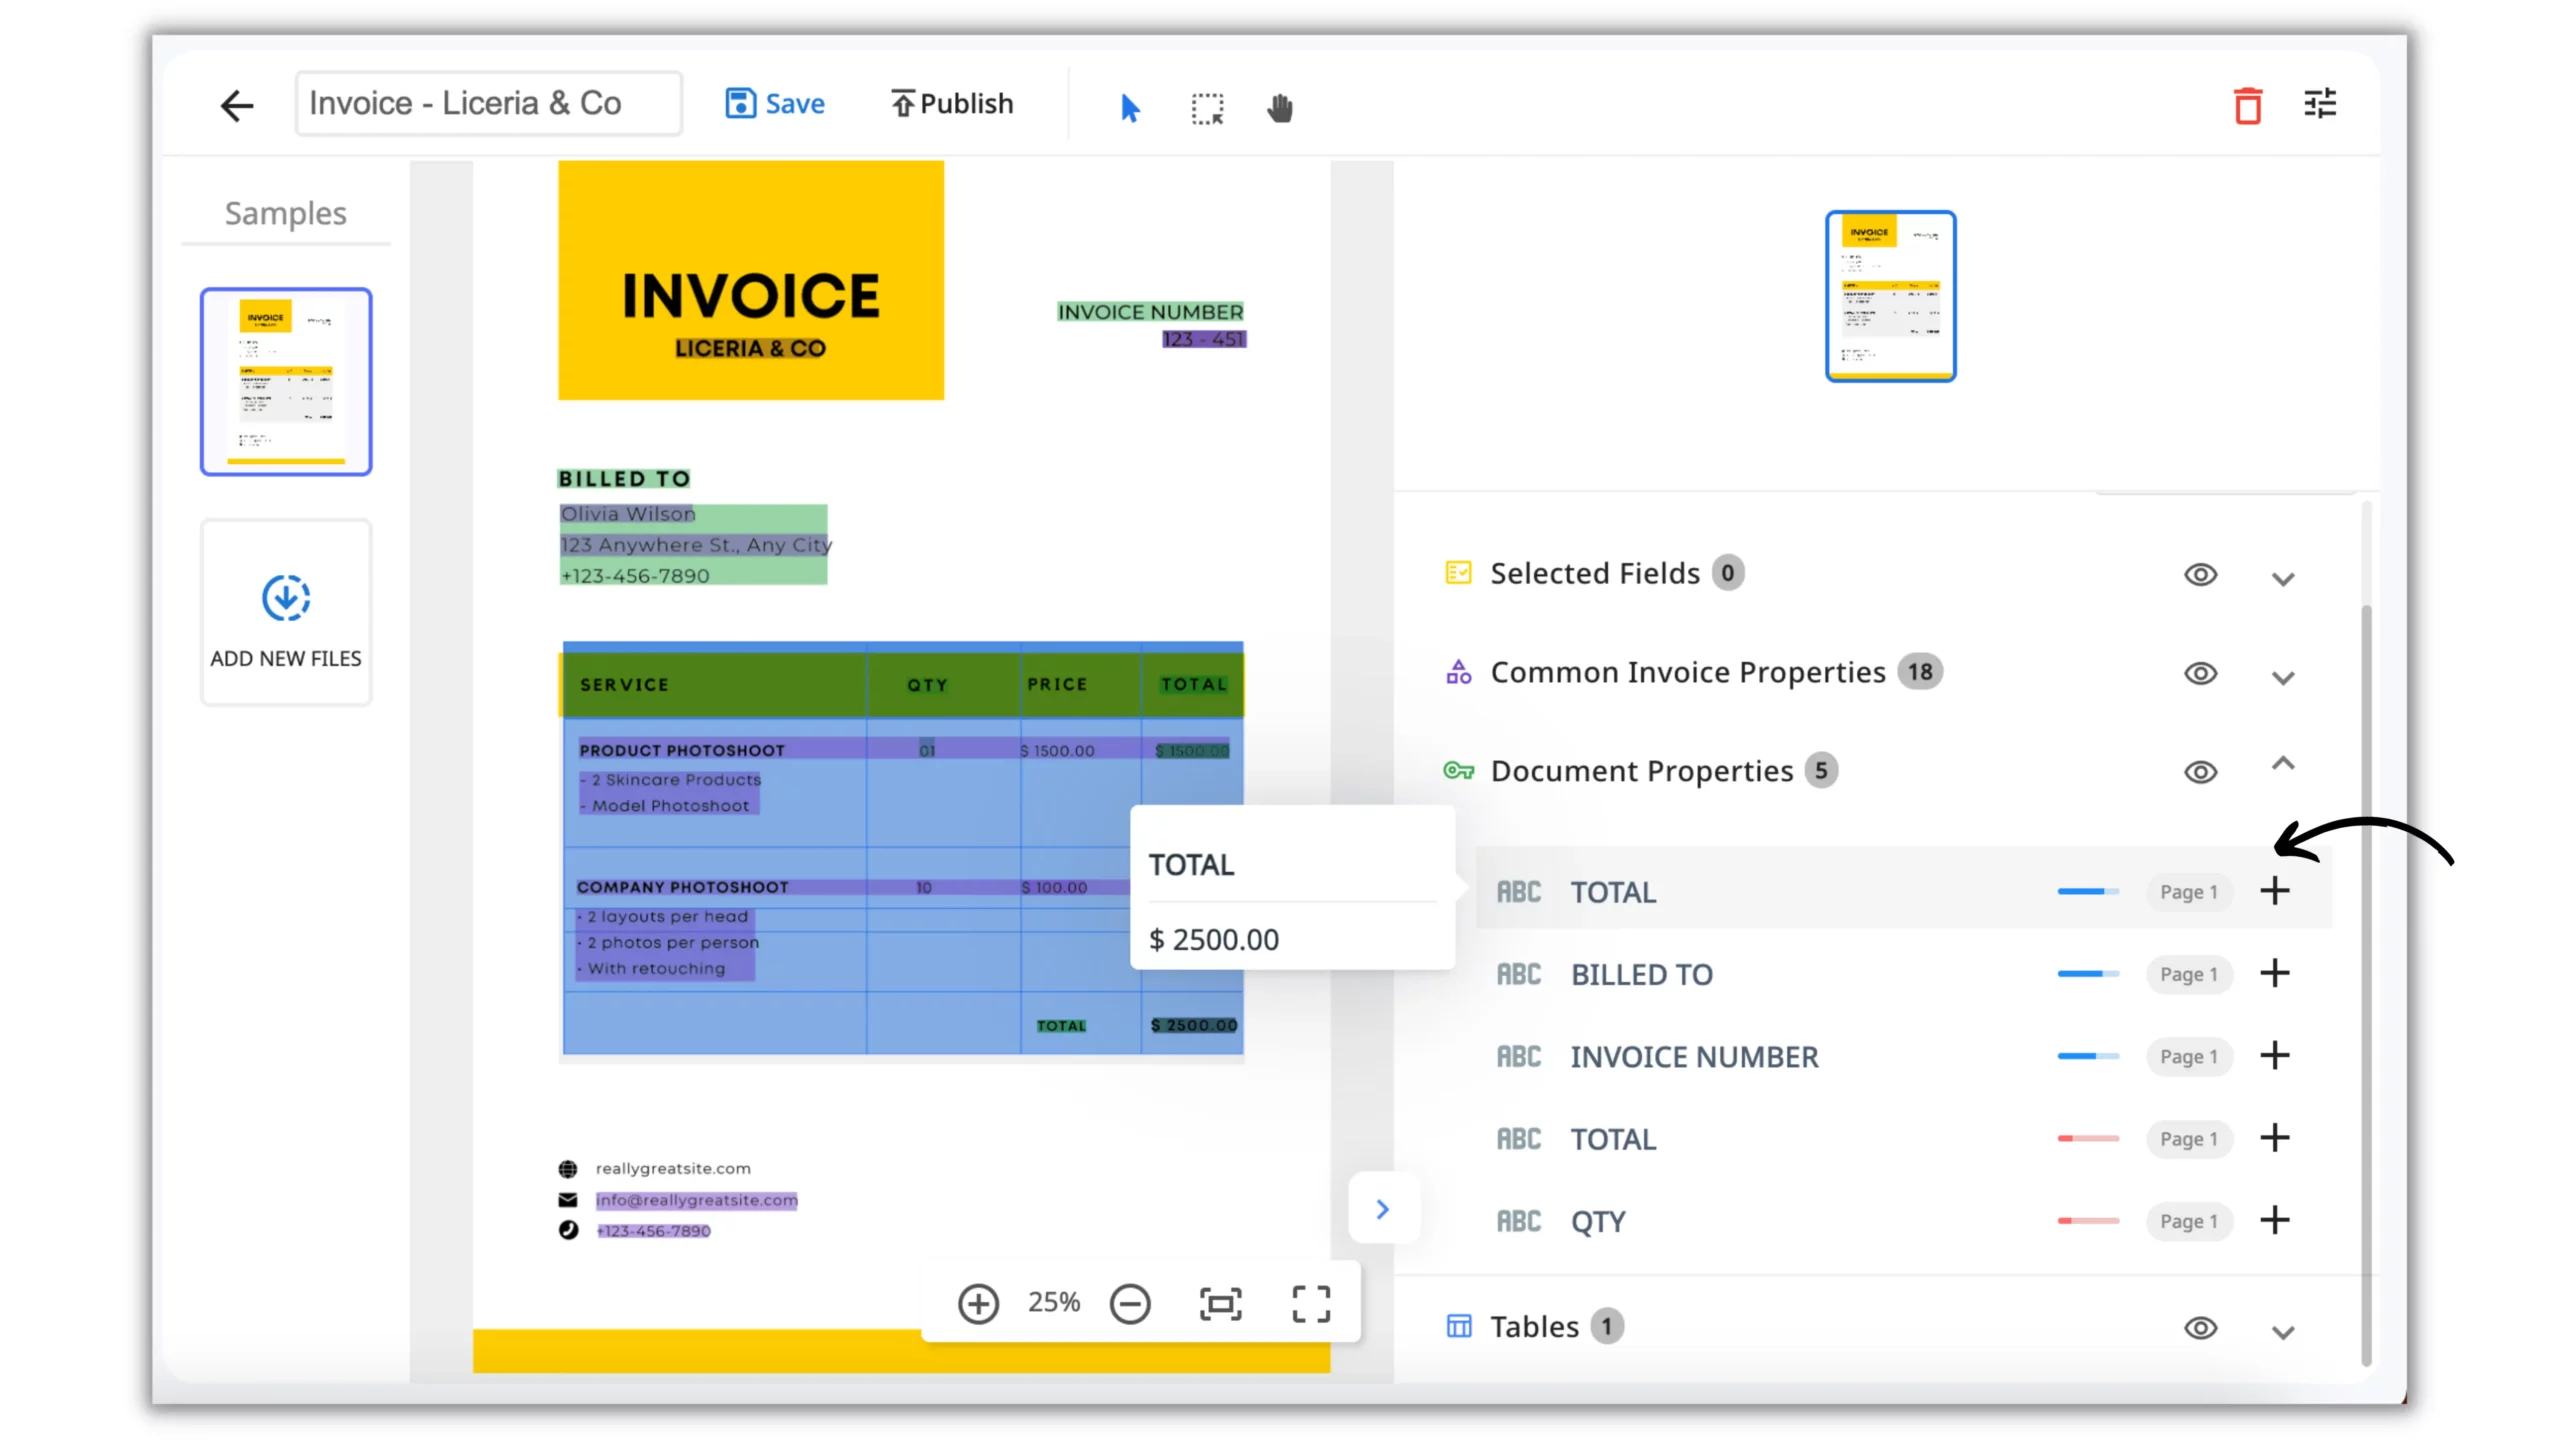
Hover over any field in any section and check if the data was extracted correctly. Click on the plus icon near the data field you want to be extracted from the Invoice.
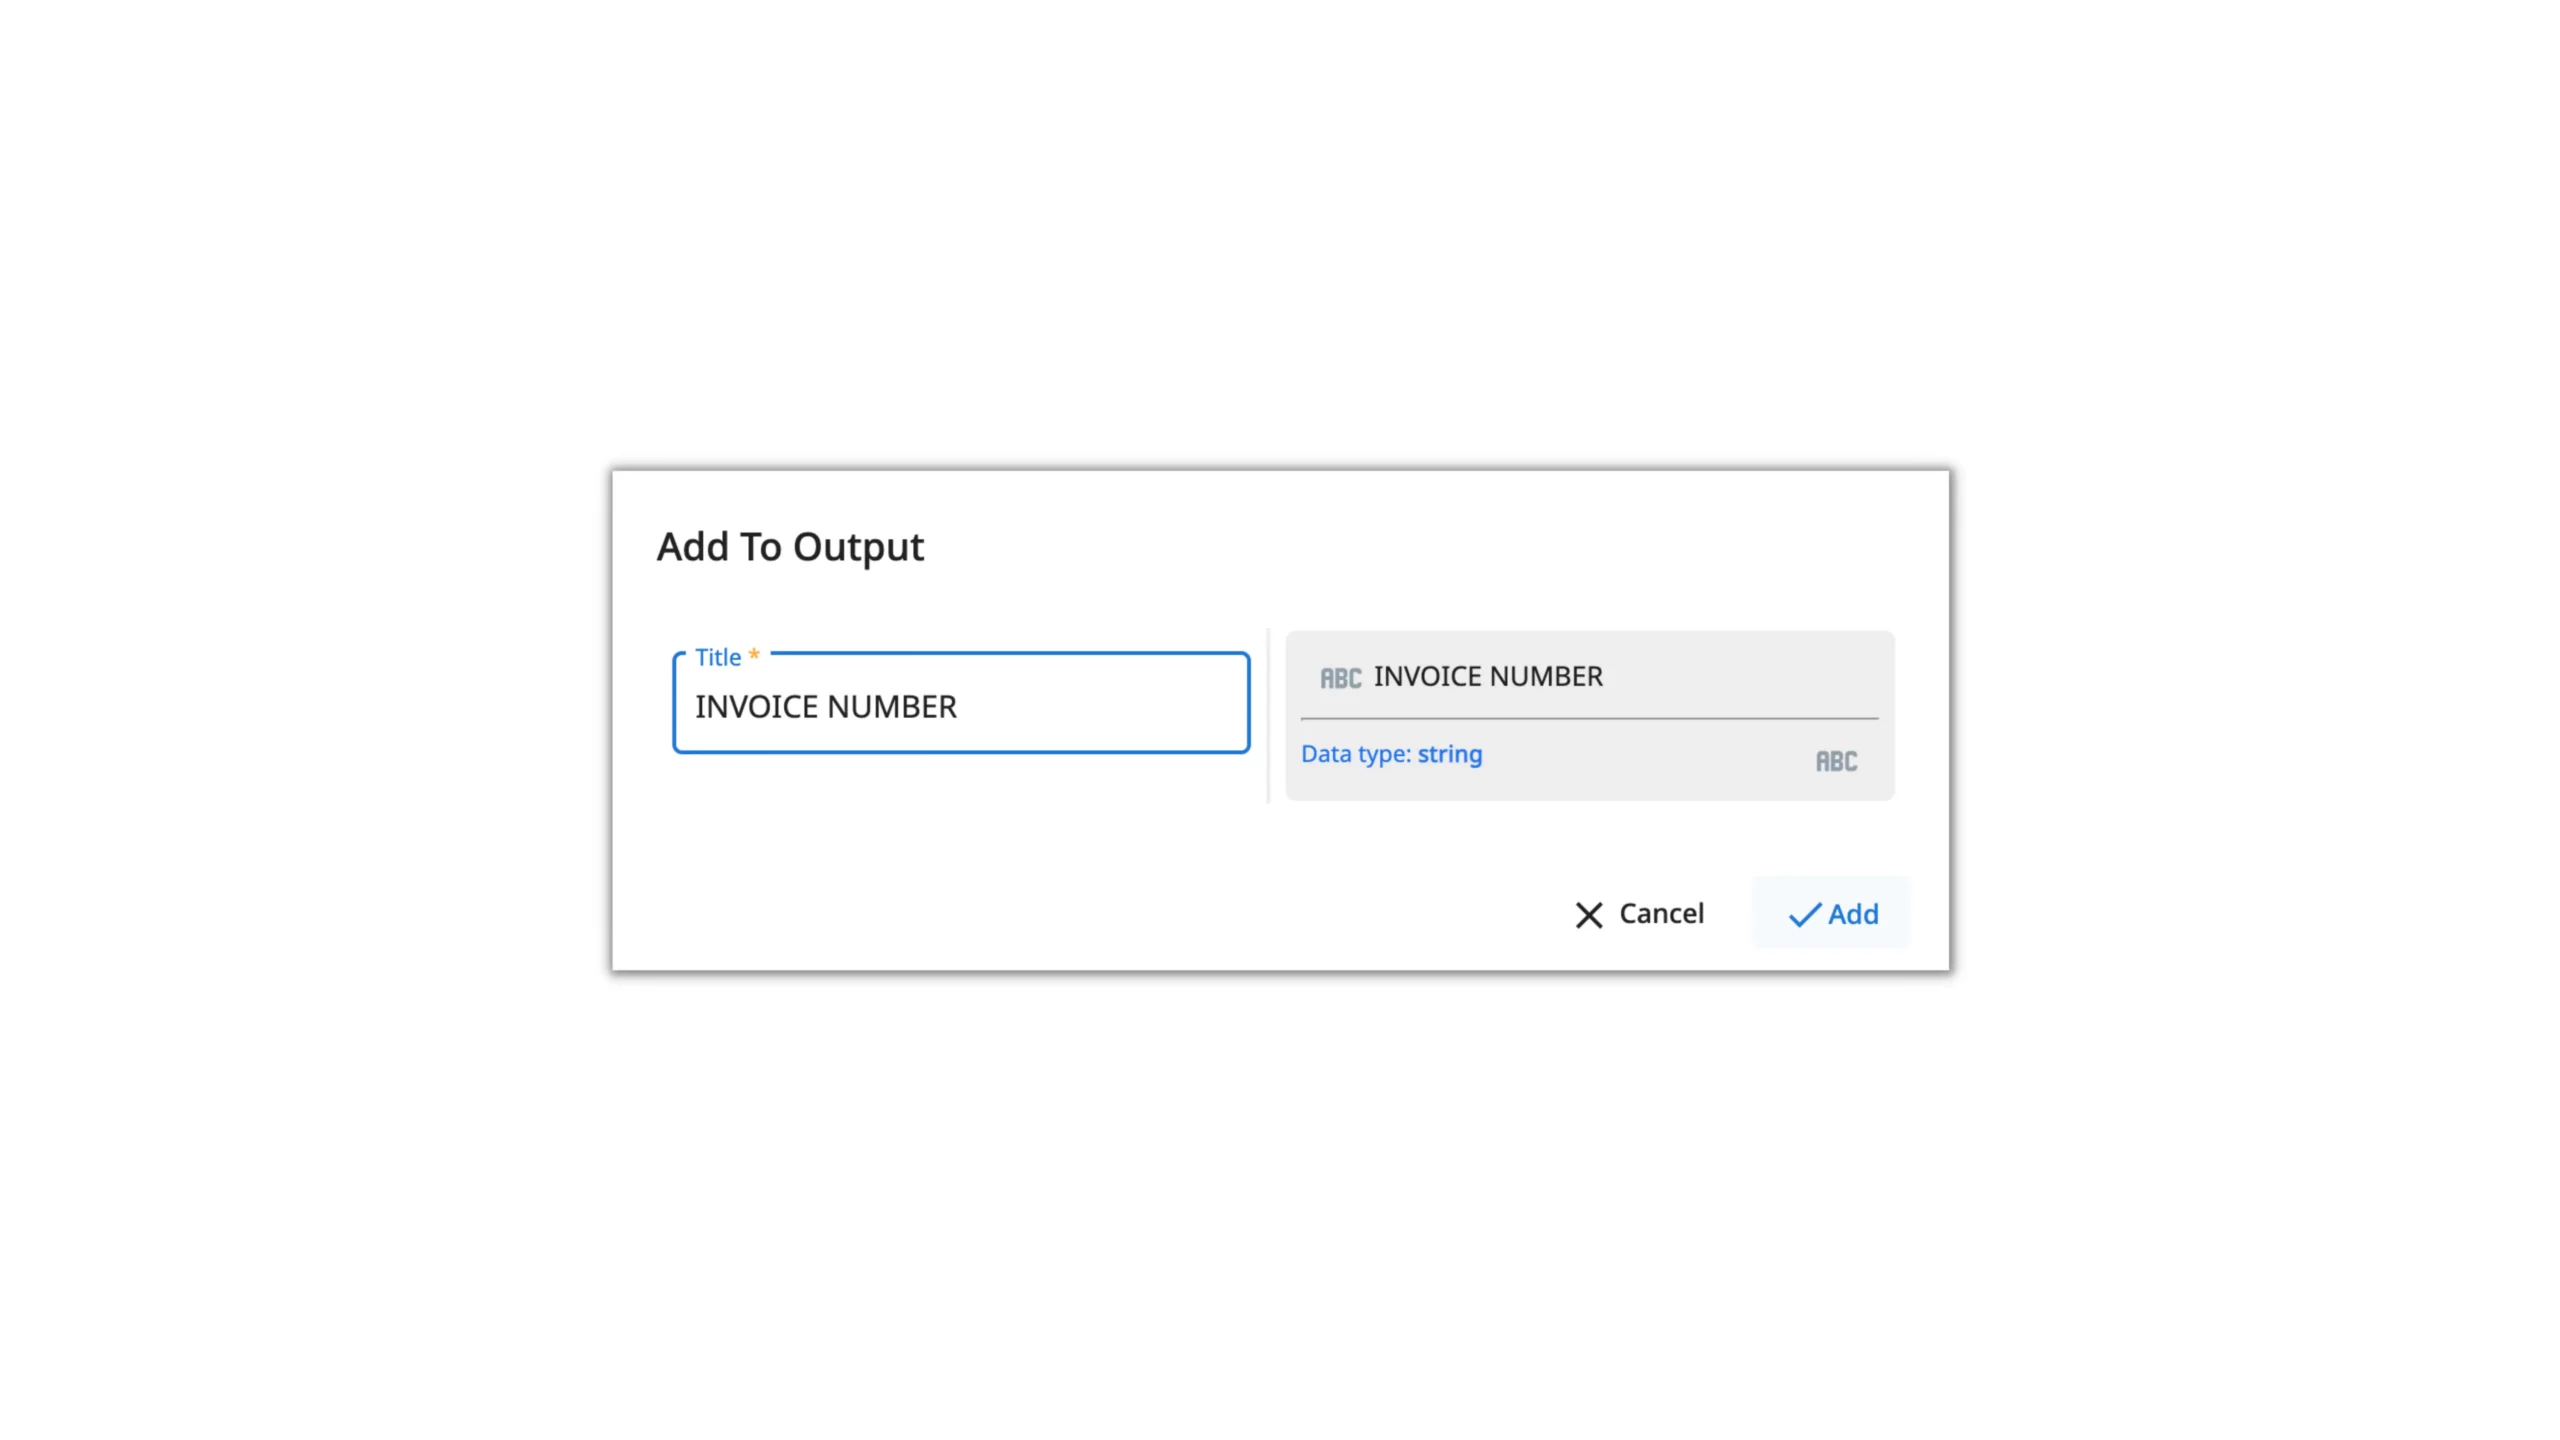
When you add the field to the Output of the AI Model, you have the option to rename the property.
Selected Fields
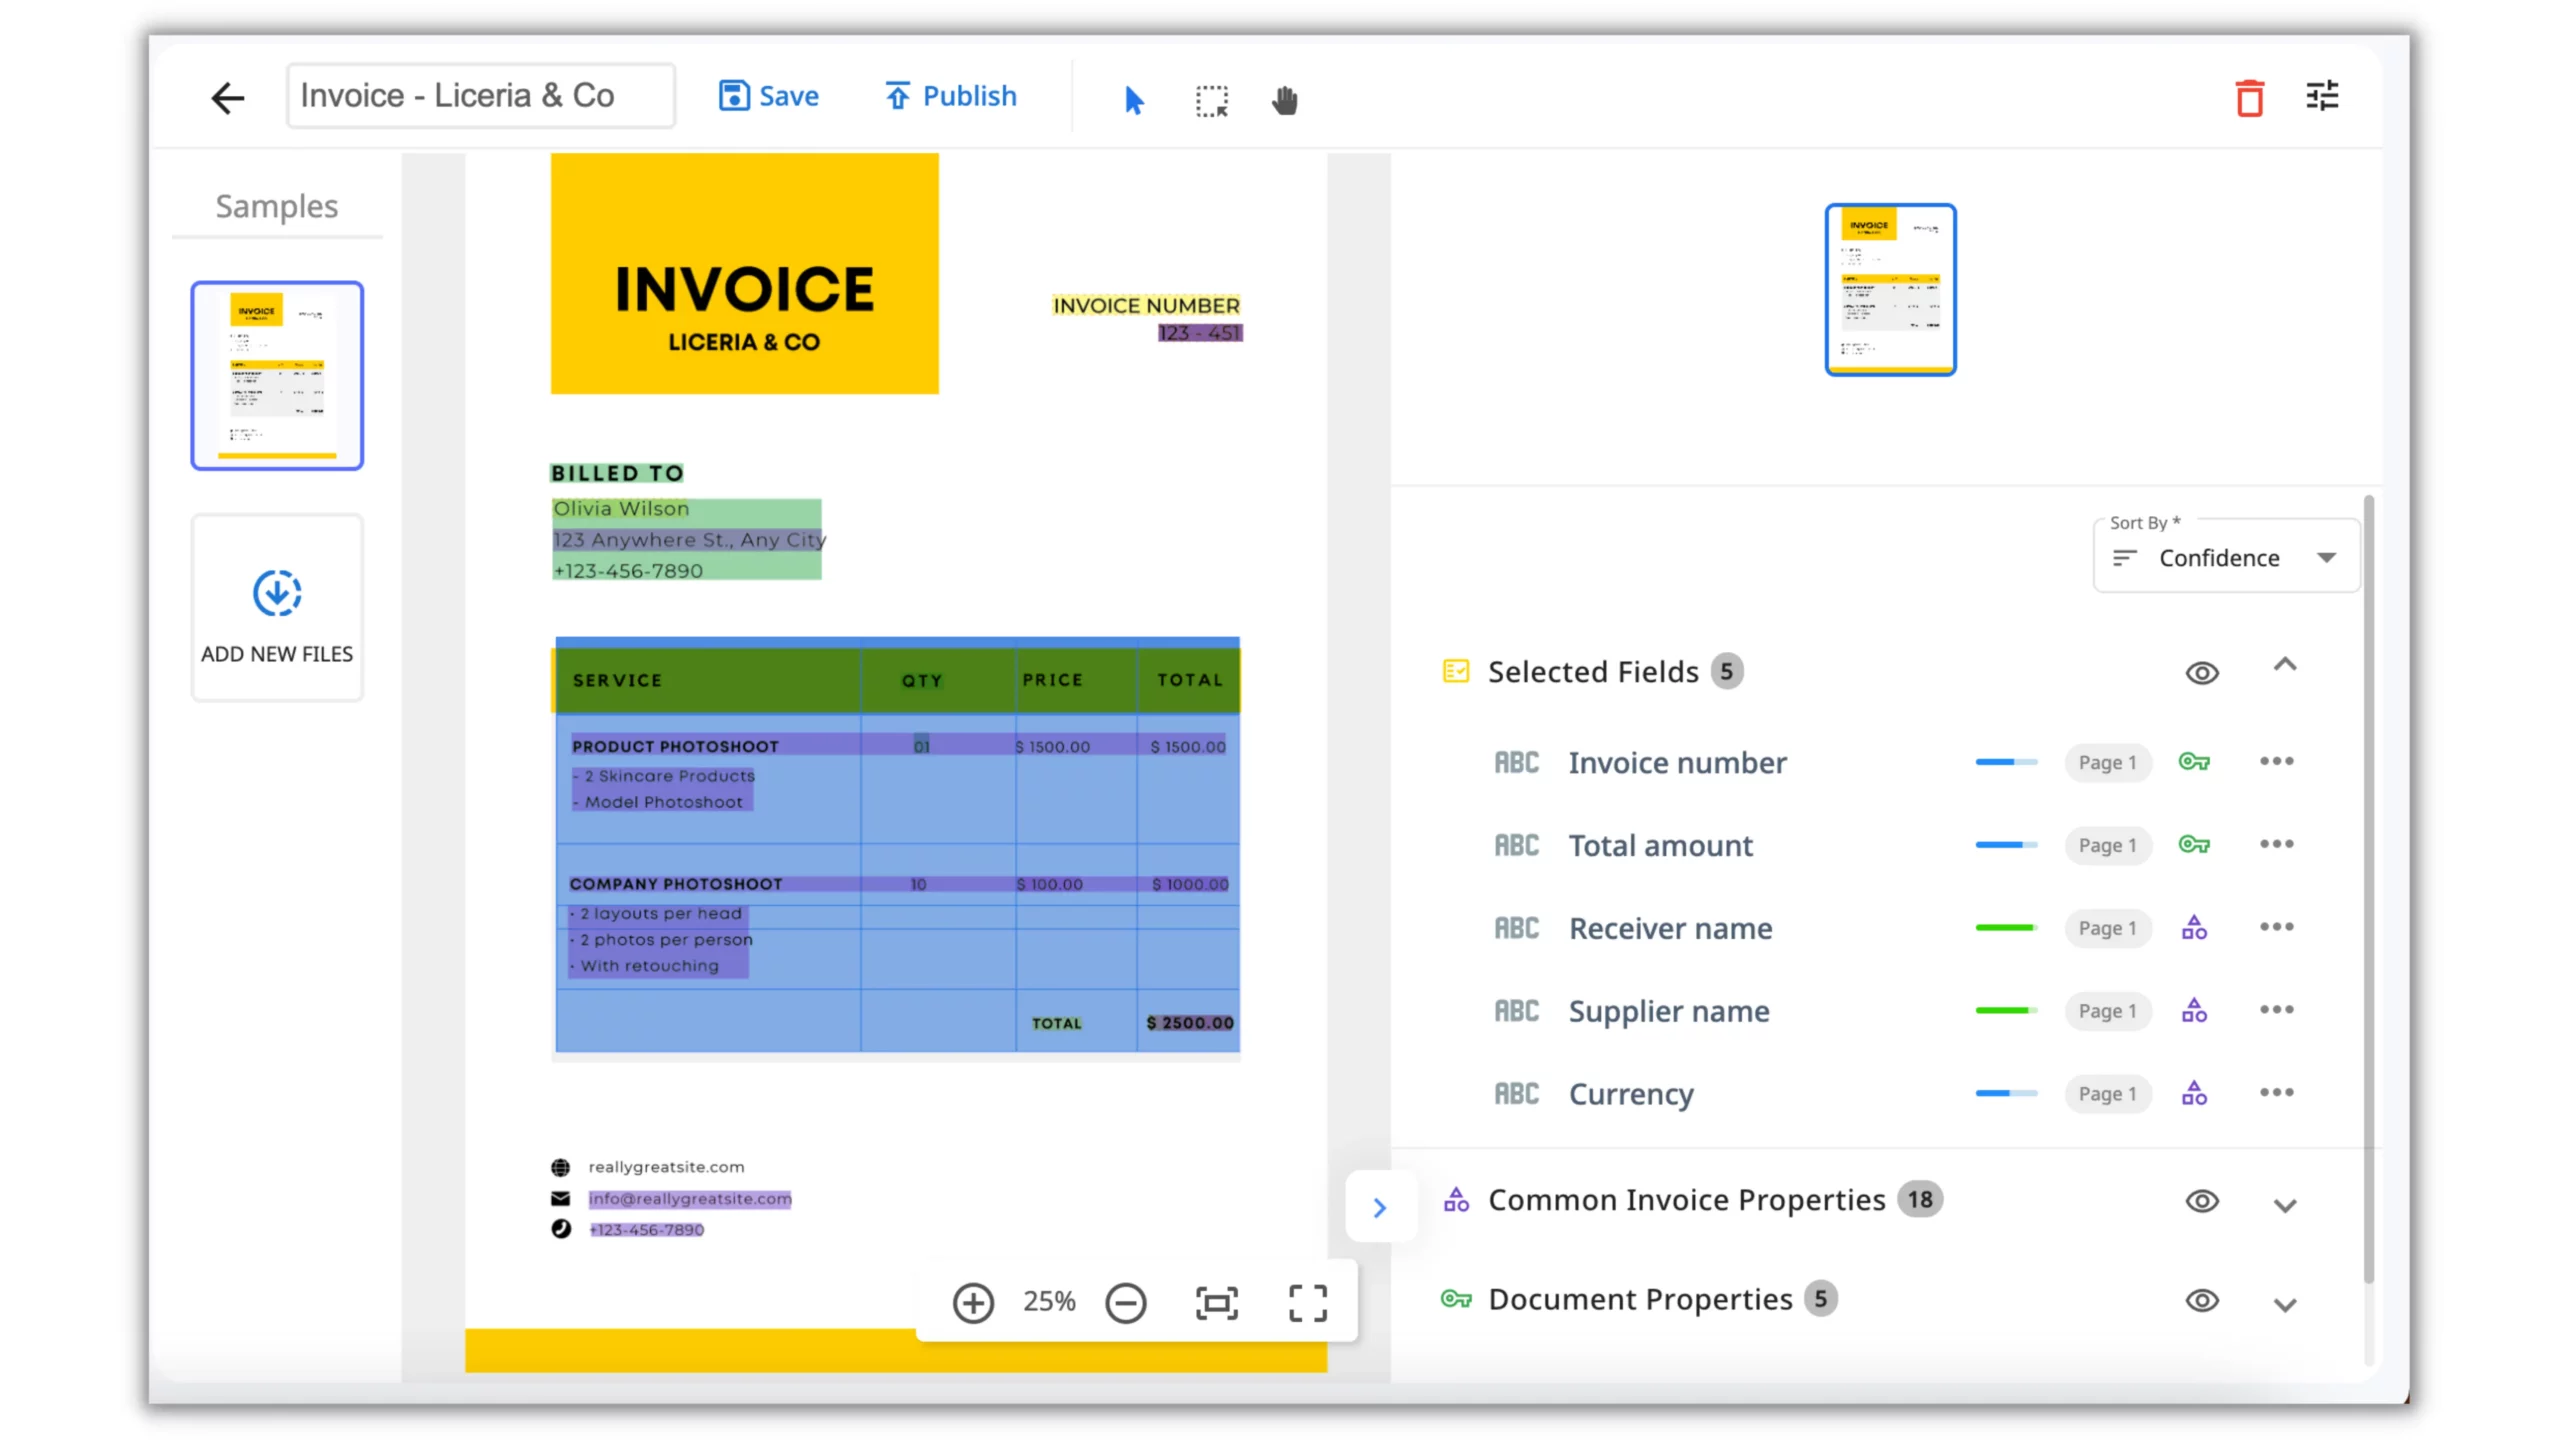
Once you add the needed fields, they will appear in the Selected Fields section.
2.3 Save and Publish
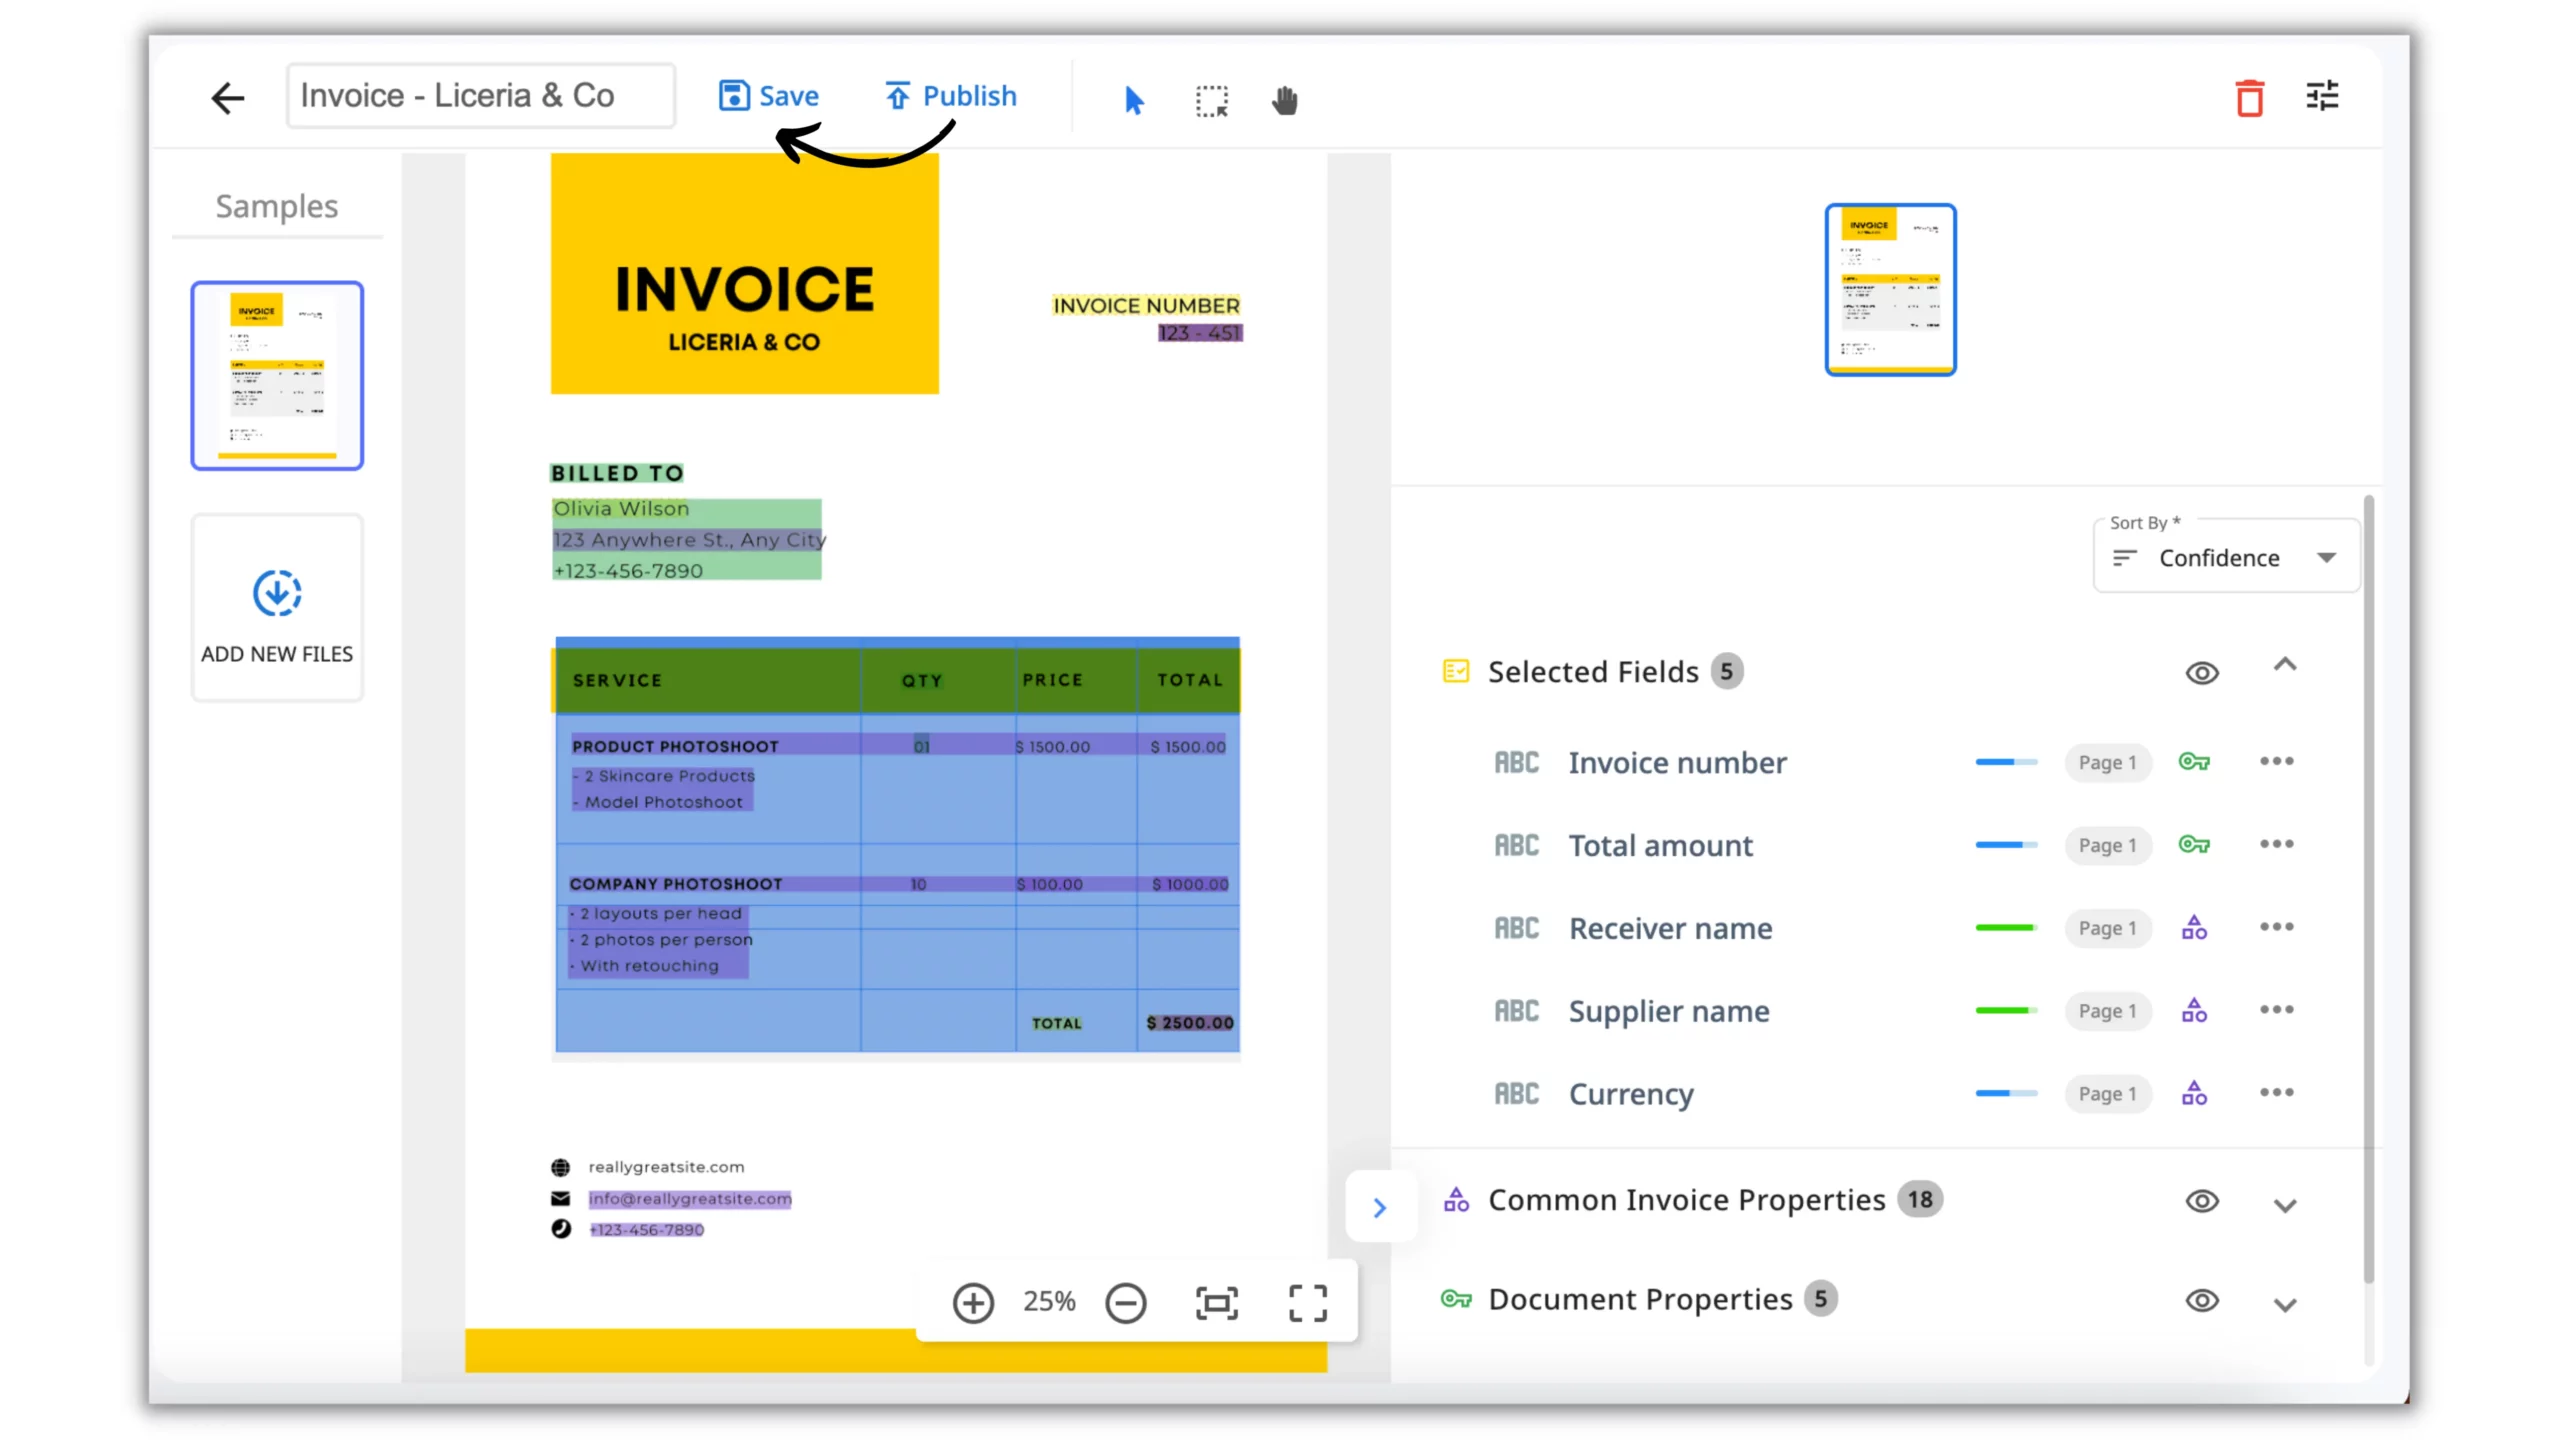
When all the fields are set up, Save & Publish the Invoice Parser to be able to use it in the Flow.
Step 3: Create a new Zenphi Flow
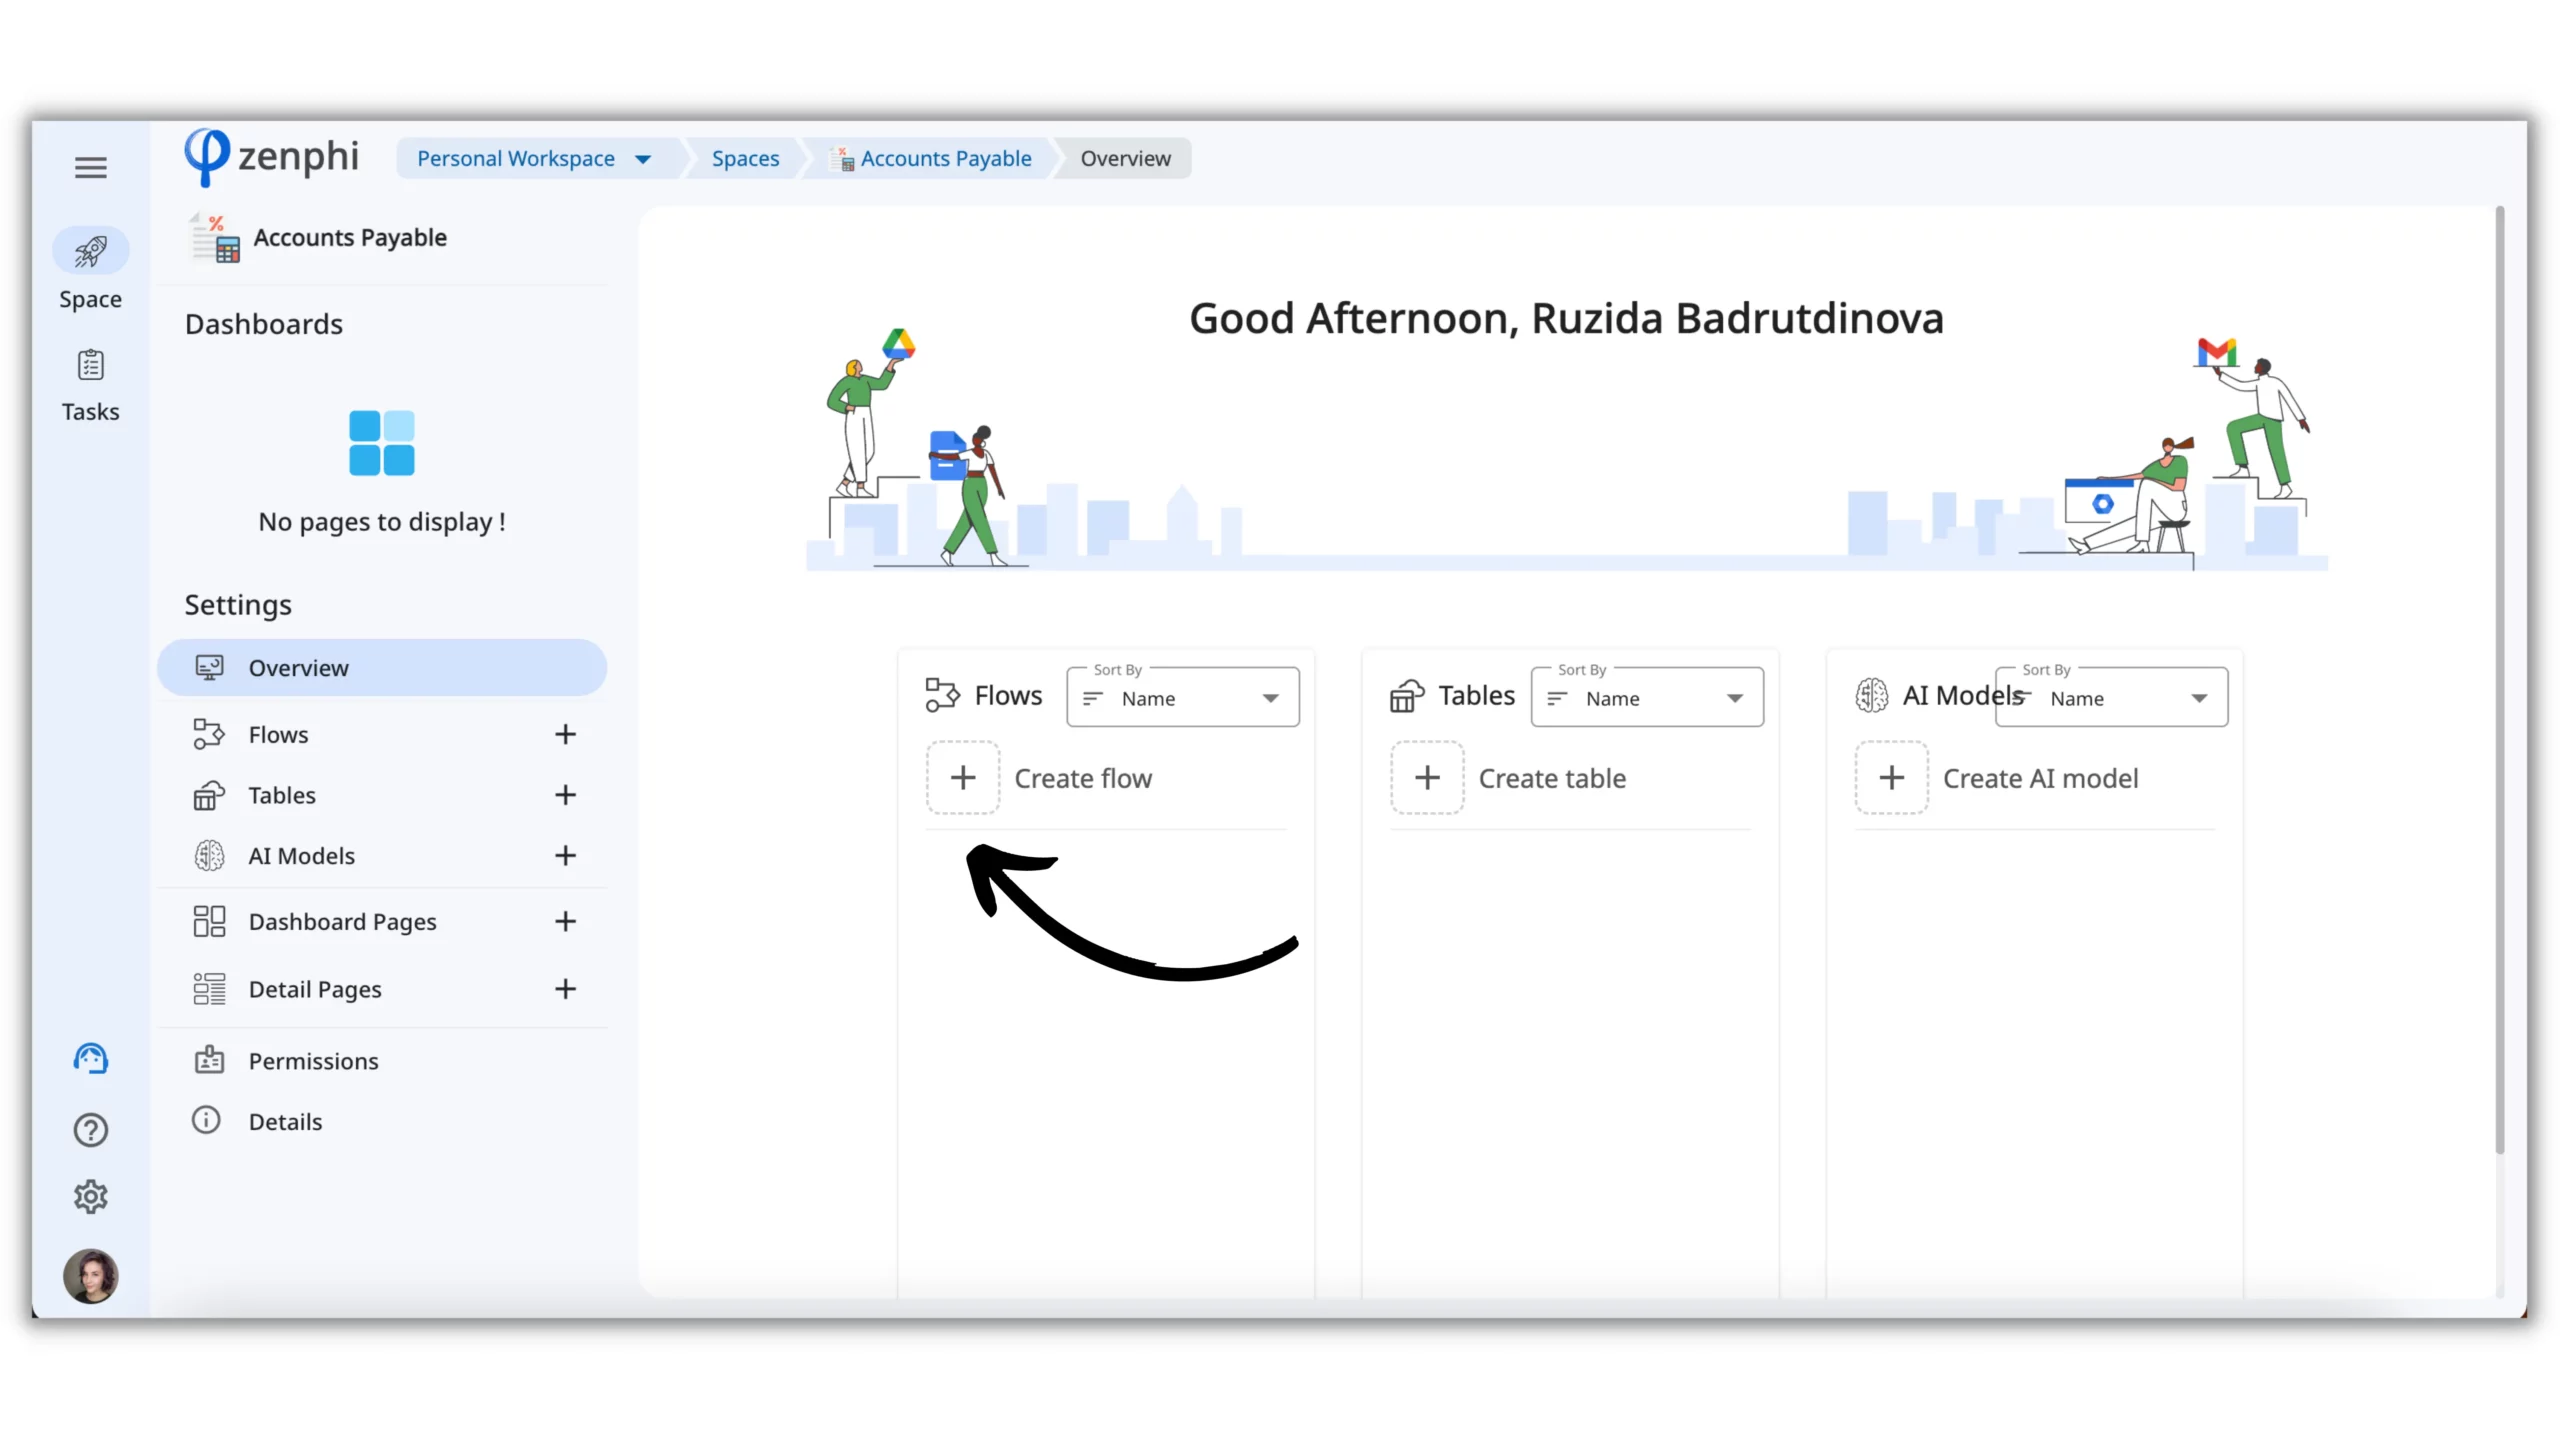
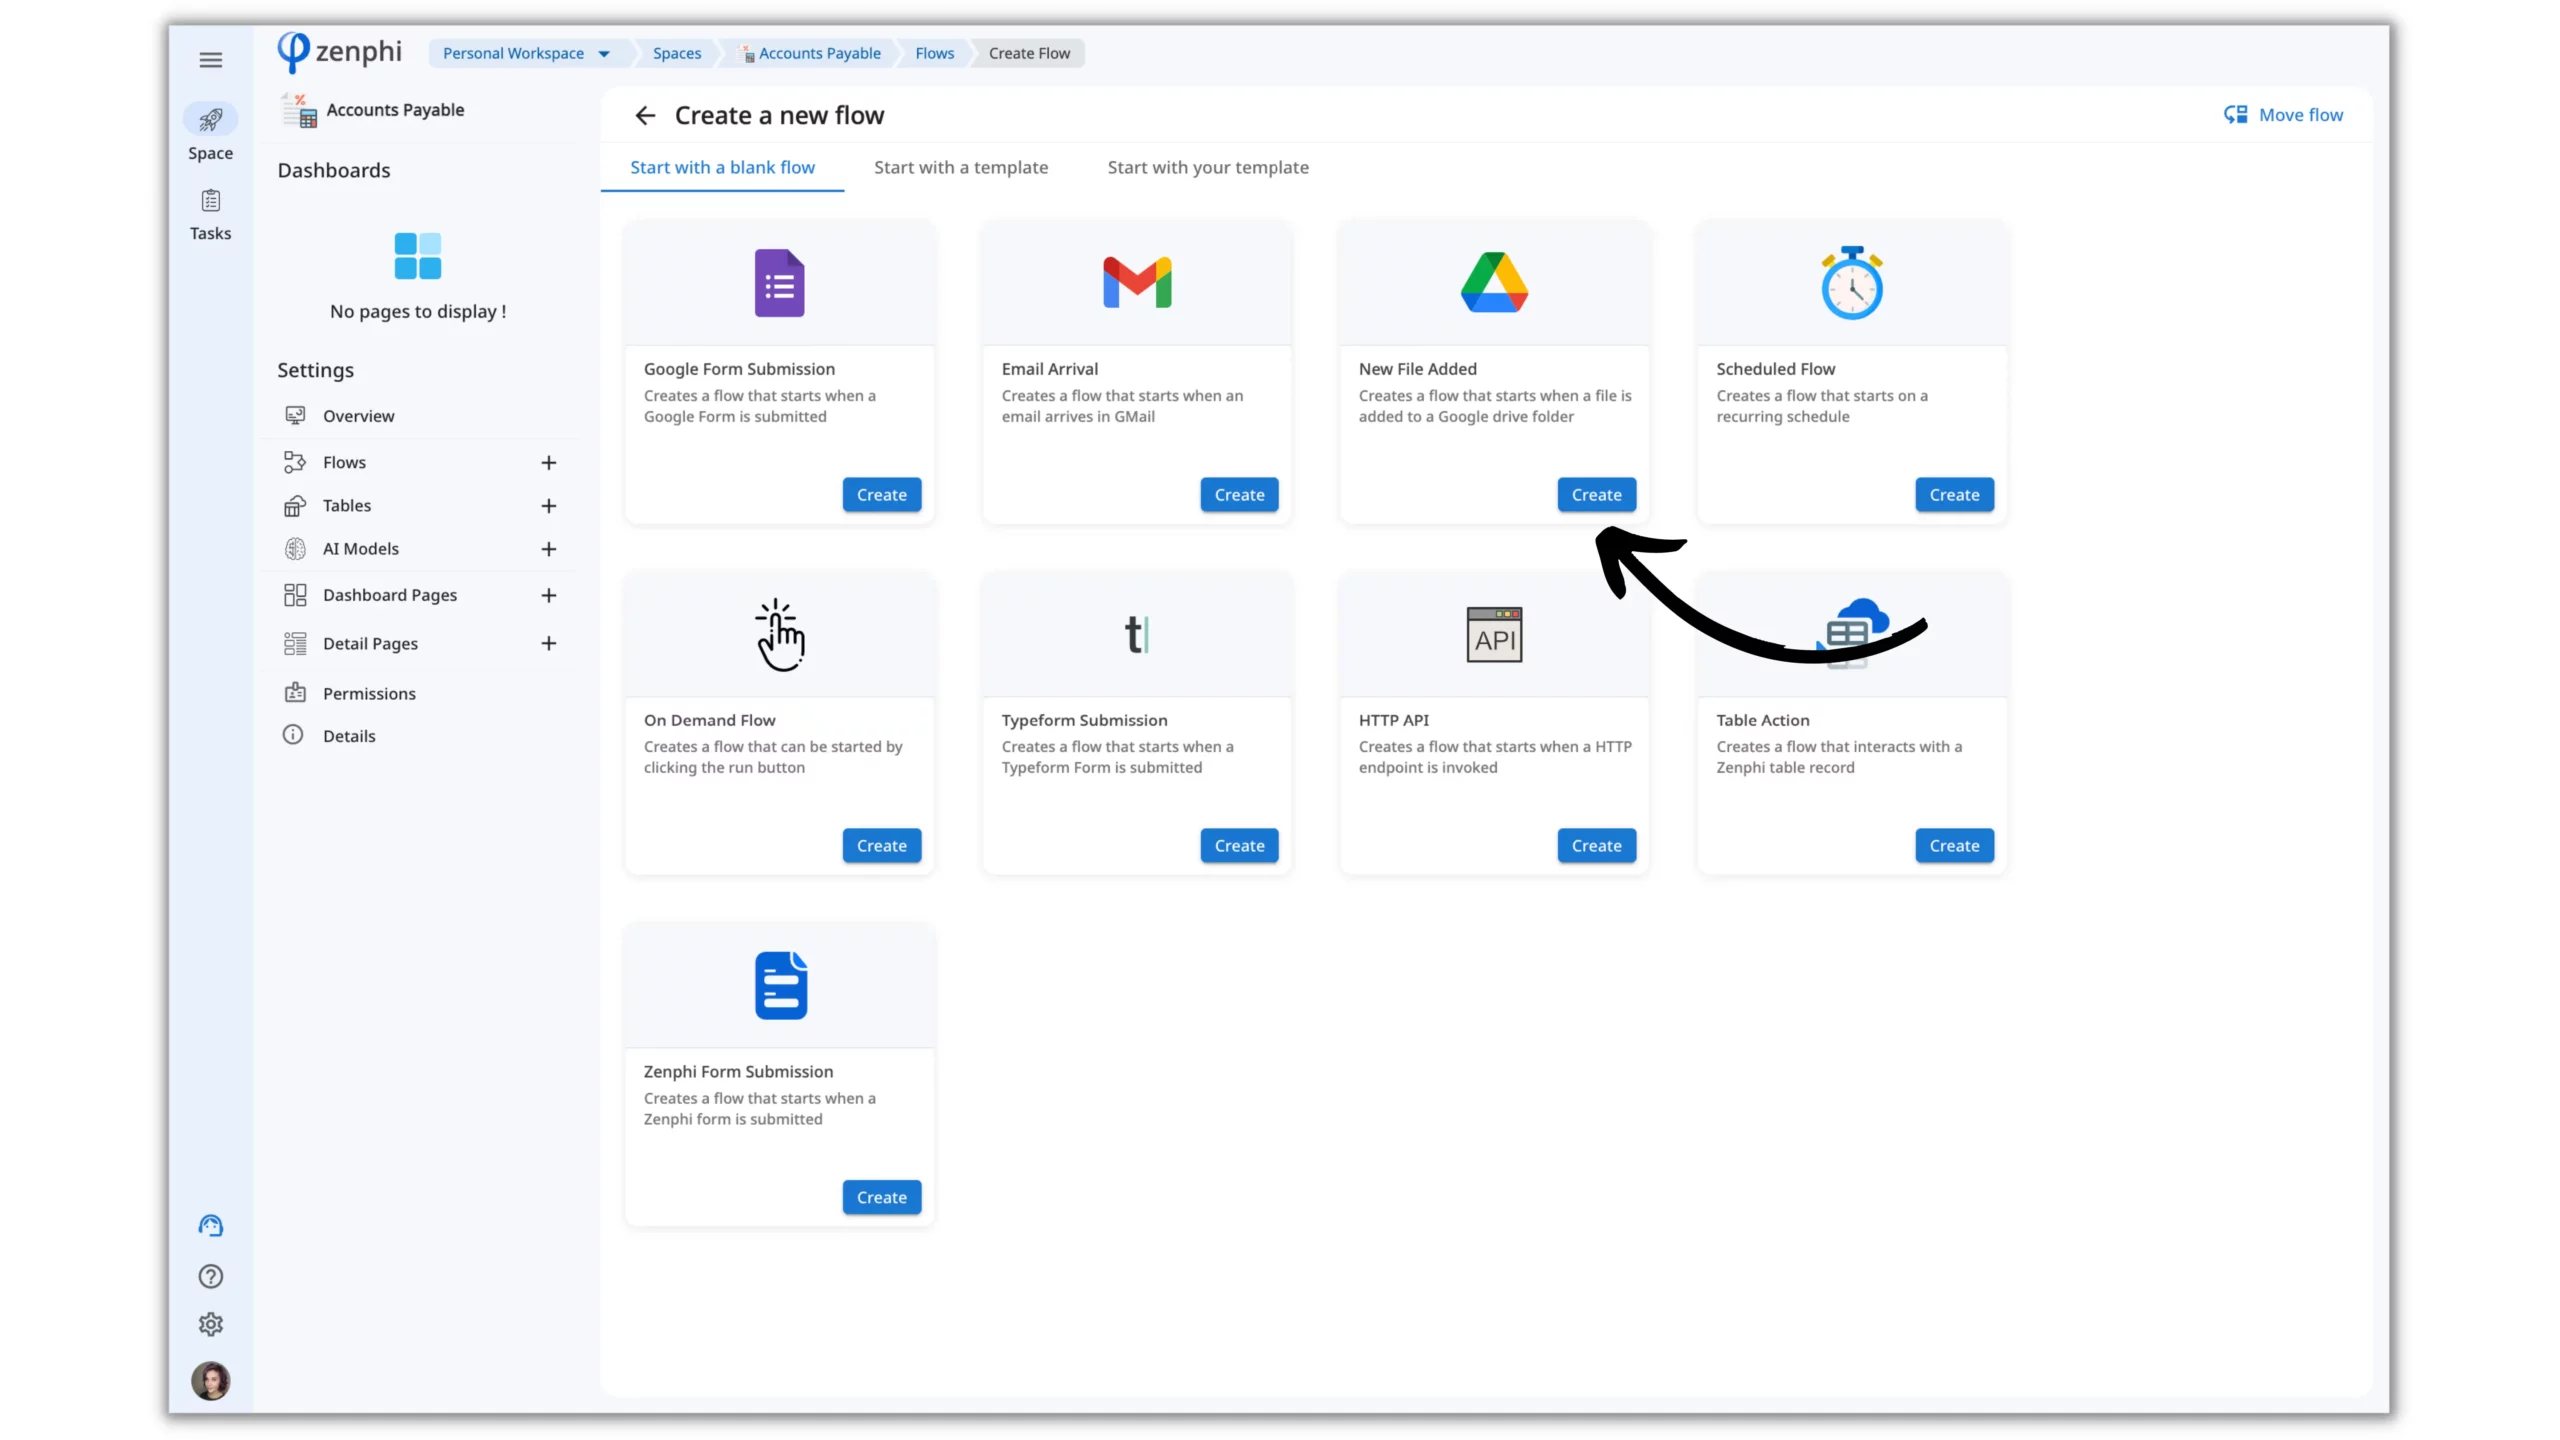
Now, let’s go back to our Space Dashboard, and click on the “Create Flow” button. This will bring up the Flow creation screen.
Step 4: Select a Trigger
A trigger is an event that initiates the Flow. For this example, we will use a New File Added to Google Drive trigger.
Step 5: Add a Run AI Model to launch the extraction of data from a PDF
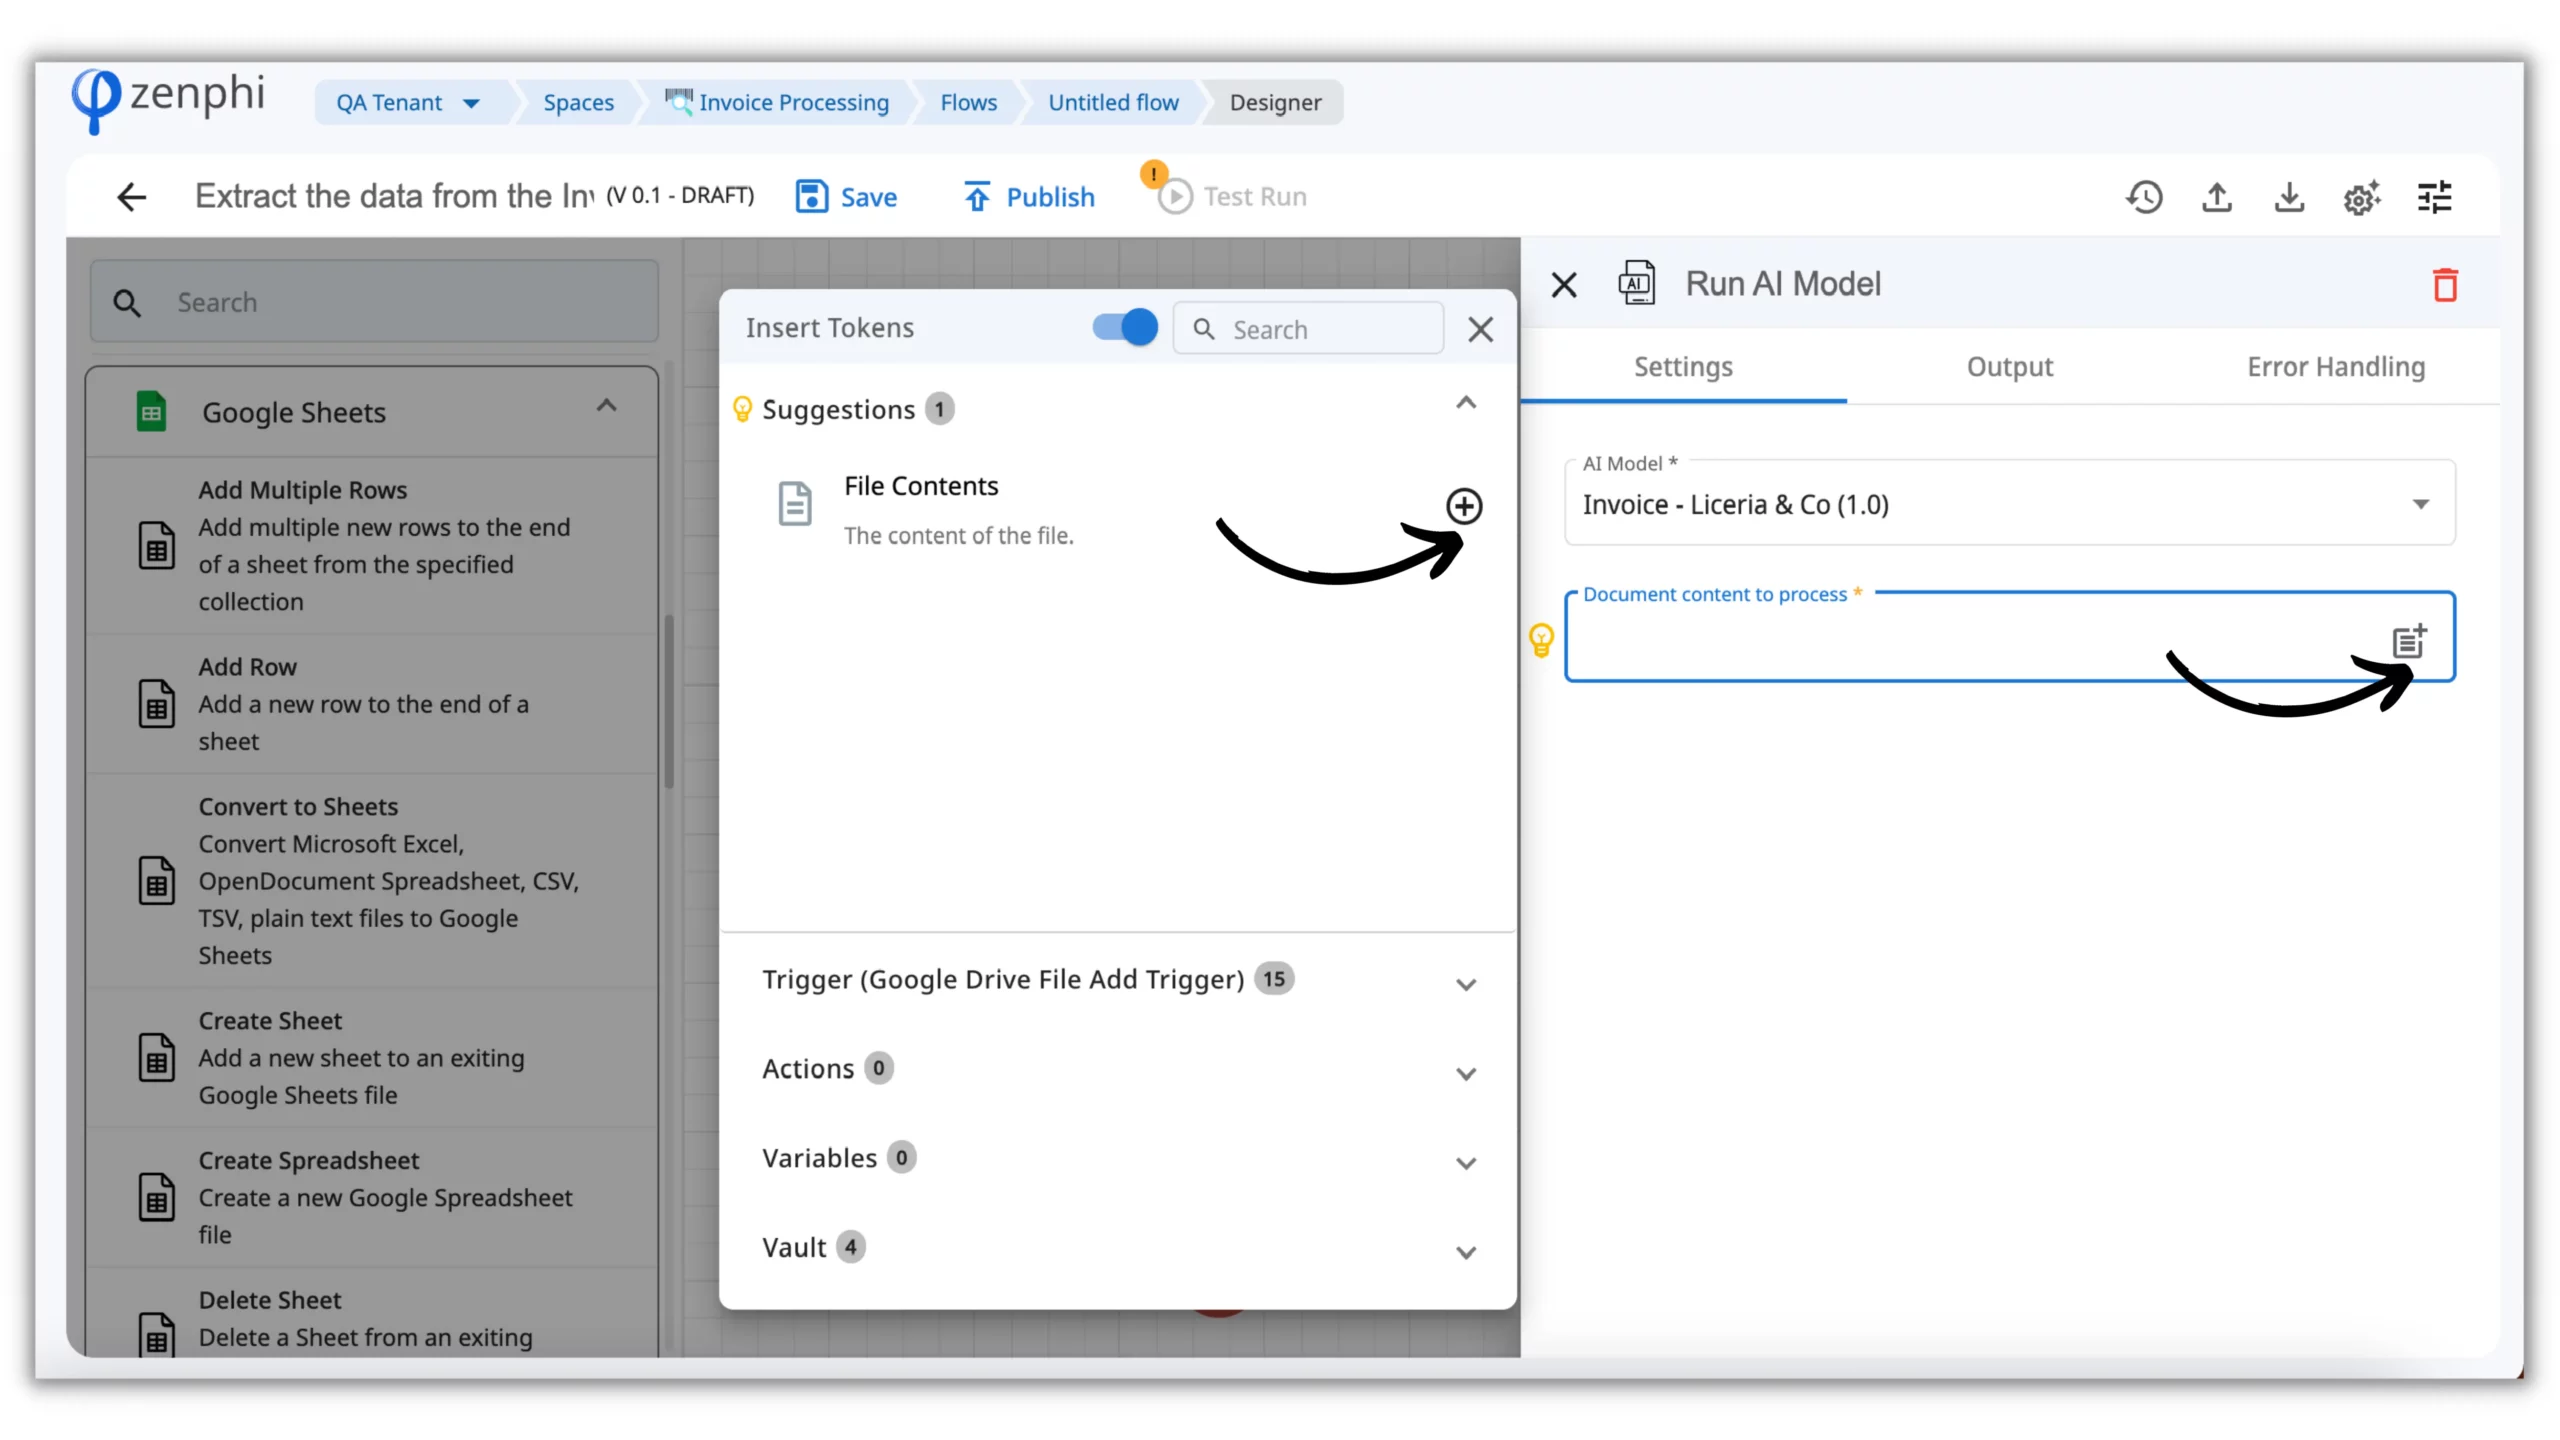
Now that we have a trigger, we can add the first action to the Flow: Run AI Model.
Click on the Gear icon inside the action, and in the “AI Model” field, choose a model we created earlier in step 2. Then, click on the Token Picker in the “Document content to process” and select File Contents from the Trigger Output. With Token Picker you can easily move the data within the Flow steps.
Once you have selected the PDF file, zenphi will analyze the document and identify the fields that can be extracted. You can then map these fields to columns in a Google Sheet.
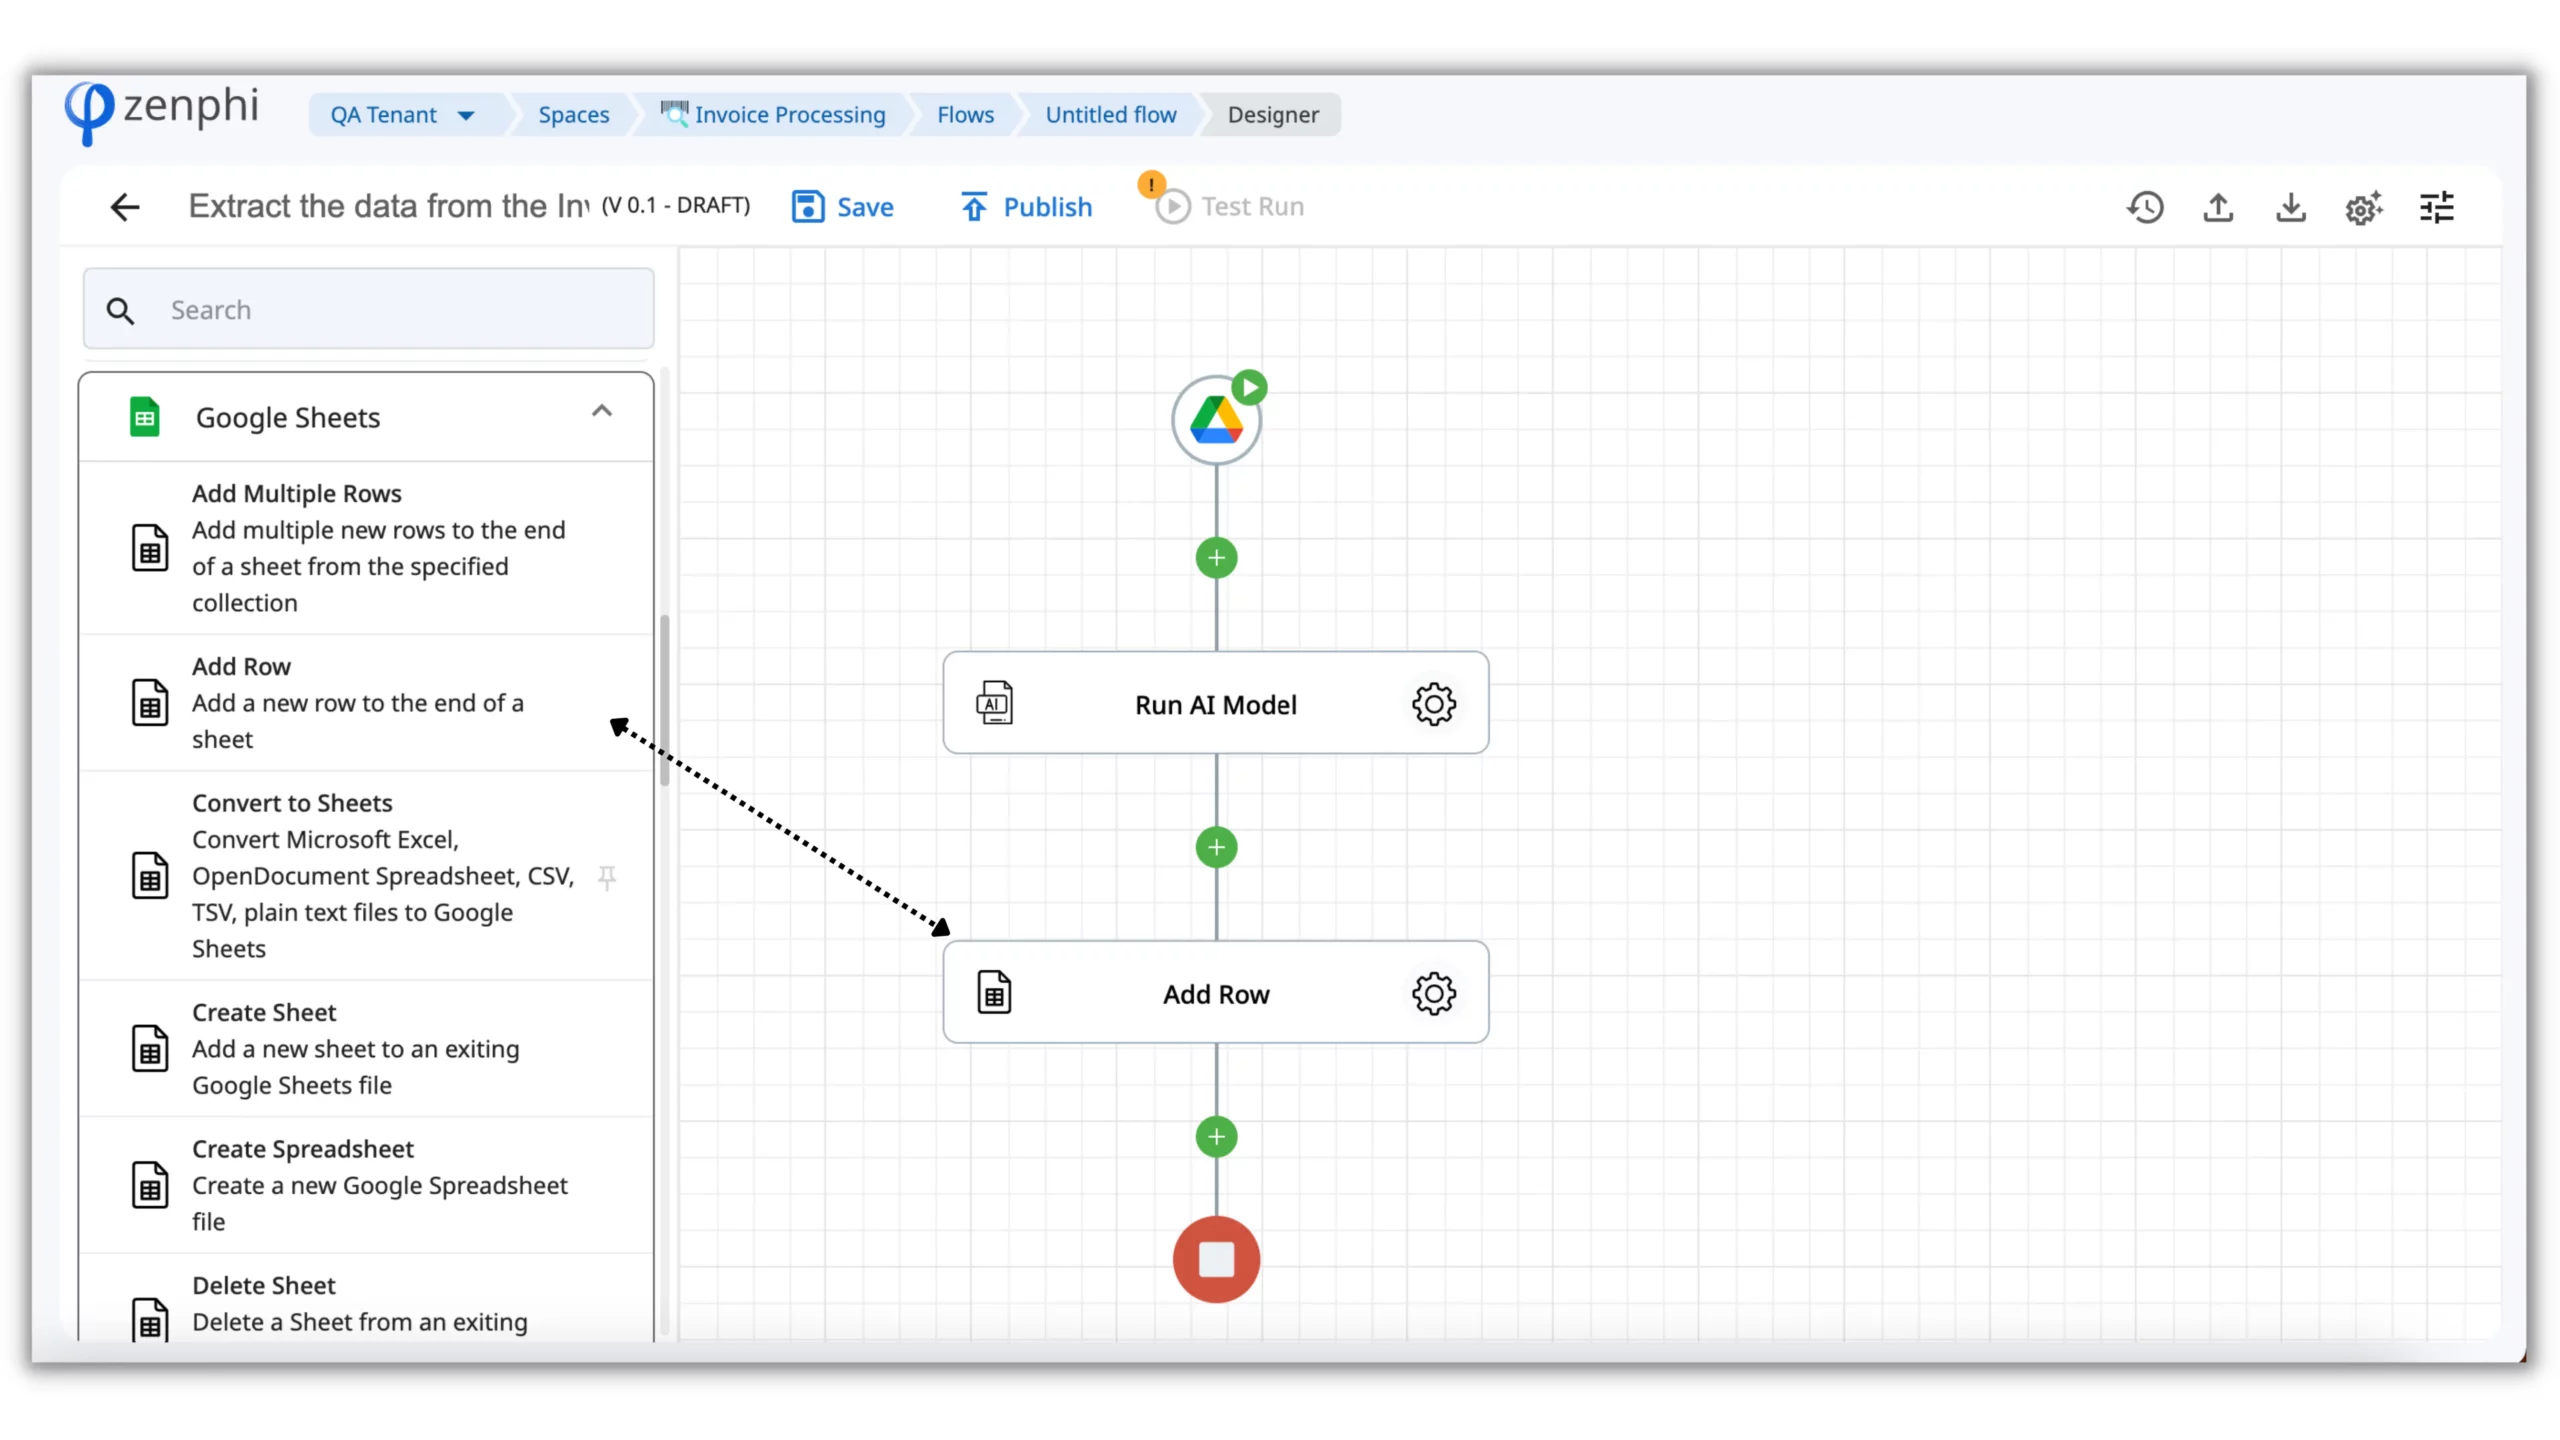
Step 6: Add a Google Sheets action
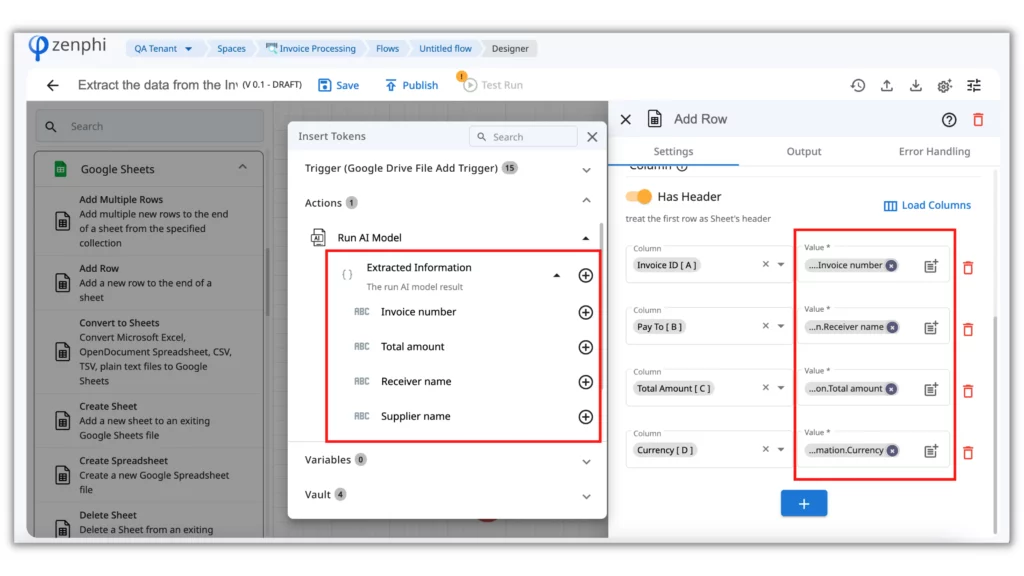
Now that we have extracted the data from the PDF, we can append an Add Row to Google Sheets action to insert the data into a Sheet.
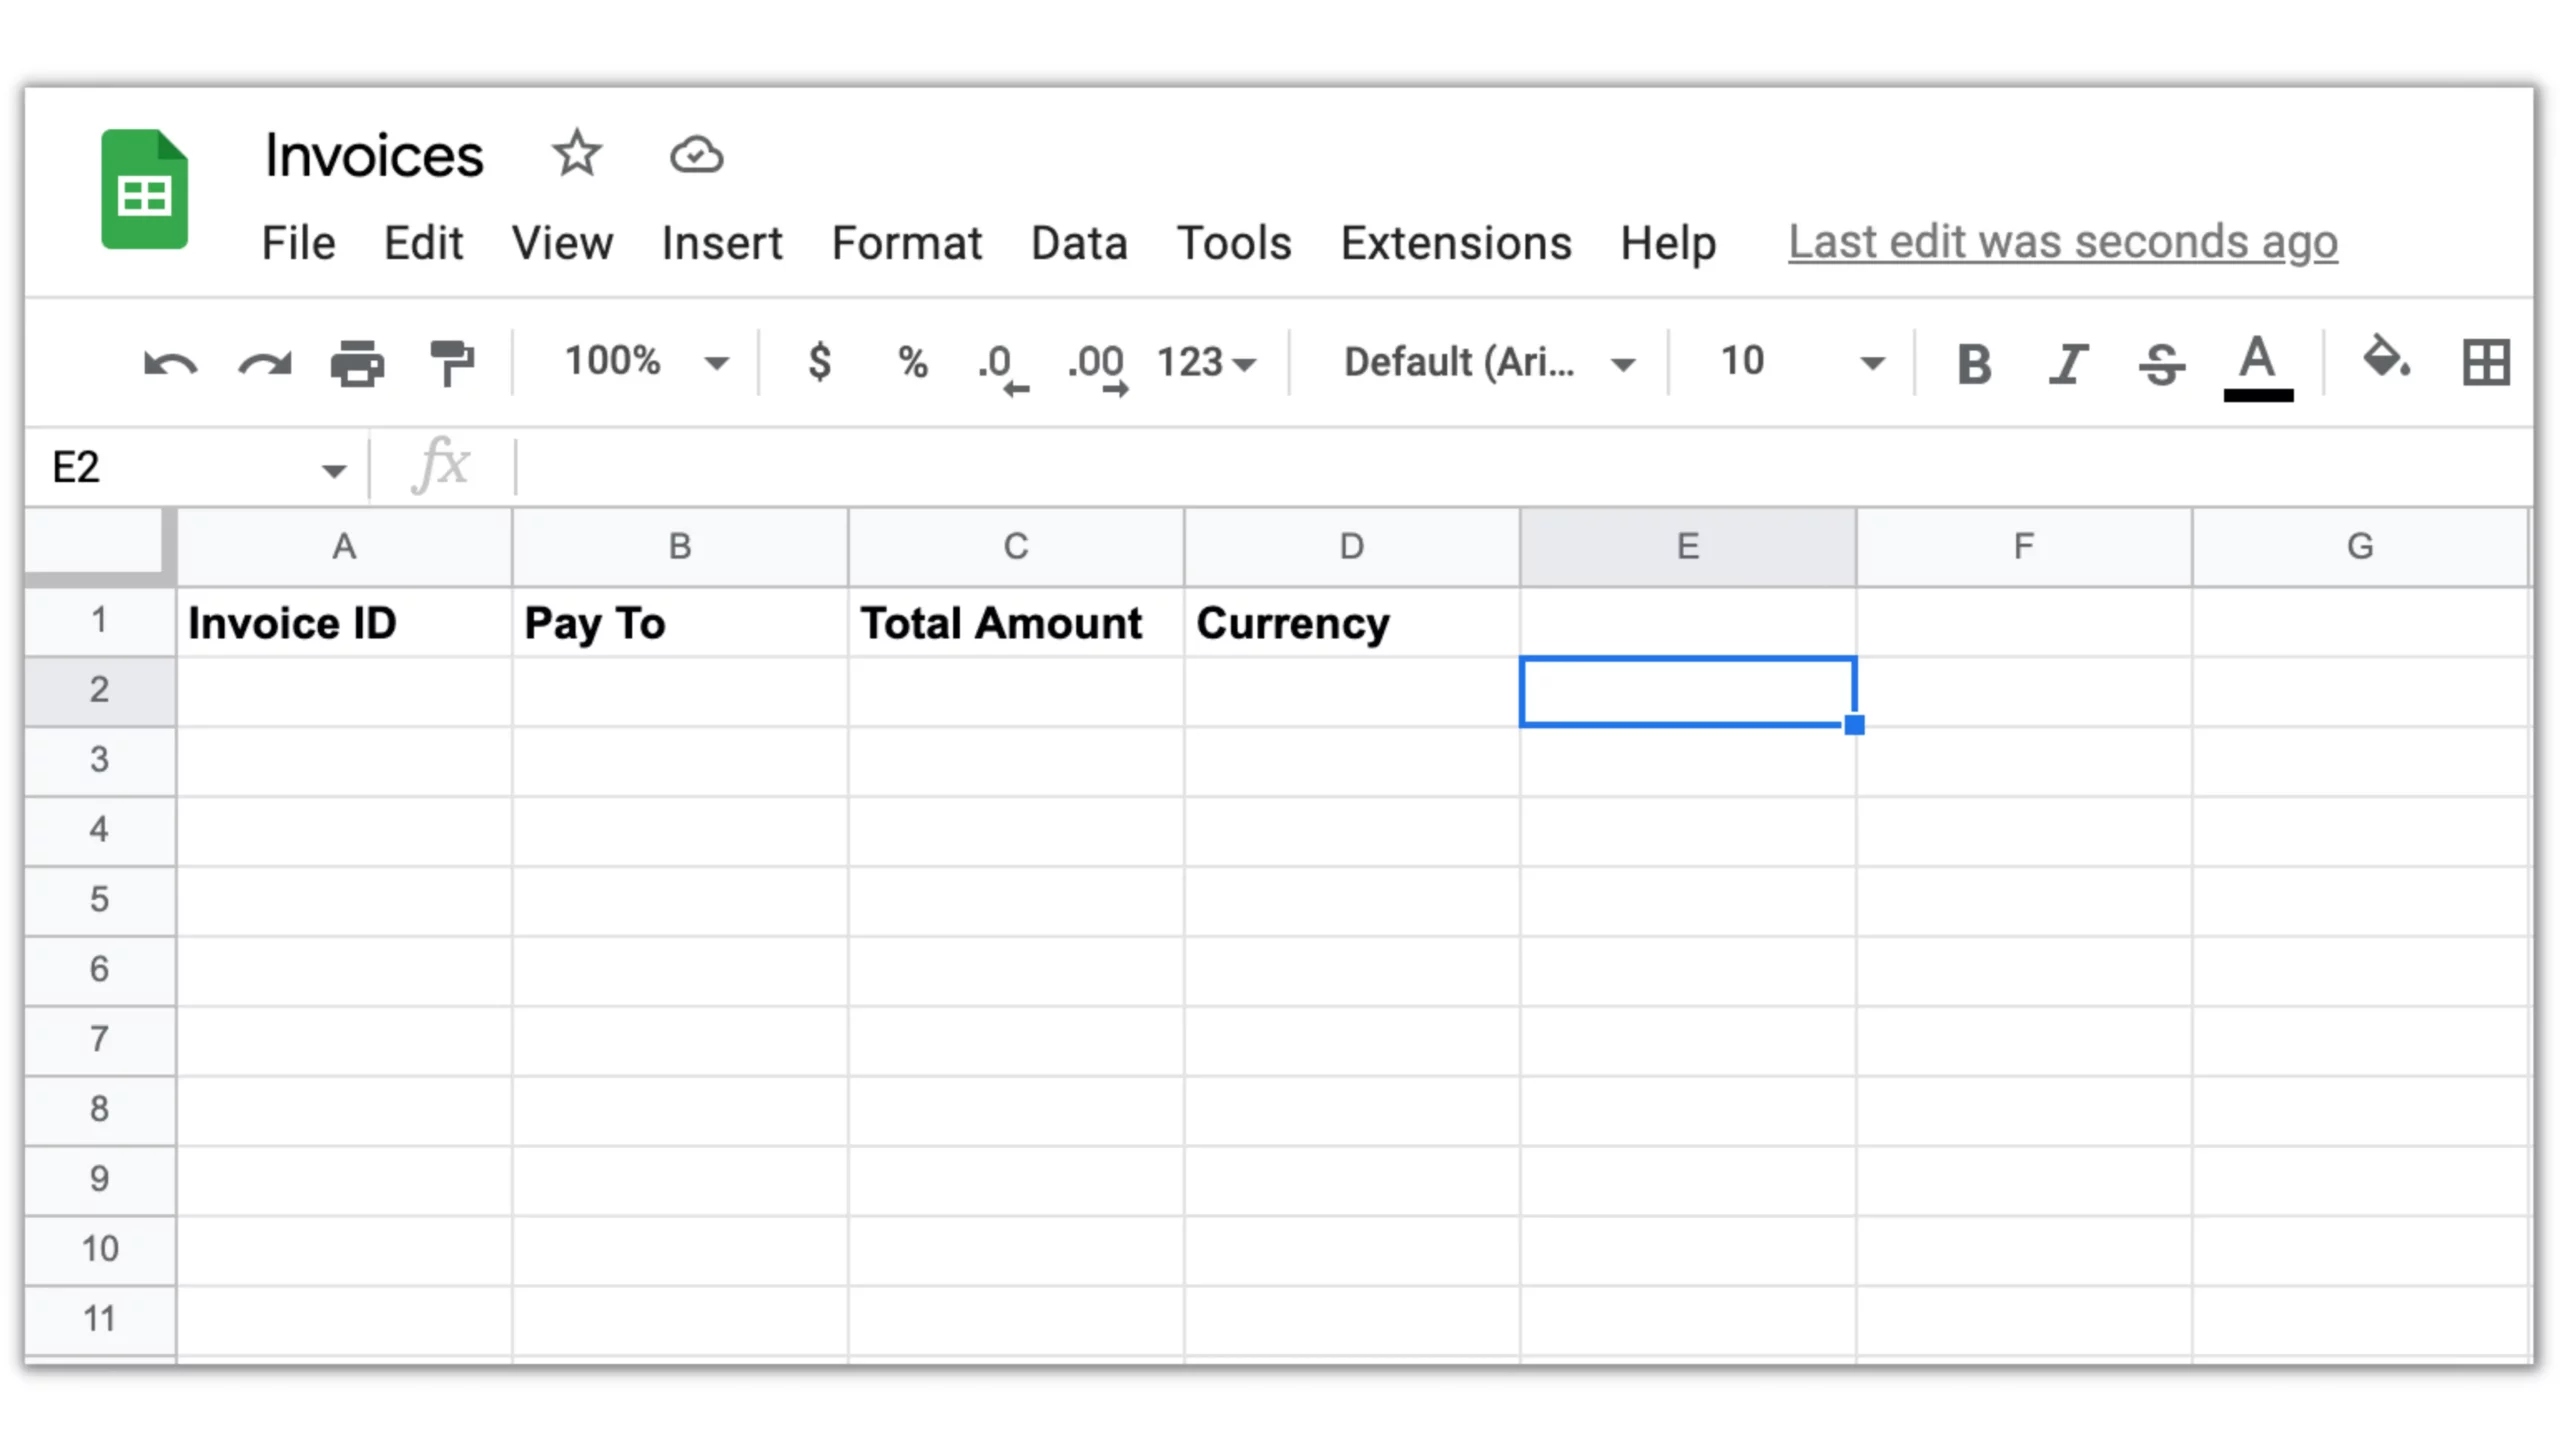
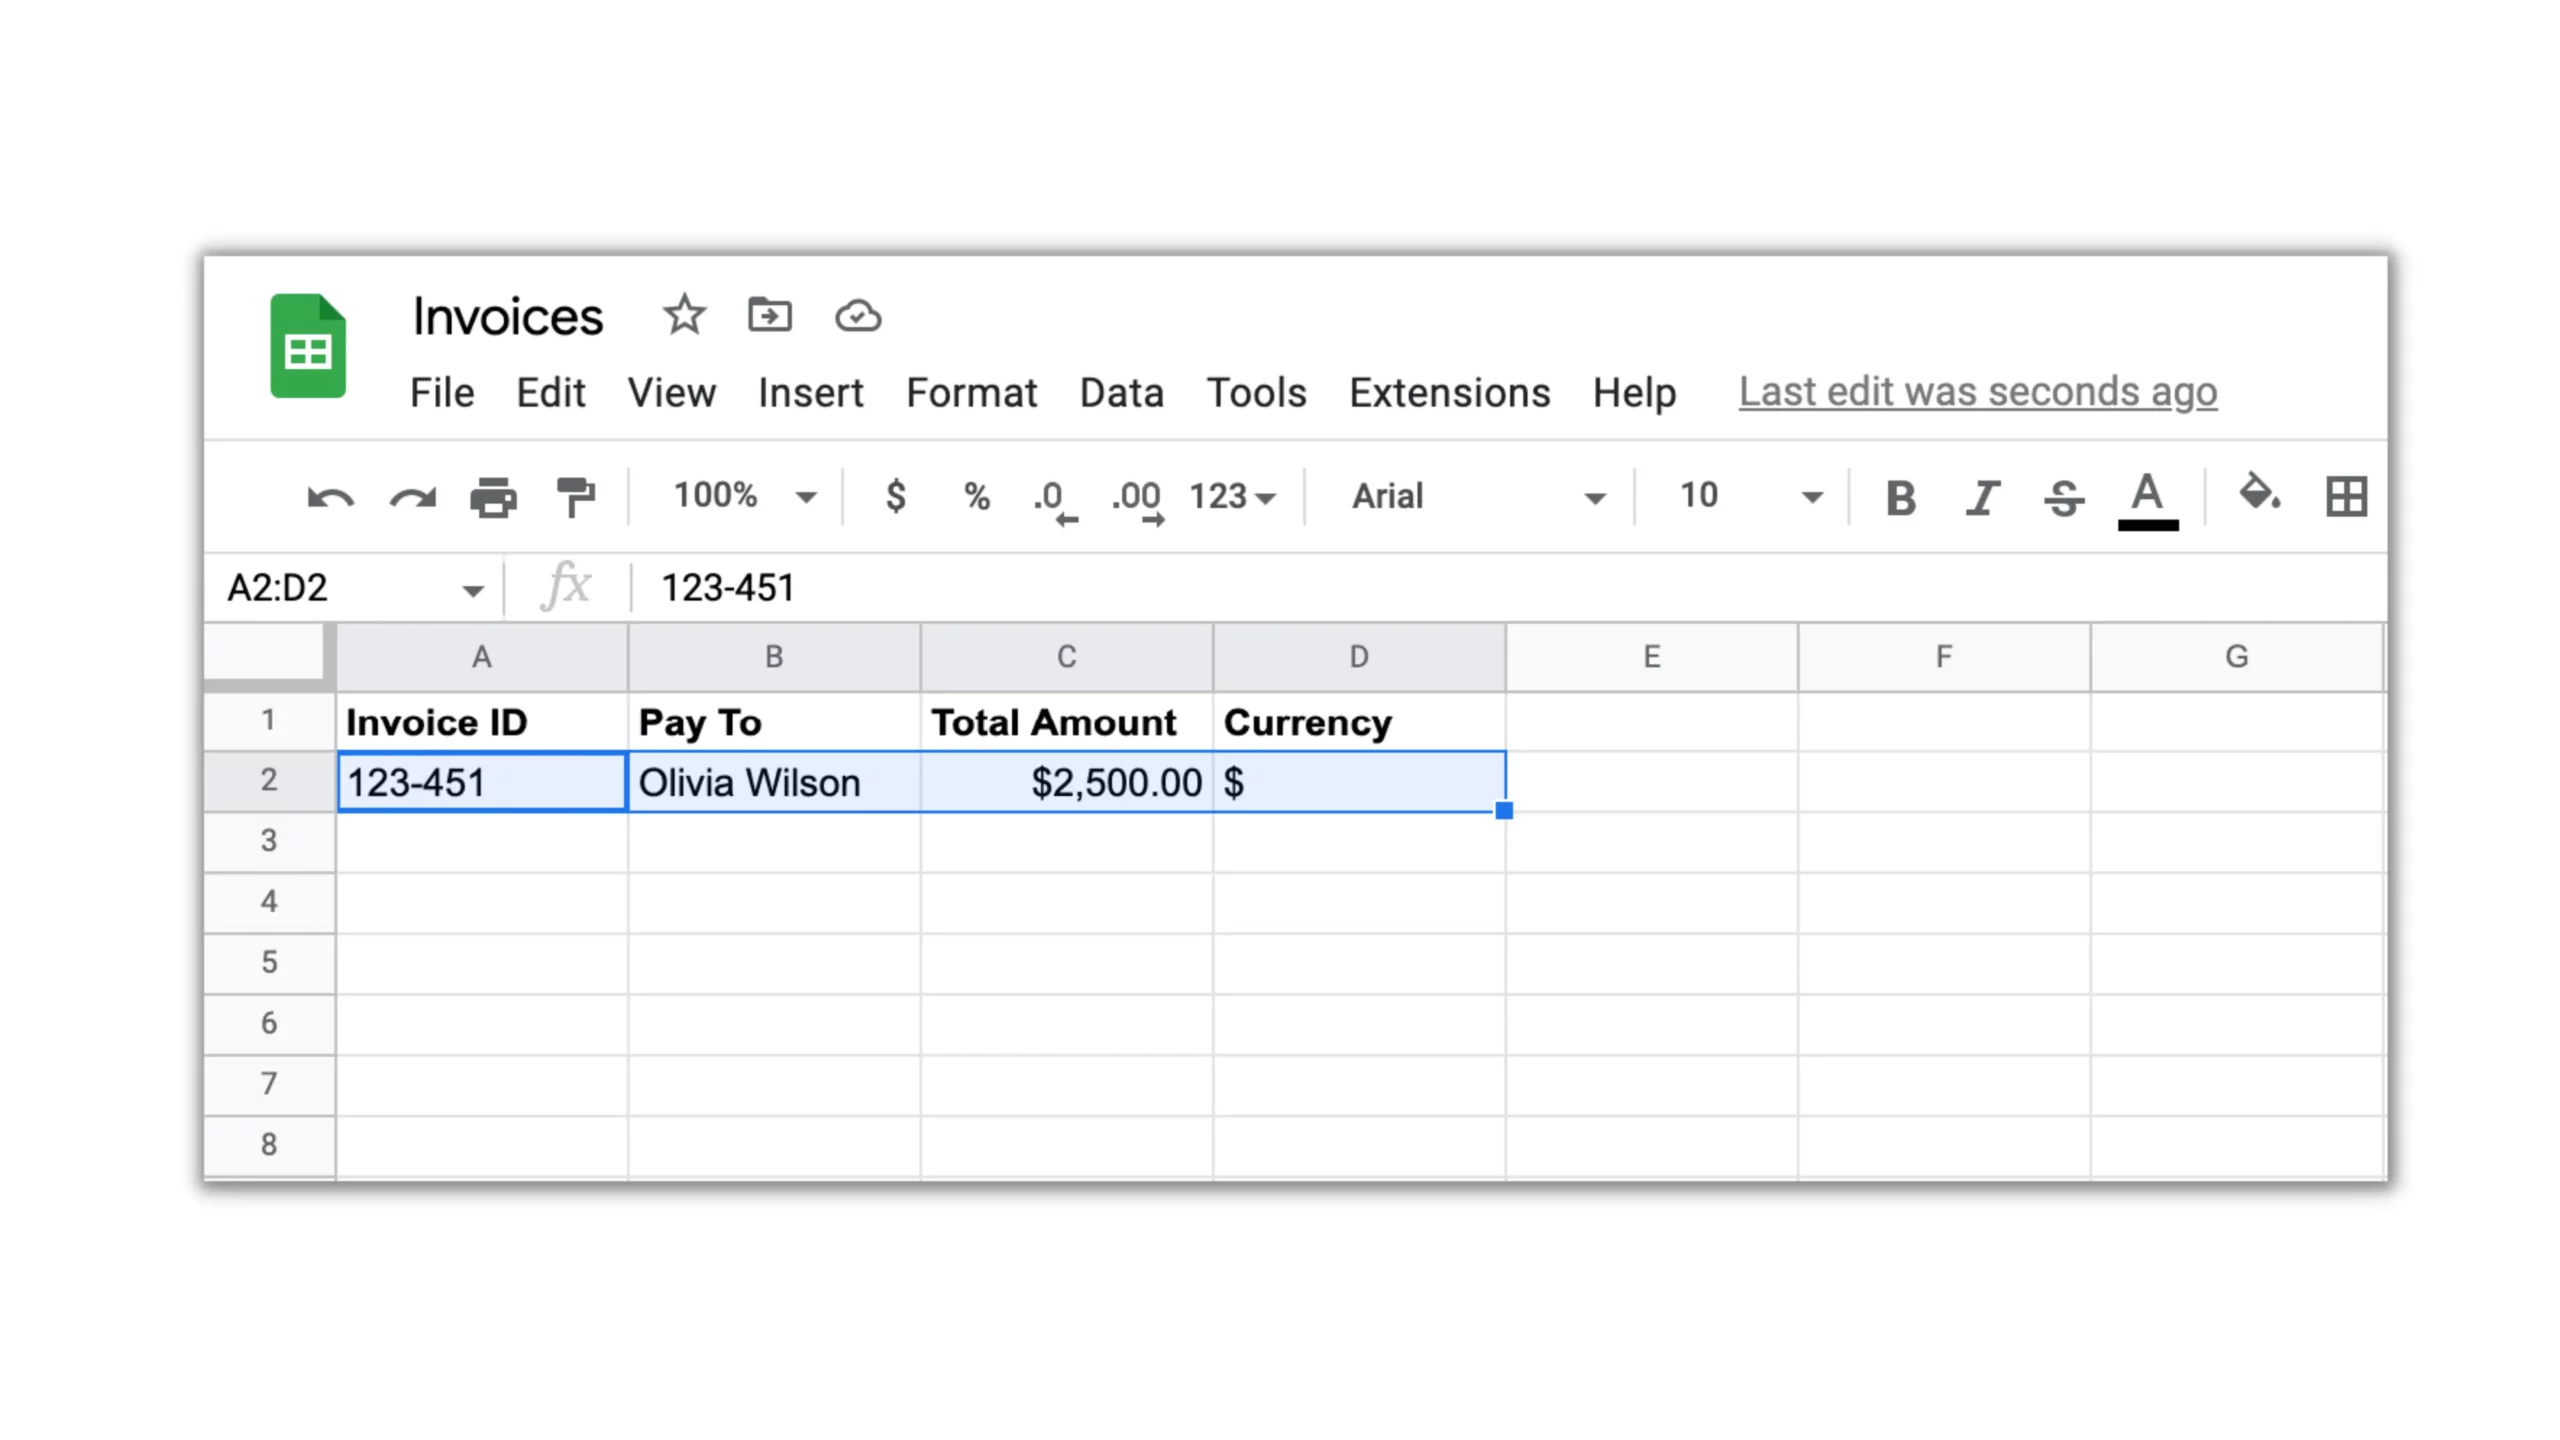
Also, let’s create a Google Sheet with the data you want to gather from the Invoice.
Then, connect this Google Sheet to zenphi in the Add Row action and map the Values for Google Sheet’s columns with the Output data from the Run AI Model action using the familiar Token Picker.
Step 7: Save, Test, and Publish the flow
Click on the Save button at the top panel. Then, launch a Test Run to ensure the automation runs smoothly. Make sure to have one test invoice uploaded to a Google Drive folder that you specified in the Trigger.
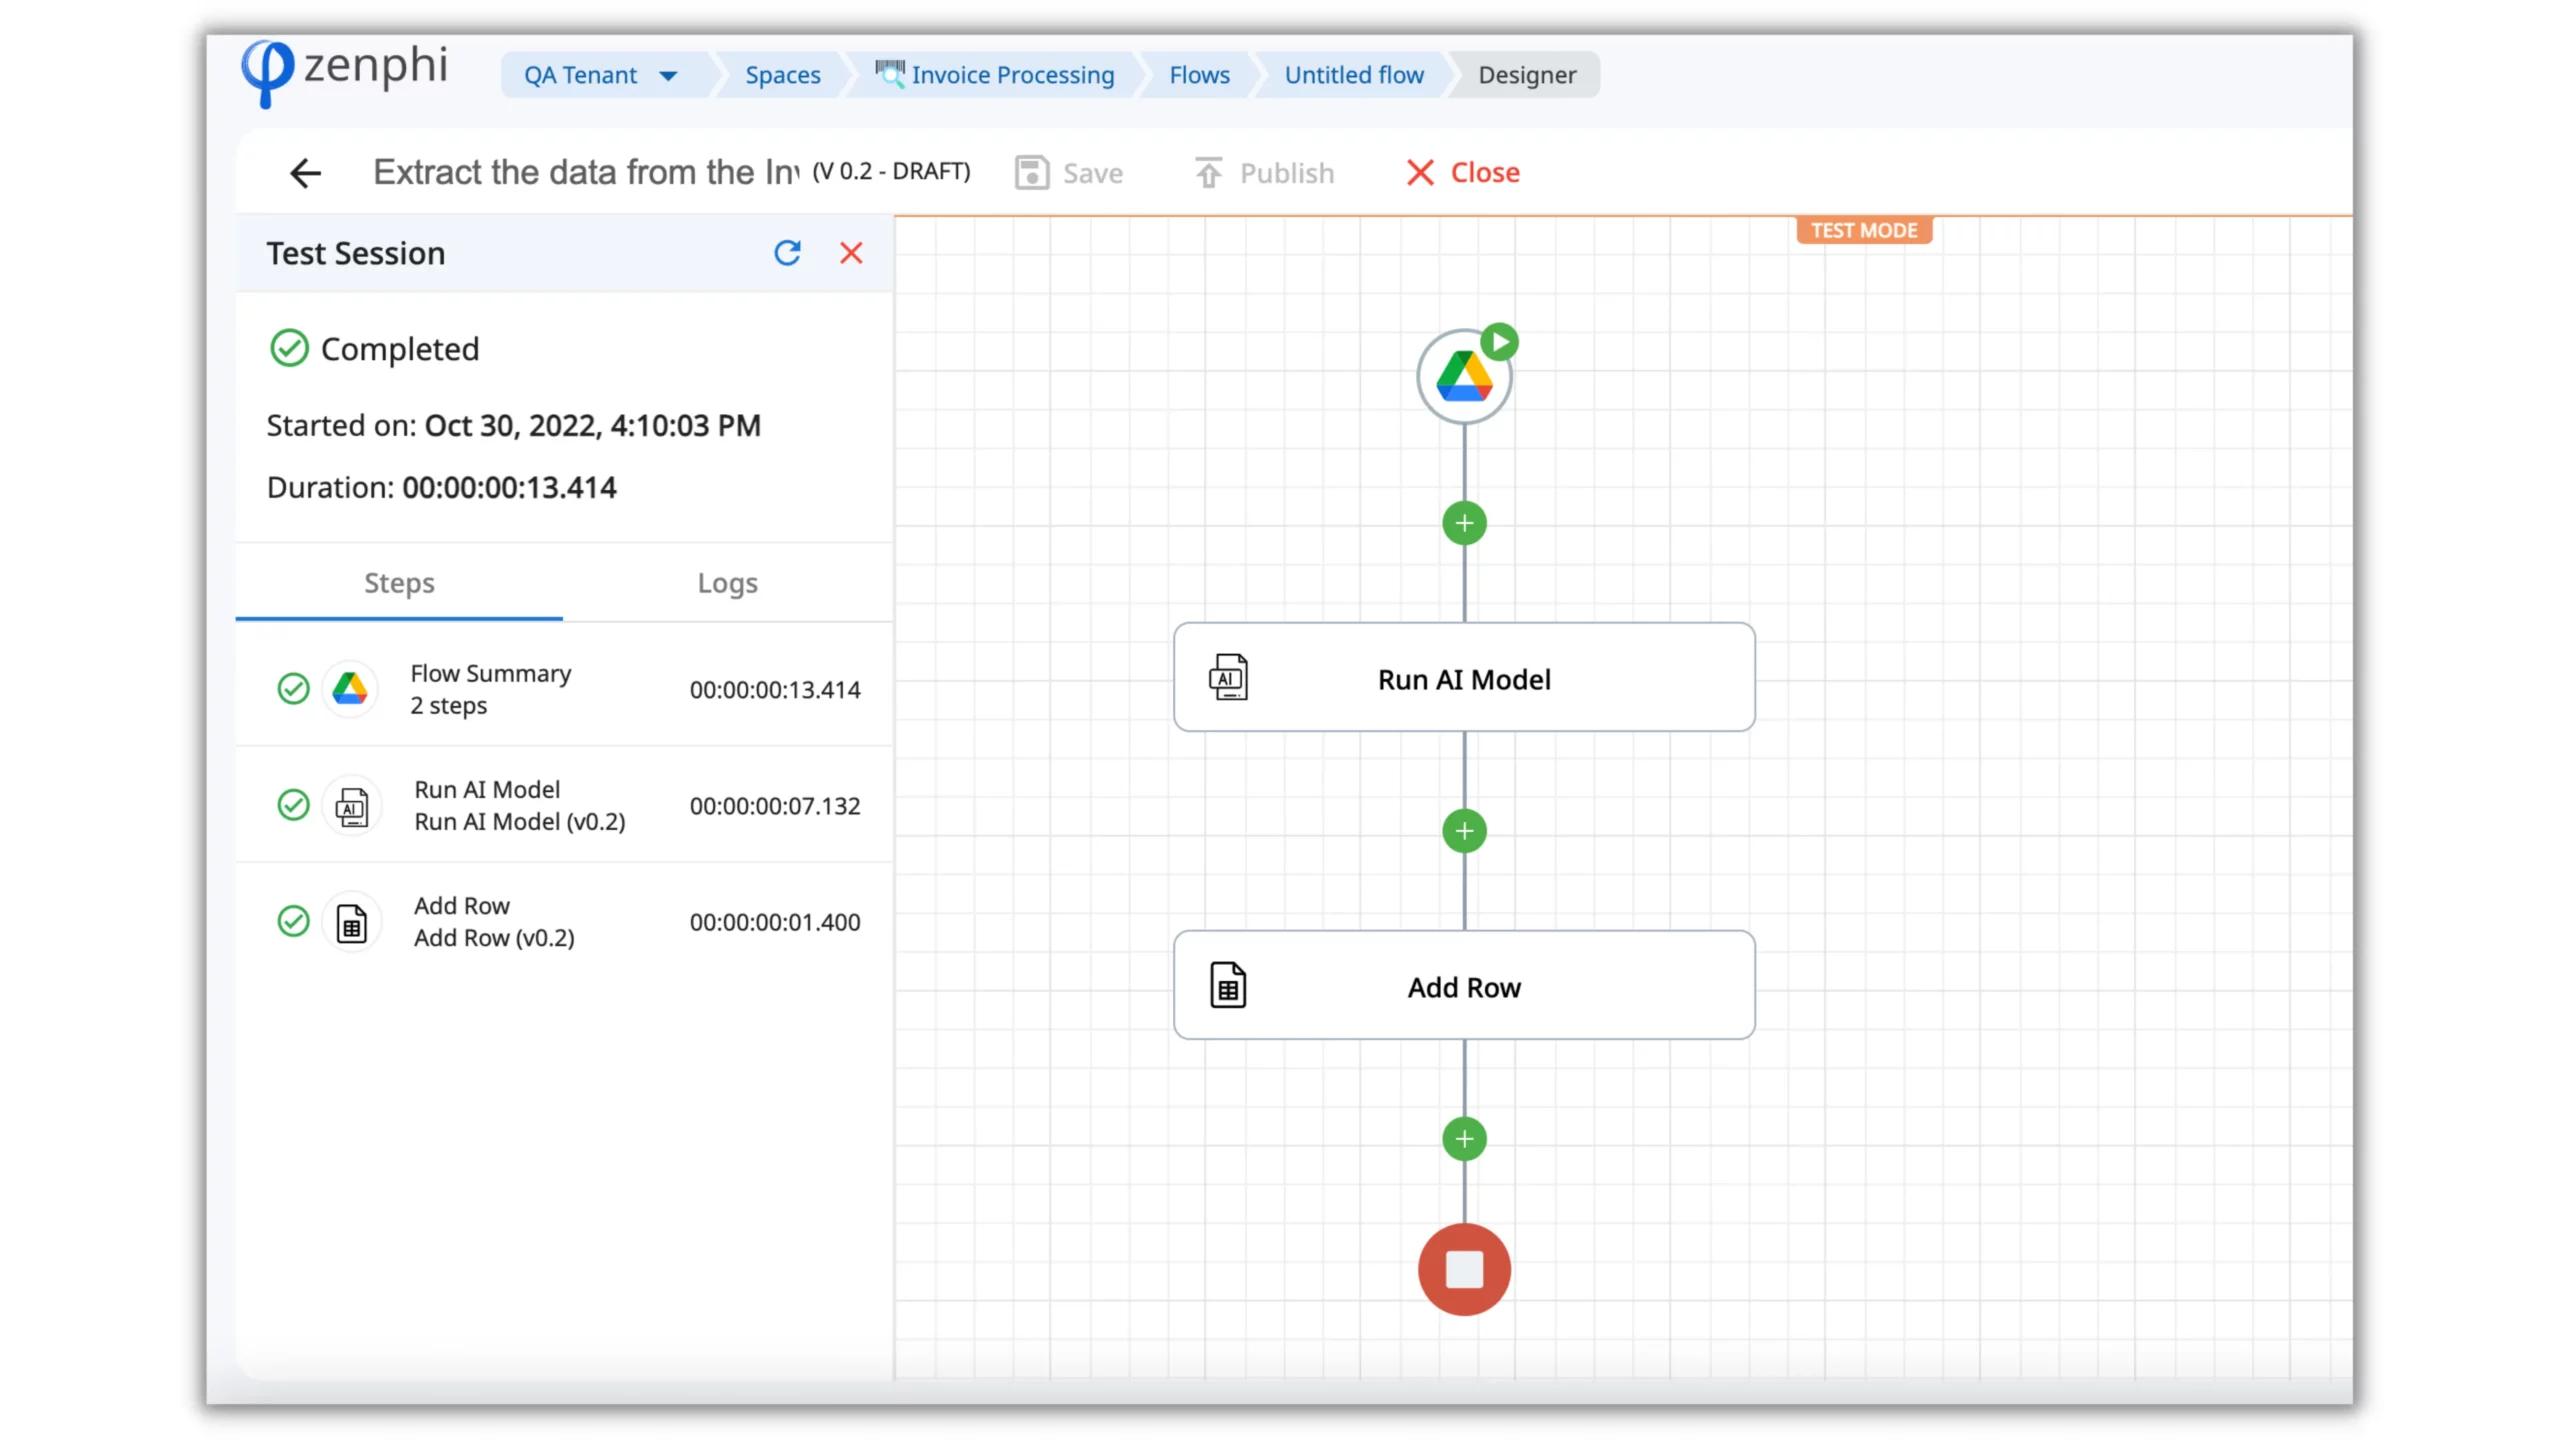
Once the Test is over, check if the data moved to a Google Sheet correctly.
When you’re satisfied with the results, publish the Flow. Once the flow has been published, zenphi will extract the data once a new PDF is uploaded to the Google Drive folder and insert it into the specified Google Sheet.
Conclusion
Using Zenphi to extract data from a PDF and import it into Google Sheets is a straightforward process. By following the steps outlined in this tutorial, you can easily automate this task and save yourself time and effort.

