Learn how to manage the access given to your Google Workspace users based on their role in the organization in a few easy steps.
Table of Contents
What Is Role-Based Access Management In Google Workspace
Google Workspace is widely recognized for its robust security features, making it a trusted platform for millions of businesses worldwide. With built-in protections like encryption at rest and in transit, advanced phishing and malware detection, and comprehensive data loss prevention (DLP) capabilities, Google Workspace is designed to safeguard sensitive information. In fact, according to Google’s transparency report, over 90% of inbound Gmail is encrypted, and Workspace services undergo rigorous third-party audits, earning certifications like ISO/IEC 27001 and SOC 2/3, which attest to its security standards .
However, despite these strong security measures, security incidents still happen even within Google Workspace. Not from technical vulnerabilities but from the human factor. One of the most common scenarios involves users inadvertently sharing sensitive information with unauthorized individuals [Download the stats on business “hackability” in 2024] . This often happens when access rights are not properly managed or when employees have more permissions than they need for their roles.
This is where Role-Based Access Management (RBAC) becomes essential as a part of your user access management in Google Workspace policy. By assigning users specific roles with defined access rights, organizations can minimize the risk of unauthorized data exposure. Implementing RBAC ensures that employees only have access to the information necessary for their job functions, significantly reducing the likelihood of accidental data loss and leaks.
Why Automating Role-Based Access Management In Google Workspace
Typically, RBAC is implemented as part of the user onboarding process. New employees are assigned roles based on their job descriptions, and their access permissions are automatically configured to match these roles. This process can be time-consuming and prone to errors if done manually, especially in large organizations with frequent changes in personnel.
Automating role-based user access controls can solve these challenges and become an integral part of your security automation solution. By leveraging automation tools, organizations can ensure that access permissions are correctly assigned and updated in real-time as roles change. This not only enhances security but also streamlines the onboarding process, making it faster and more efficient.
In this tutorial, we’ll explore how to automate role-based access management in Google Workspace, helping you create a secure and scalable user management system.
How To Automate the Role-Based Access Approvals as A Part Of User Management Process
Set Up Your Zenphi Account
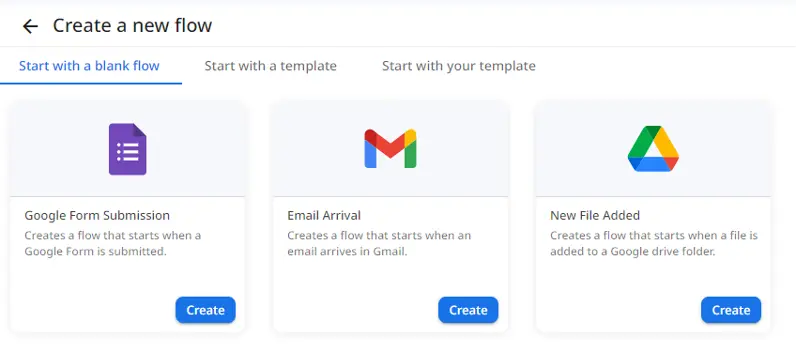
Let’s get started by setting up your Zenphi account. Click here to create your free account, and once you’re in, it’s time to build your first automated flow. In Zenphi, a ‘flow’ is the entire automated process. It consists of a trigger that starts your flow and subsequent actions that represent the steps in your process.
For this example, we will use the “Google Form trigger,” which will ensure that whenever a response is submitted for a new hire, they will automatically be onboarded as soon as possible.
Creating The User’s Account
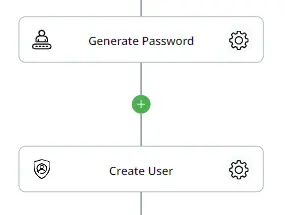
Creating a new user’s Google Account is a crucial part of our Zenphi automation flow. Zenphi offers a powerful tool called the “token picker” that allows you to insert dynamic data from the Google Form Submission. Locate the token picker by finding the chain icon. We will make use of two actions to be able to create their account while also providing a secure password
First, use the “Generate Password” action to create a safe and unique password for the user. This ensures security and simplicity in your onboarding process.
Next, utilize the “Create User” action to set up the new Google account. In this step, you can:
- Select the user’s password
- Grant them access to change the password upon first login
- Add personal information
- Configure additional settings
Adding the User to their Groups
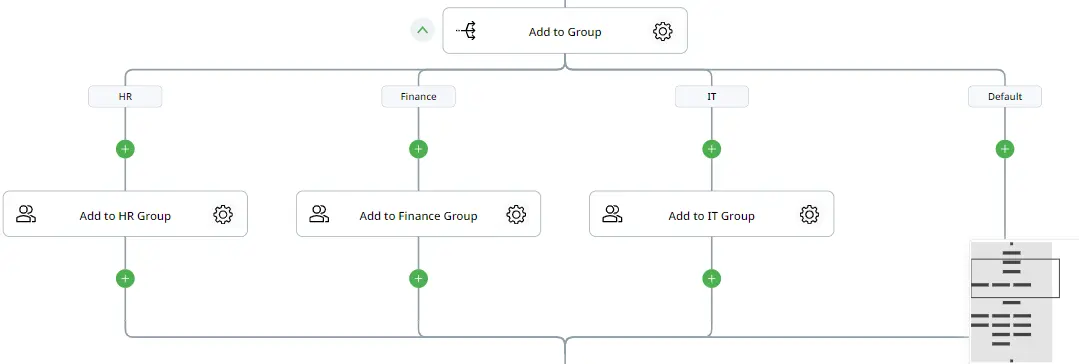
Depending on the department the user will be in, they will need to be added to a different Google Group. For this, we will use a powerful action called “Switch by Value,” which redirects to a branch based on the department chosen in the Google Form. Simply select the question that will serve as the input and add the different options they can choose from in each of the branches.
Then, we can use the “Add to Group” action to add them to their respective groups depending on the branch taken. Simply add the group key, choose their email address from the previous action where we created their account, and assign their role.
Giving Permissions Depending on their Role
When adding a new user, it’s crucial to grant the appropriate access level based on their role. For instance, a manager will need different permissions than an intern. To achieve this, we’ll use the “Switch by Value” action to ensure correct permissions are granted based on the access level indicated in the Google Form. Depending on the role selected by HR in the Google Form, users will be redirected to different branches using the “Switch by Value” action.
We’ve already helped hundreds of companies to automate IT Operations and Google Workspace Admin tasks. Book a call to learn the best practices from your peers and listen to their honest experience with Zenphi.
Admin and Manager Roles
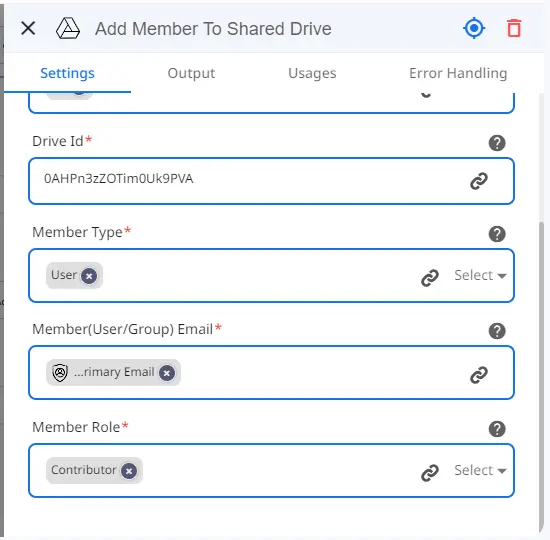
For Admin and Manager roles, we will add the member to any necessary Shared Drives using the “Add Member to Shared Drives” action. Simply indicate their email, the Drive ID, and the role they should have.
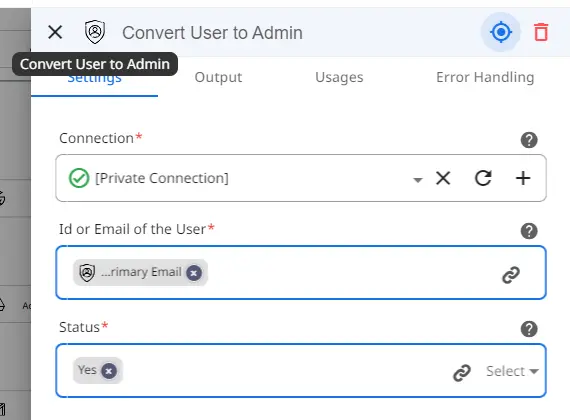
For admin roles, we will convert their regular account to an admin account using the “Convert User to Admin” action.
Creating Gmail Signatures
To ensure uniformity, we will create Gmail signatures for all users regardless of their role using the “Set Gmail Signature” action. You can format the signature to maintain a consistent appearance across all employee emails.
Notifying Users of Account Creation
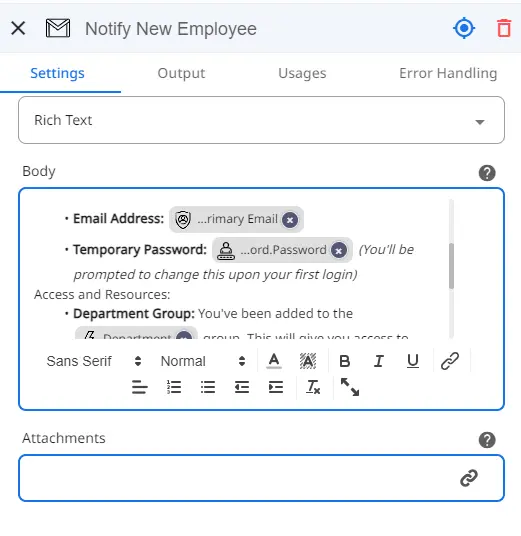
As a final step, we will notify users that their account has been created. To do this we will make use of the “Send Email (Gmail)” action to send an email notification on behalf of the HR team. This action allows you to customize the subject and body of the email to include essential details like their email address, temporary password, and access to Shared Drives. You can format these emails to suit your requirements.
By following these steps, you can efficiently manage user access levels and ensure all users have the necessary permissions and uniform email signatures.
Testing and Publishing your Flow
Now, all that is left to do is save and publish your flow. Once published, your flow will automatically start whenever a form response is submitted. This ensures that whenever a user needs to be onboarded, their account will be created automatically, they’ll be added to their respective Google Groups, and they’ll be given access to any necessary drives.
With Zenphi, you’ll save a significant amount of time and avoid human errors in the process. We highly recommend signing up for a demo meeting with our specialized team. During the demo, we can walk you through our platform, answer any questions, and even help build your first flow at no cost or commitment.

