AI Automation For Procurement , AI Document Processing , AI Enablement For Finance Teams , Google Sheets Automation , Operationalize AI For Business
Reviewing invoices can be a tedious process. This is where automation and AI come into play. Due to them, you can automate the process of extracting values from your invoices that you receive in PDF, JPG or Doc format, and save all relevant variables in a Google Sheet. In a few quick steps, you’ll be able to extract the information, send the invoice for payment, and notify the supplier to ensure efficiency. This is how you can do it
Table of Contents
On average, processing an invoice can take 1-2 weeks for most businesses, as most accountants process around 40 invoices a day. This can lead to late payments or lost invoices. With automation, you can reduce manual effort and even errors.
Thanks to Zenphi’s powerful “Invoice AI Model,” you can easily indicate which fields you’d like to extract, enabling you to process invoices as soon as they come through with the help of a custom model.
In this guide, we will cover how you can leverage AI workflow automation to create a flow for automated data extraction from PDF (applied to selected invoice fields). This flow would also analyze the confidence score for these matches, and decide if manual review is required. This will allow you to send invoices for manual review only if needed, ensuring the values are correct before being sent for payment, and finally notifying the supplier that the payment has been completed. This tutorial will help automate your invoice processing workflow and is very helpful for procurement processes automation , as well as for and finance ops automation.
Applicable for 2 way invoice matching as well.
How To Automate the Process Of Invoice Capture and Data Routing
Set Up Your Zenphi Account
Let’s get started by setting up your Zenphi account. Click here to create your free account, and once you’re in, it’s time to build your first automated flow. In Zenphi, a ‘flow’ is the entire automated process. It consists of a trigger that starts your flow and subsequent actions that represent the steps in your process.
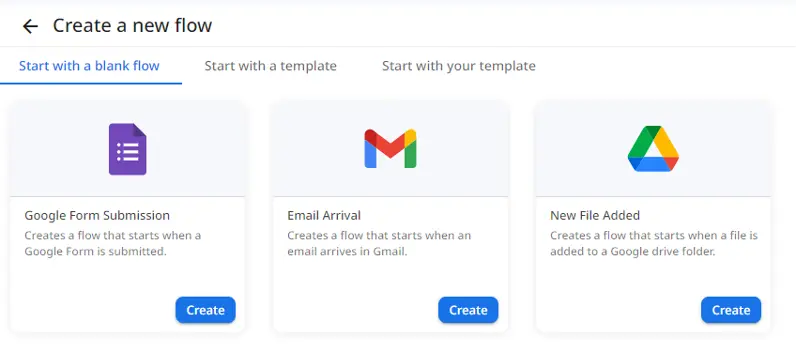
For this example, we will use the “Google Drive trigger,” which will ensure that whenever an invoice is added to a selected Drive folder, it’ll automatically be captured and processed. However, you can also choose the “Gmail trigger” if your invoices tend to come through via email!
Creating the Invoice AI Model
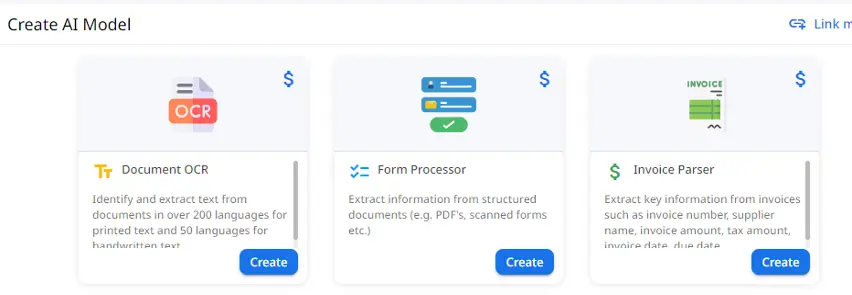
The first step is to create your AI model. Zenphi offers many different types of AI models that you can use. For this example, we will be using the “Invoice Parser” that allows you to extract data from invoices like the invoice number, the total, the supplier, and much more. Simply upload a sample invoice and select which fields you want the model to extract. You may see some suggested fields automatically, but you can use the select tool to choose any additional fields. Any selected fields will be automatically extracted and available to use inside your flows. AI models can be used in all the flows within the same space as long as they are published, making it easy to implement across all of your workflows.
Extracting and Analyzing the Invoice Fields
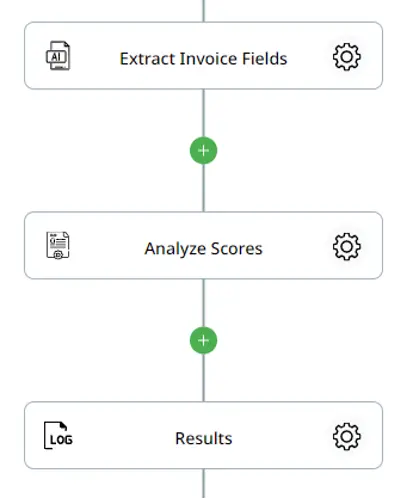
Now that we have published our AI model, we can use it in our flow. The first action we will add is the “Run AI Model.” Select the model previously created from the drop-down menu. The number to the right of the name will indicate the version of the AI Model, so make sure you select the most updated version! Then, select the document you want to process, in this case, the file content from our Google Drive Trigger.
If you look at the output of the action, you’ll be able to see all of the fields we had selected in the AI Model page as well as the confidence score for each match. We will be using these confidence scores for our next action.
Next, using the “Execute Script” action, we will write a short java script that will return the average of all the confidence scores and indicate how many of them are below the threshold of .8. This will help us decide if manual intervention is needed or if it can be automatically approved.
Add the Extracted Fields to the Google Sheet
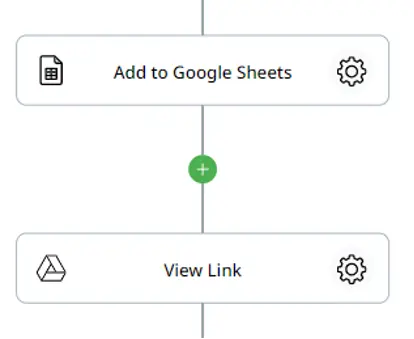
Now that we have successfully extracted the fields, we will add them to a Google Sheet to keep track of all invoices. This can be done using the “Add Row” action. Select the Google Sheet that you wish to add the row to and assign the output of our AI Model to each one of the columns.
Then, use the “Get Item Information” action to retrieve the view link to the Google Sheet. This way, you can share it with whoever needs to view the file if manual review is required.
We’ve already helped hundreds of companies to automate accounts payable and invoice processing within secure and familiar Google Workspace environment. Book a call to learn how your organization can benefit from it.
Decide if Manual Review is Required
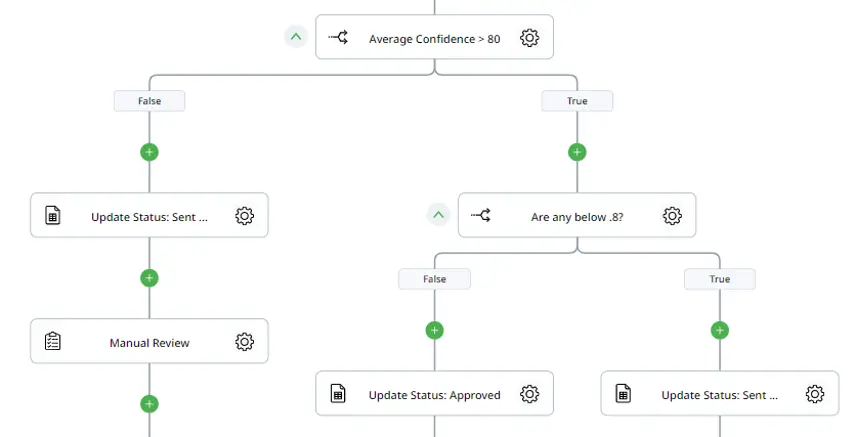
Since we want to ensure that manual review is only used if necessary, we will use two “If Condition” actions to decide if this step is needed. This action will go through the true branch if the average confidence score, which we found using our “Execute Script” action, is over .80. Then, using another “If Condition” action, it’ll check if any of the confidence scores are below .8. This value comes from our “Execute Script” action, which returns how many of the scores are below the established threshold. If either the average confidence score or one or more of the scores is below the threshold, we will send the file for manual review.
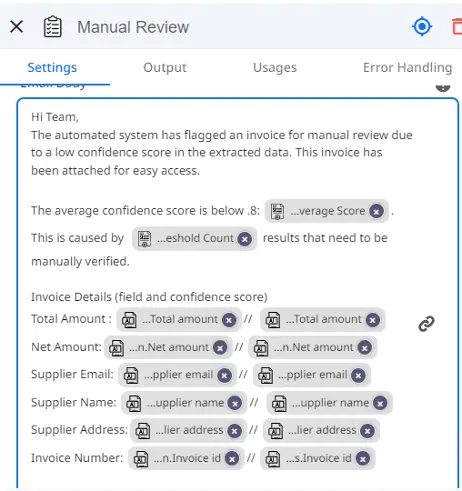
If manual review is required, we will use the “Update Row” action to change the status in the Google Sheet row to “Sent for Manual Review.” Then, using an “Assign Task,” we can send an email to the accounts payable team. Feel free to use the token picker to add values from previous actions. Here we have added the extracted fields, their confidence score, the average score, and results that need to be verified as well as the view link to the Google Sheet. Don’t forget to add the original file as an attachment to ensure they can view the file and make any necessary changes.
Send Invoice for Payment and Notify the Supplier
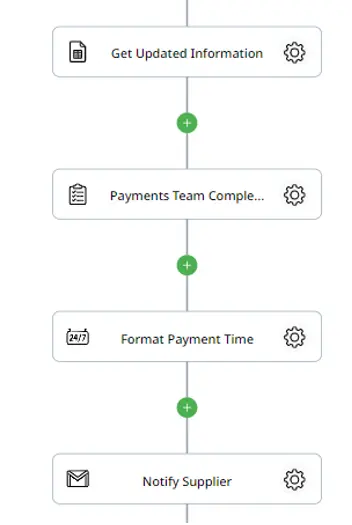
After the review is completed, or if manual review wasn’t necessary, we will go ahead and send the invoice out for payment since all the fields have been corrected or were already approved. To ensure we have the most up-to-date information, we will use a “Read Row” action to read the added row to retrieve the most recent information. Then, using the “Assign Task” action again, we can send a task to the payments team, letting them know the information for the invoice that needs to be paid. Once the task has been completed, we can notify the supplier. This will be done using the “Send Email (Gmail)” action. With the help of the “Format Date/Time” action, we can add the time when the payment was completed to our email, making it easy to choose how you wish to display the date and/or time.
Testing and Publishing your Flow
And that’s it! As you can see, in just a few quick steps, you can automate the process of capturing data from your invoices, store the information in a Google Sheet, and send it for payment while notifying the supplier in a timely manner with the help of Zenphi and AI. You can add or remove actions that aren’t necessary for your process. Once you’re finished, simply save and publish your flow, making it ready for whenever an invoice arrives in the selected Drive Folder.

