Employee offboarding is an important process for any business. It can have a greater impact on overall organization security and efficiency than one might think. If offboarded incorrectly or not in a timely manner, former employees and contractors may still have access to sensitive data, putting your organization’s security at risk. Additionally, you may still be paying for inactive licenses, important files may be lost, and more.
As a Google Workspace administrator, it is your responsibility to ensure that the employee offboarding process from Google Workspace is seamless and there are no delays caused by inter-departmental issues.
In this guide, we’ll learn how to automate the employee offboarding process from Google Workspace with zenphi – the only no-code automation tool built specifically for Google Apps.
Set Up Zenphi
The first step is to set up your free zenphi account. Use this link to quickly register. Once you’re in, click on the “Create new space” button – this Space creates a container for everything related to your employee offboarding automation.
At zenphi, we are all about efficiency. That’s why we have created dozens of pre-built automation templates to help you get started faster. Launch our Google Workspace Admin template to quickly set up popular admin tasks such as employee onboarding and offboarding, updating email signatures, exporting Google Vault data, and more.
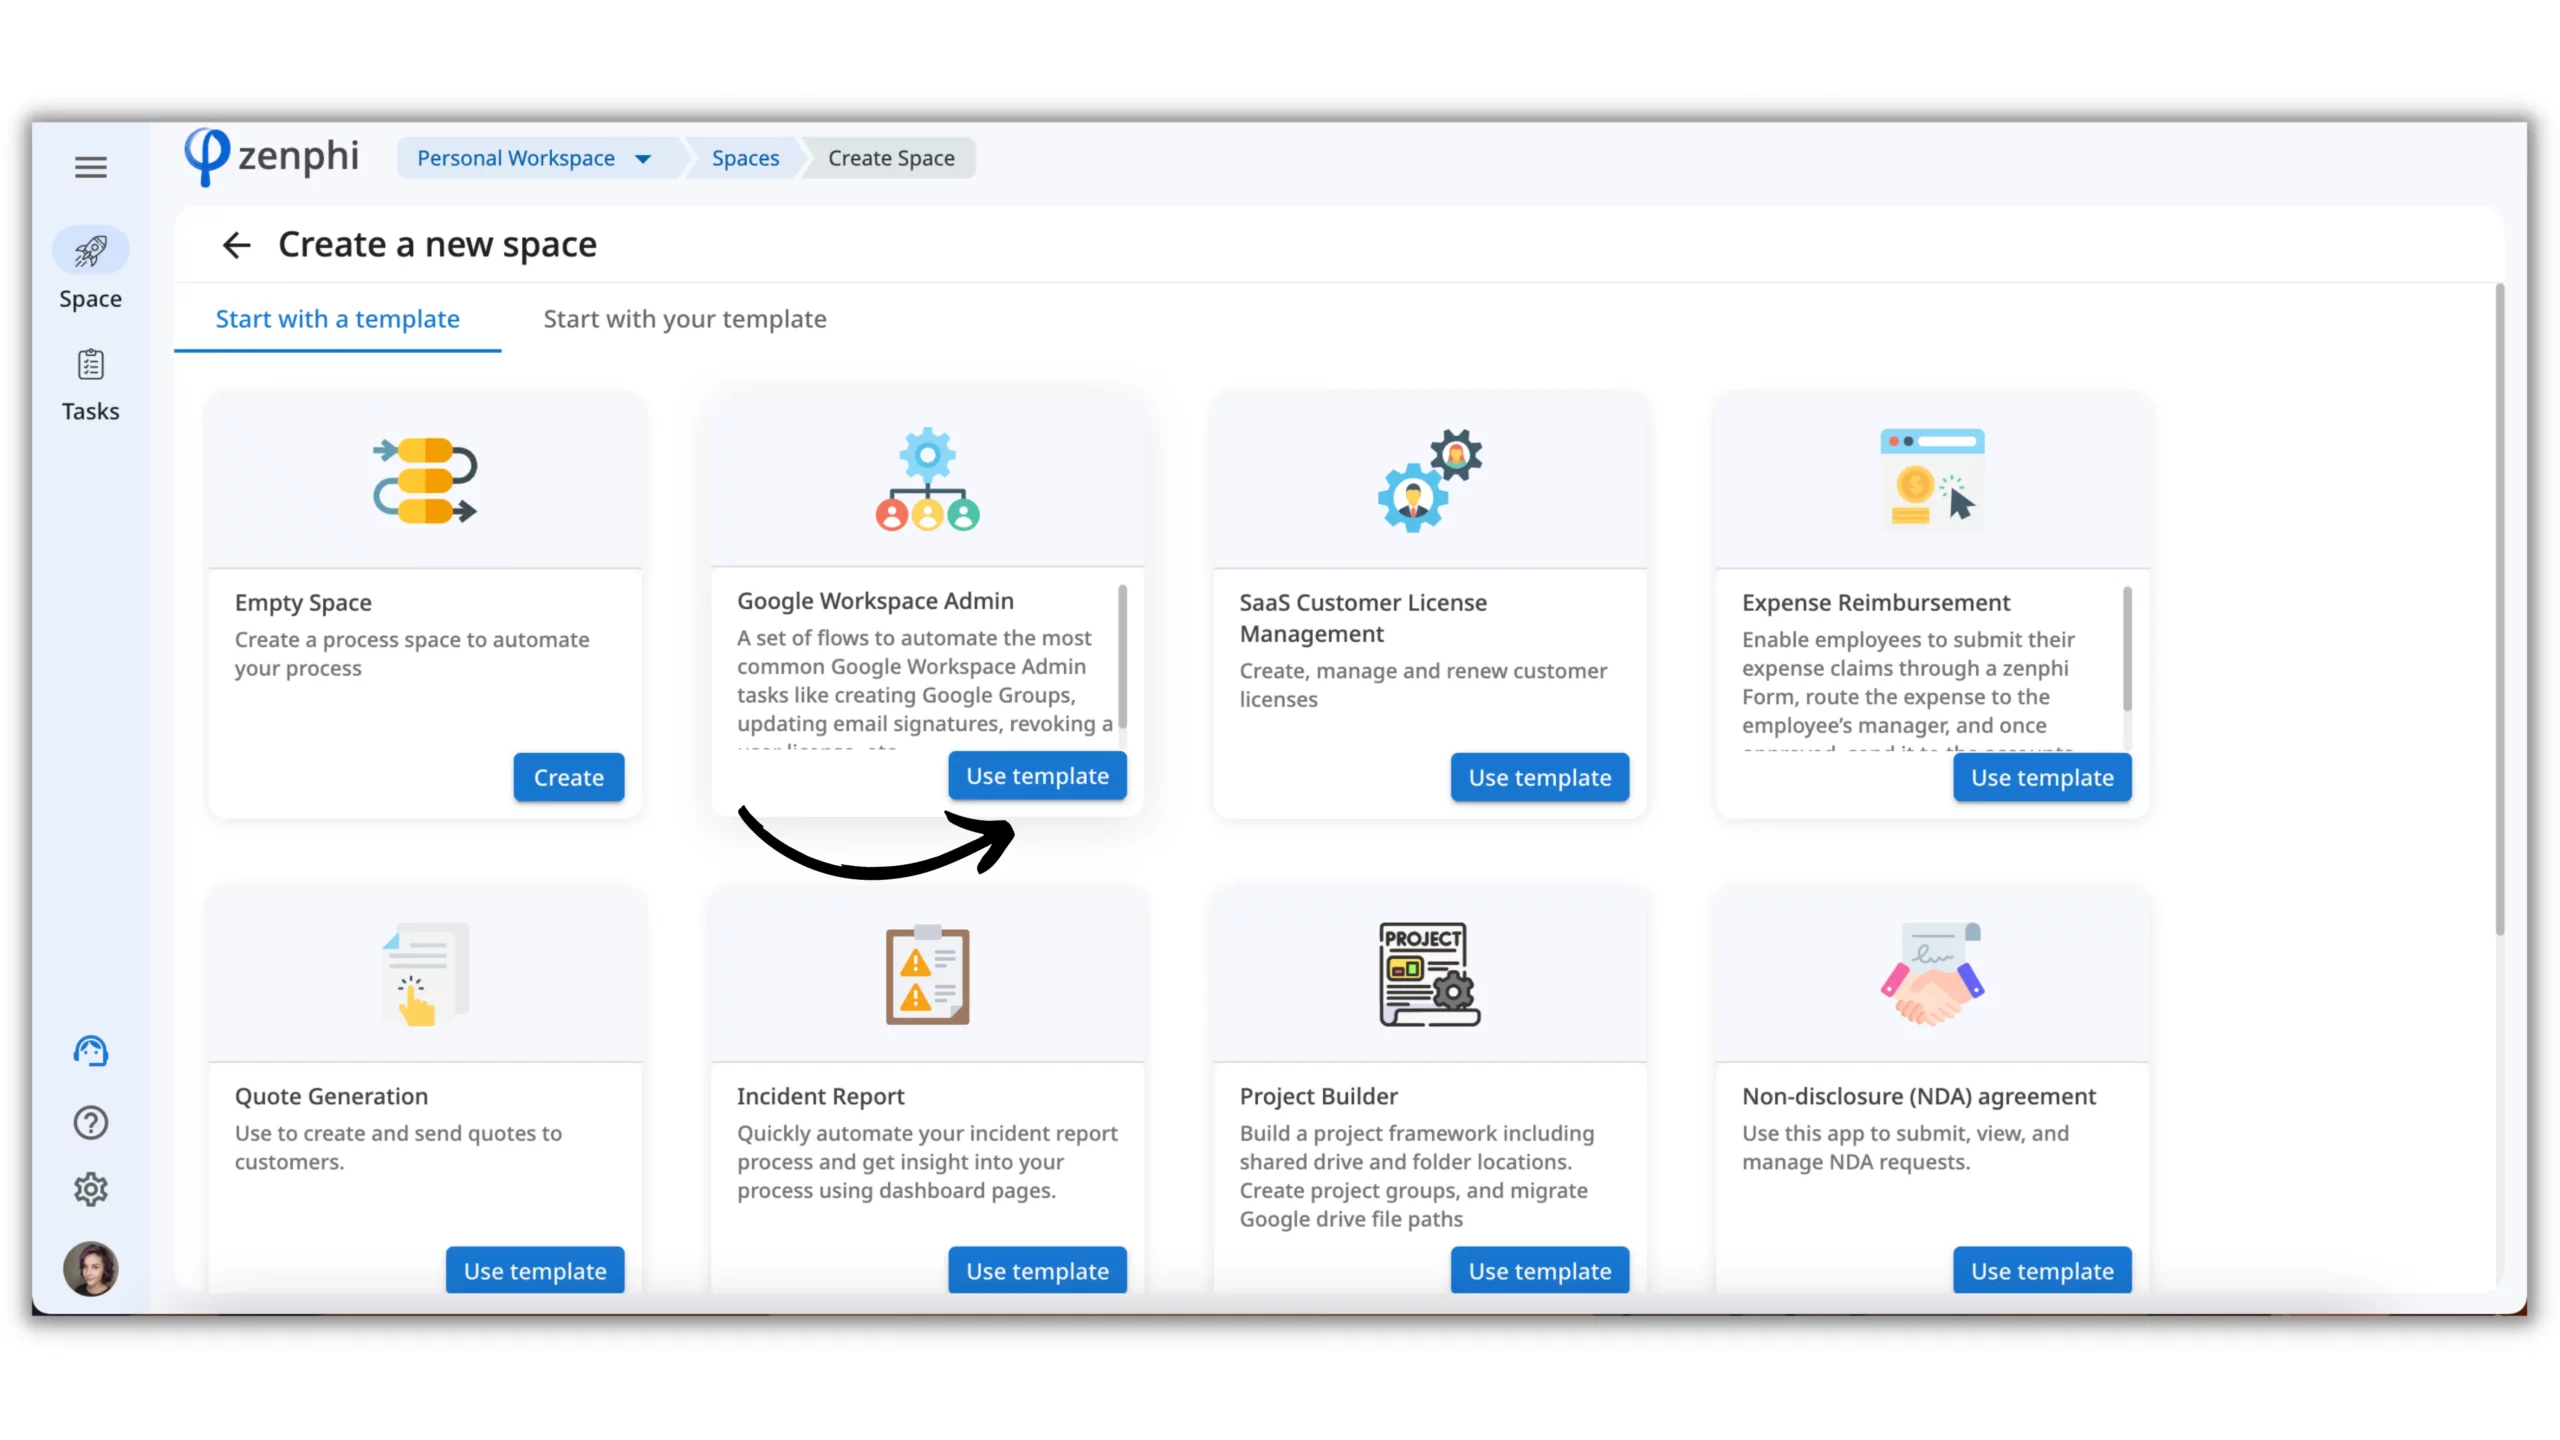
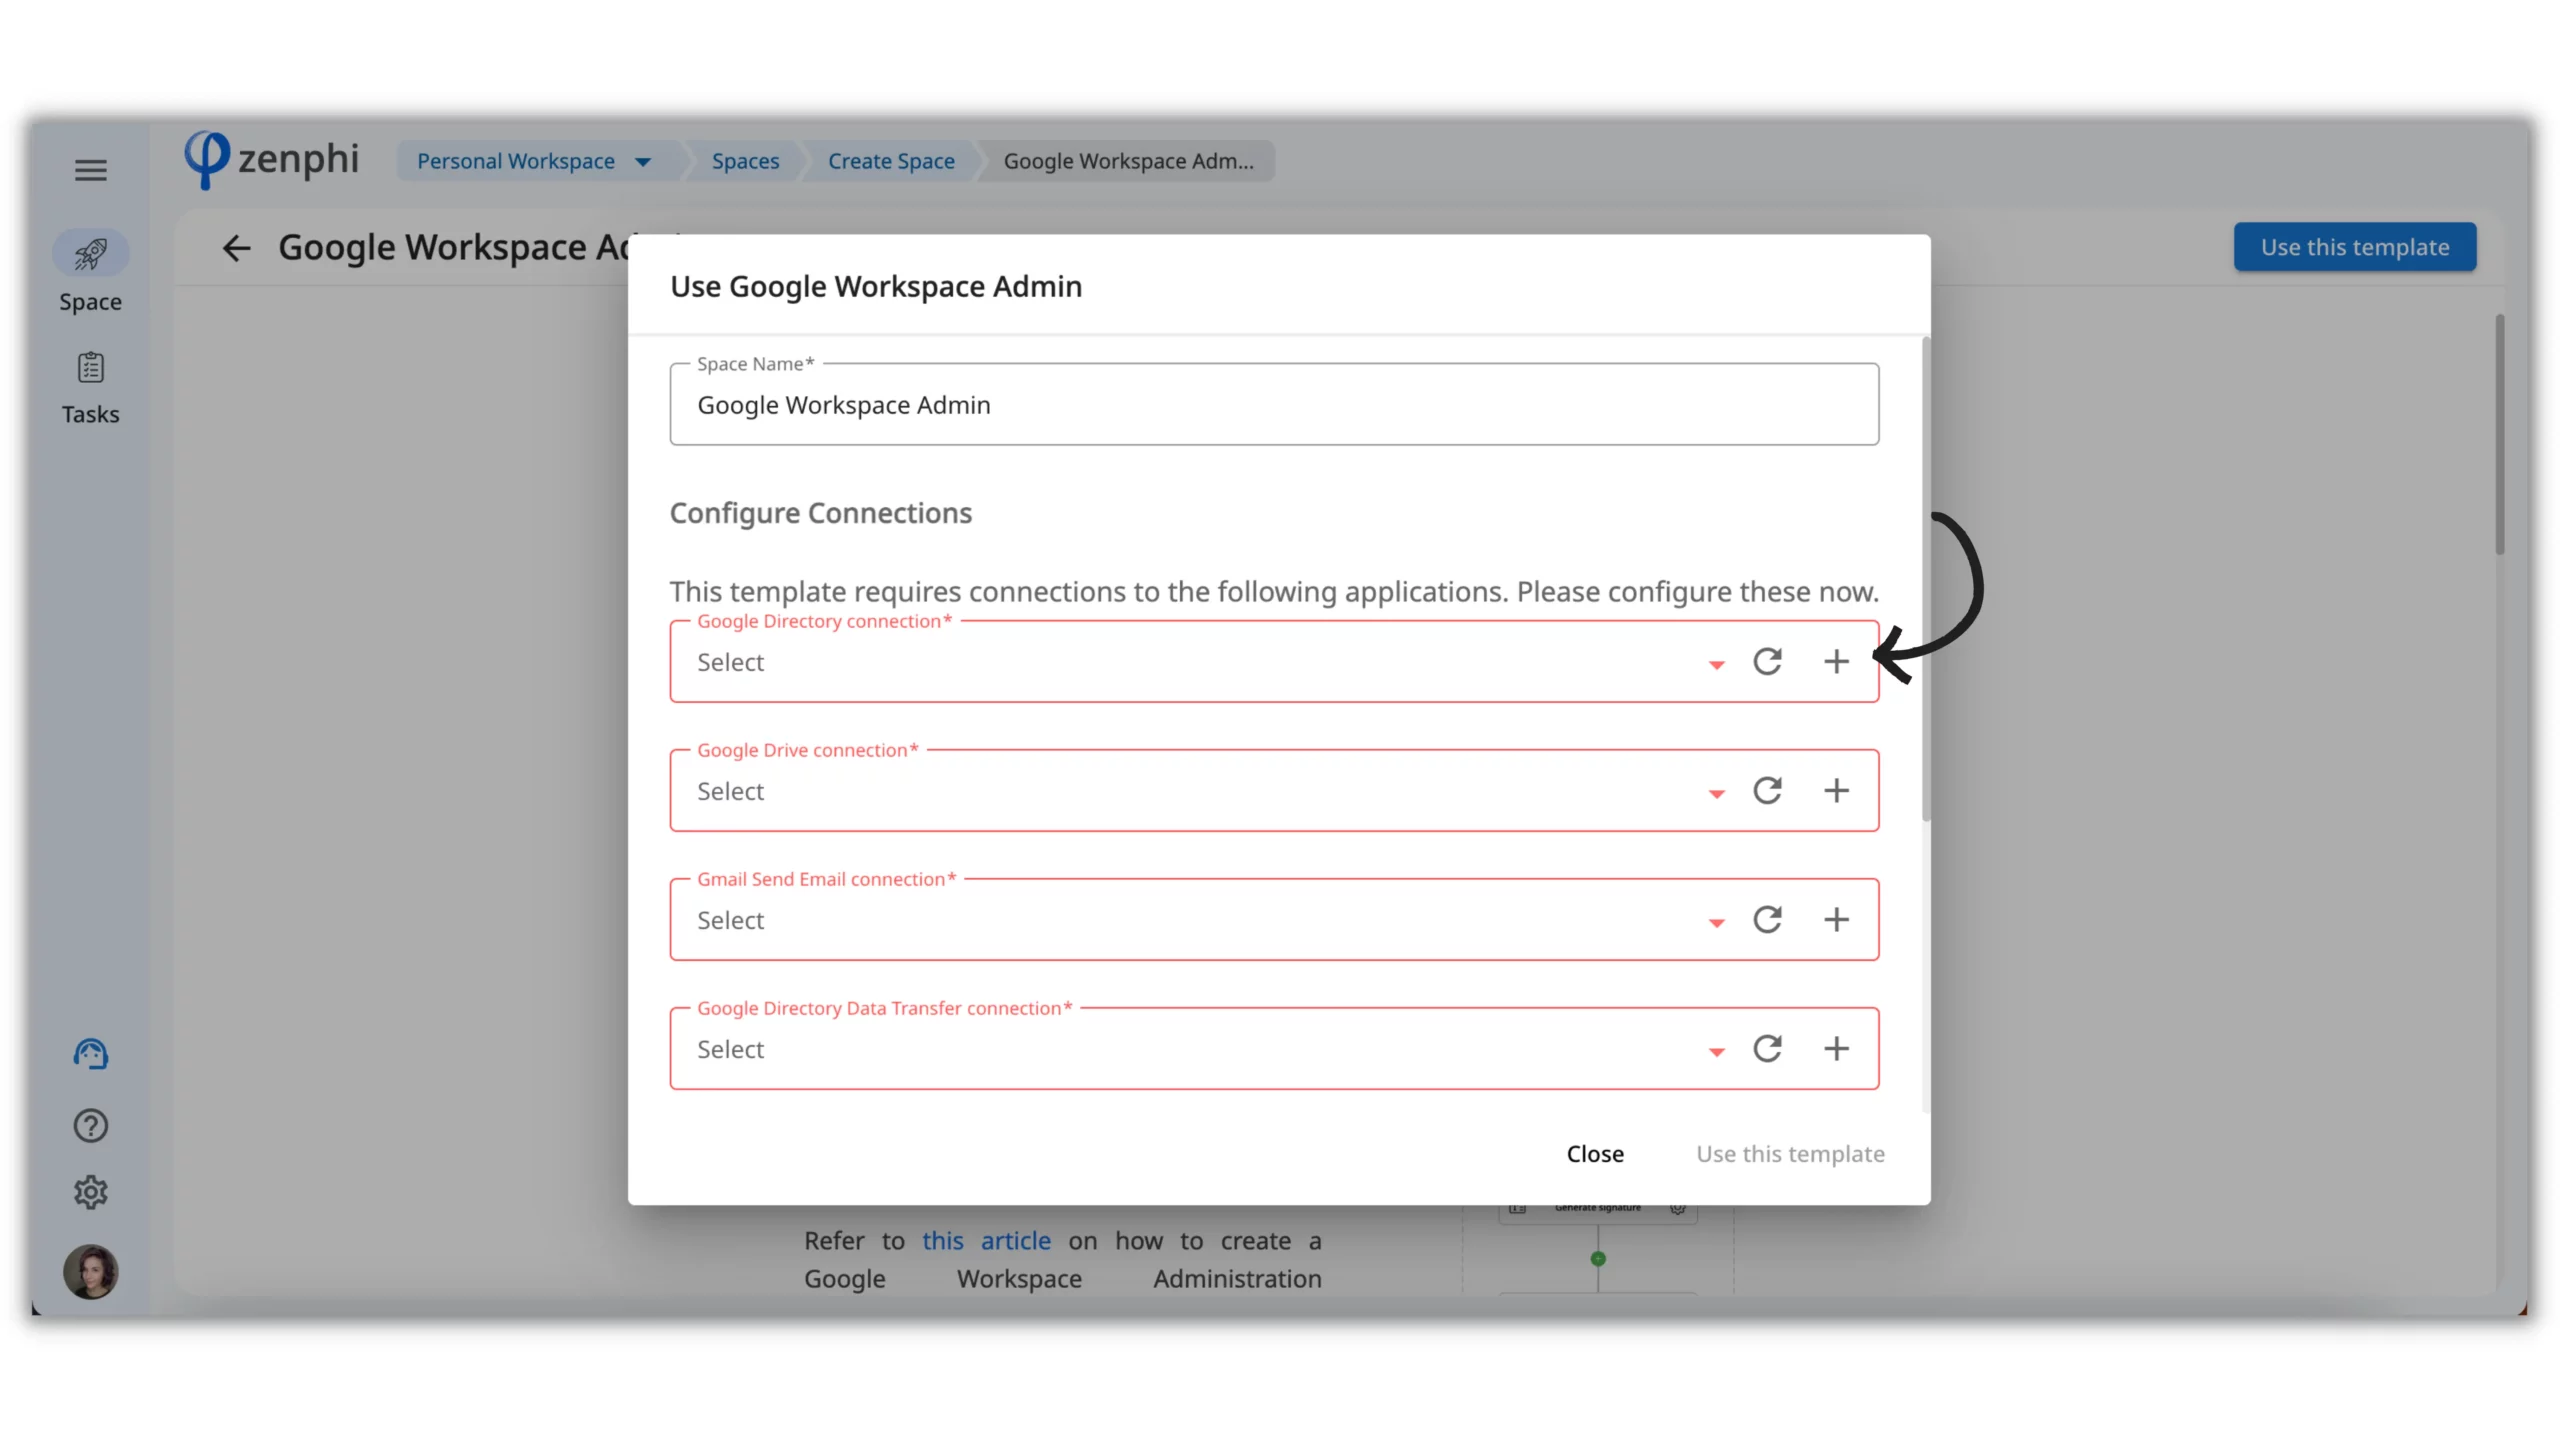
To launch the template, configure a few Connections. With these, zenphi can integrate with your Google Workspace account. Simply click the plus sign, and you’re all set.
At zenphi, we prioritize your data security. See how we ensure your safety.
Inside the template, there are six different Flows available to you.
A Flow is an automated workflow at zenphi. It consists of a Trigger – an event that initiates a workflow execution – and Actions – the steps of the workflow.
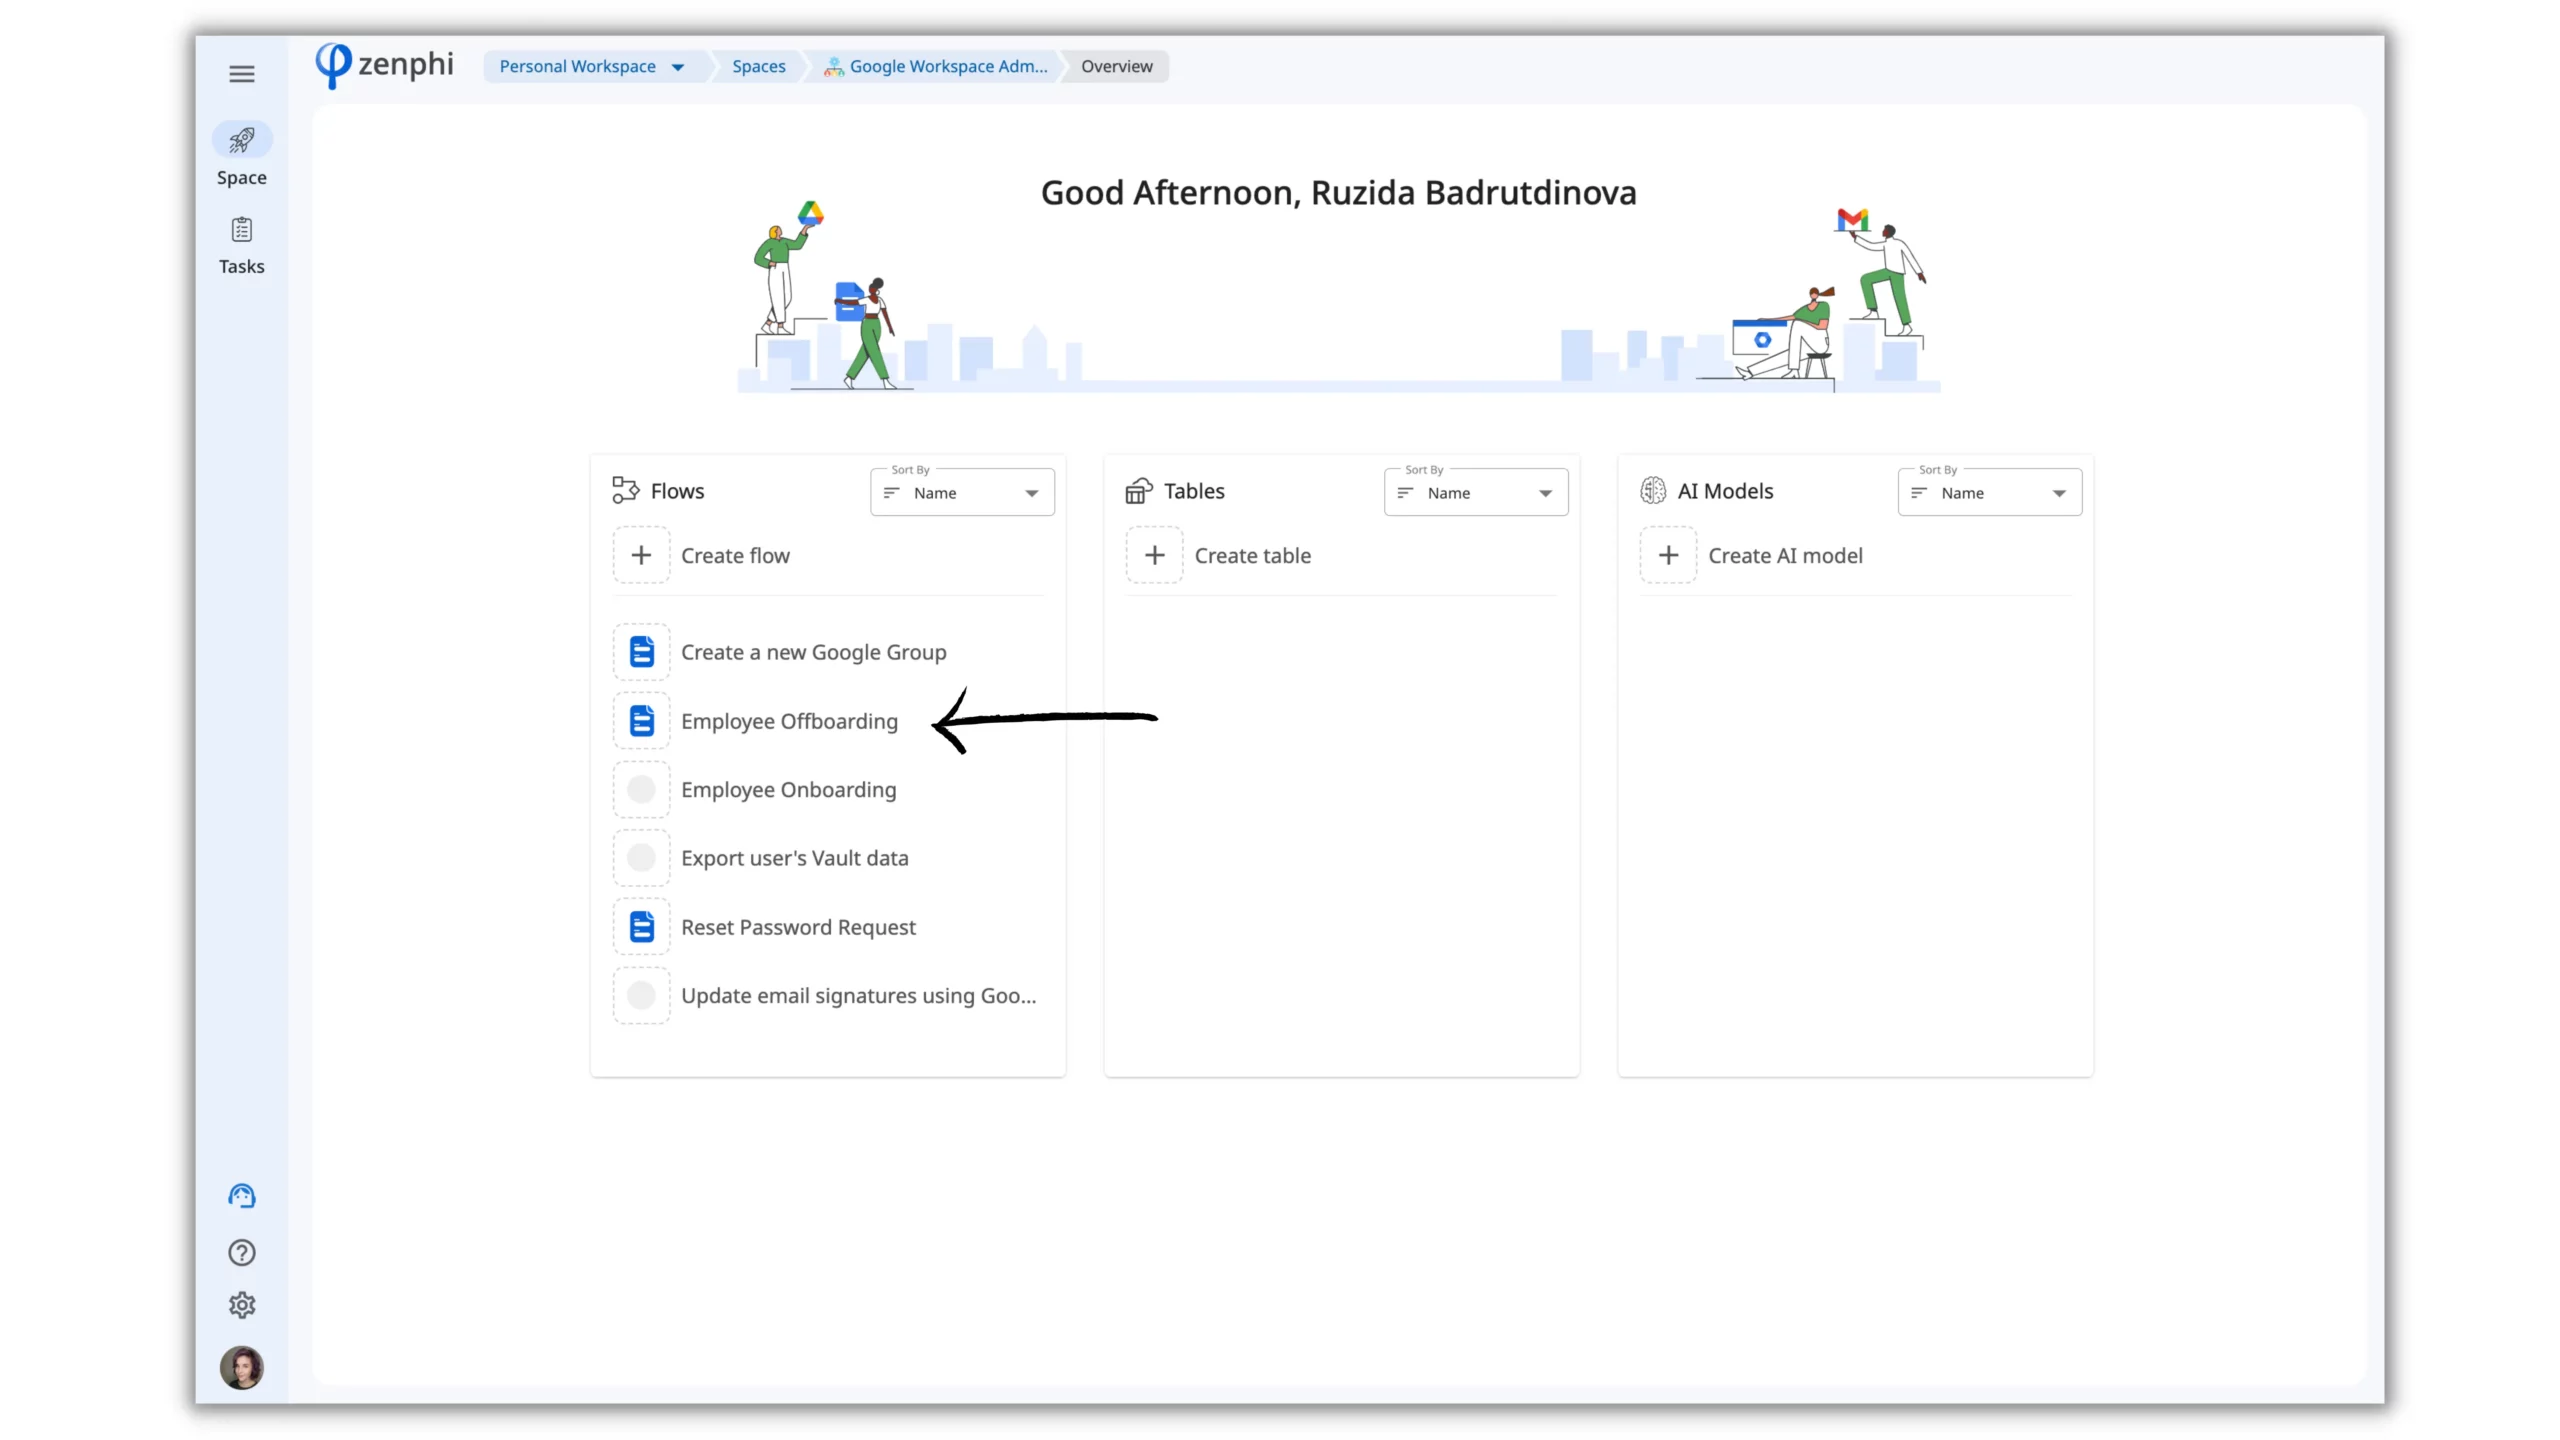
Choose the Employee Offboarding Flow and click on the “Edit Flow” button.
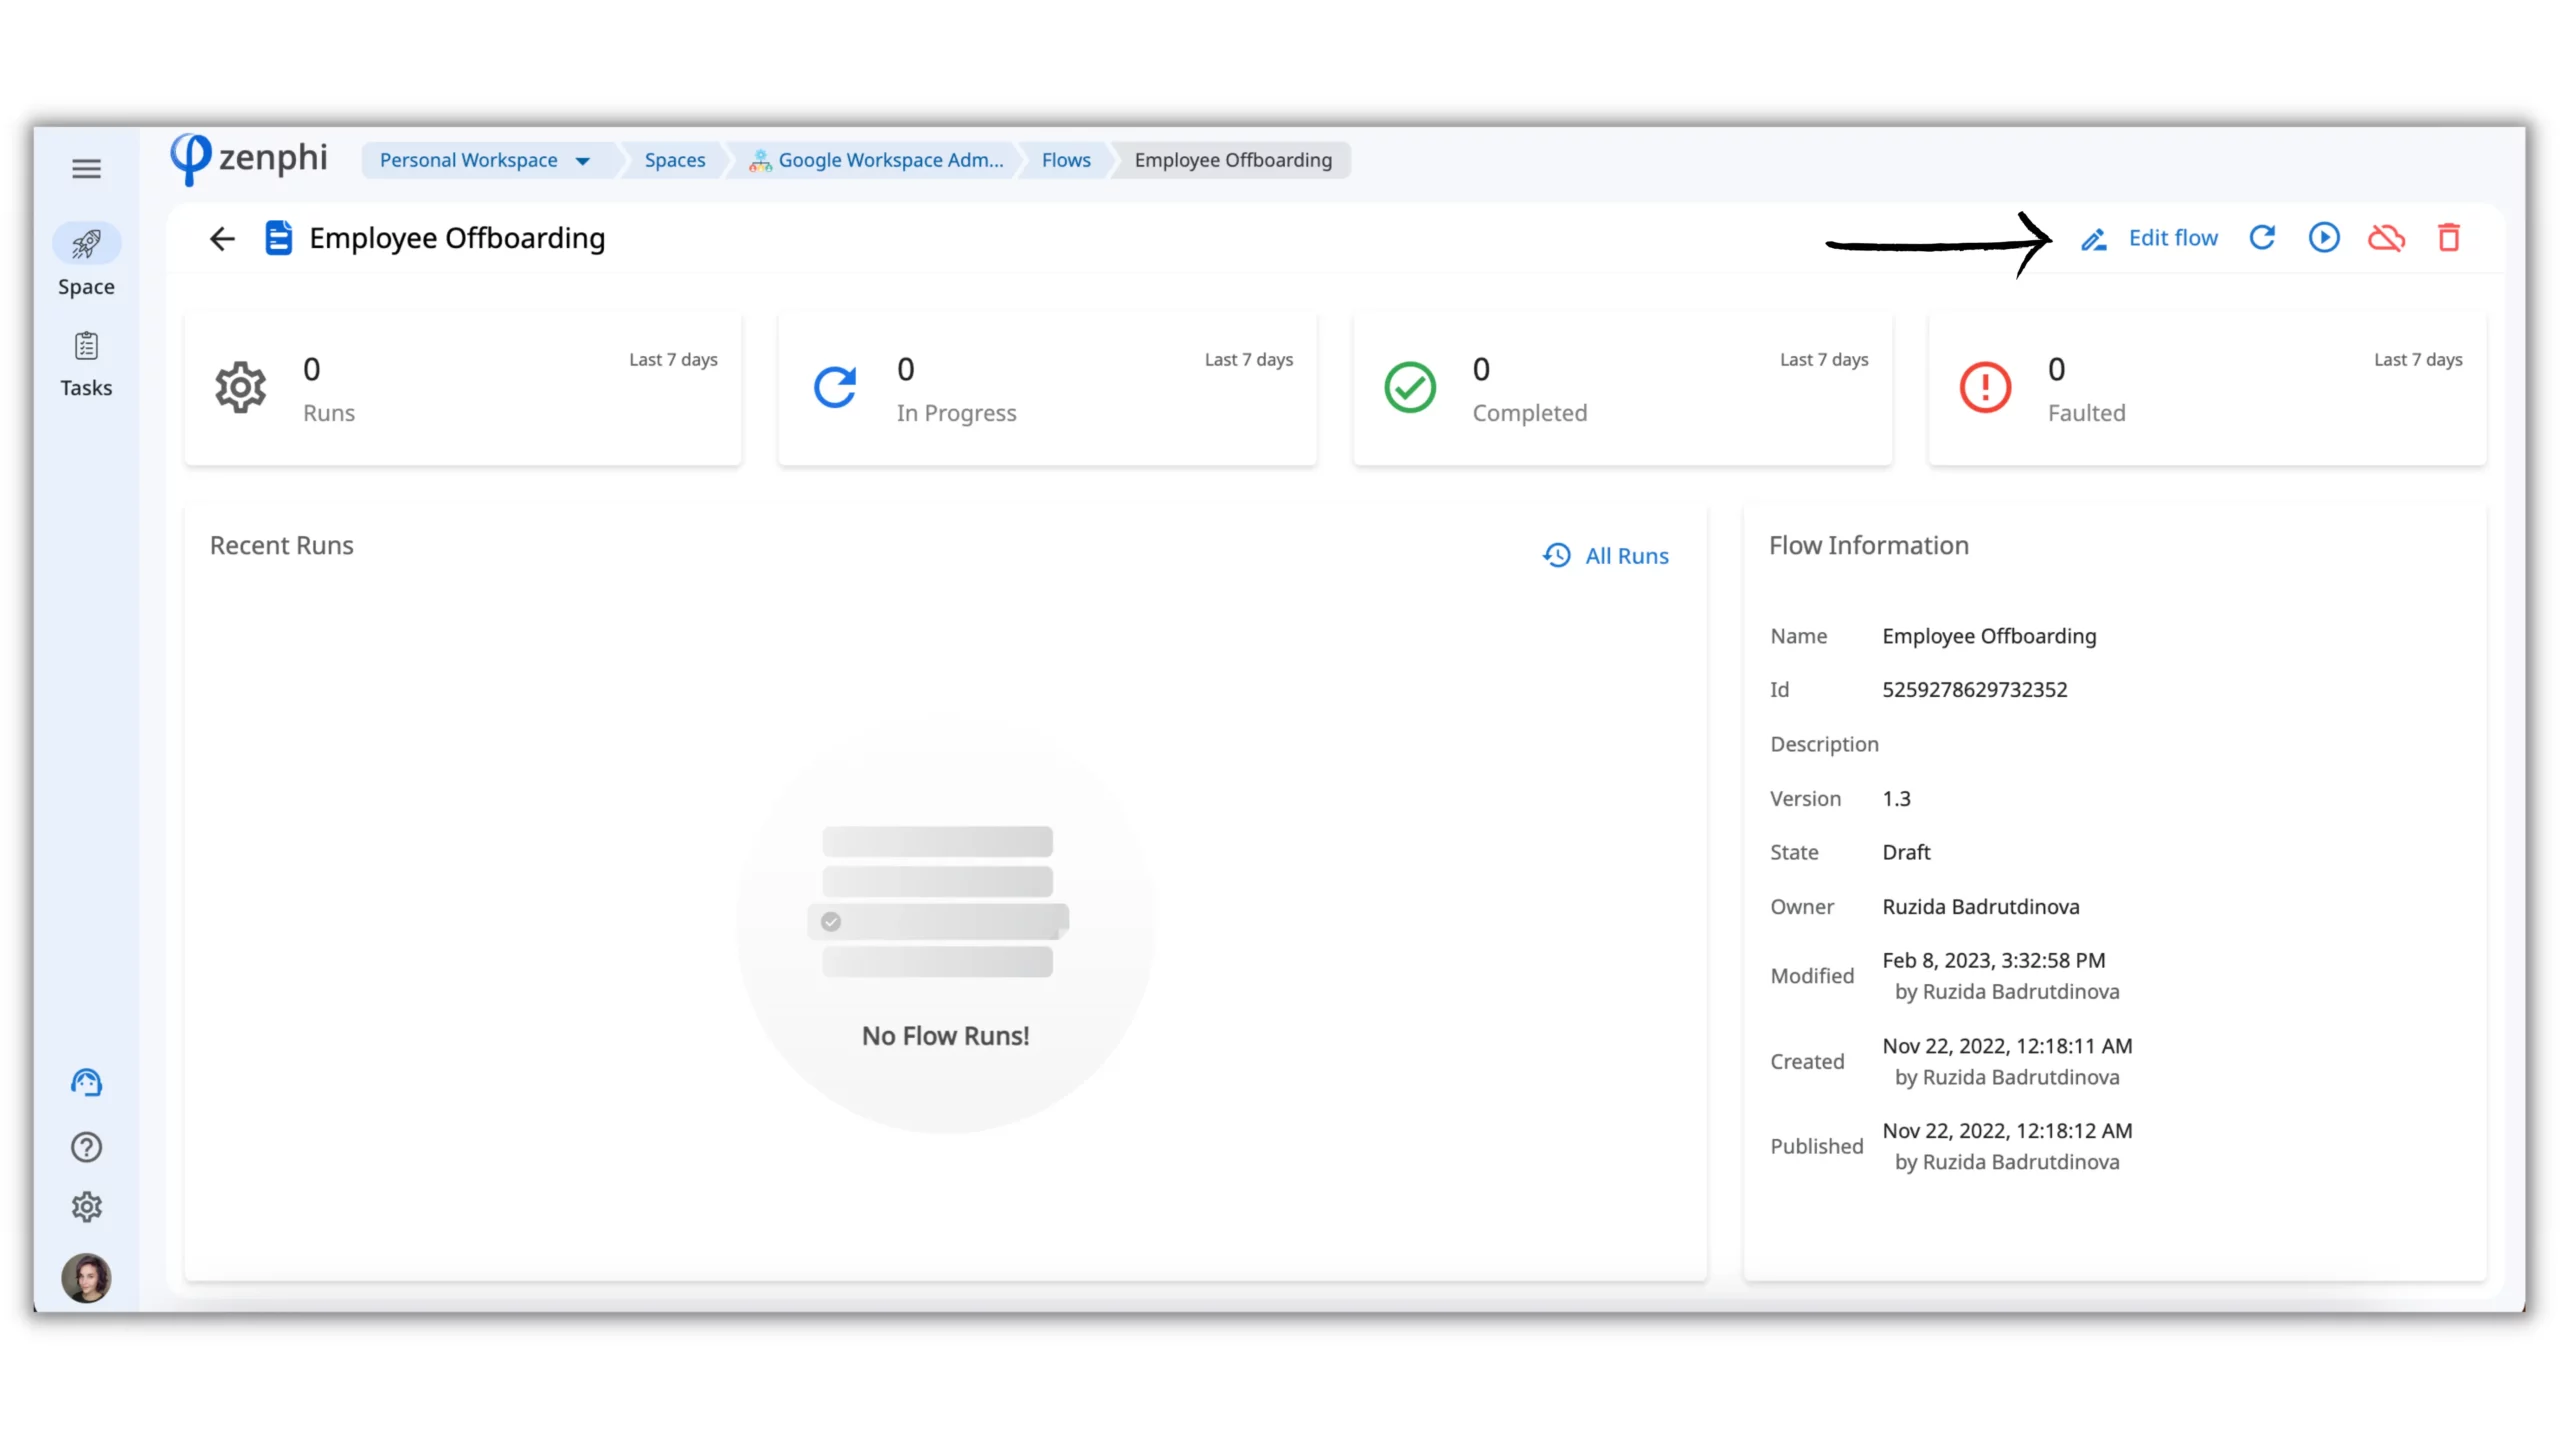
Set Up The Employee Offboarding Flow
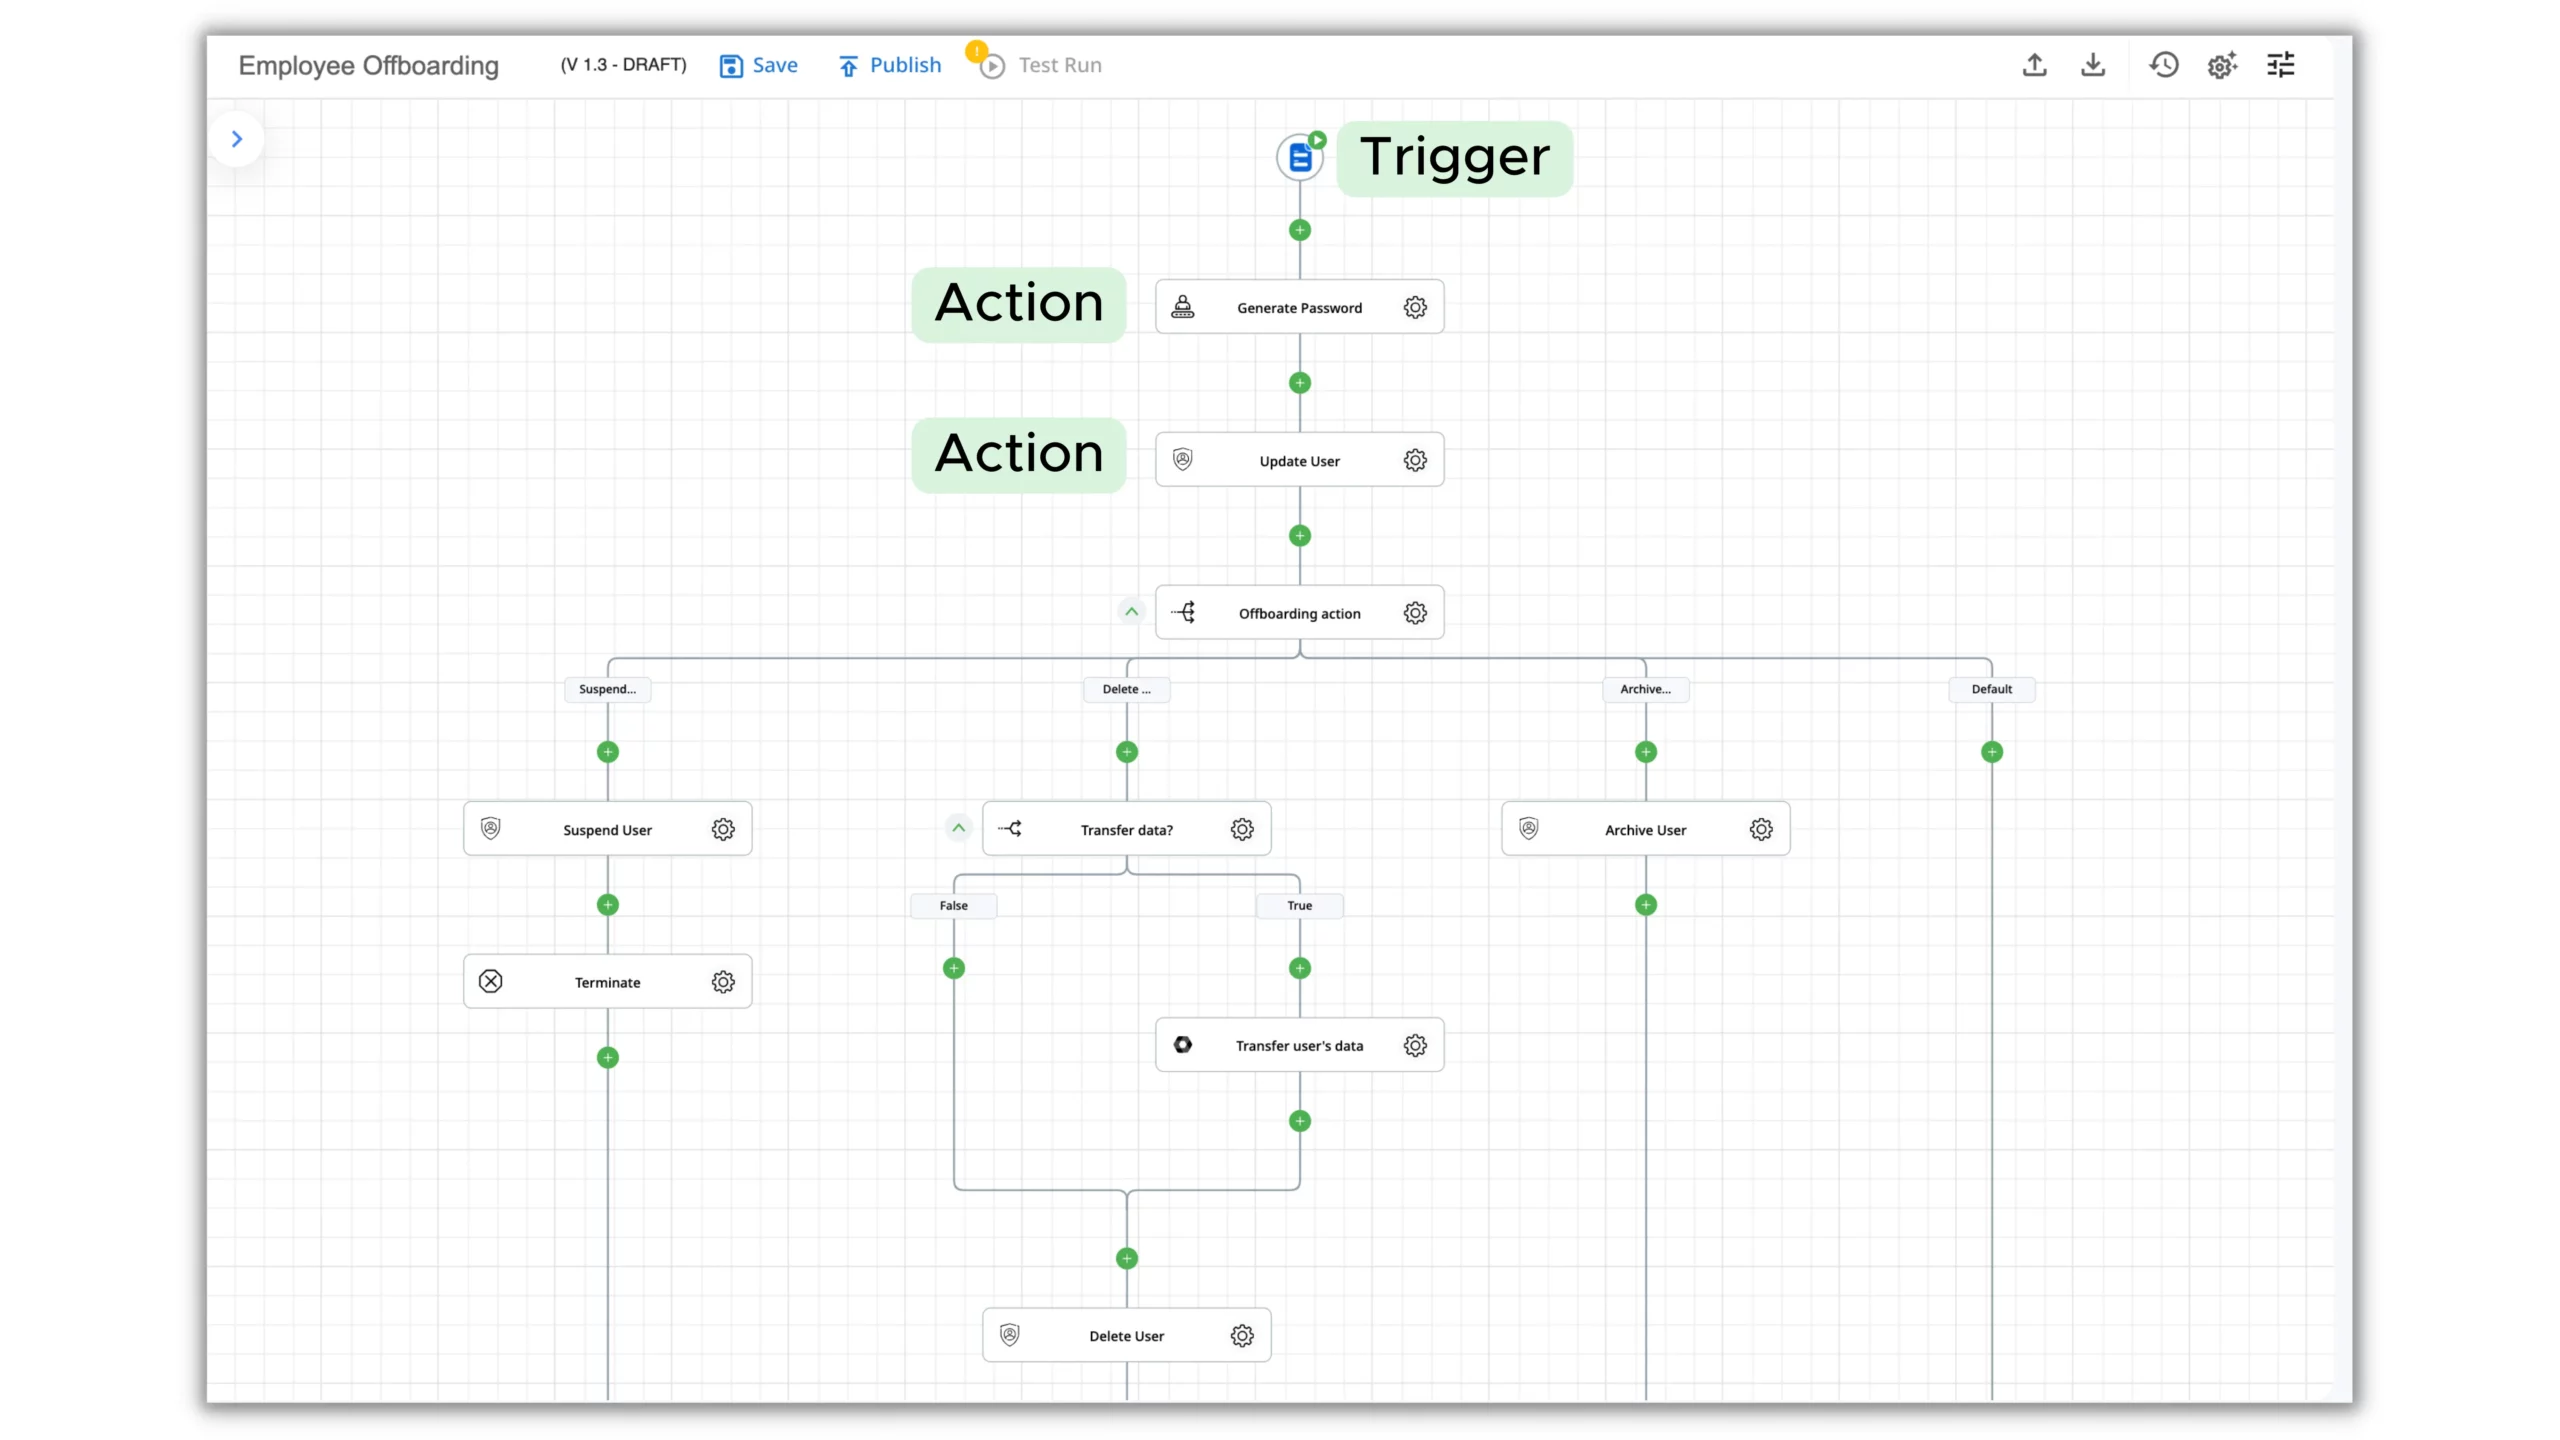
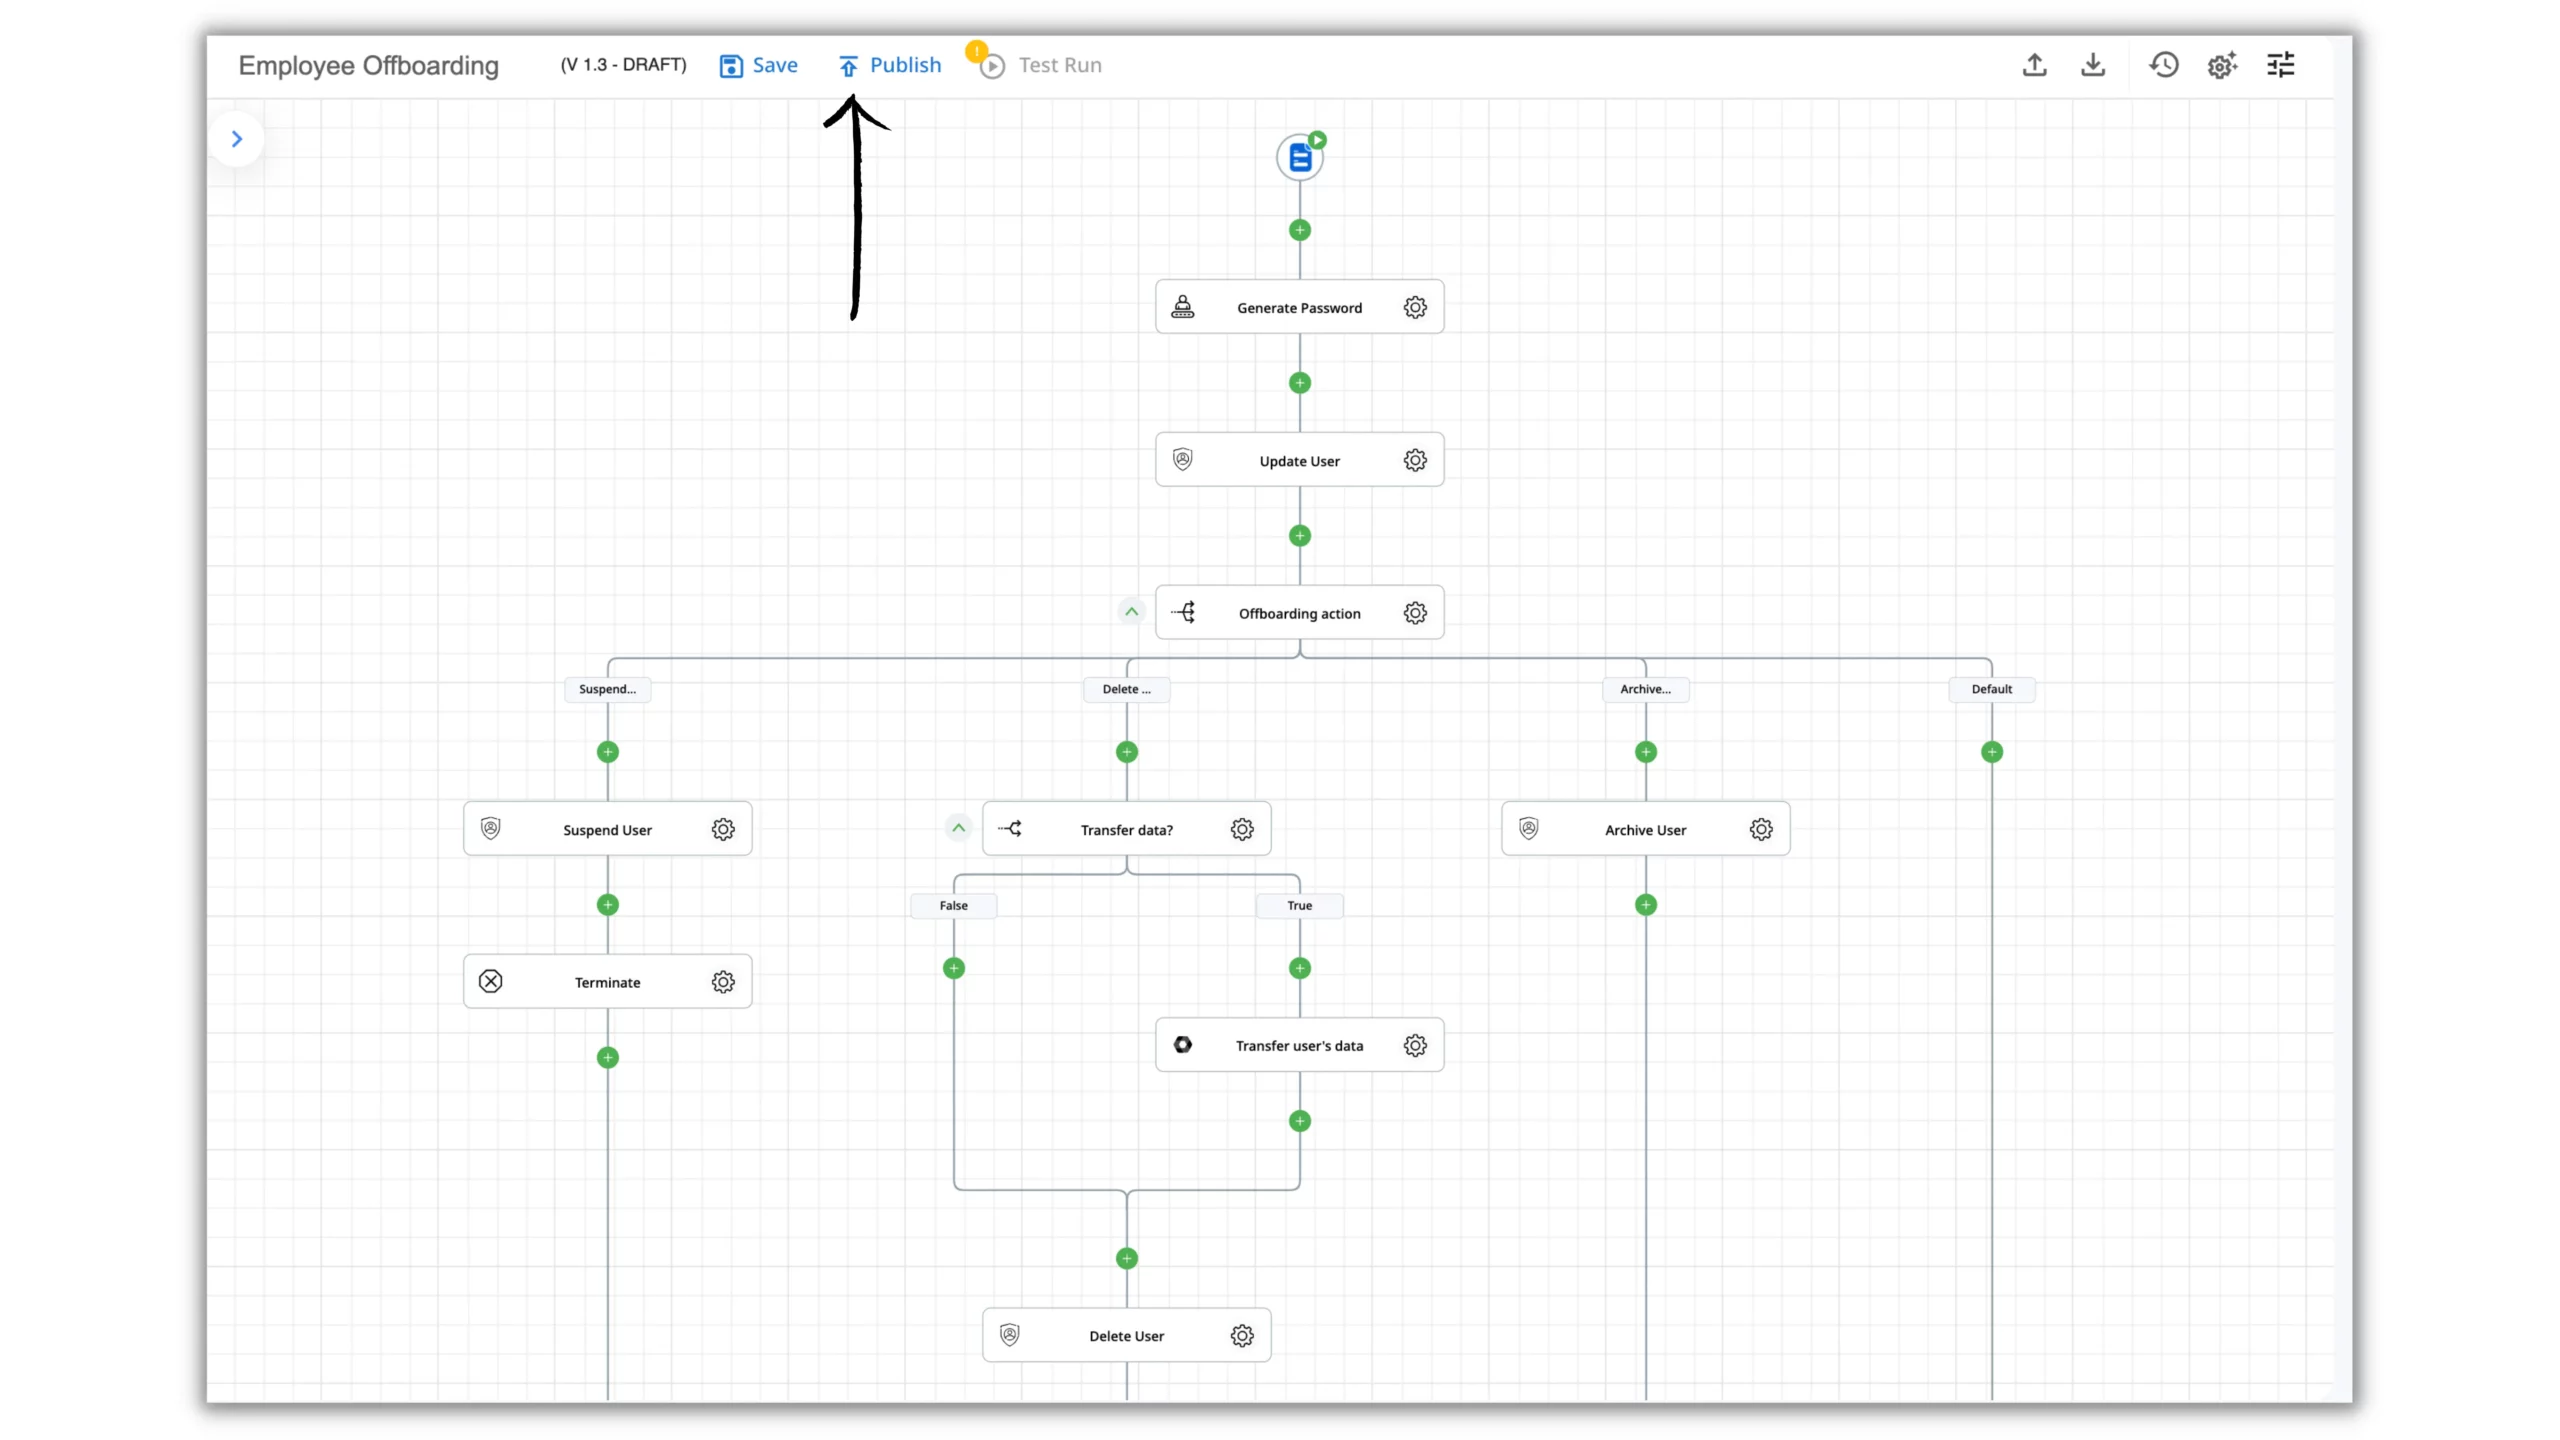
This is what the automated process will look like. We considered all the best practices for employee offboarding when creating this Flow to ensure security and process efficiency. However, you may need to add extra steps to your process. It’s easy to modify this template by adding or removing Actions or changing the Trigger.
With zenphi, your Flow can be triggered by various events:
For Employee Offboarding, we have set up a Form Submission Trigger. This means that every time a Form is submitted, an automated workflow begins. You can fill out the Form yourself, or, for example, allow your HR team to initiate the process.
Step 1: Fill in the Employee Offboarding Form
Click the Form Trigger icon to open the Trigger Settings panel on the right.
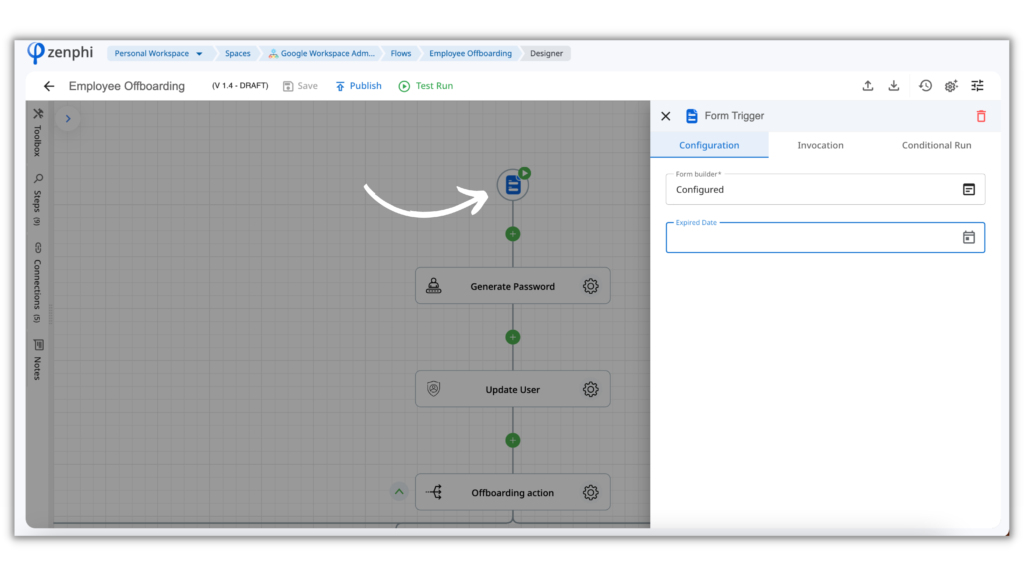
You can use “Form Builder” to edit the Form later. But for now, let’s switch to the Invocation tab to see how the completed Form will appear. Here are the questions we’re interested in:
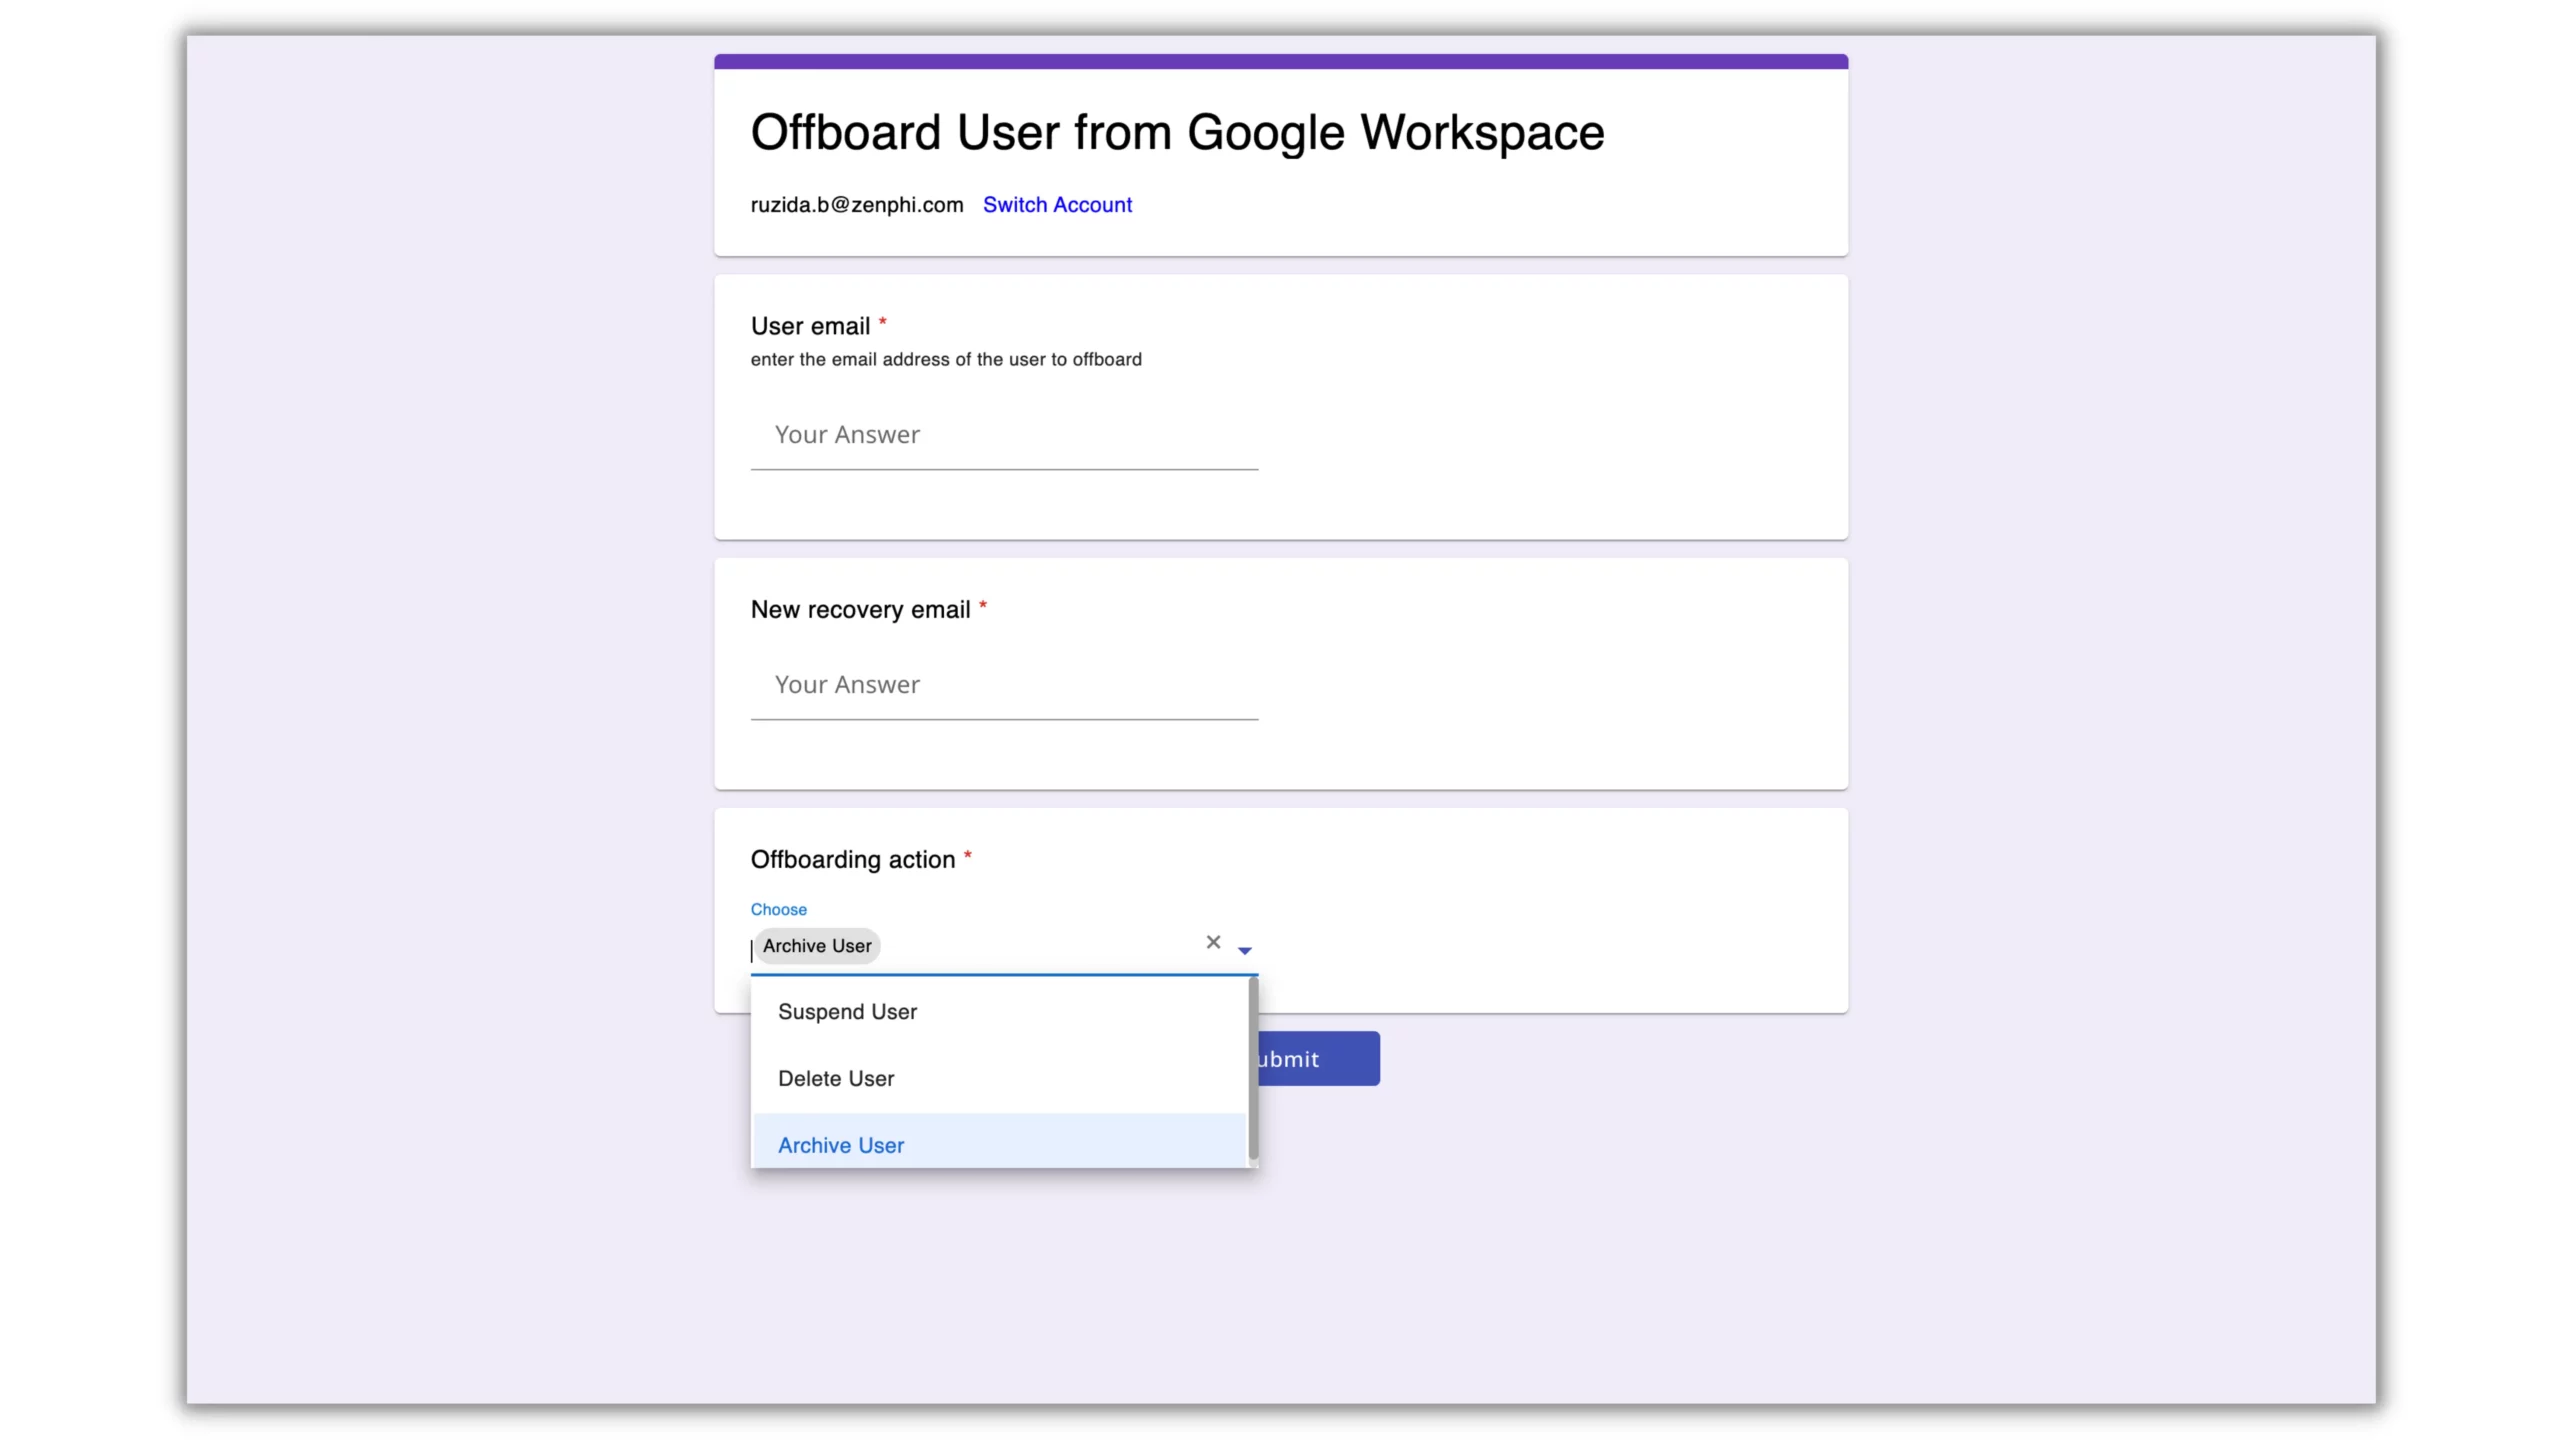
1. User email
2. New recovery email
3. Offboarding action
Suspend – Temporarily block a user’s access without deleting their data, such as files and emails. Access can be restored at any time. Please note that license fees will still apply when suspending accounts.
Delete – by deleting a user you are permanently removing their access and data (unless you transfer it to another user), and canceling the licenses.
Archive – by archiving a user you keep their data but restrict their access. Please note that you will need a separate license for archived users.
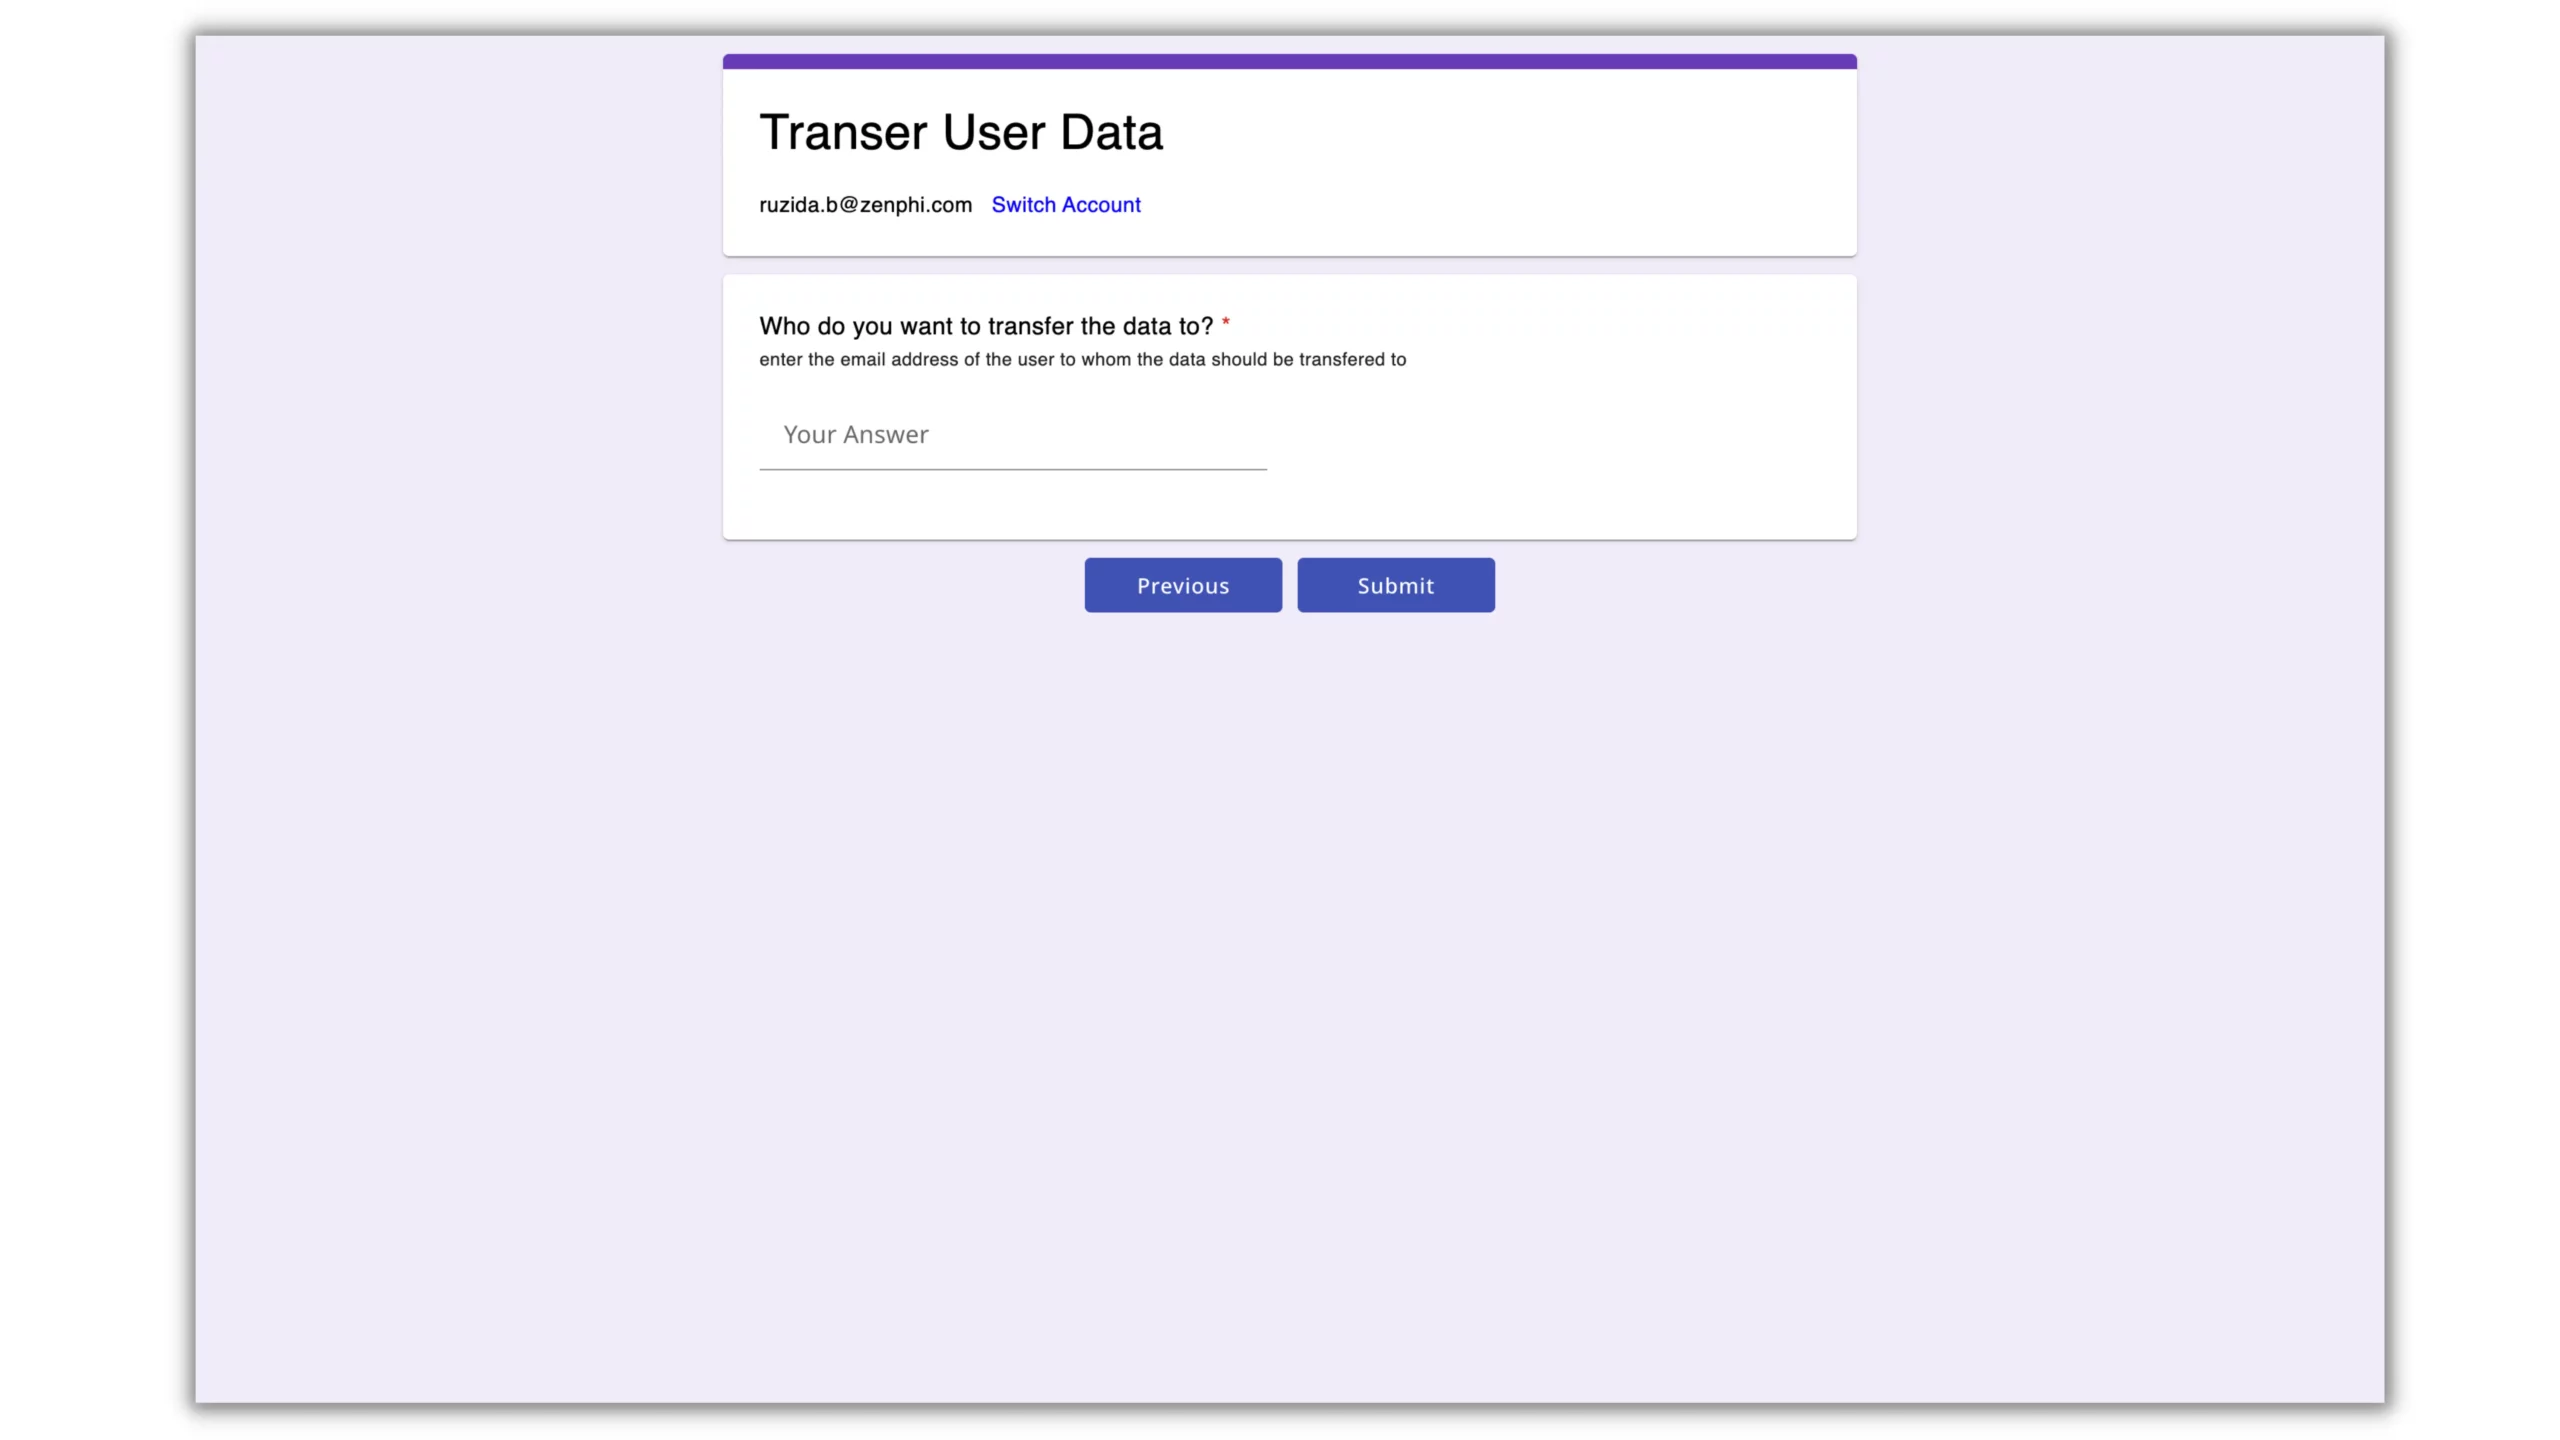
4. If deleted, the email to which you want to transfer the data.
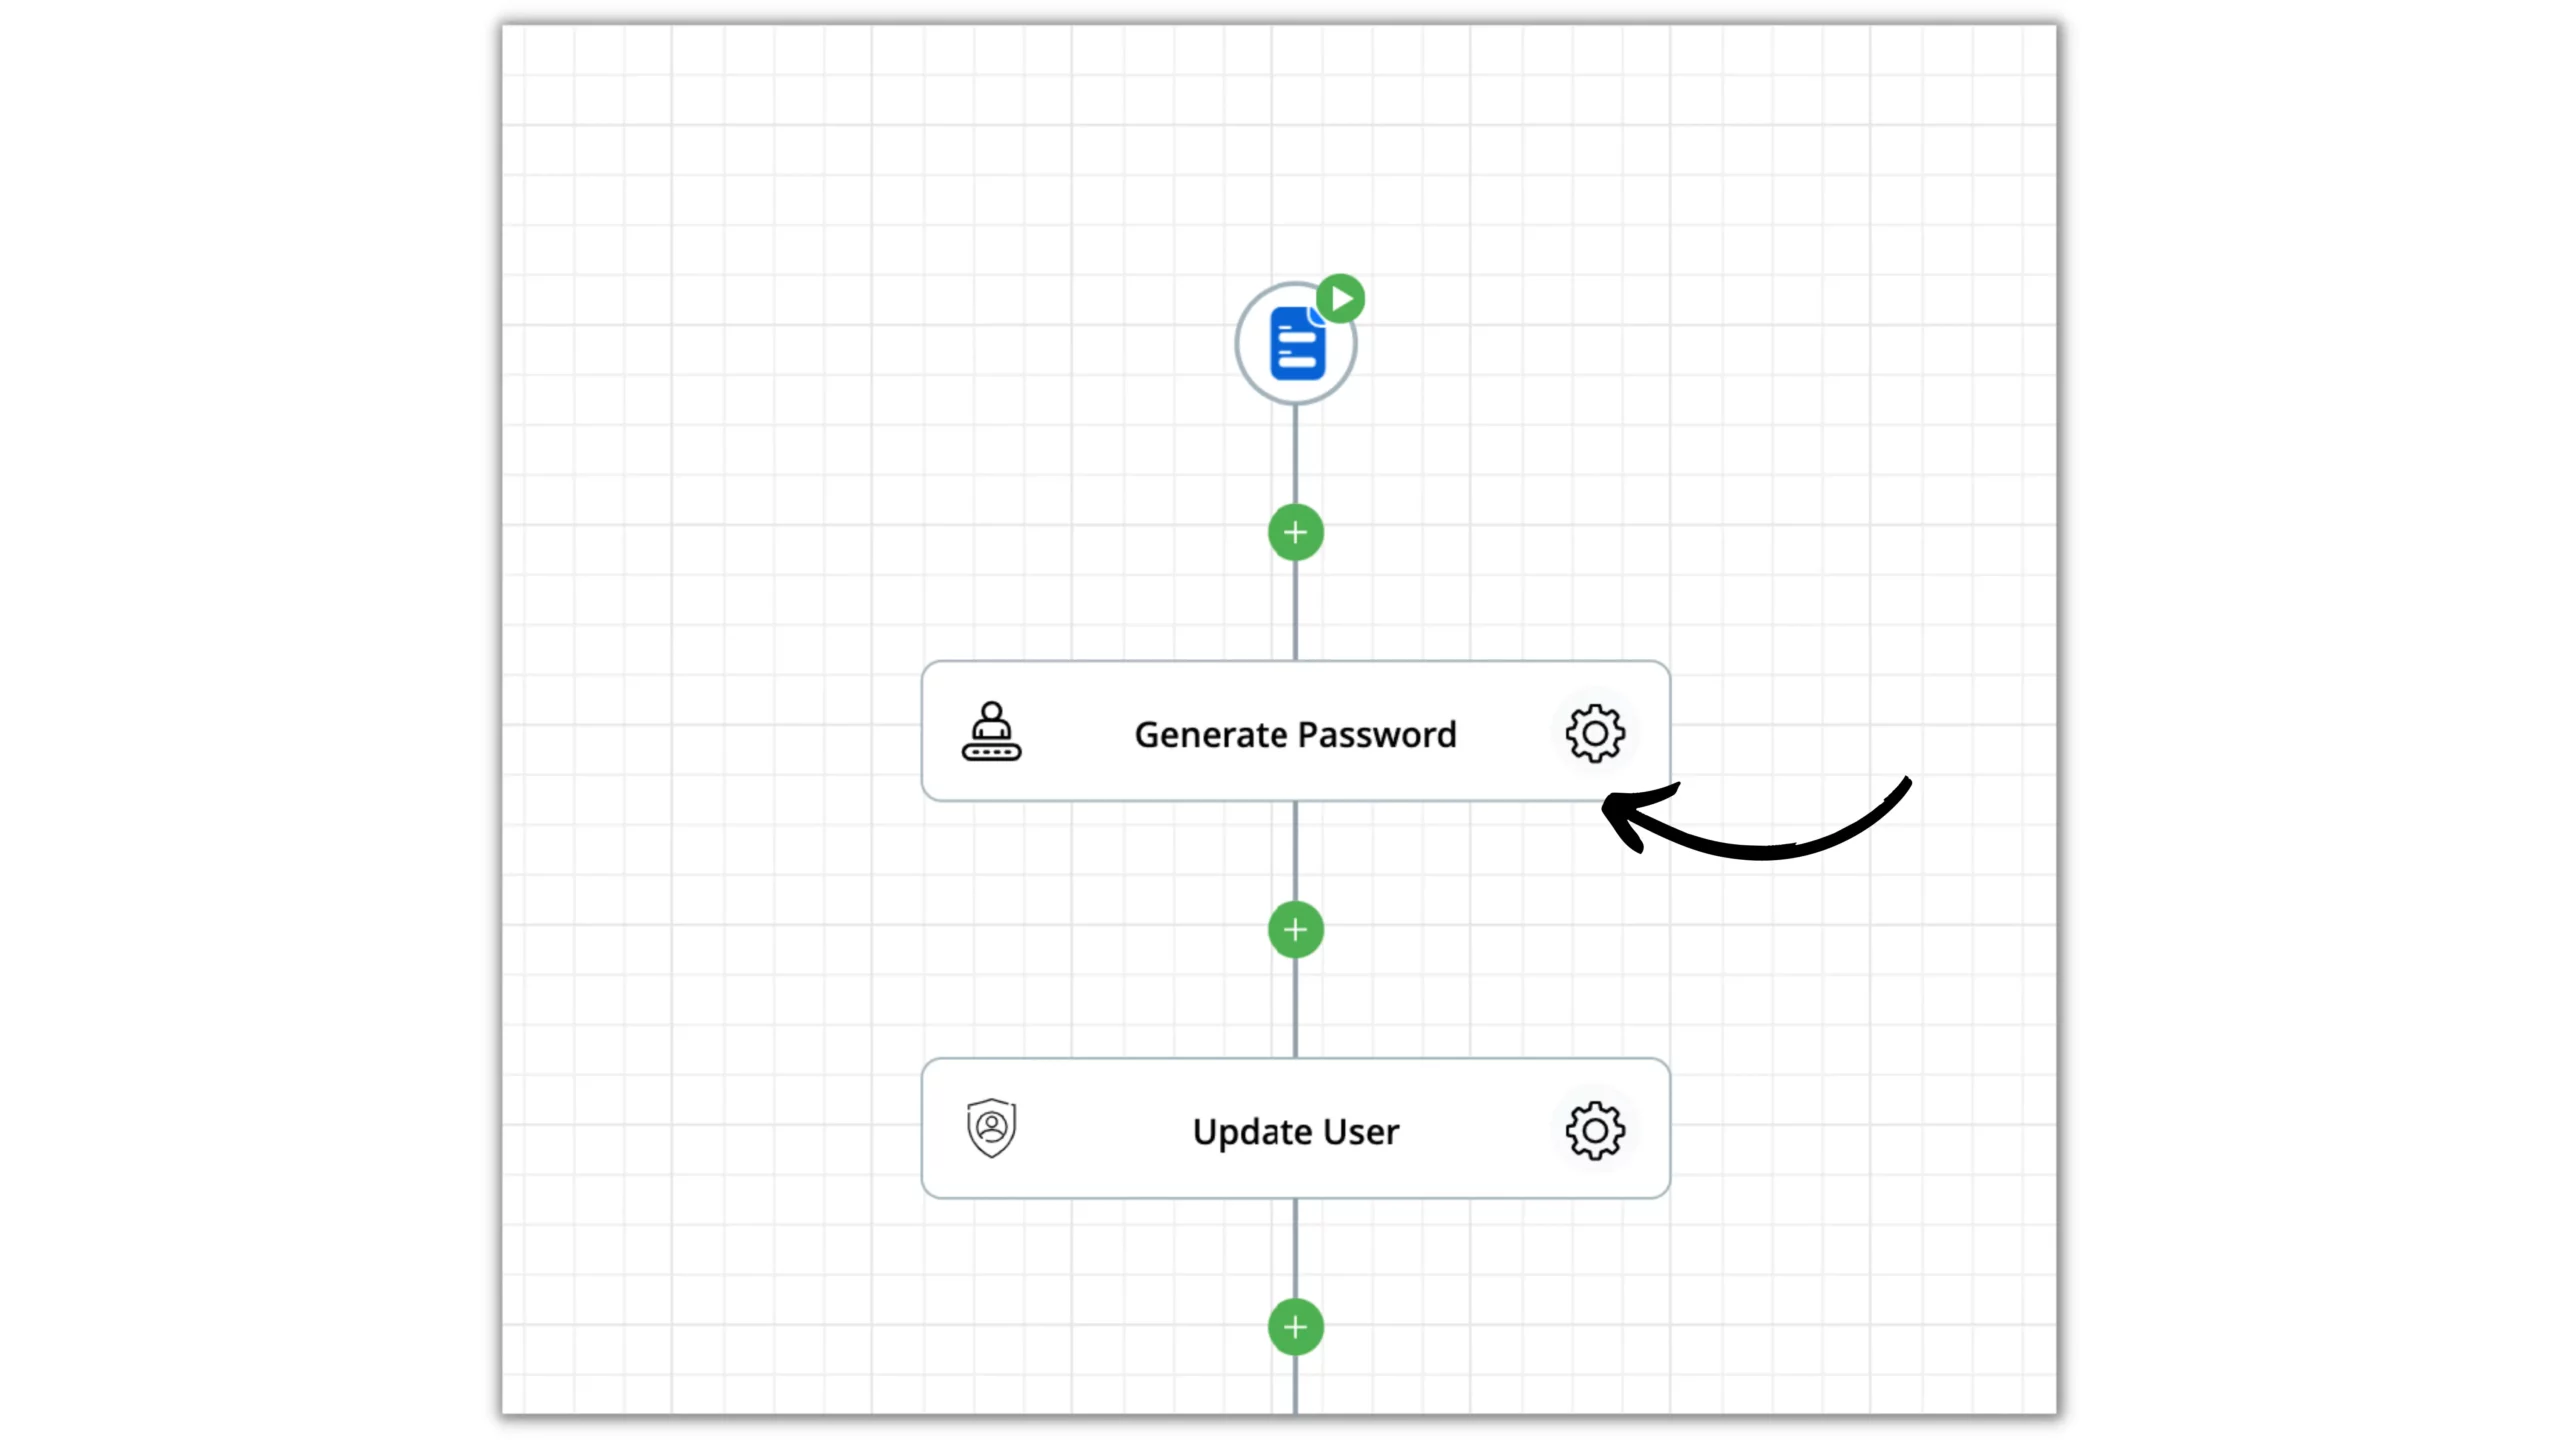
Step 2: Reset the Password And Update the Recovery Email
Generate Password
Resetting the password for offboarded users is a great practice for reducing the risk of unauthorized access. So the first step after the form is submitted should be to “Generate Password”.
Click the gear icon of the Action to open the settings panel.
Here, you can indicate the password’s specifications, such as length and symbols.
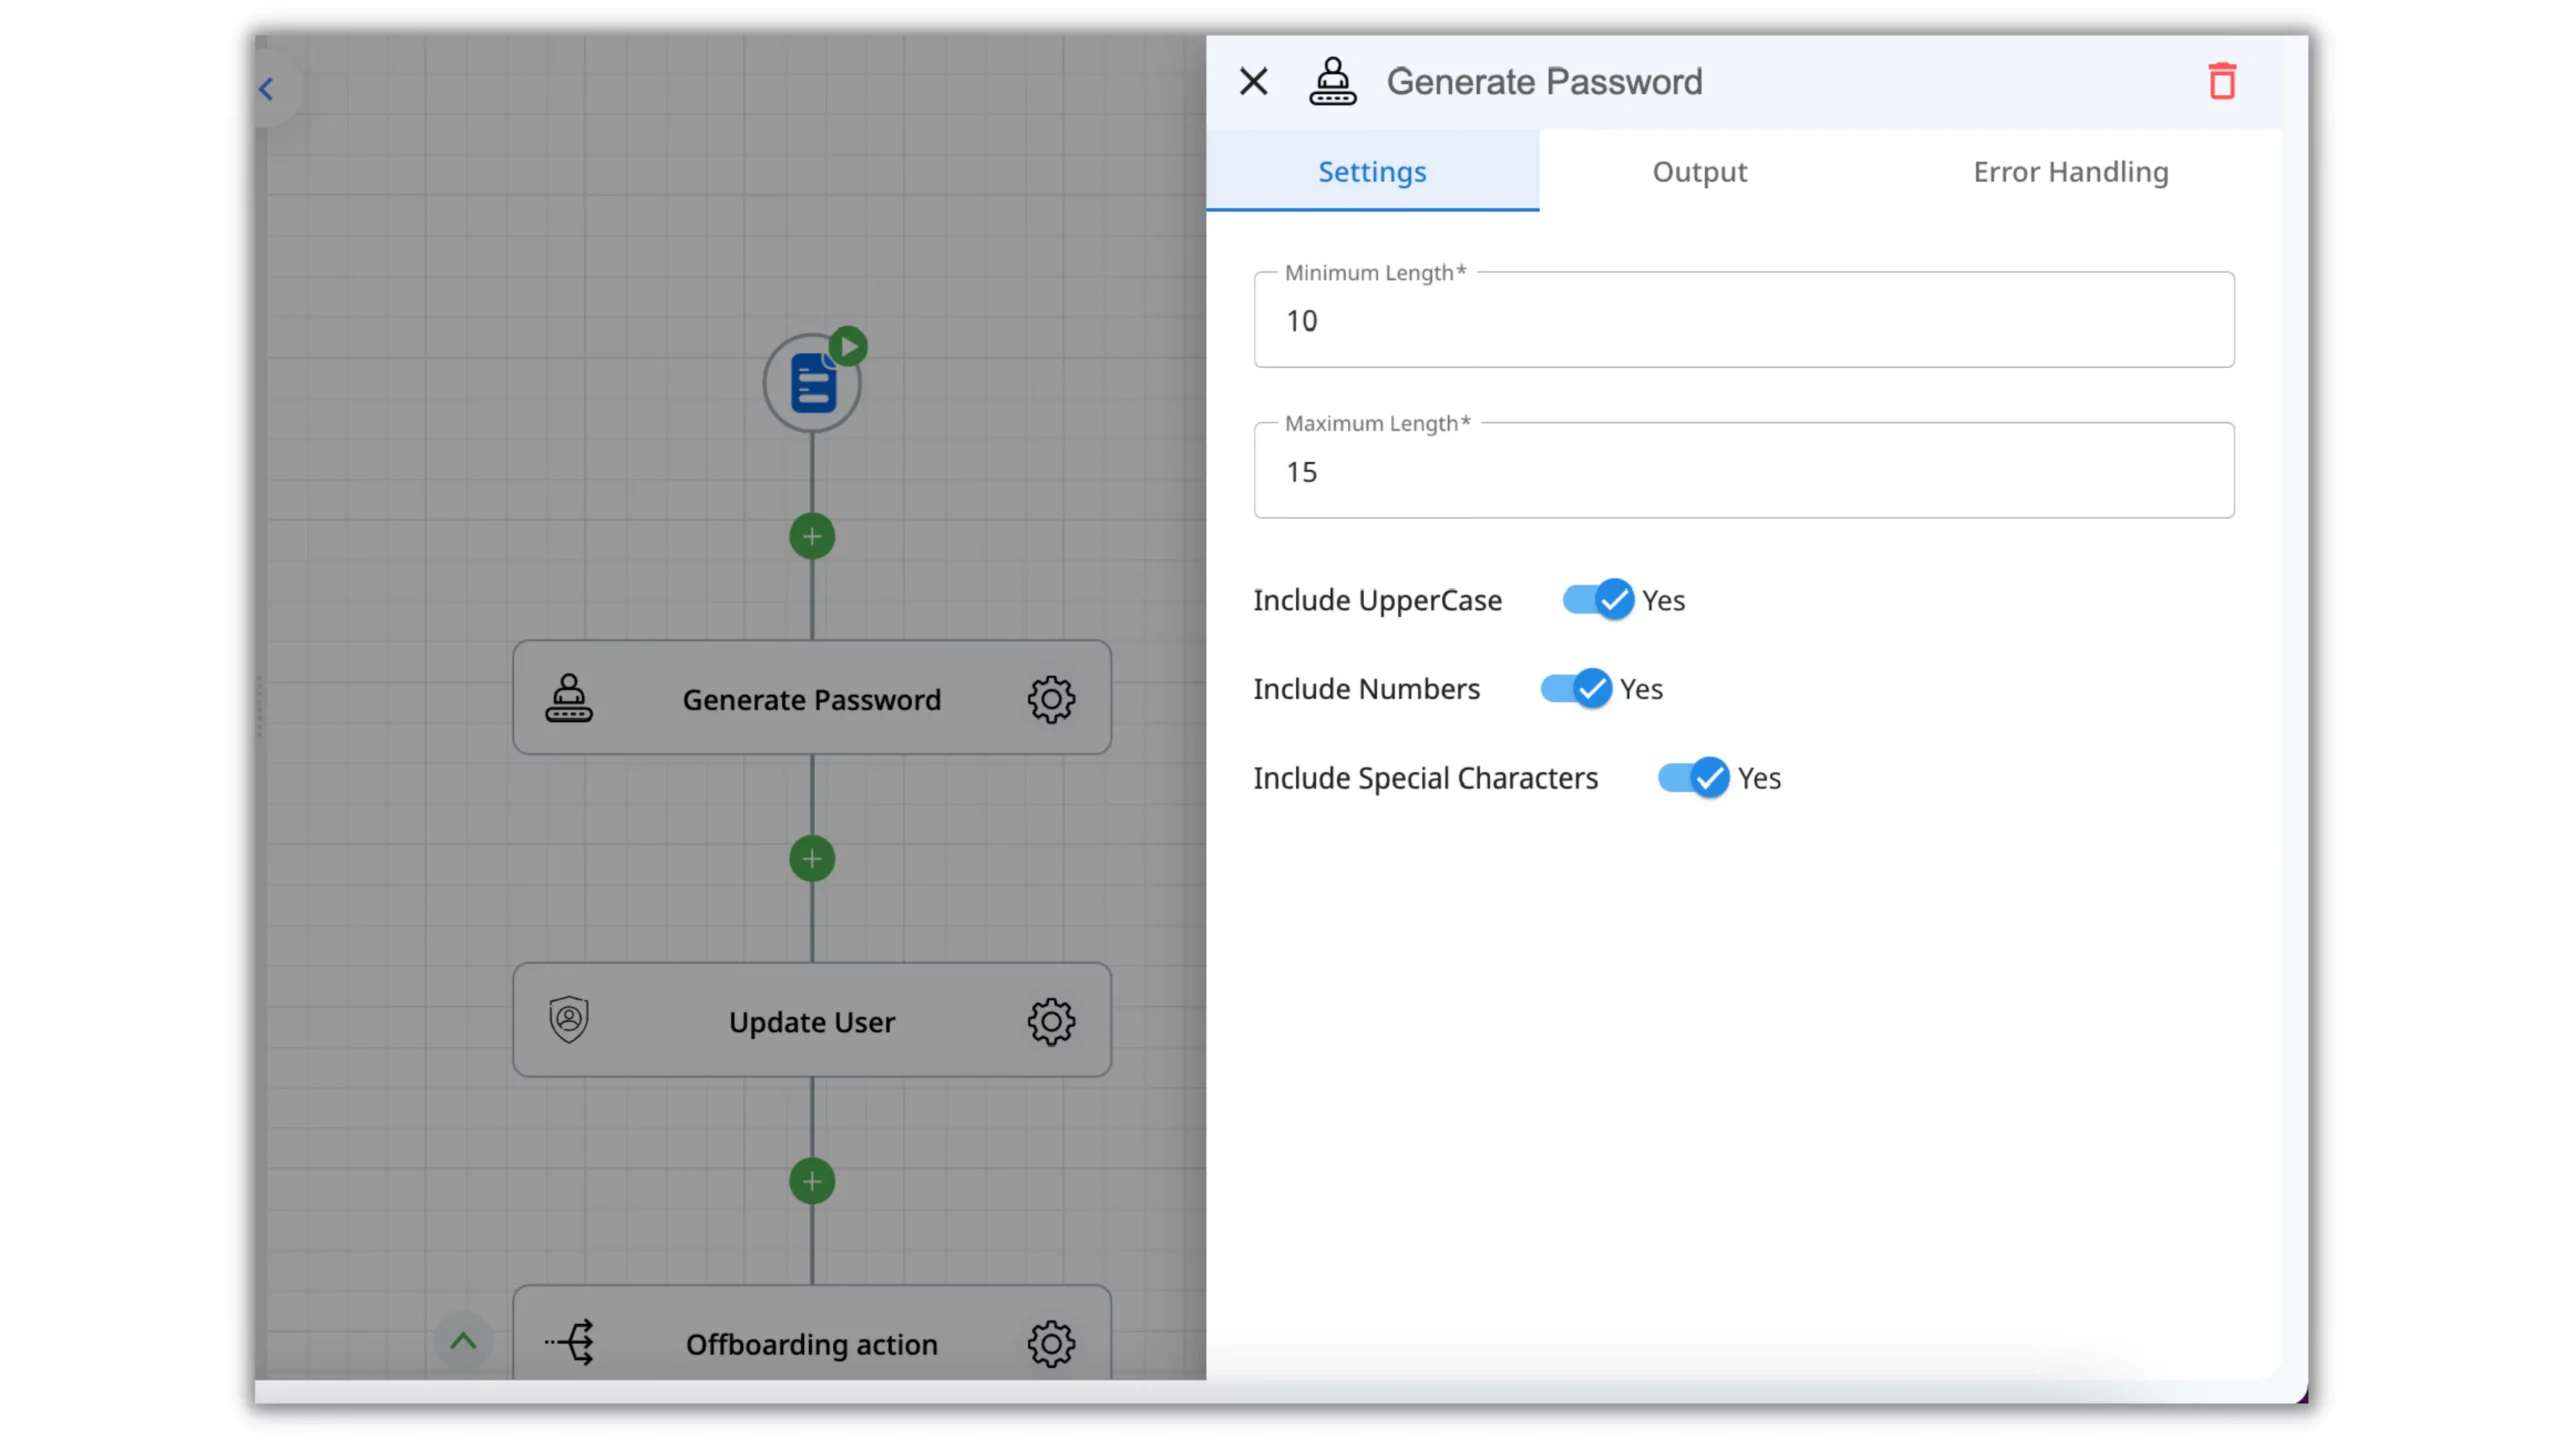
Switch to the Output tab of the Action to check out what unique data will be available for you to insert further in the process after this step is completed. As you can see for this Action we’ll have a “Generated password“.
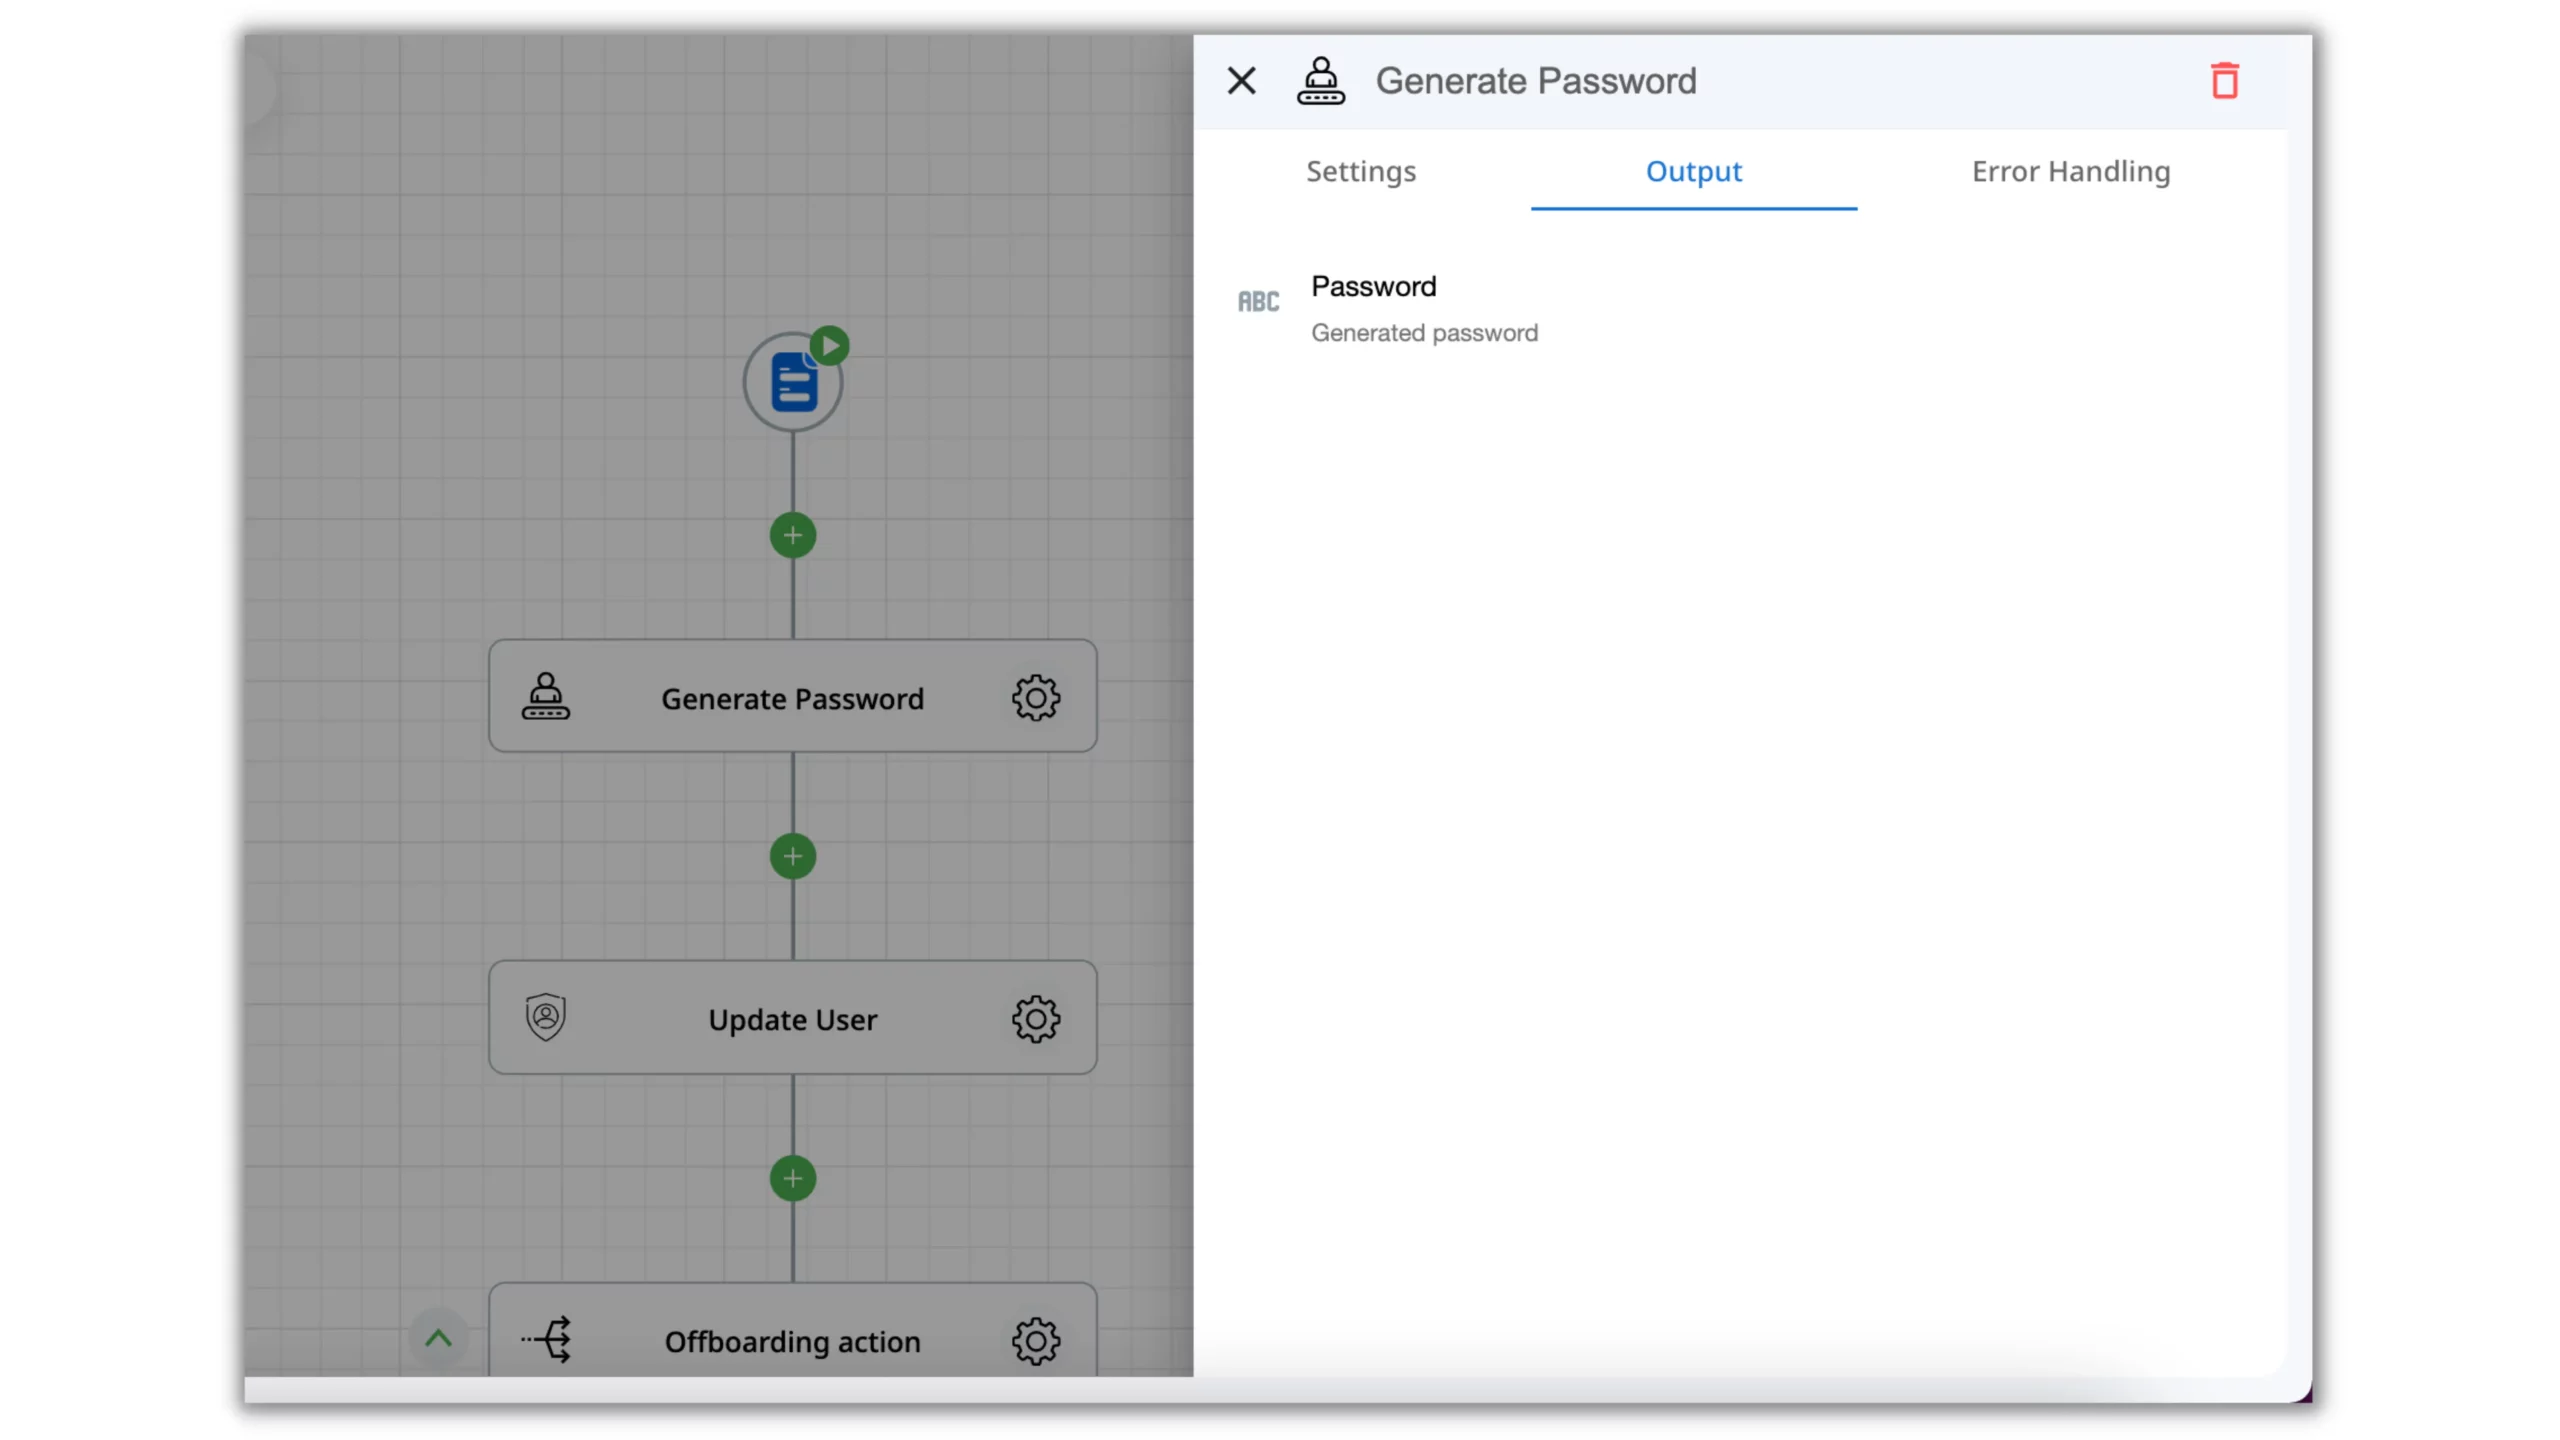
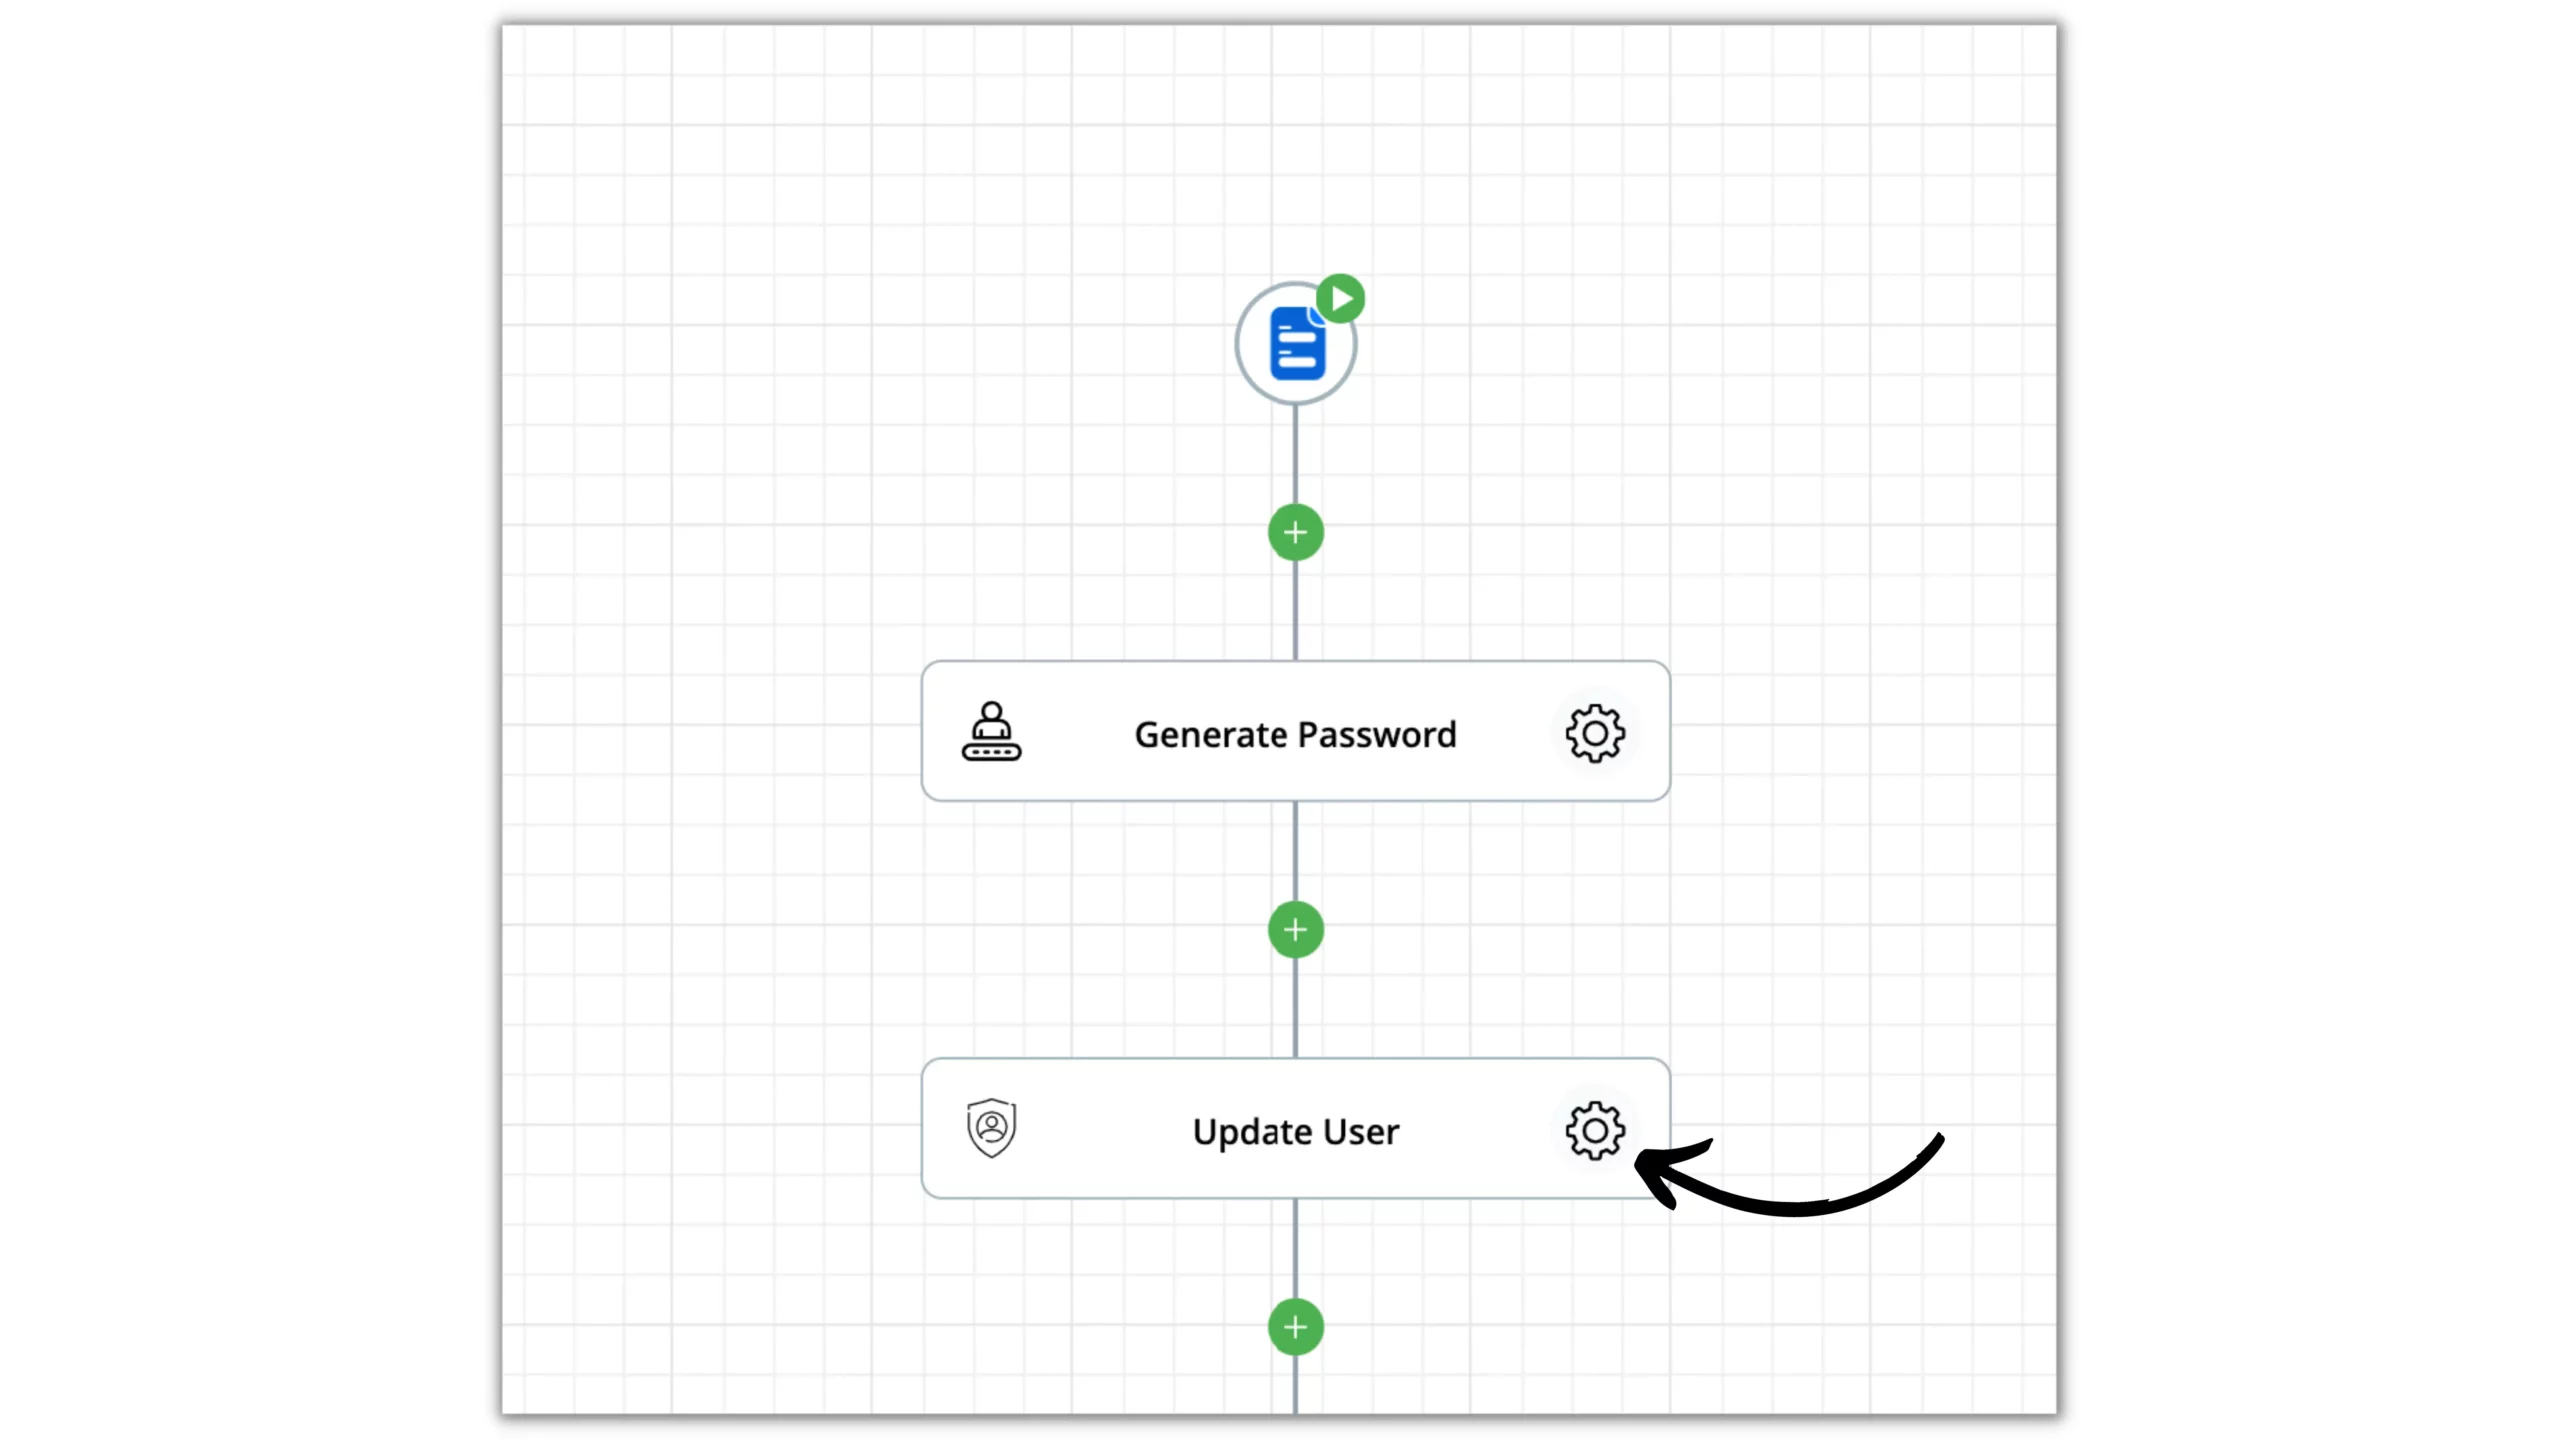
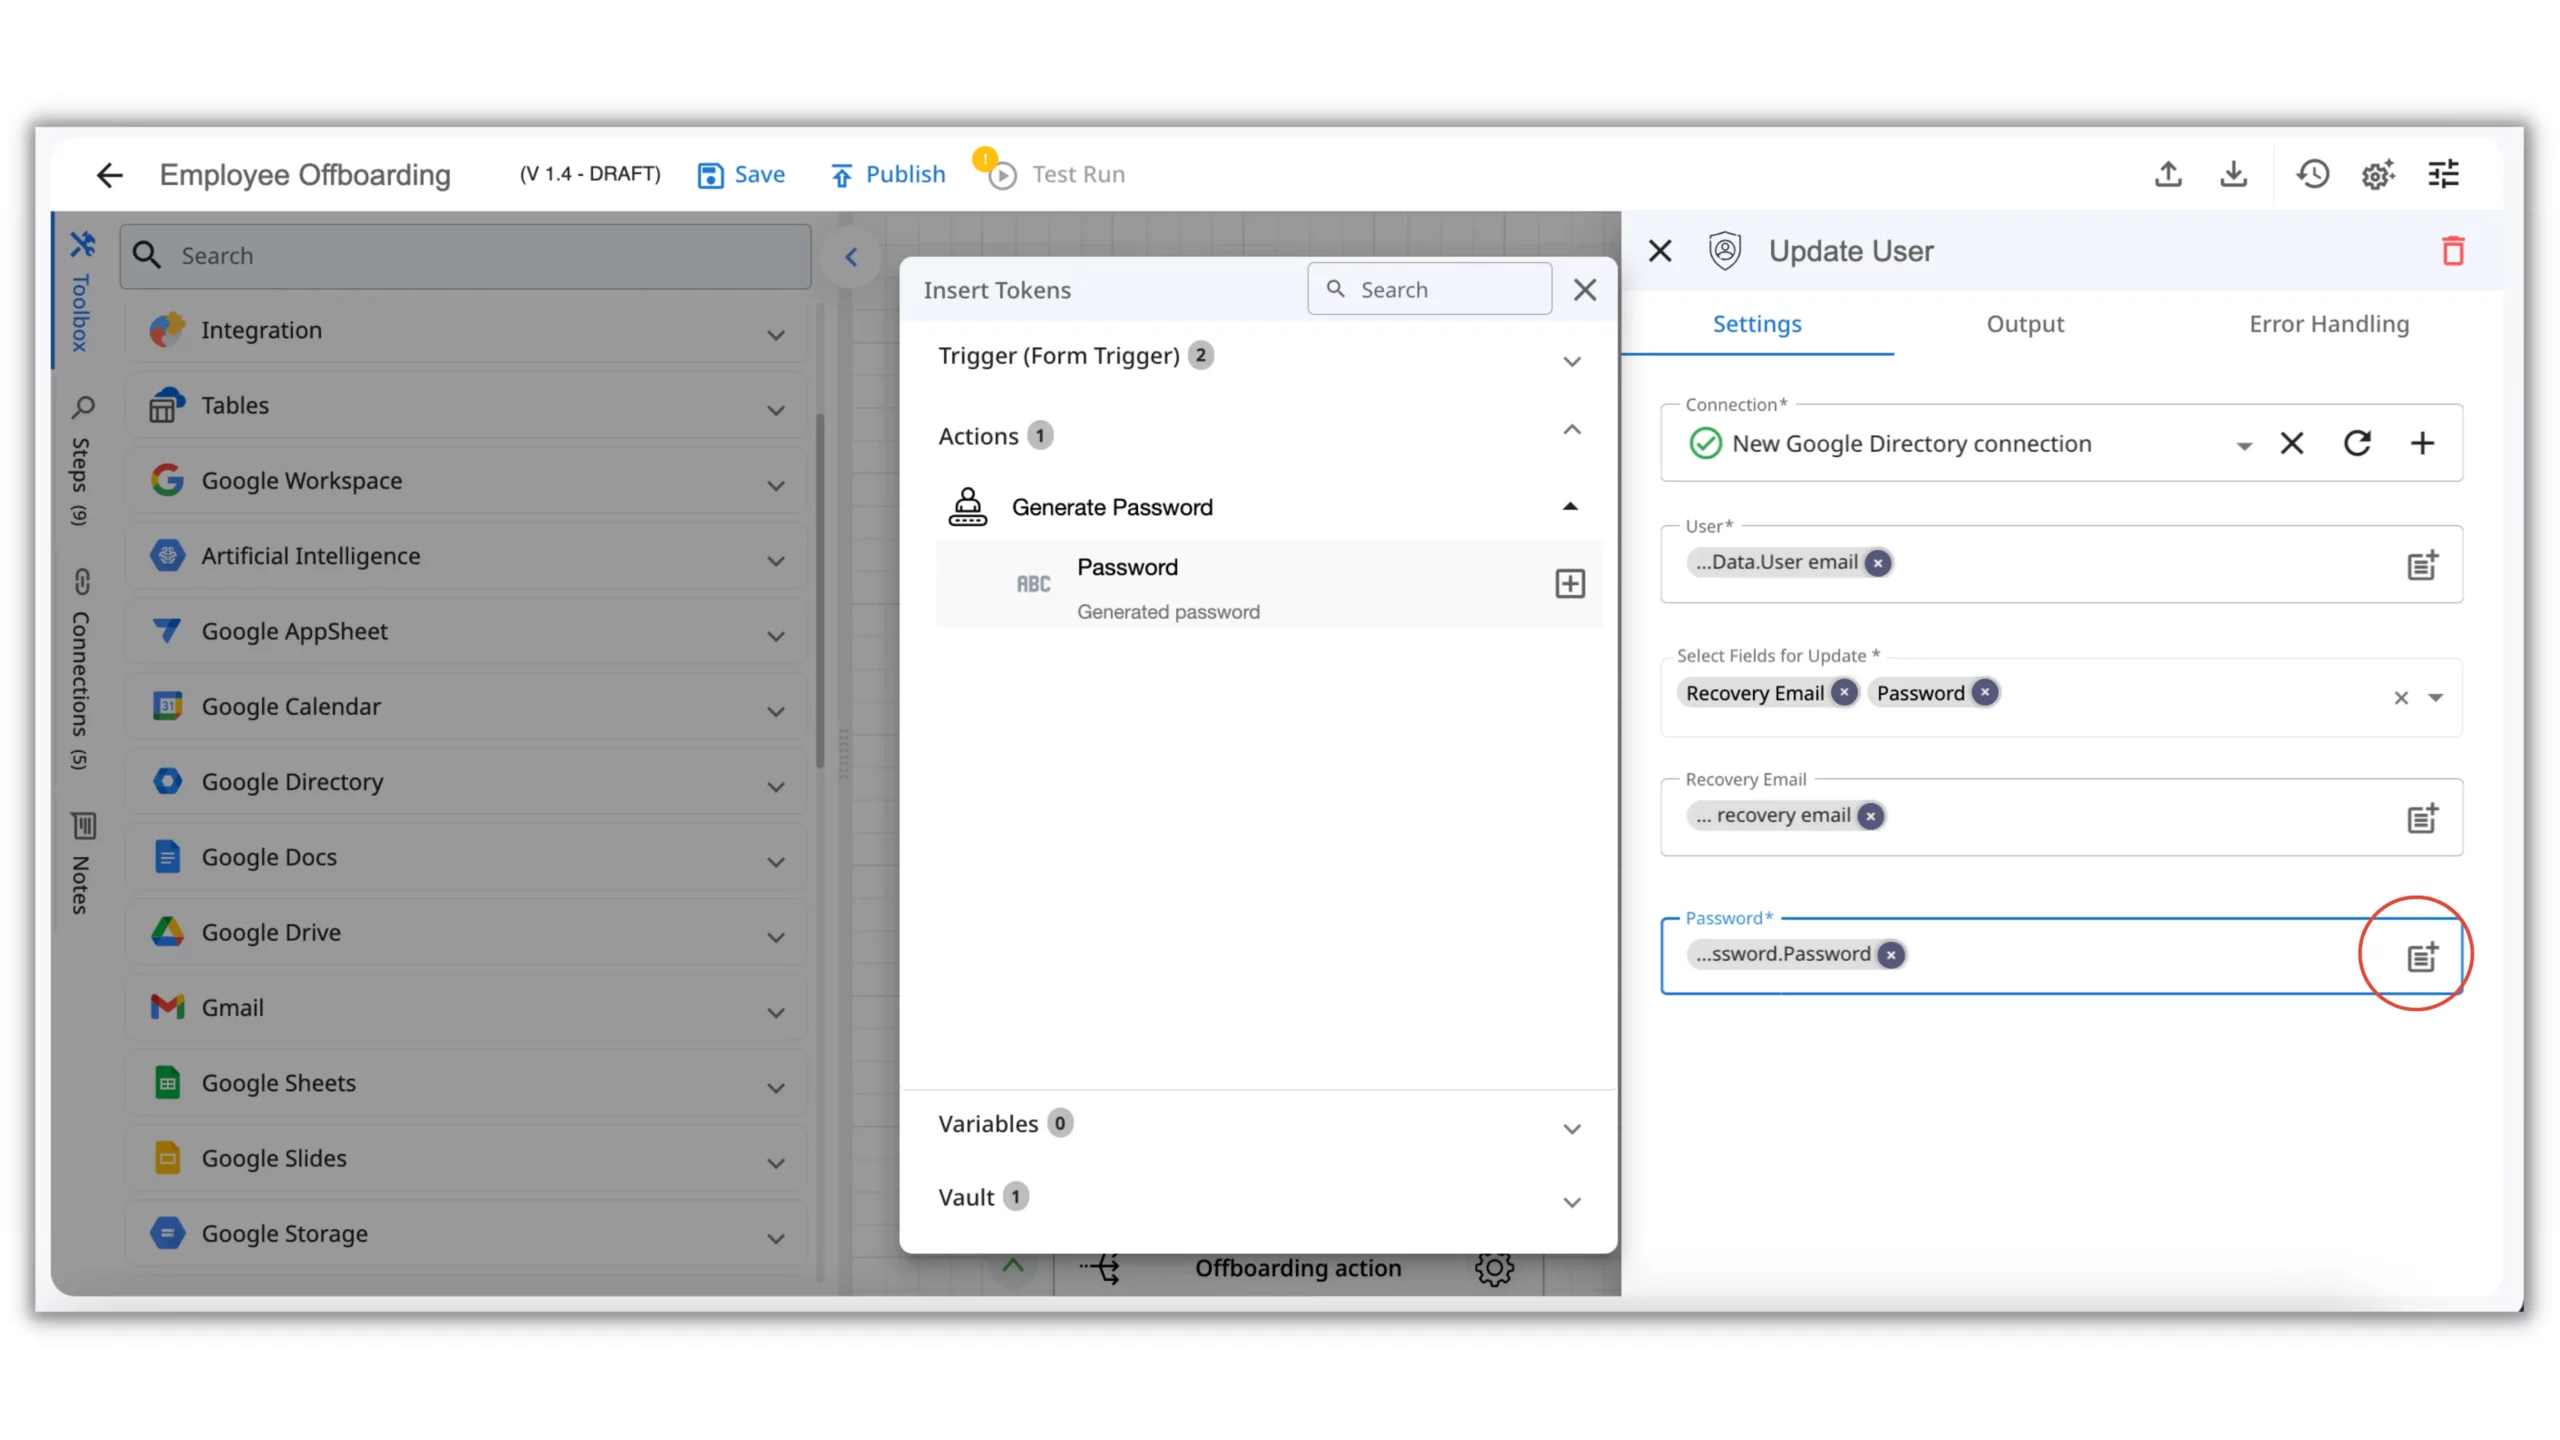
Update User
Now, let’s open the next Action of the Flow – Update User.
In this action we should configure a few fields:

- Connection – to update the User in Google Directory zenphi needs your permission to do so. As you may recall, we set up the connection when we launched the template, so simply select it from the drop-down menu.
- User – here we need to specify the email of the offboarded user. For that, we’ll be using the Token picker. Click on it and a tab will open, displaying the output data from the previous steps of the Flow. Select the “User email” from the Form Trigger.
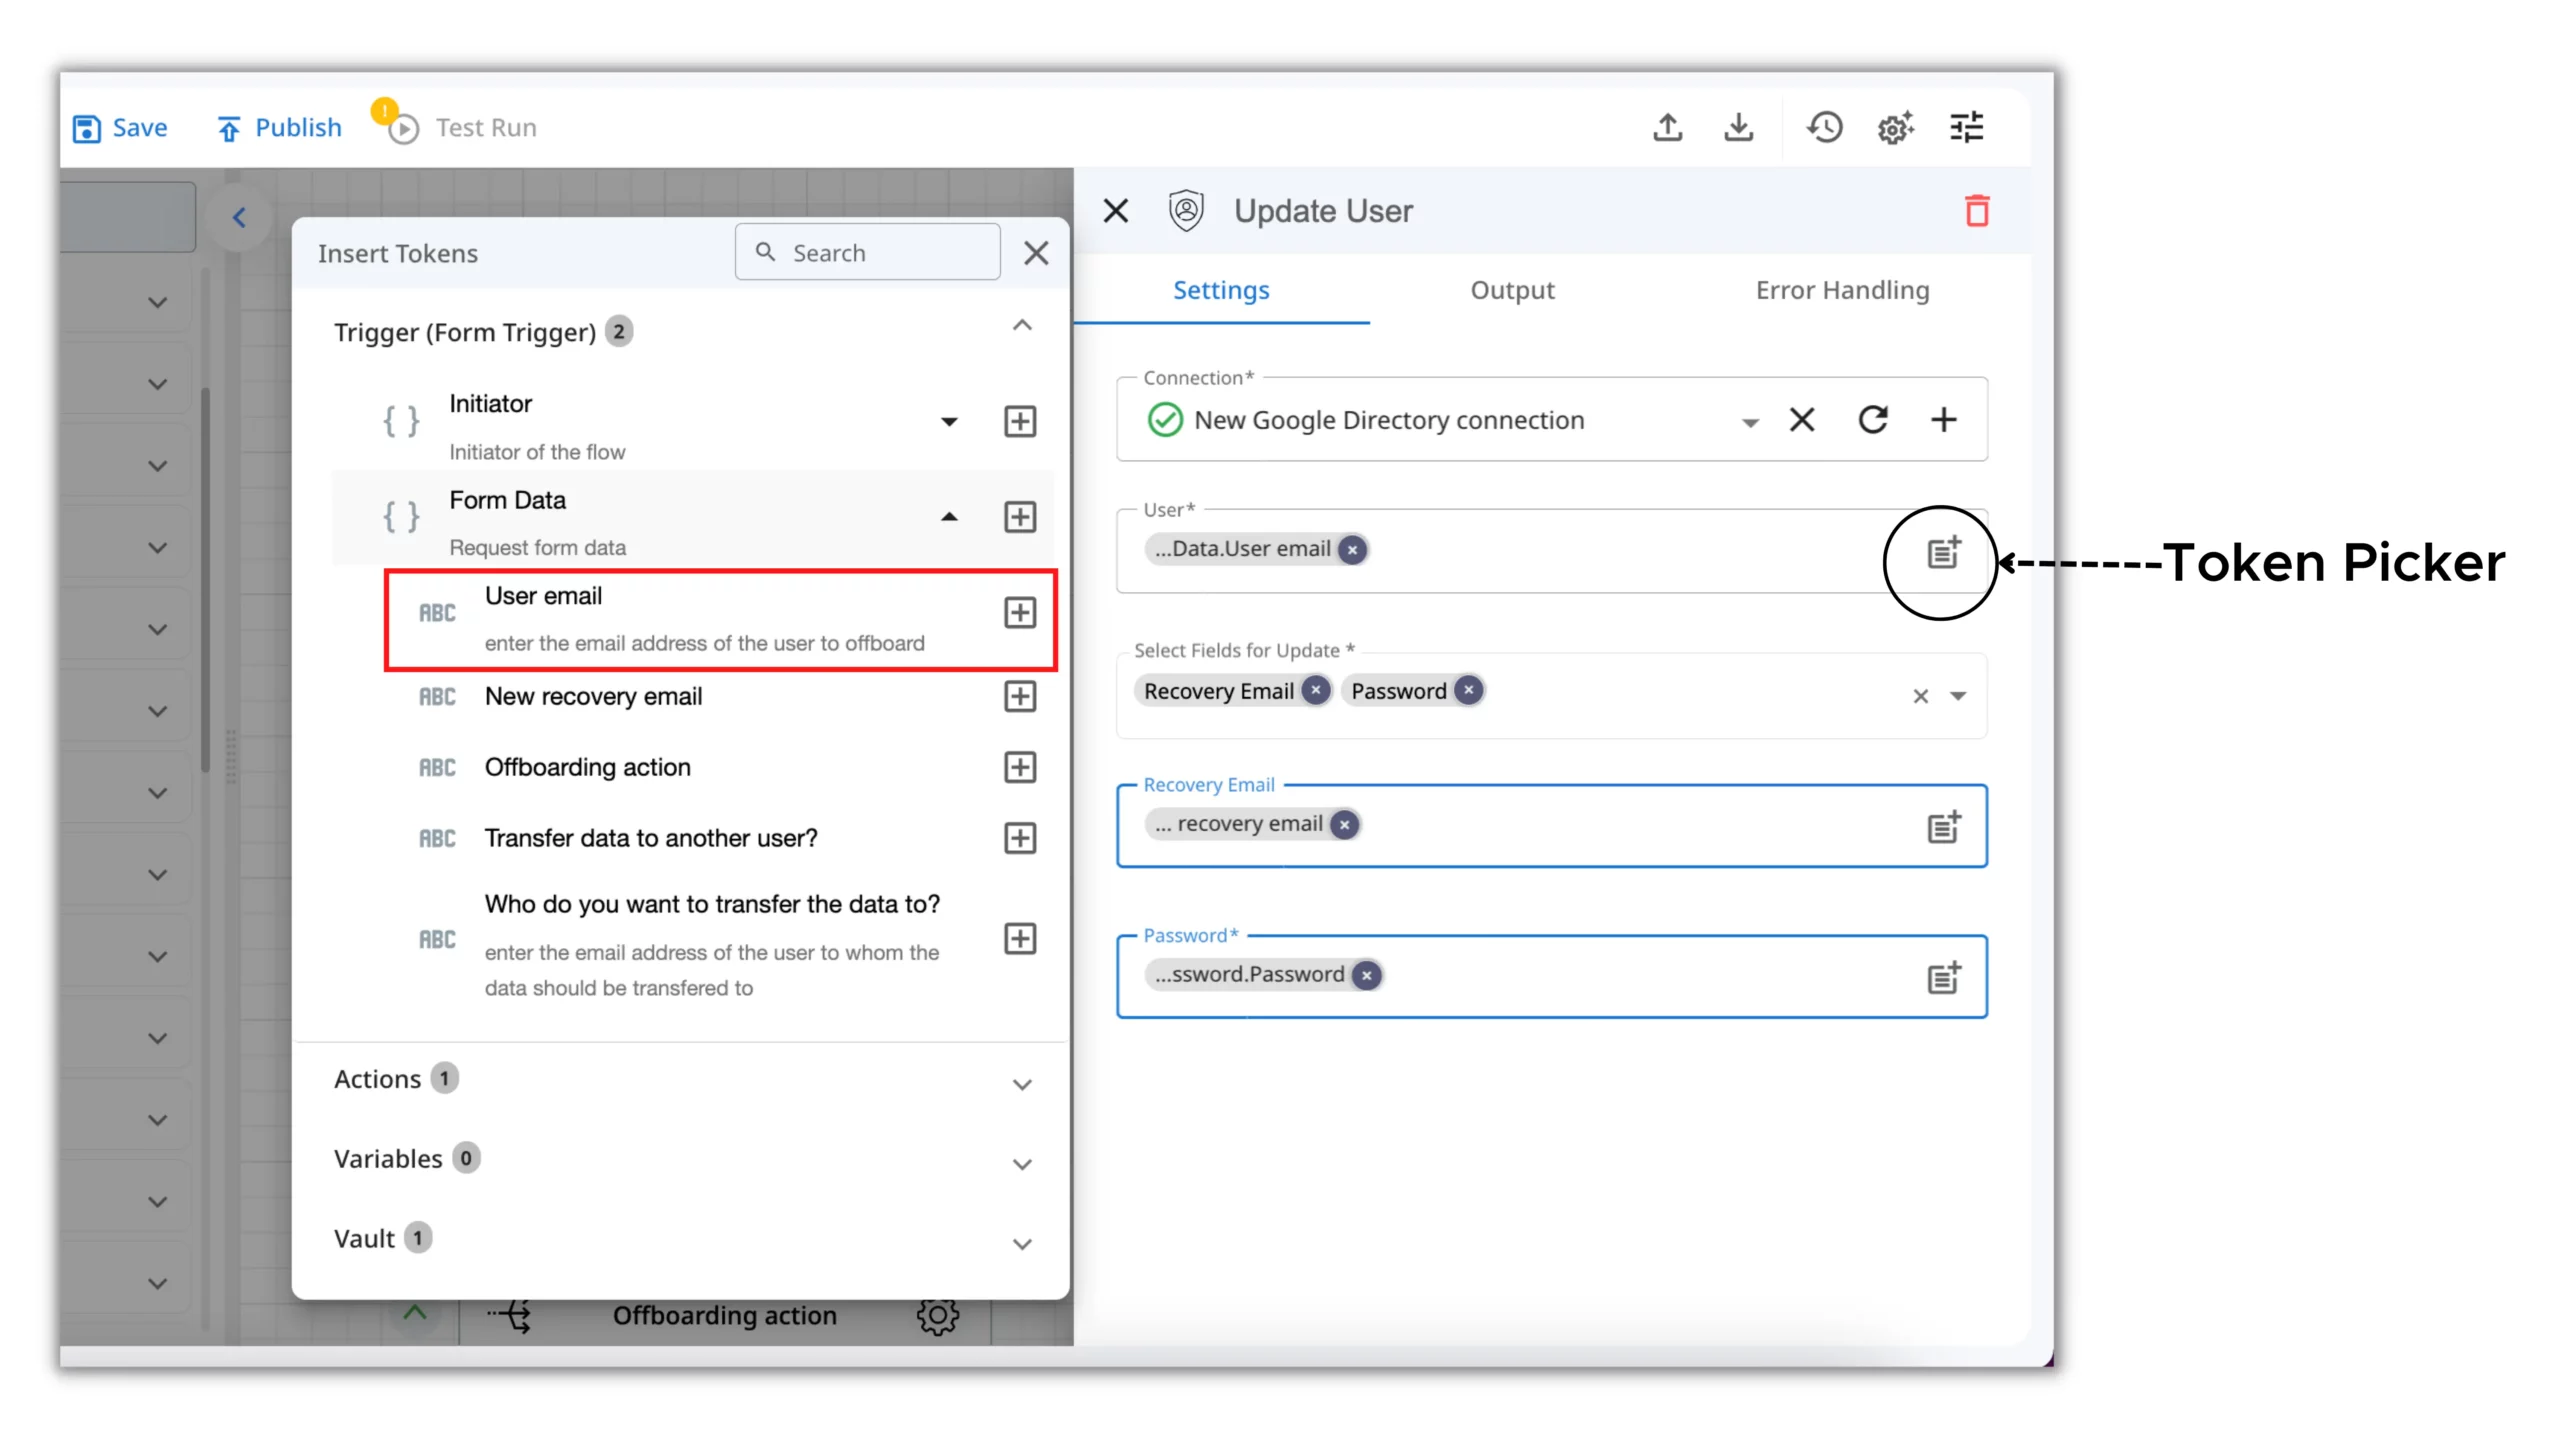
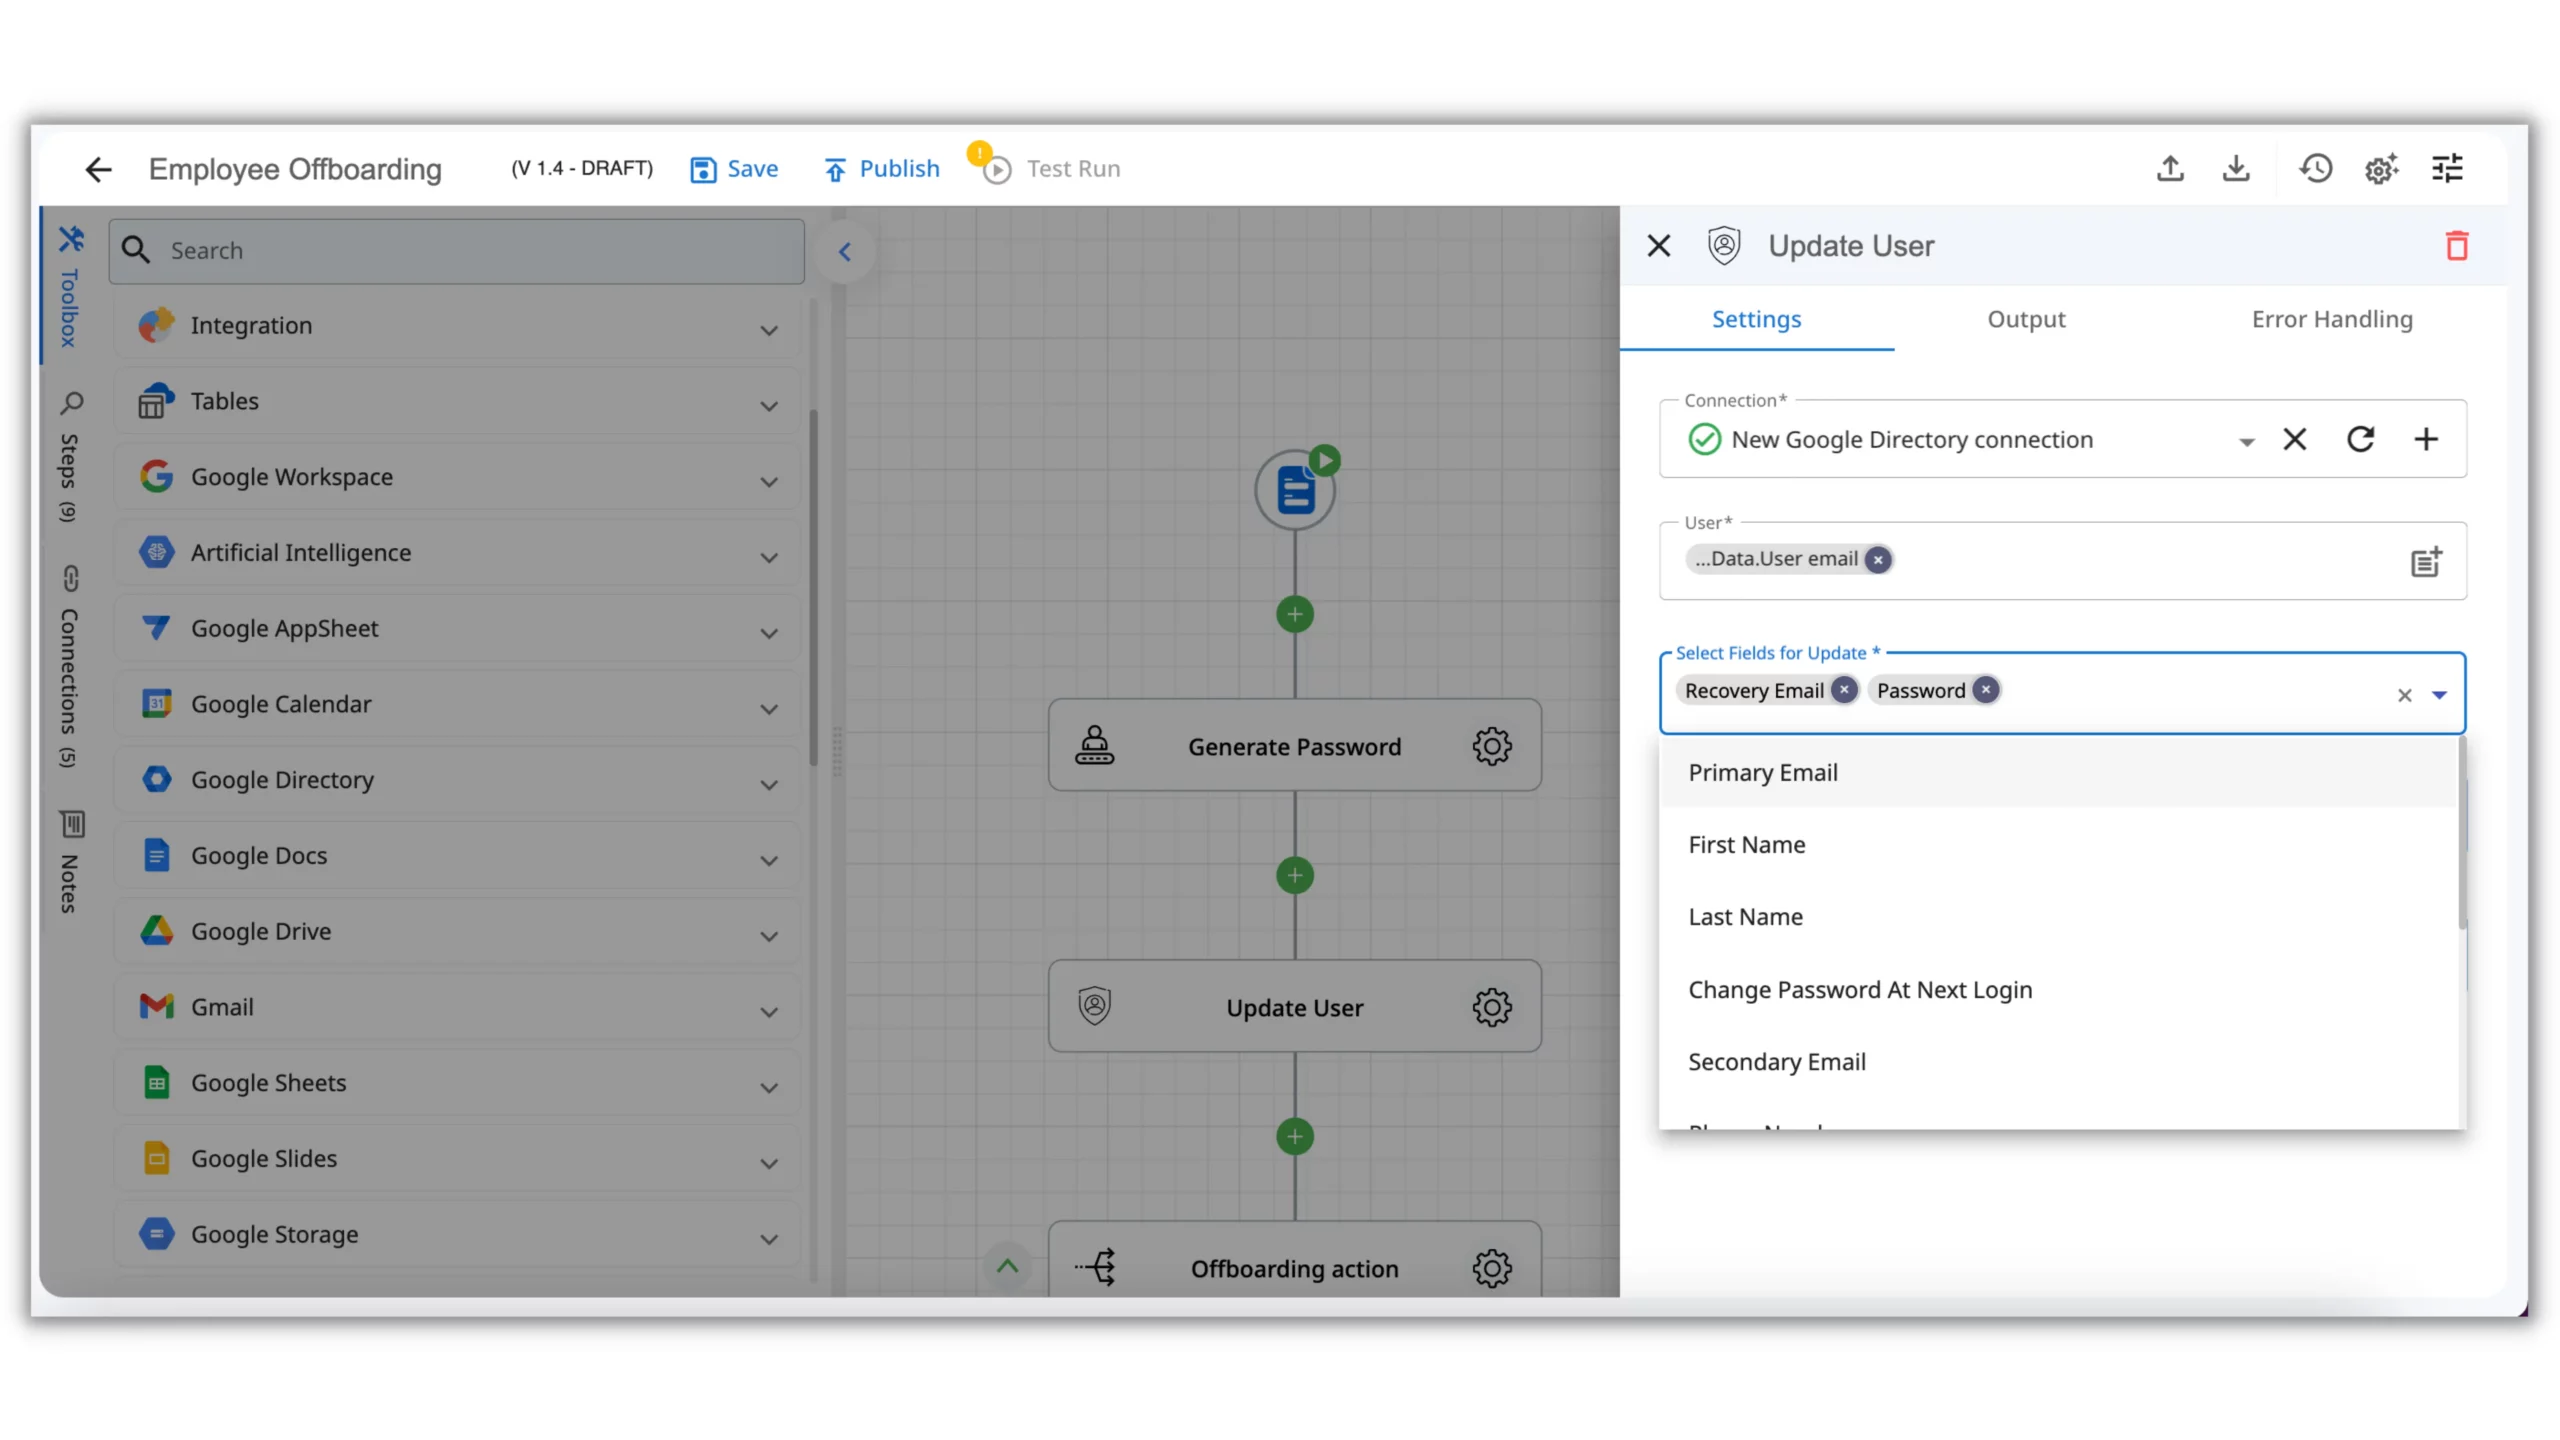
- Select fields for update – we’re interested in the Recovery email and Password.
- Recovery email – here we’re using the same Token Picker and taking the data from the Form.
- Password – for this one, we’ll take the data from the Generate Password action we set up earlier.
Step 3: Offboard the User
Now that we have gone through the basic security measures, we are ready to offboard the user. To do this, we will use the “Switch by Value” action.

- Input – here we’re using the initial Form response about what we want to do with the user;
- Value – here we’re indicating the possible actions: we can answer Suspend, Delete, or Archive.
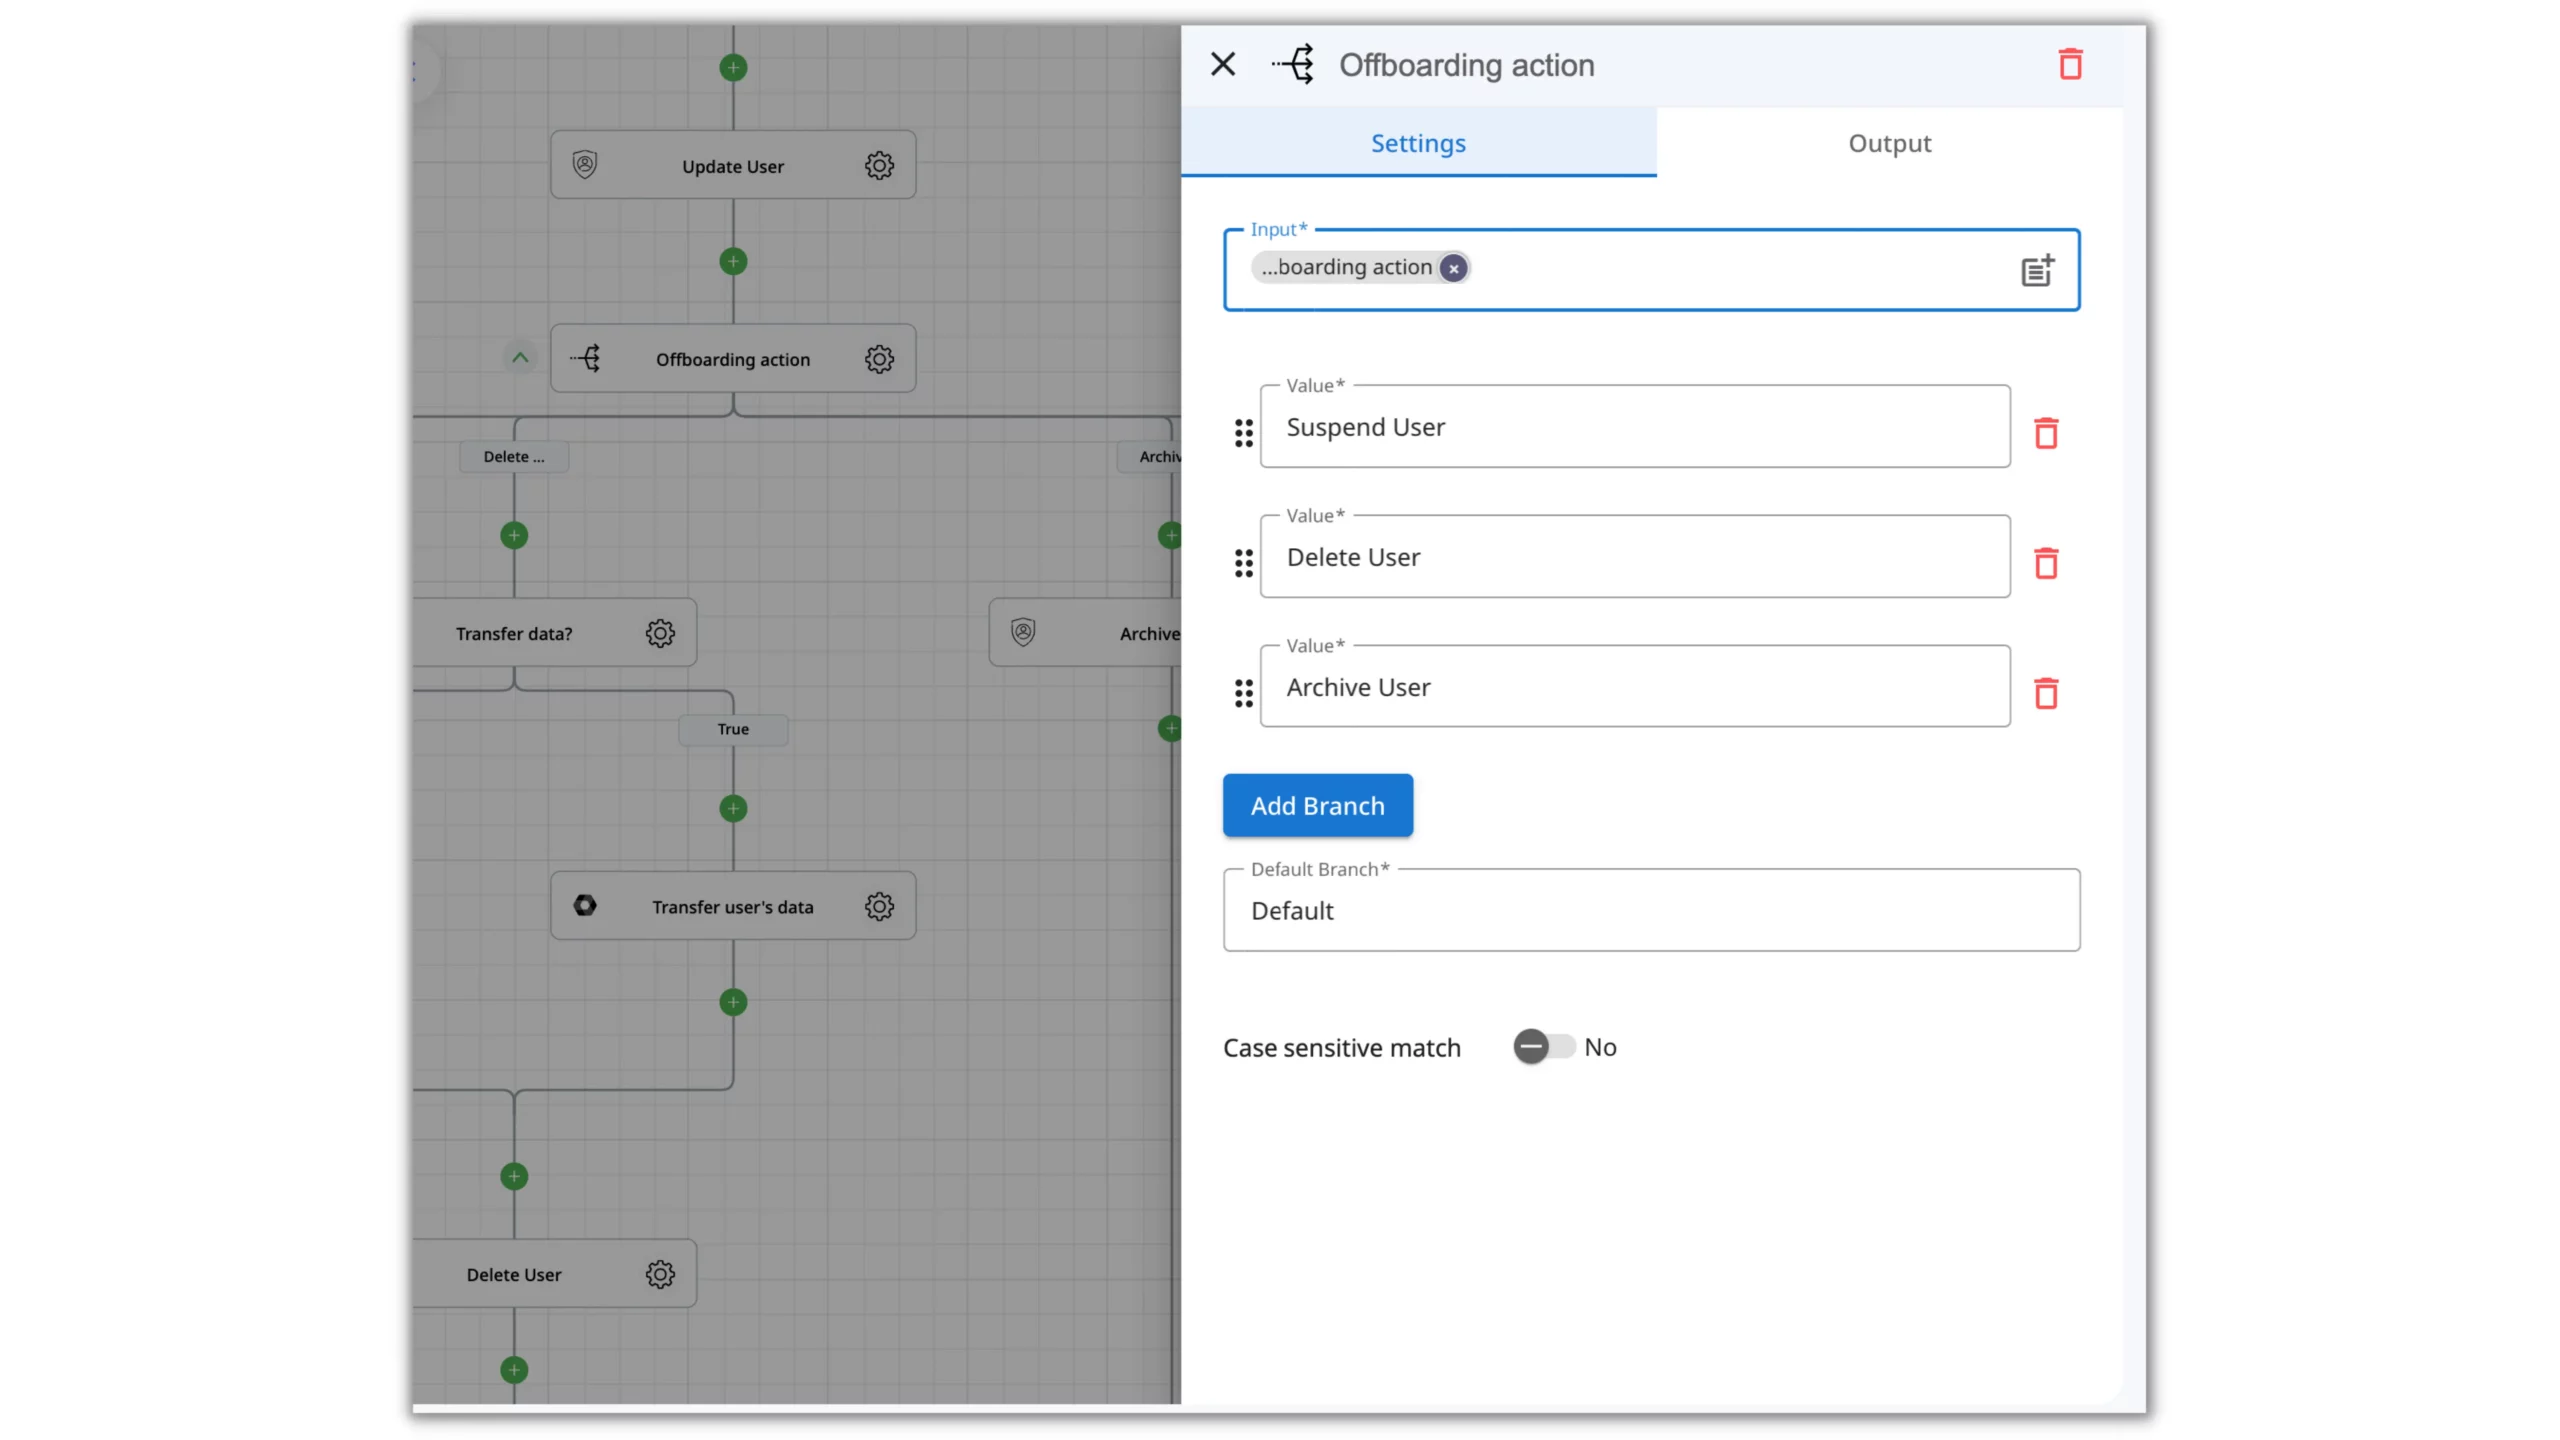
Then, we can attach further actions to each path.
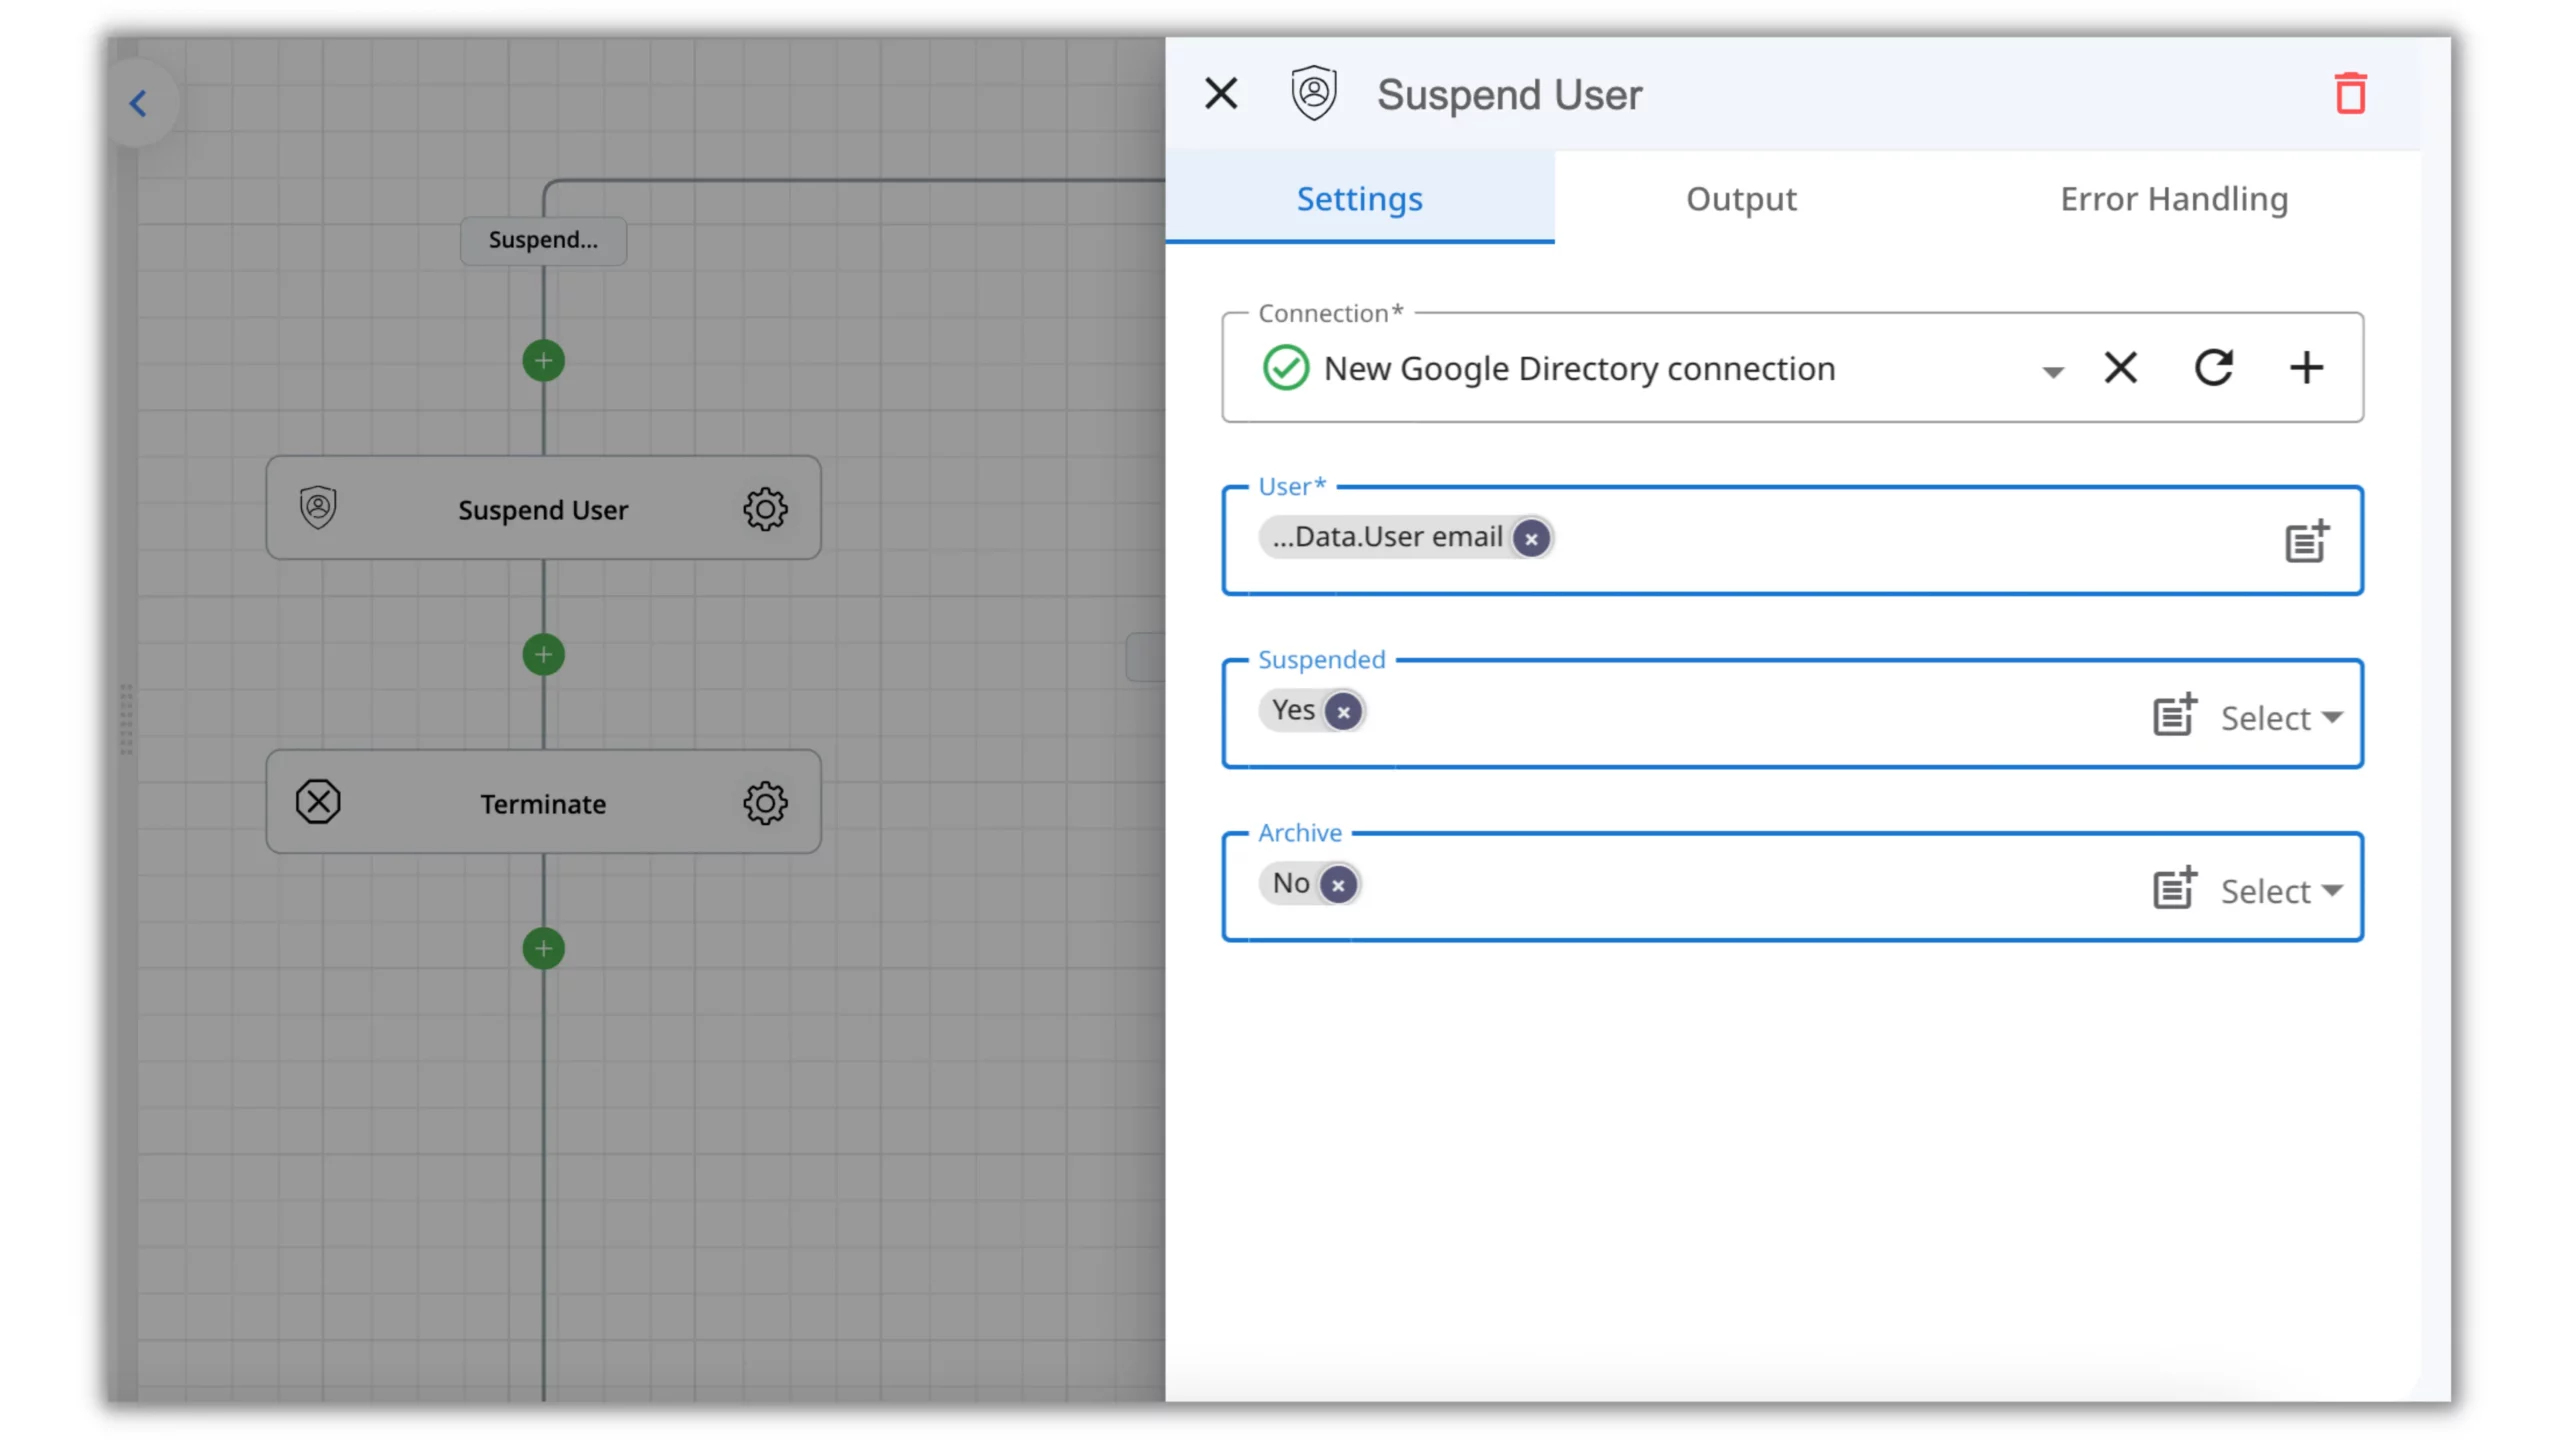
3.1 Suspend
Setting up the Suspend action is straightforward. As earlier, we just need to choose the Google Directory connection, indicate the User with the Token Picker, and select “Yes” under the Suspend field.
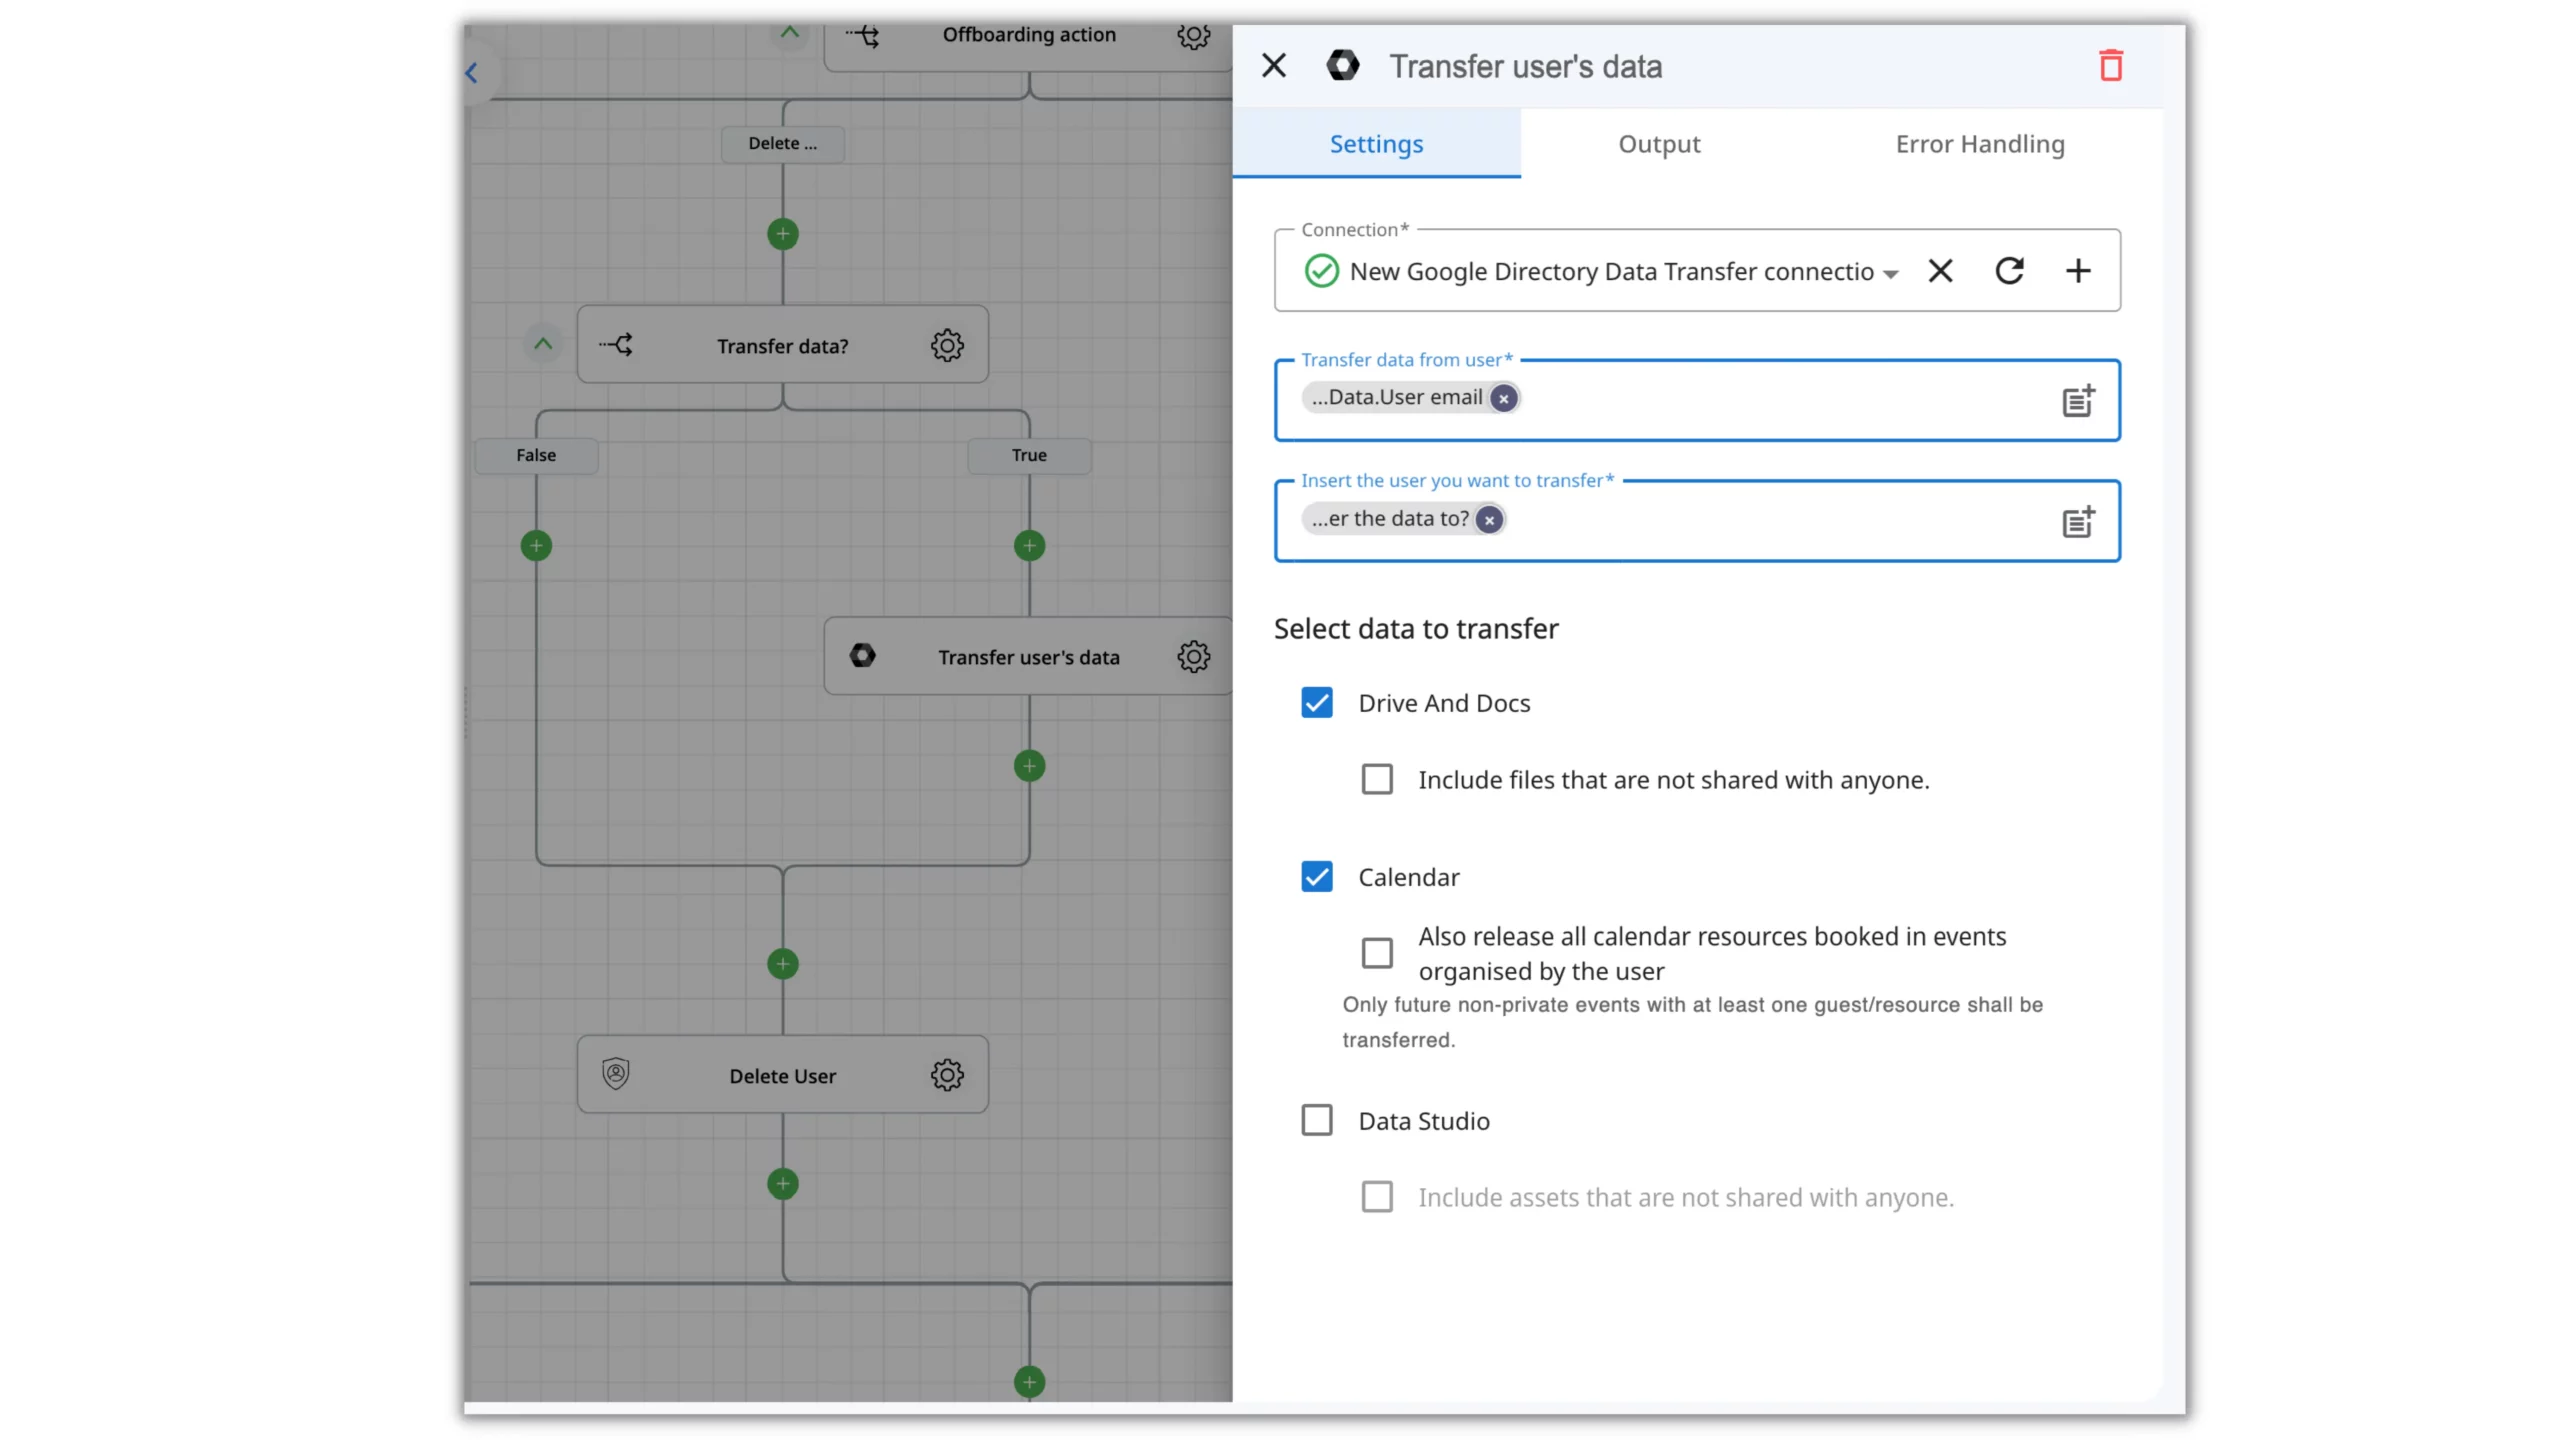
3.2 Delete and Transfer the Data
Remember, when we need to delete a user, we can transfer their data to another active user in the organization or opt not to.
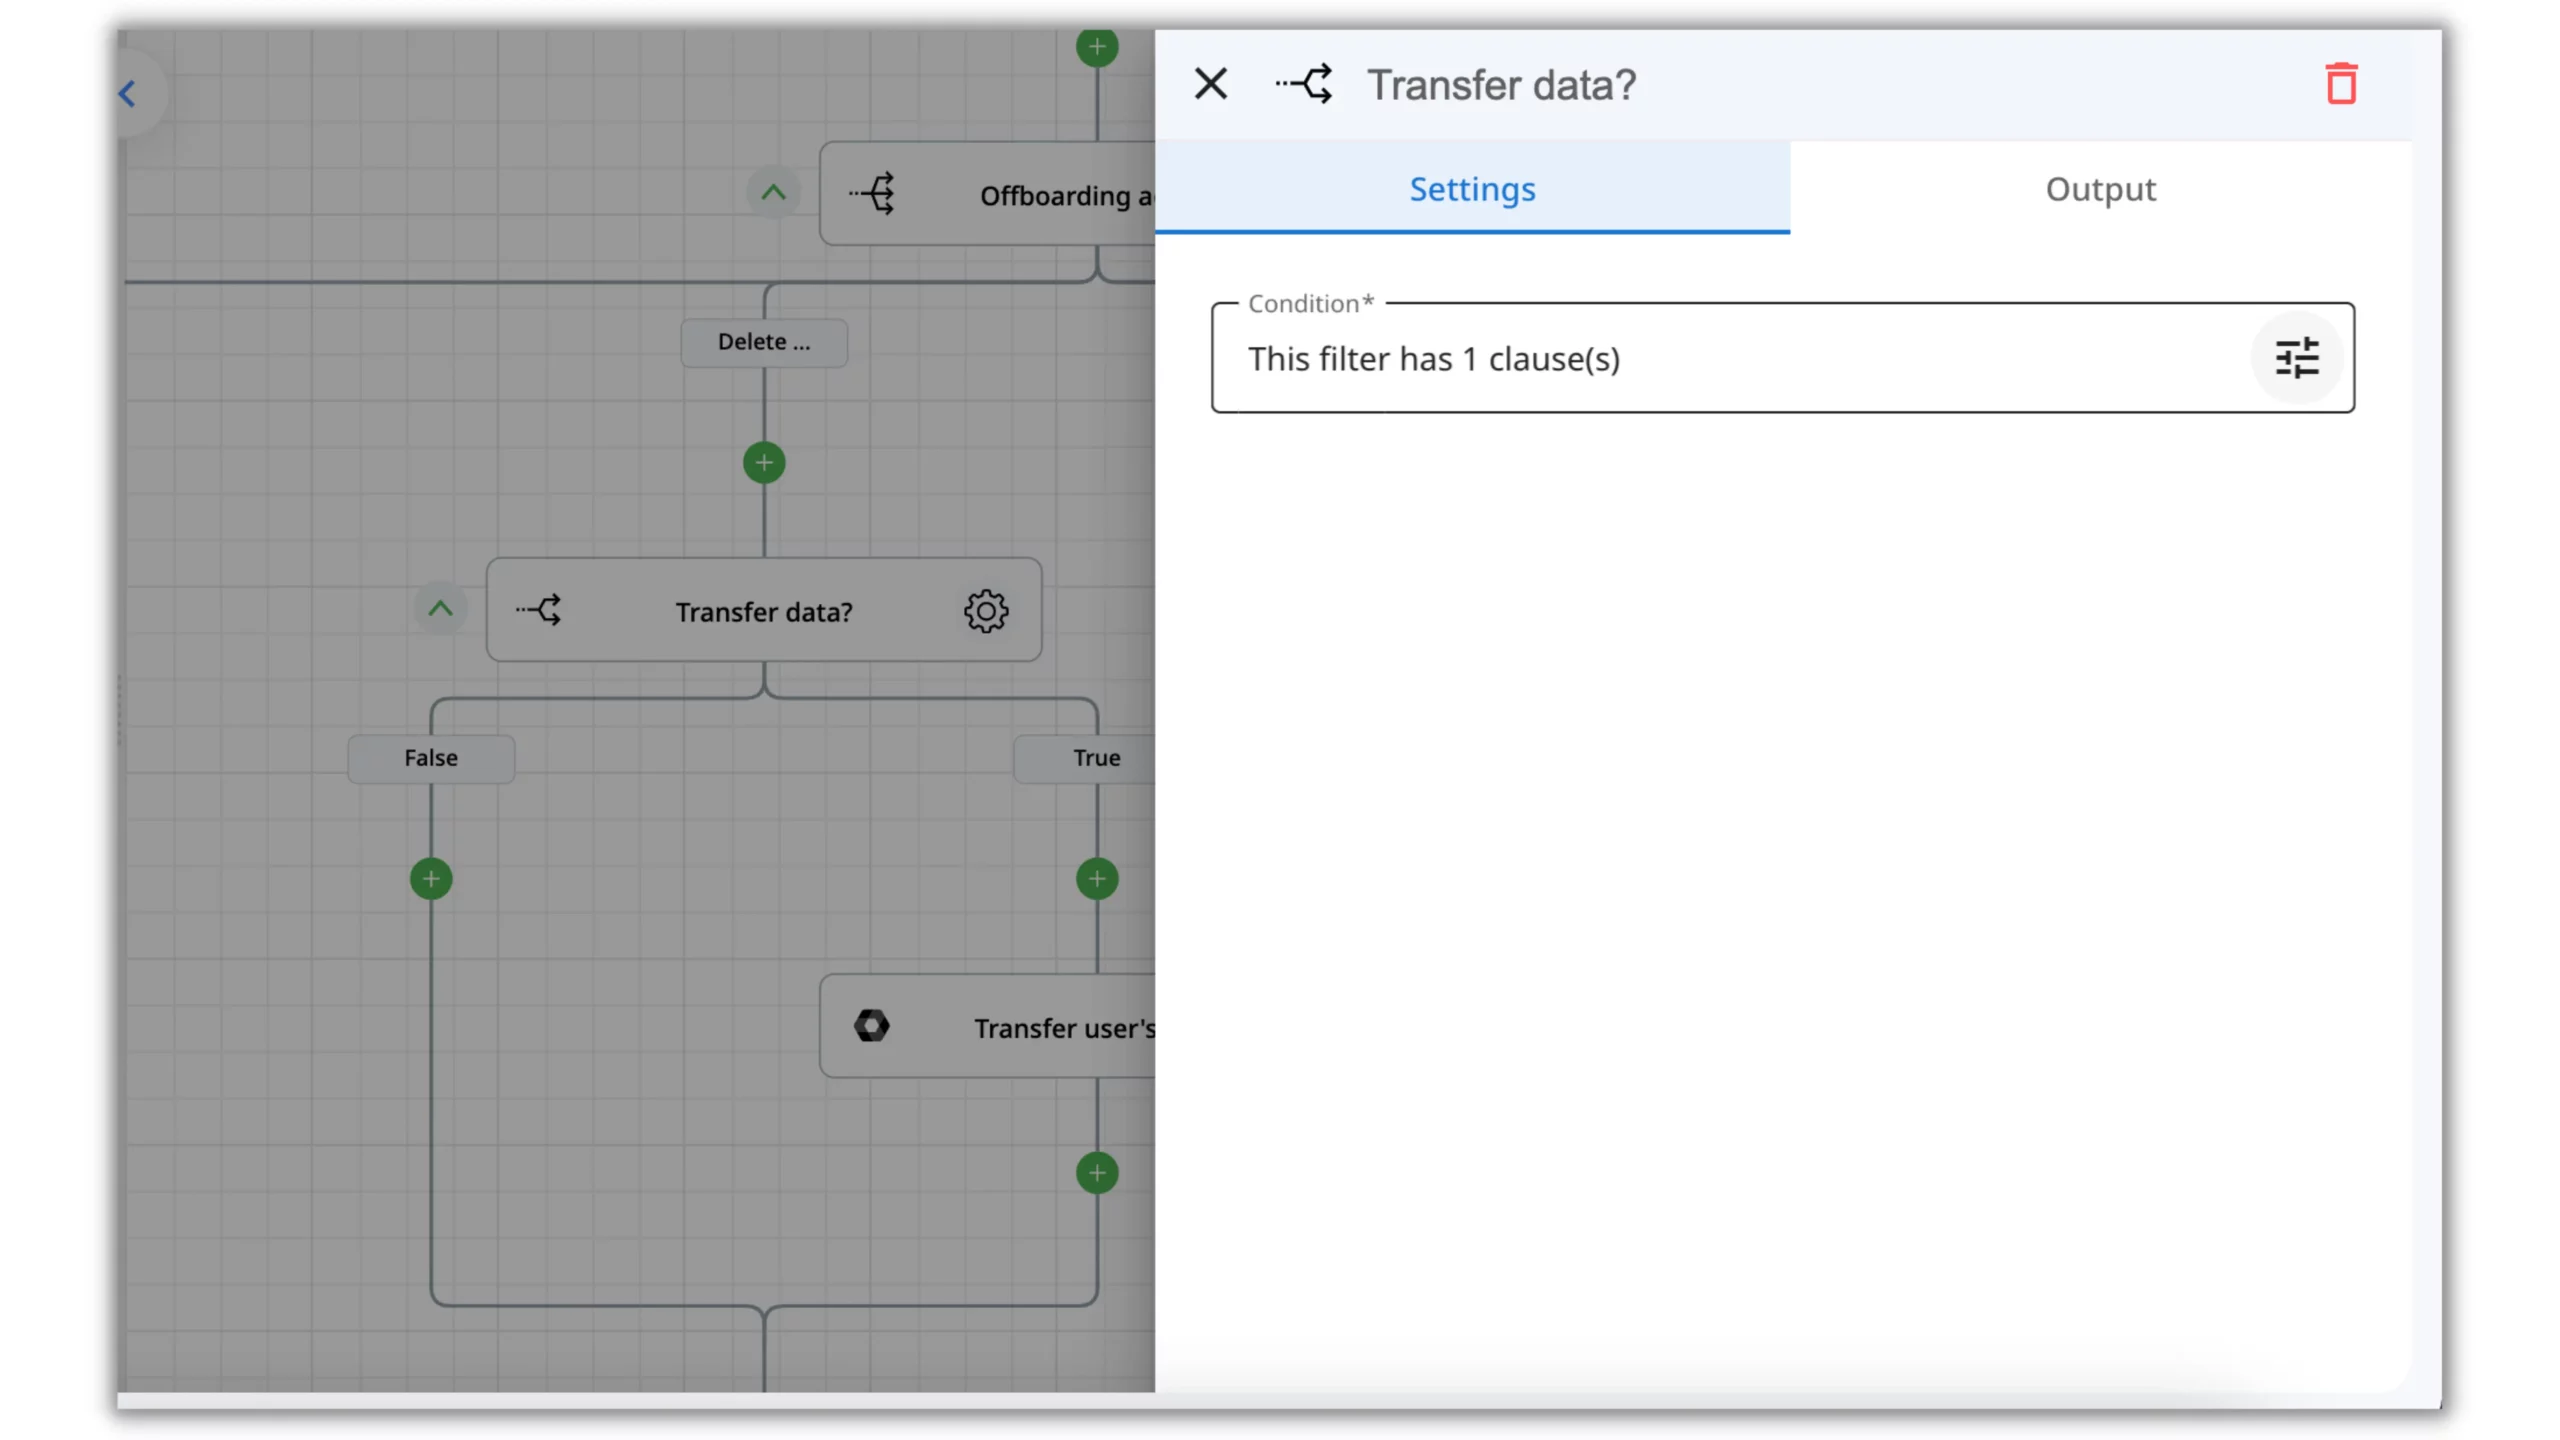
To create a conditional path, we use the “If Condition” action and configure it as follows:
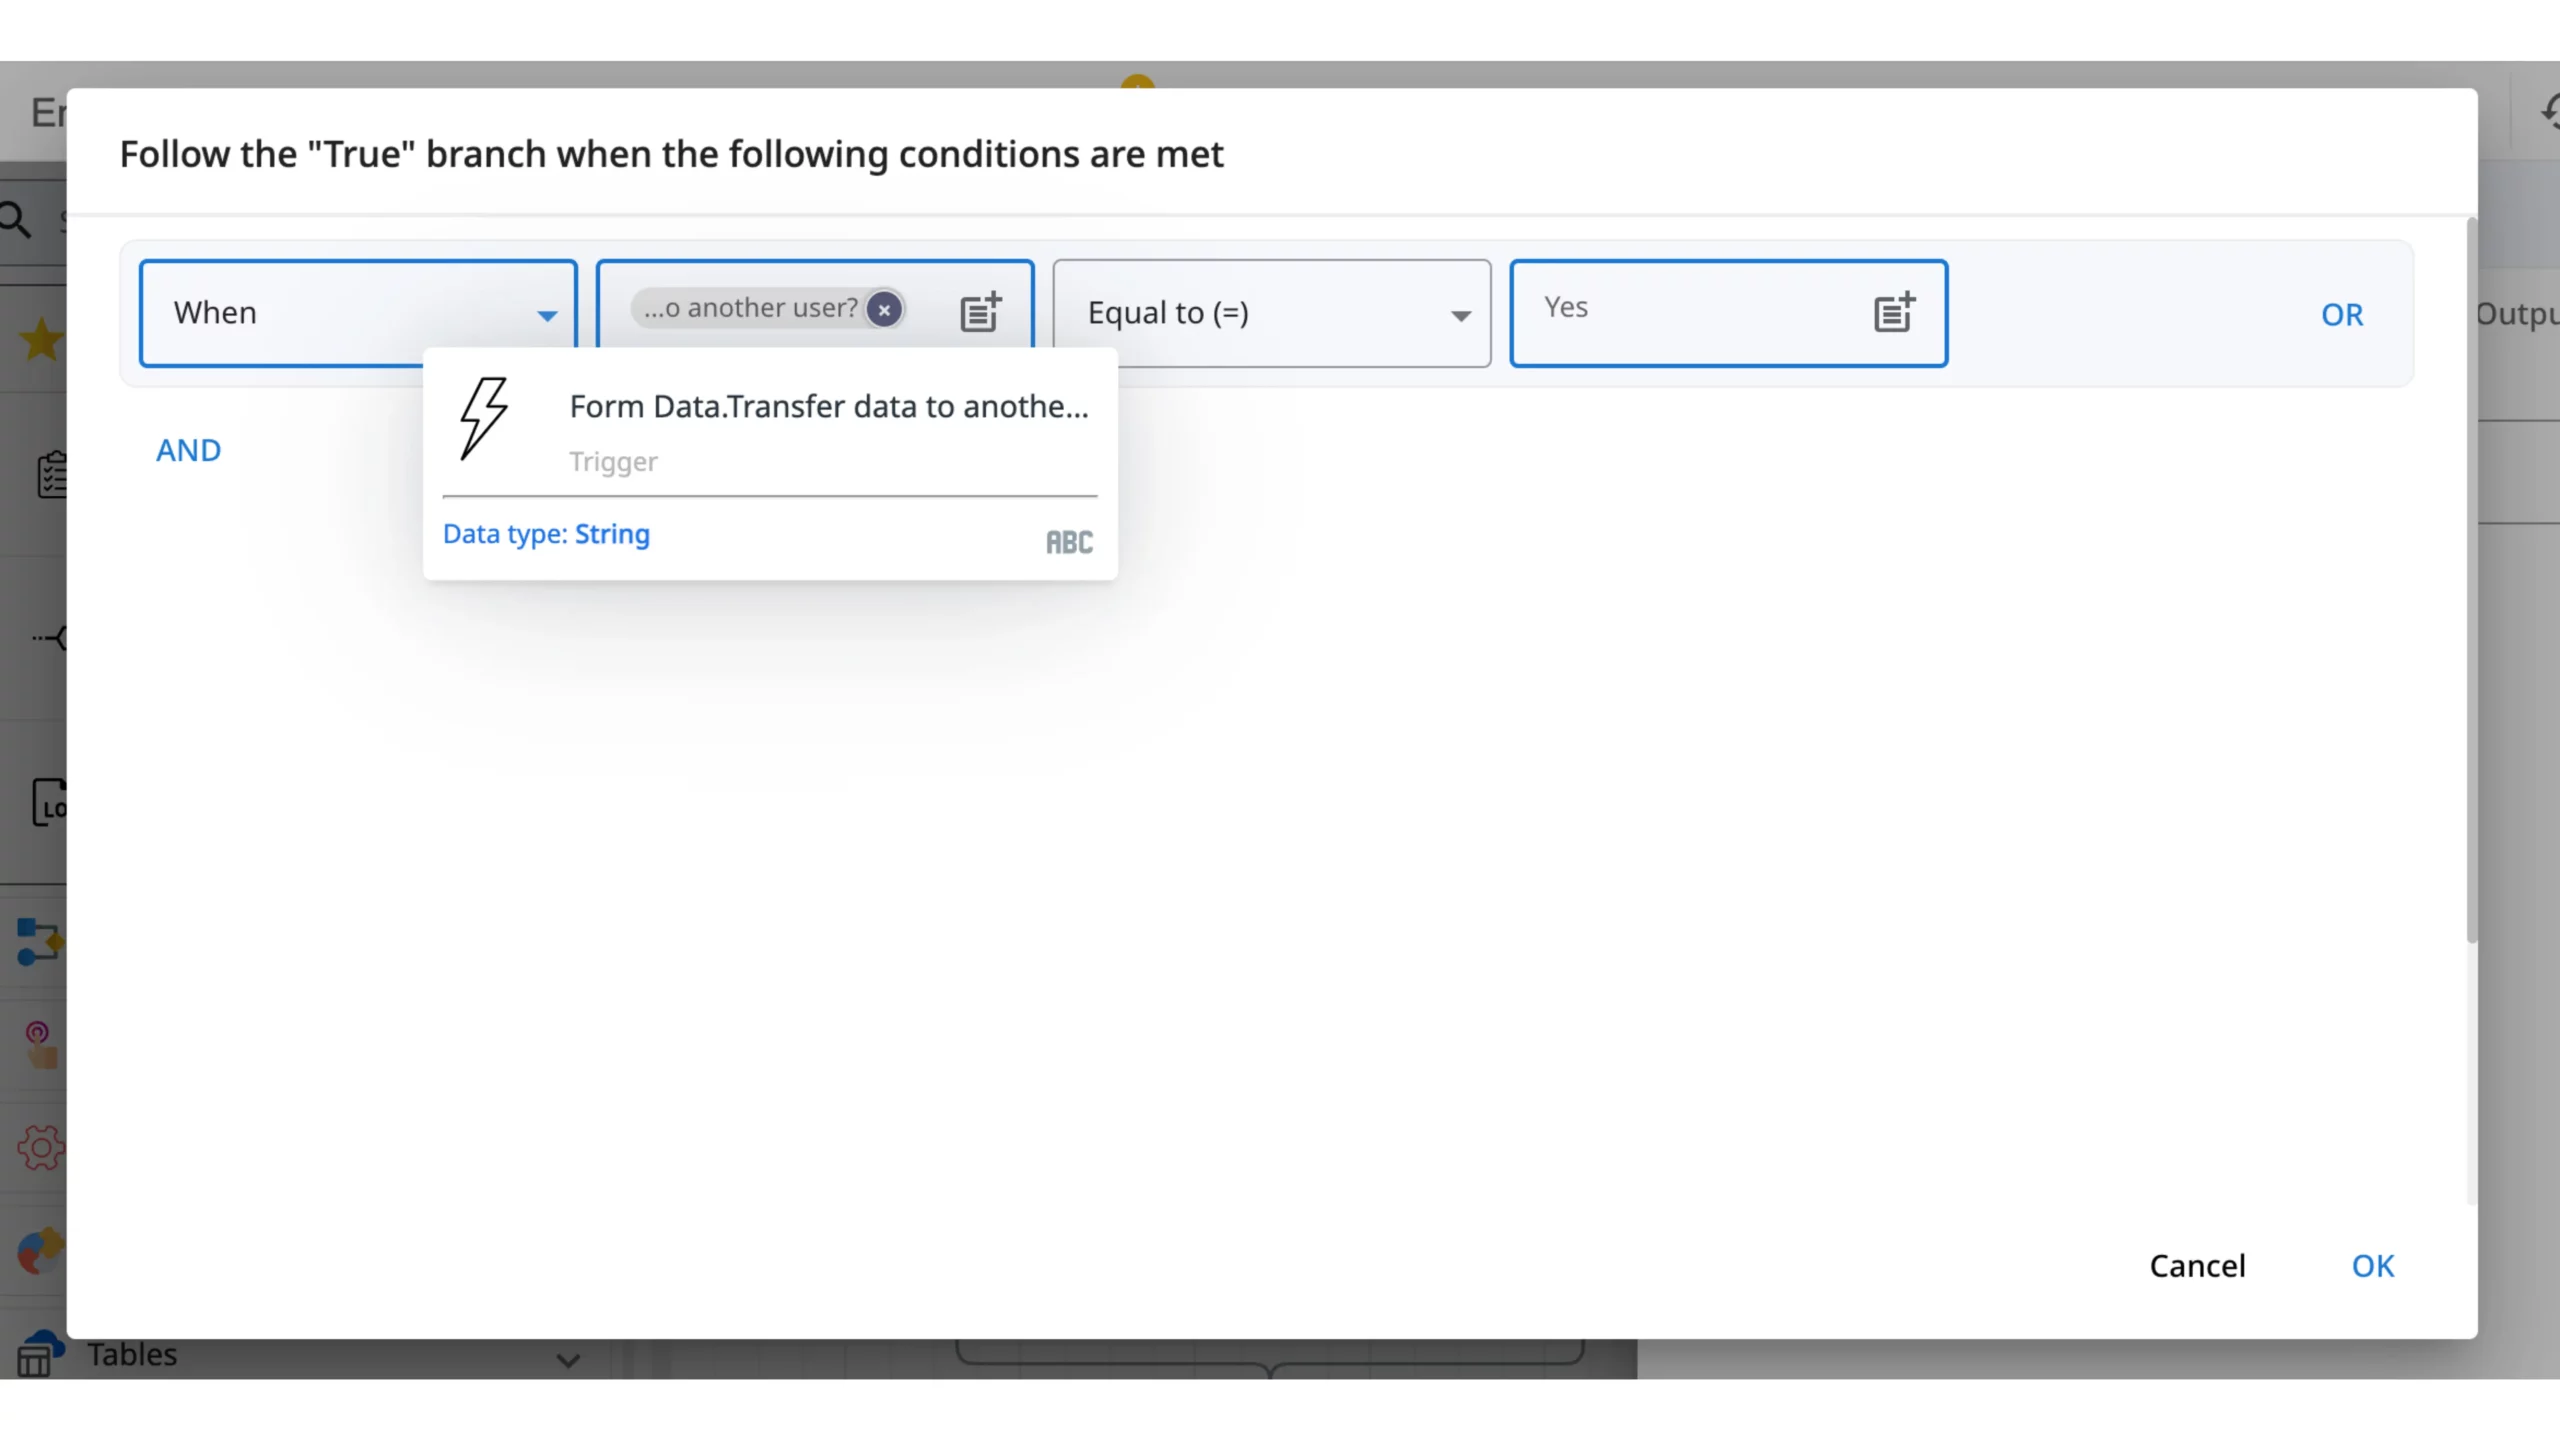
If the form submitter responds positively, the “Transfer user’s data” action will be performed. We use the Token Picker to specify the user’s emails from the Form response and select the data we want to transfer.
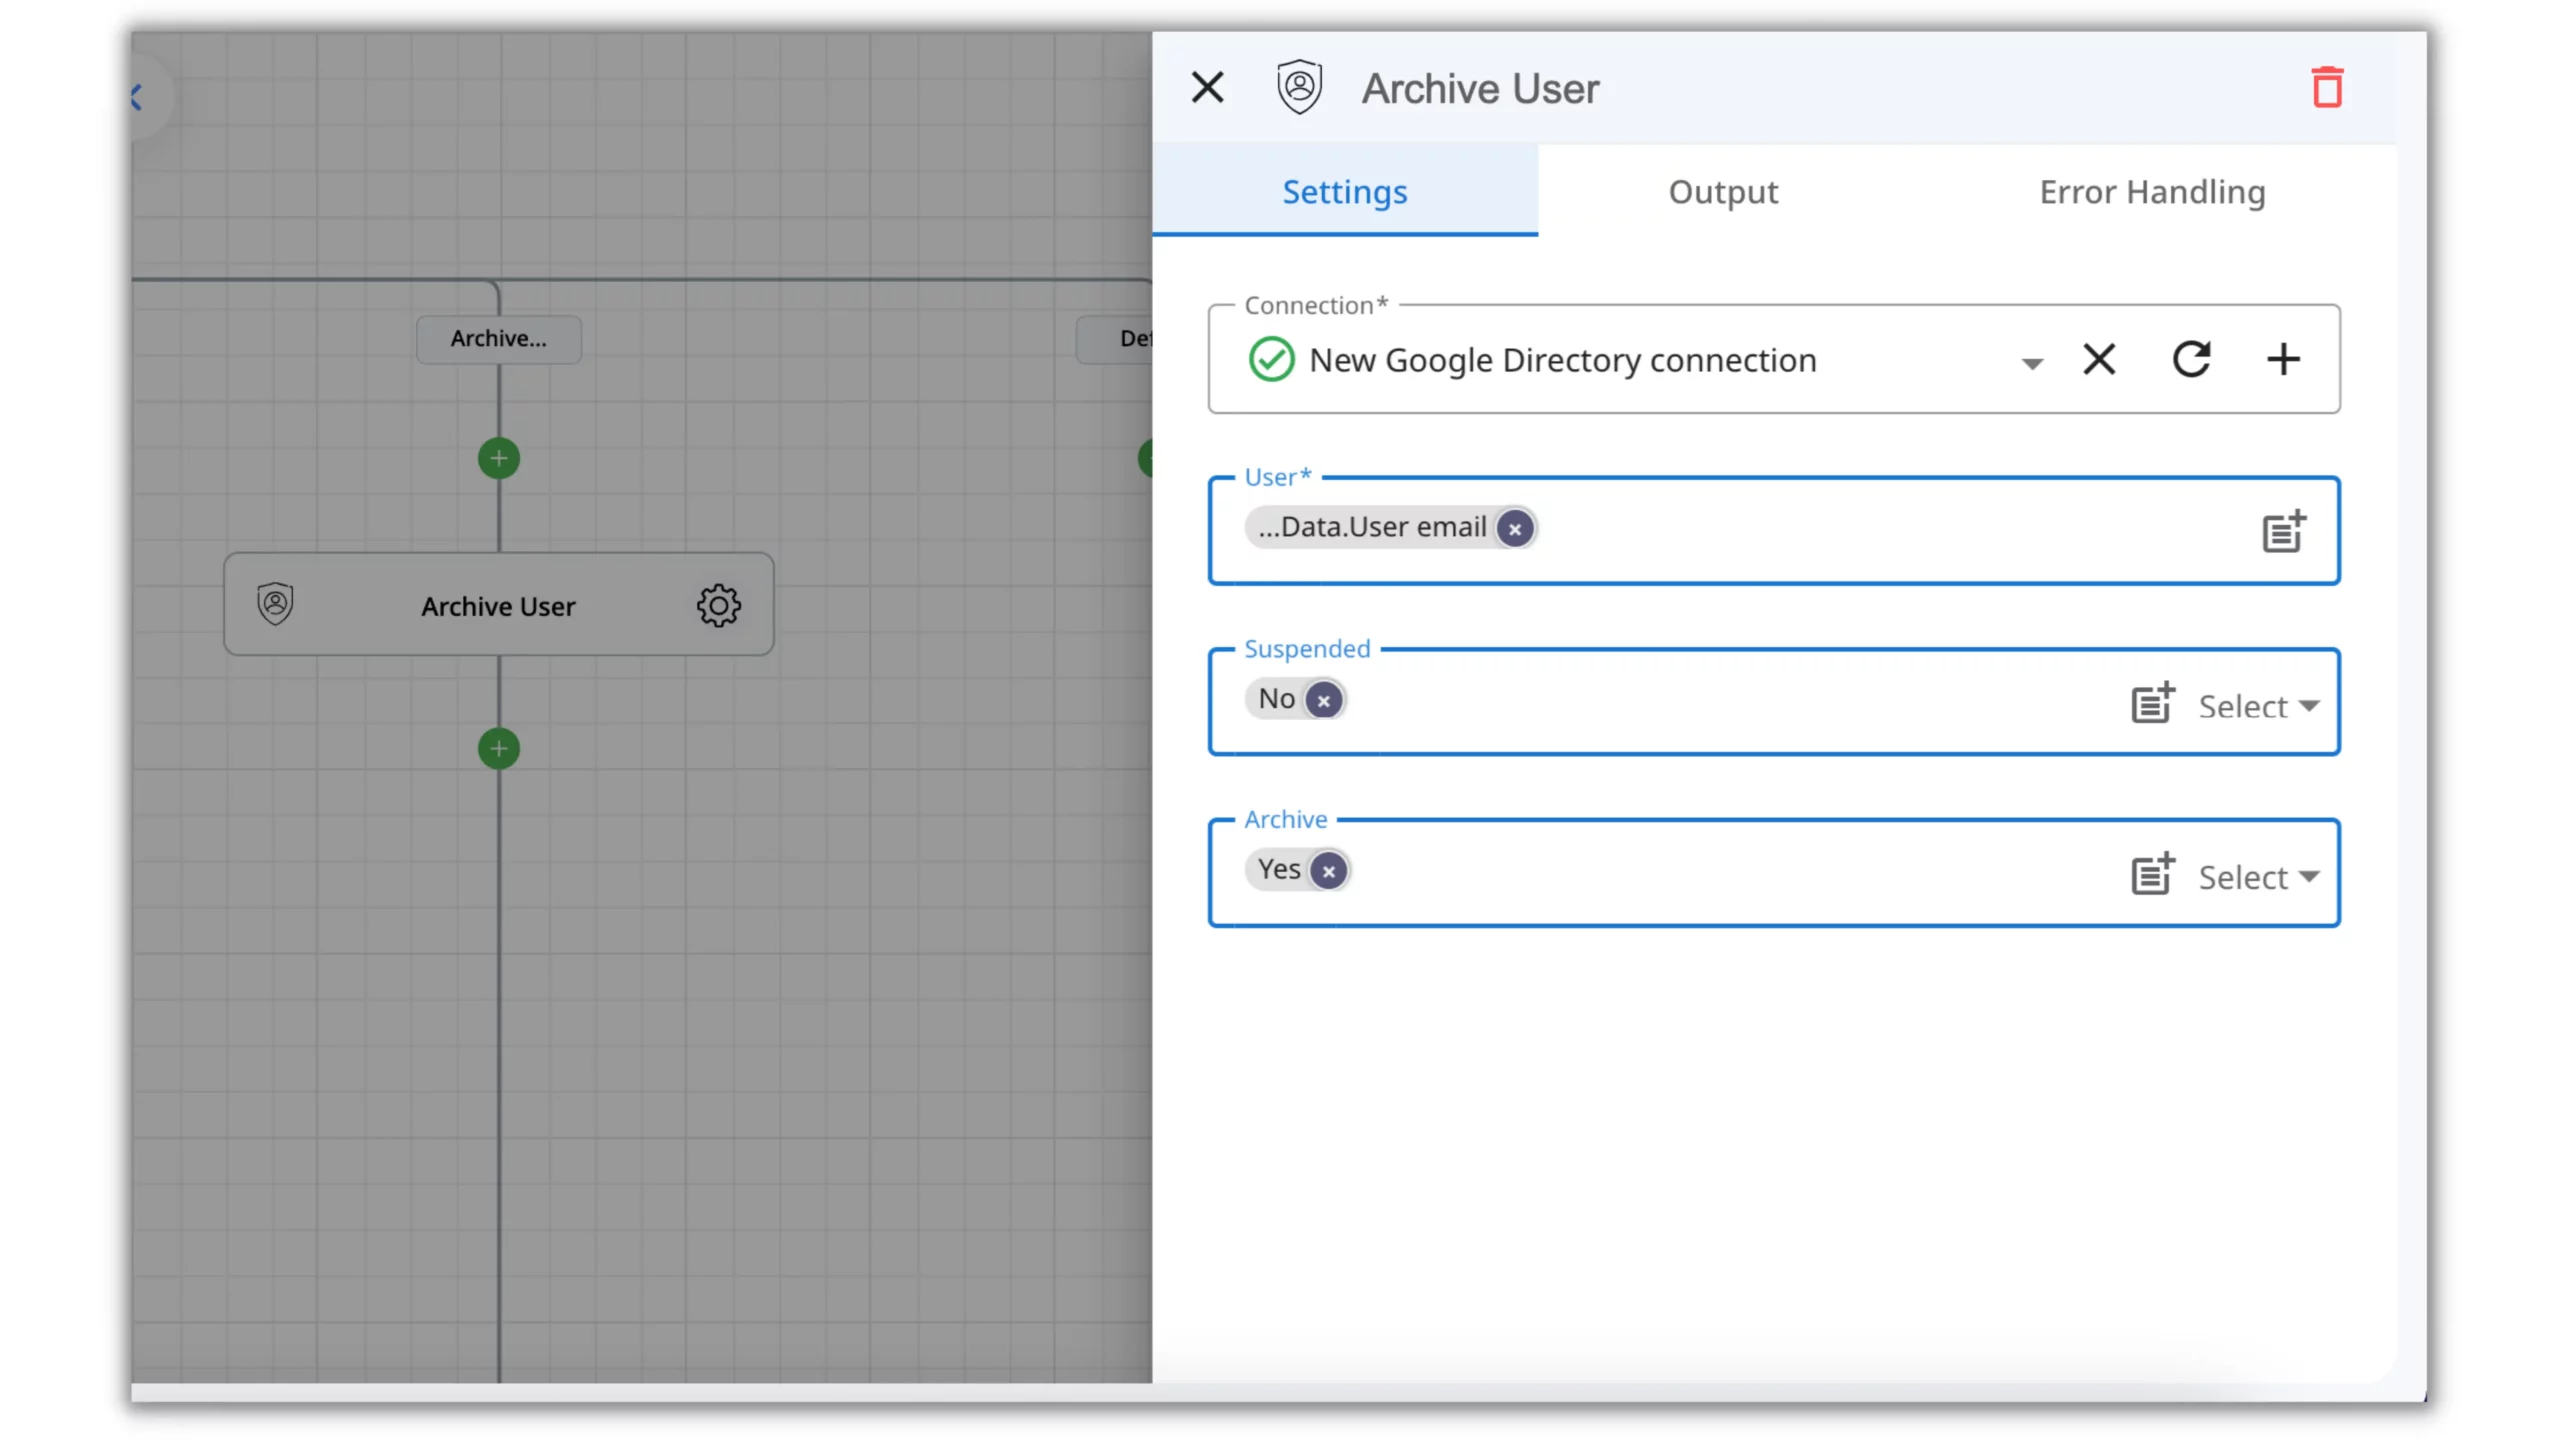
3.3 Archive
The Archive action is configured in the same manner as the Suspend action.
Publish the Employee Offboarding Flow
Click on Save and Publish, and from now on, once the form is submitted, the Offboarding process will start executing. We refer to each Flow execution as a Flow Run. To view an overview of all Flow Runs, return to the main page of the Flow.
Before Publishing, it’s a good idea to Test it first. Here is how you can do it.
With zenphi, you can not only automate processes and save a significant amount of time, but you can also create comprehensive databases and business dashboards. Learn more about it here.
Conclusion
Automating employee offboarding with zenphi is a great way to streamline the process, save time, and ensure your organization’s security. With just a few steps, you can have your automated offboarding process set up and running without writing any code.
You can use zenphi for free if you have only one automated workflow and offboard fewer than 30 users per month. Alternatively, discover more pricing plans to unlock more automation opportunities.
Check out how Aravin Srinivasan, CTO at Zenphi, explains Google Admin process automation in detail in this webinar recording below.