Automating incident report workflow on G Suite can bring you a lot of advantages. Incidents happen in and around the workplace. And when they do, it is bound to interrupt some parts of your business operation. Incidents also may or may not incur injury or loss and/or damage to company property. The former may lead to financial claims, and the latter will cause delays in your operation.

You file an incident report to ensure that every incident has undergone proper assessment and responded accordingly. An incident report is a formal document filed by the people involved or witnesses to the incident. This tool will effectively capture or record important details of the event such as injuries and accidents towards employee(s), damage to company properties, lack of safety protocols, or any gaps within.
And since there is always the looming possibility of an incident eventually happening, it is a good idea to start automating. This way, you can record, track, and deploy the solution faster.
There are several ways to automate your incident report workflow. Others may require simple coding or buying an unfamiliar solution. But it can also be as easy as availing a platform that is an extension of tools you are most familiar with.
Why use zenphi when automating incident report workflow on G Suite
zenphi is a workflow automation platform made for teams that rely on Google Workspace (formerly known as G Suite). This means you do not have to go out of your way to start automating your incident report workflow using unfamiliar tools. Zenphi utilizes all Google tools, including several select third-party tools, and let them automatically interact with each other the way you want them.
Things such as automatically collecting all the data every time a form comes in and recording them into a Google Sheet. Or automatically pulling data from an existing Google Sheet and turning them into Slides. You can do all these without having to leave the G Suite platform — a power the zenphi can afford you.
Interested to know the steps? Then read on. . .
Here is a quick summary of how we are automating incident report workflow on G Suite:
- Using Google Forms, create the Incident Report form. Include details such as:
- Submitter’s email address
- Incident Type
- Location
- Incident Description
- Pictures of the incident (if any) ex. picture of a broken window
- Create a Google Sheets file containing the information of the location managers such as:
- Office location
- Name
- Email address
- Store the files in a specific Google Drive folder so you can find them easily during the automation configuration. Also, create a destination folder for all attached files of the forms that are submitted.
- Specify the Gmail inbox that will receive and send the confirmation whenever someone submits an incident form
- When an employee files an incident report using the Incident Report Form, the automated system activates.
- The system will lookup the Location Manager’s name and information, and then send a confirmation email to the person filing the incident report.
- A task will be assigned to the Location Manager to look at the incident report and approve or reject the details.
- The filer will be notified of the Location Manager’s response through email.
Note that you can customize this automated incident report workflow according to your needs by adding more actions from the Designer panel.
Tools you need to start dynamically automating incident report workflow on G Suite:
- Google Forms to create the Incident report form.
- Google Sheets to record the information of the Location Manager(s).
- Drive to store the form, the record of the Location Manager(s) information, and the attachments.
- Gmail Inbox that will receive and notify the person who is filing the facilities incident report.
- zenphi to automate the entire system of facilities incident report filing.
Here is a step-by-step guide to automate facilities incident report filing:
In this simple example scenario, you will learn how to start automating incident report workflow on G Suite using zenphi. You can also totally customize the flow according to your needs by adding new actions from the Designer panel.
Step 1.
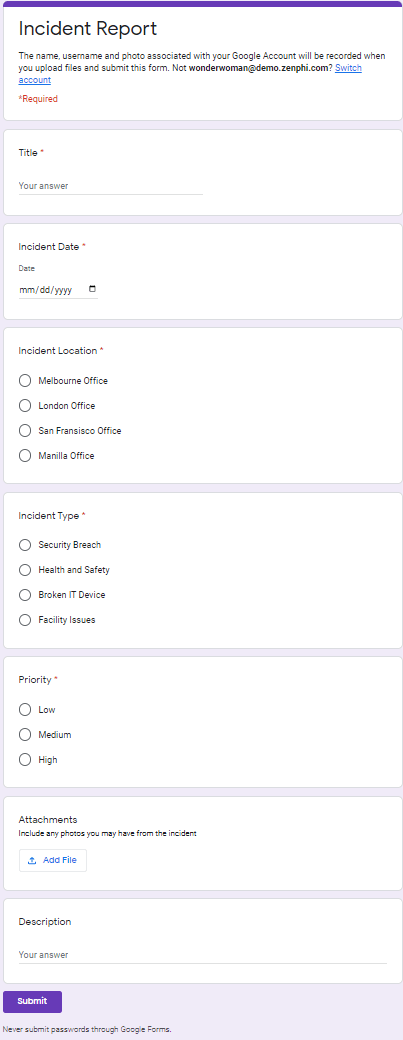
Prepare the Incident Report form using Google Forms. Include all the necessary details to make the report comprehensive as much as possible.
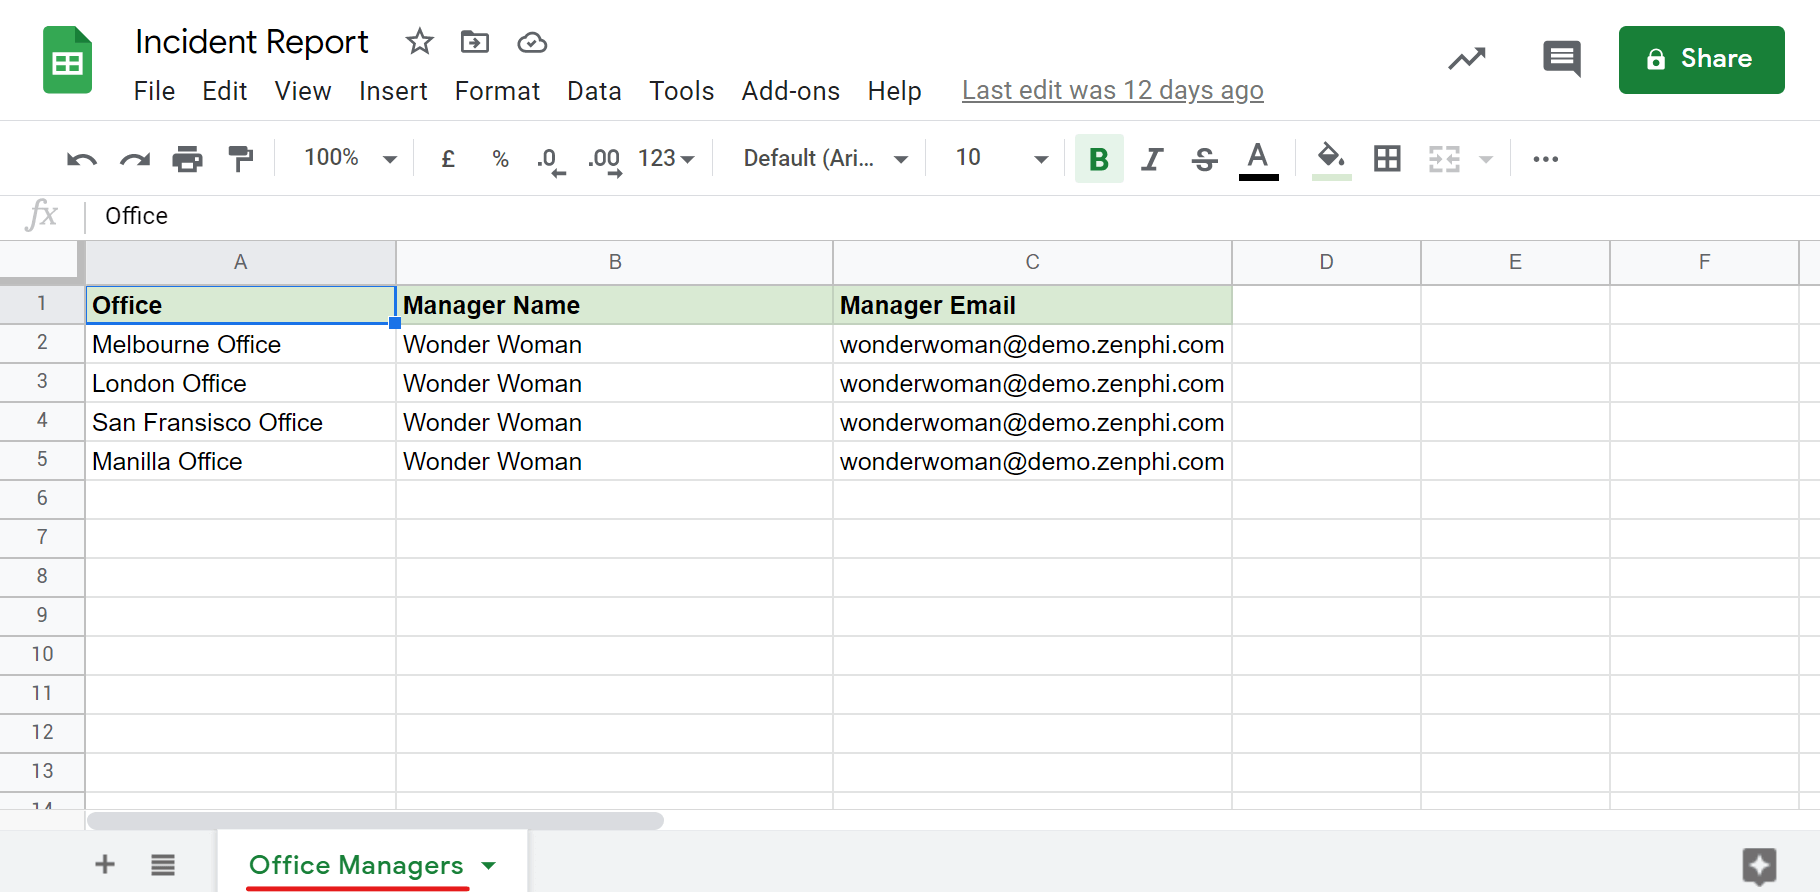
Create a list of your Location Managers’ information.
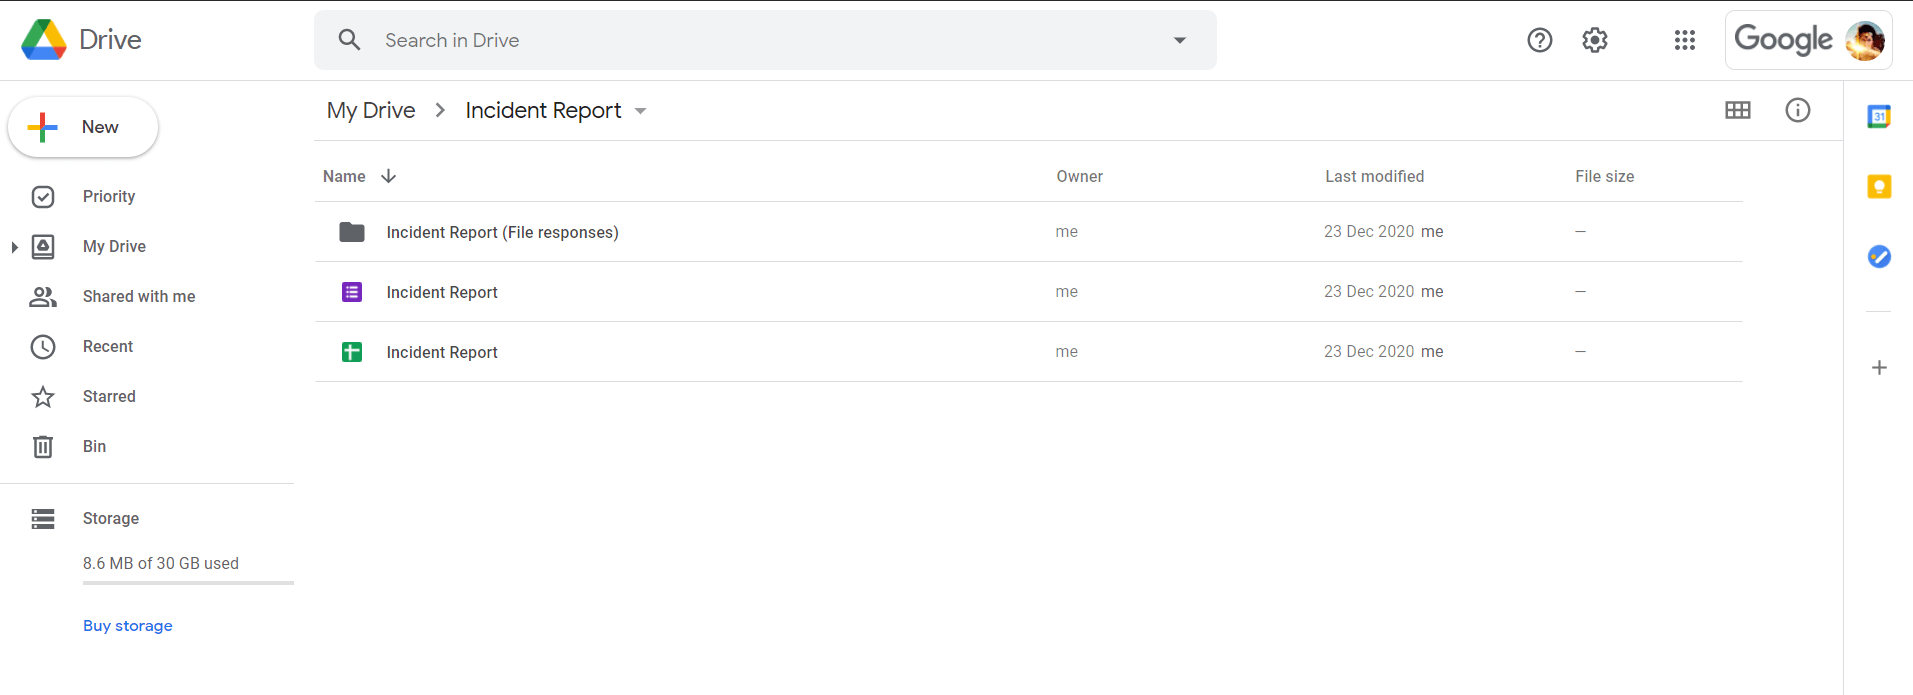
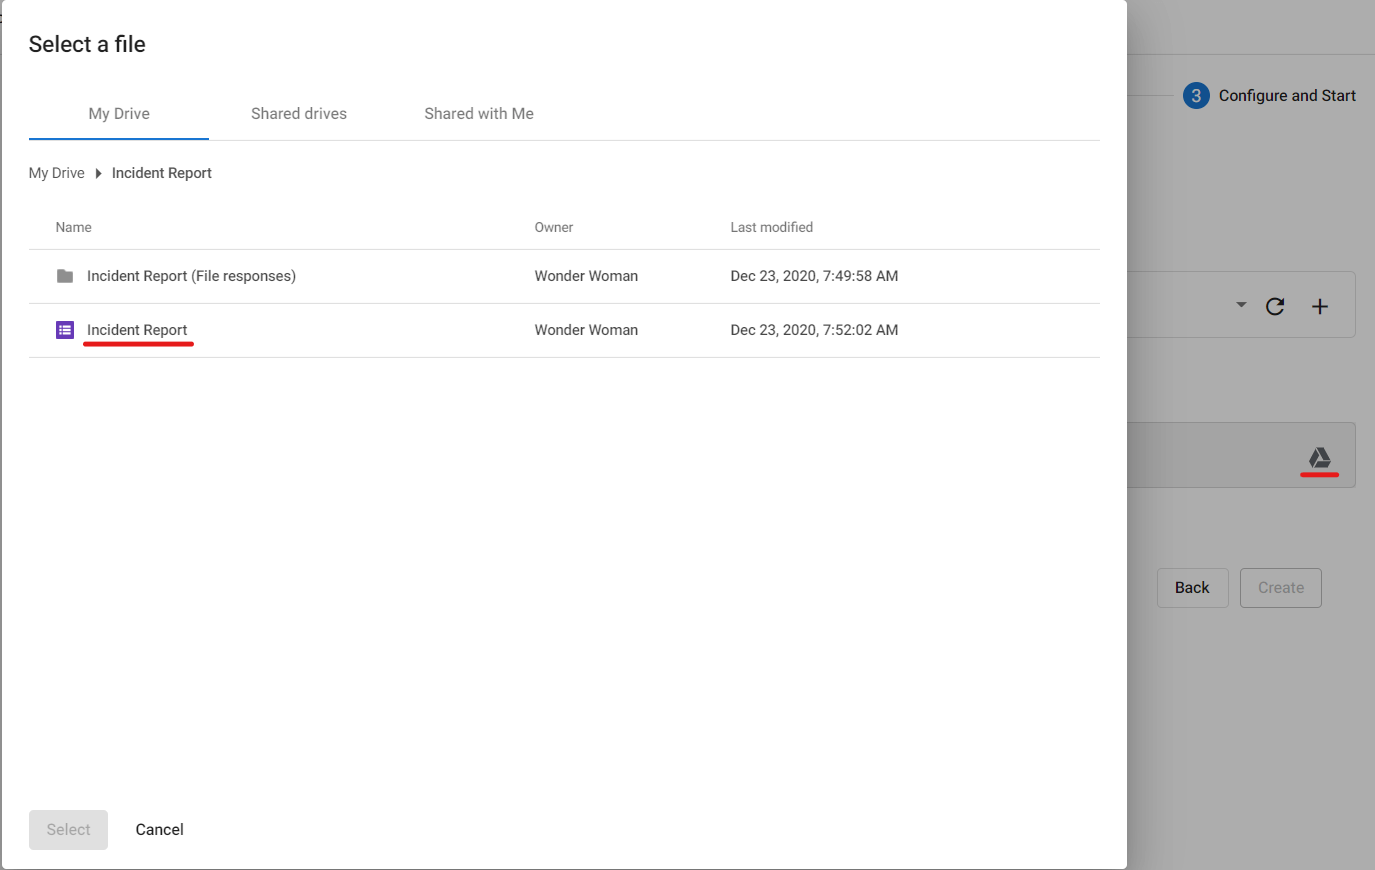
Store it in Google Drive. We will also create a new folder and name it “Incident Report (File Responses)” and within it is another sub-folder named “Attachments (File Responses)” where all attached images of the incident report will be collected.

Step 2.
Log in to your zenphi account and create a new flow. If you haven’t yet registered, you can create a free basic account using your Google credentials.
In this scenario, we are naming the test automation workflow as “Incident Report”.

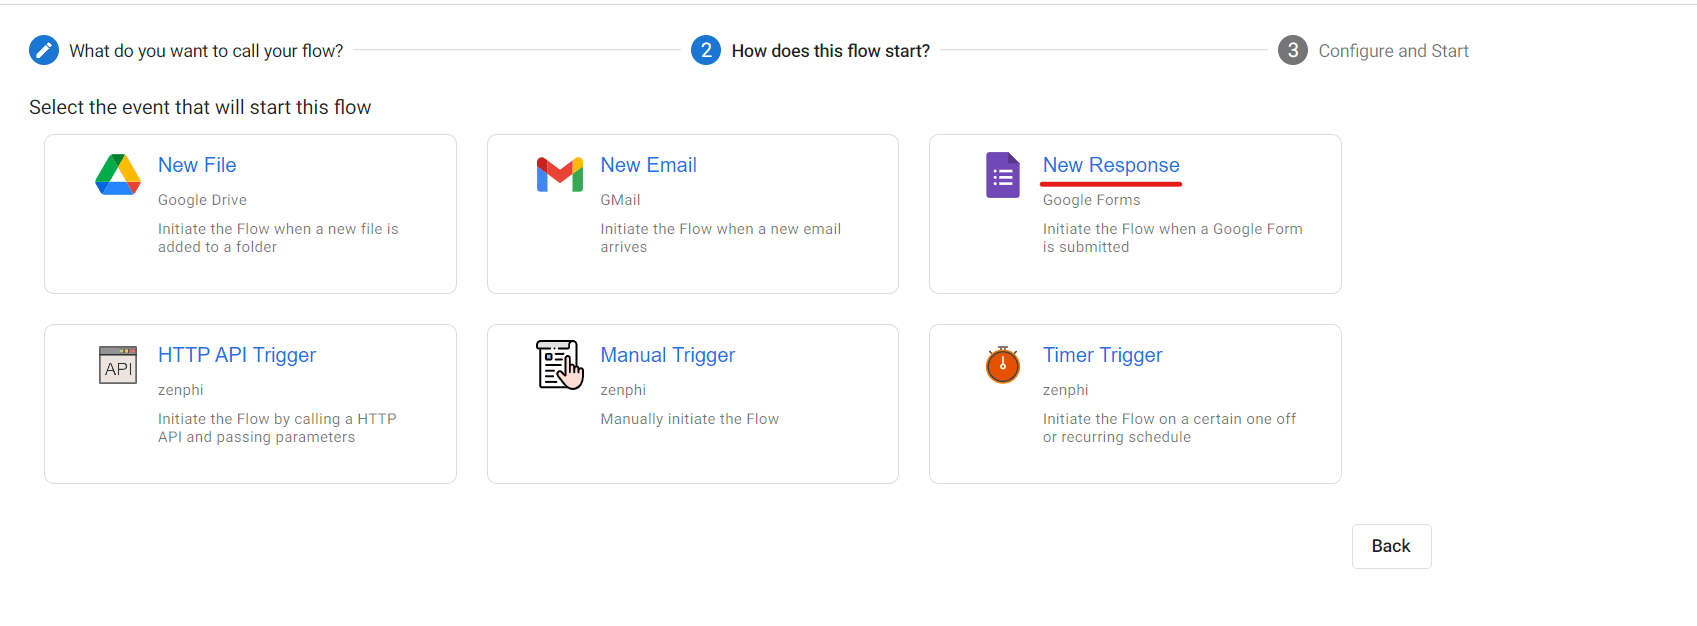
After clicking Next, you can then select the Trigger that will activate your automated facilities incident report filing. For this, we selected New Response. Every time a form comes in, this flow will automatically activate.
Configure the Trigger by setting the Connection.
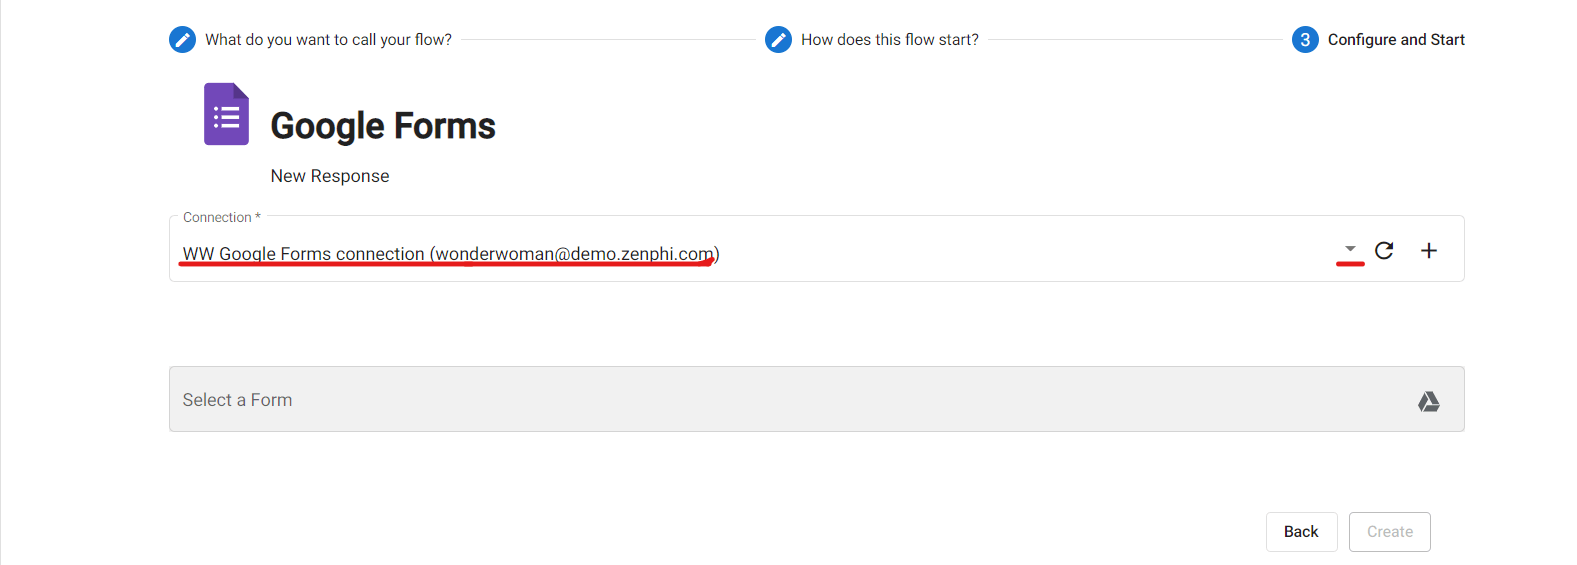
Configure the Trigger by setting the Connection.
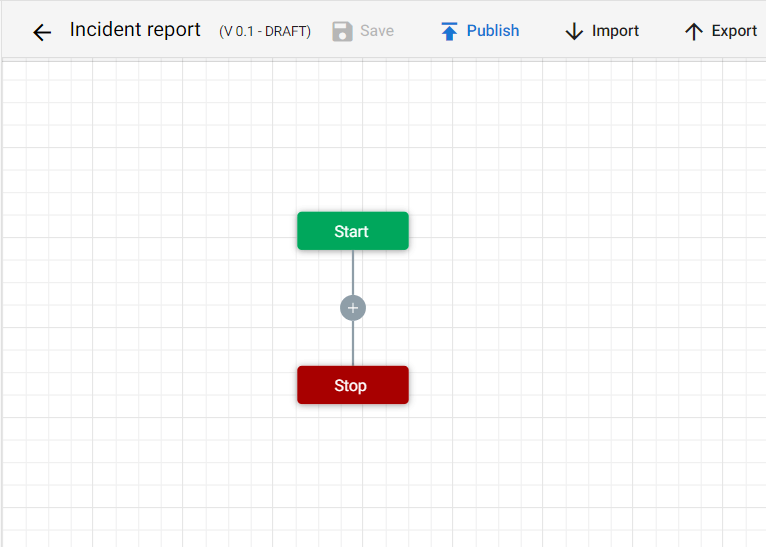
Hit Create and below is the blank flow for your Facilities Incident Report filing.
Step 3.
This action will automatically lookup and retrieve the Location Manager’s information where the Facilities Incident report was filed.
From the Designer panel, drag and drop Lookup Row action.
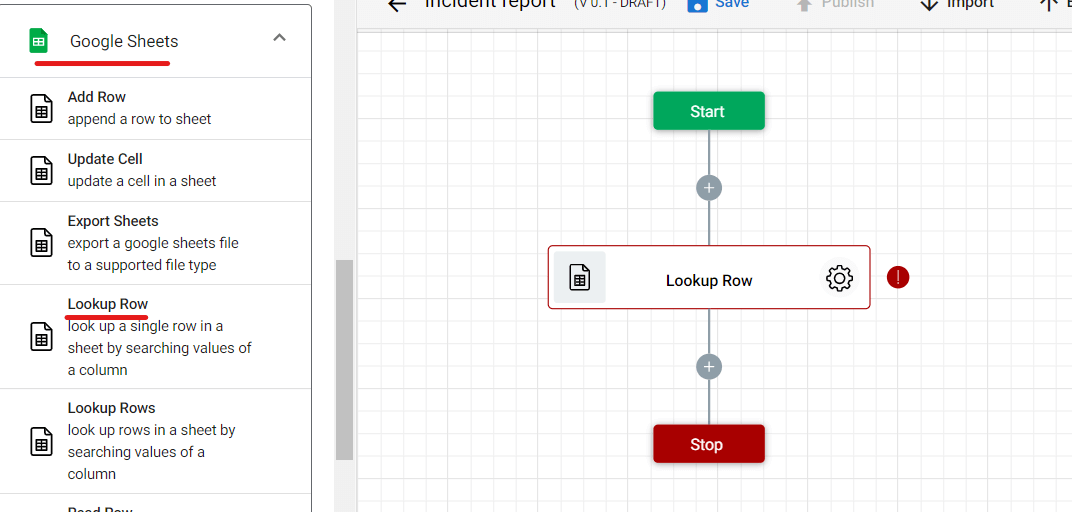
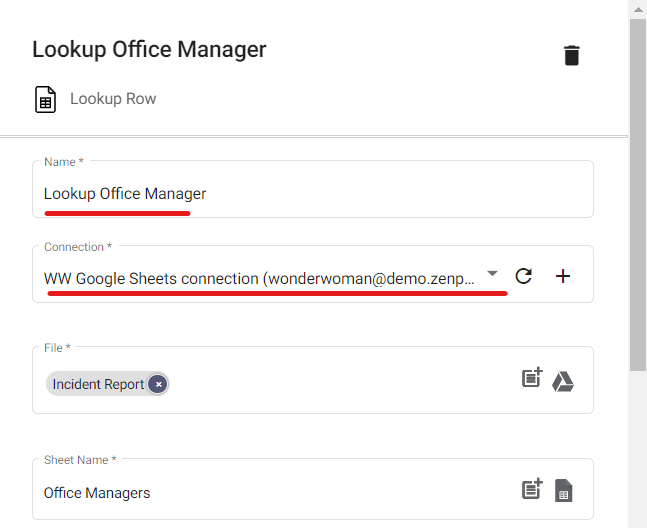
Configure this action by clicking the gear button. The action’s Name section is pre-filled but you can customize it according to your preference. In our case, we will name this action “Lookup Office Manager”.
For the Connection section, make sure it points to the right Google Drive where the list of Location Managers is currently in store. You can also click the + button if you want to add a new connection.
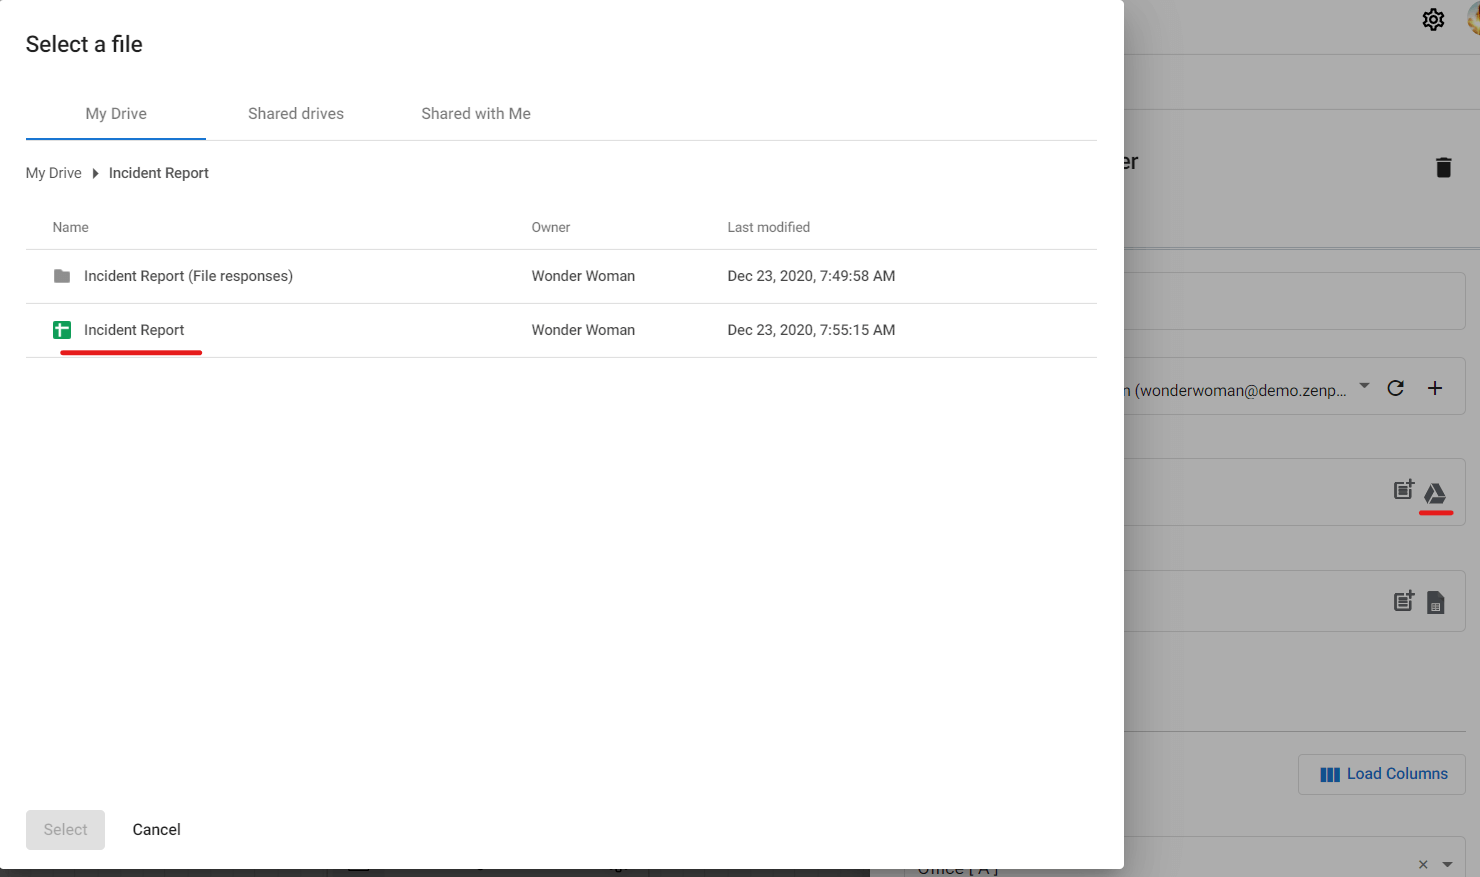
At the File section, click the Drive icon and select the Sheets file containing the list of Location Managers and their information.
Make sure you indicate the right sheet of the Google Sheets file.

Scroll down and enable Has Header. This will treat the first row of your Google Sheets file as headers.
At the Search Column section, select Office[A]. This will read all the values under the Office column of your Google Sheets file. The Office column in your Incident Report file indicates which manager is assigned to what location.
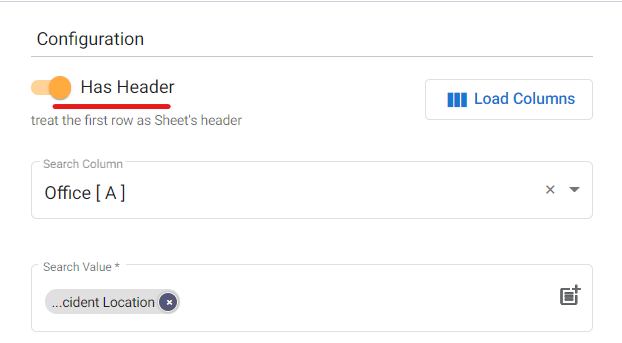
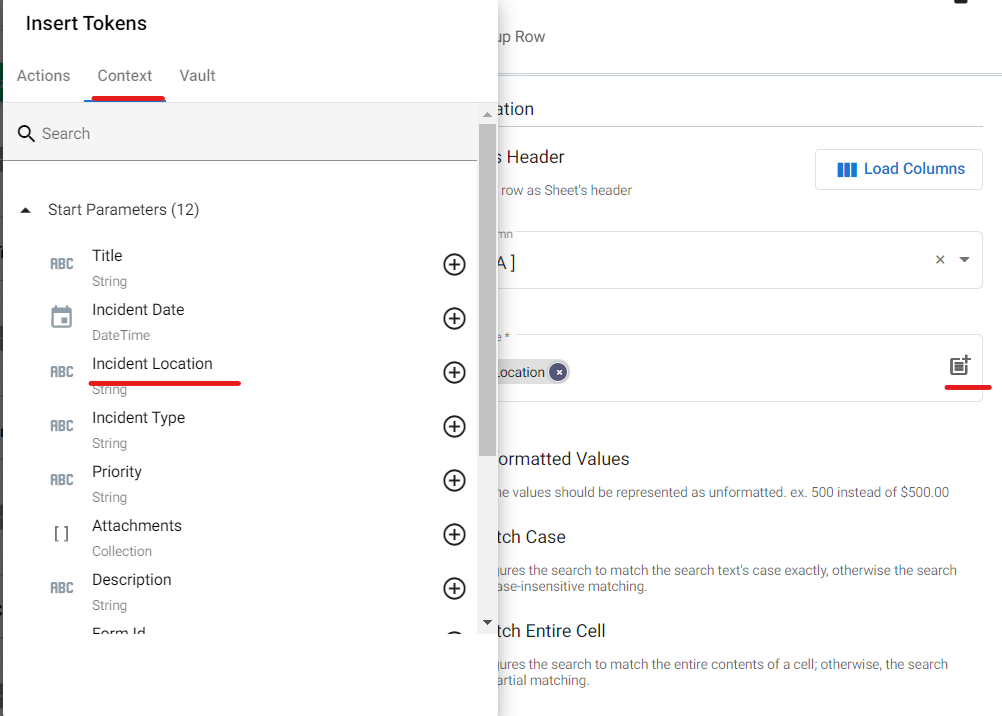
To configure the Search Value section, click the parameter icon, then go to Context. From the dropdown list, select Incident Location. This will automatically retrieve the right location and all other corresponding information such as the Manager, his/her email, and the Office(location).
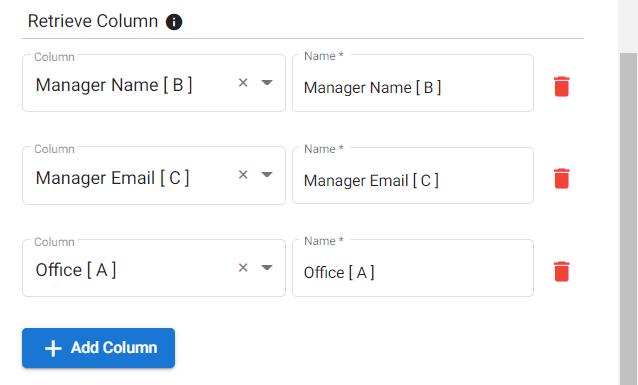
To make sure that values such as Manager Name, Manager Email, and Office are retrieved properly, you should indicate them under the Retrieve Column section.
Step 4.
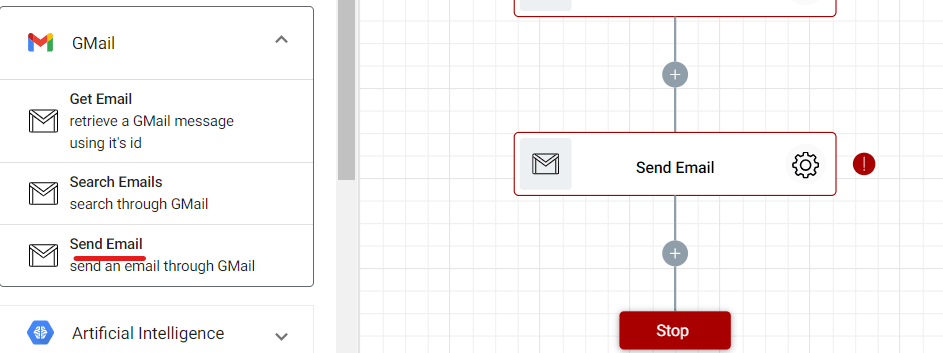
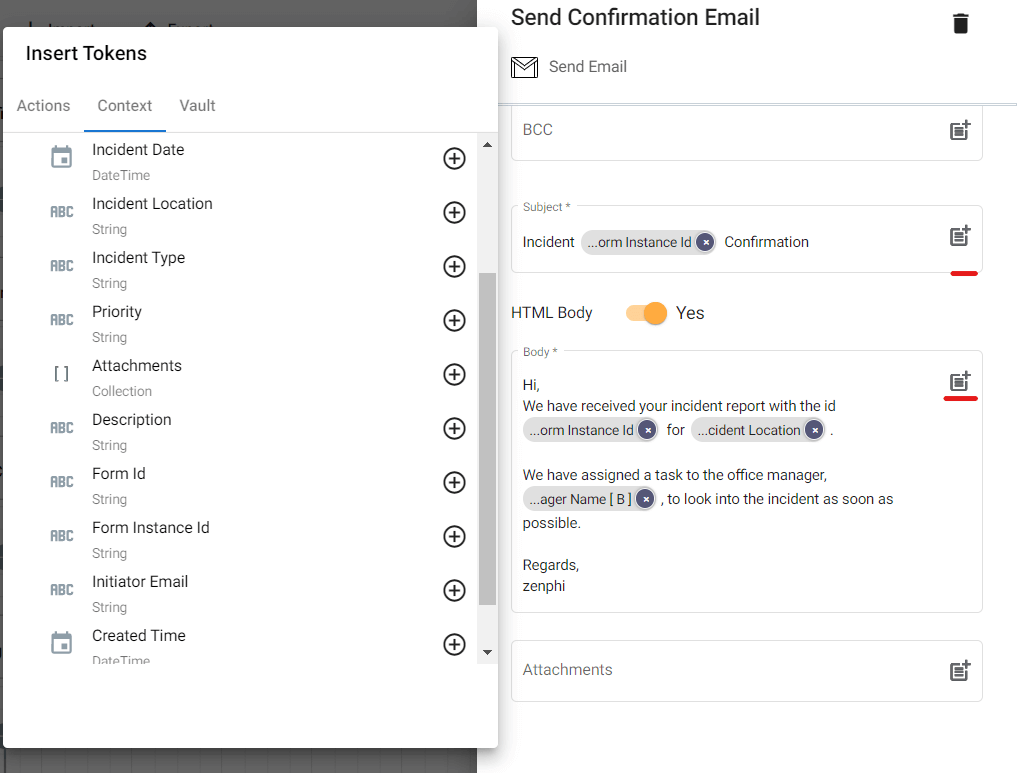
Drag and drop the Send Email action into the flow. This step will send a notification email to the person filing the incident report of the receipt of the Form.
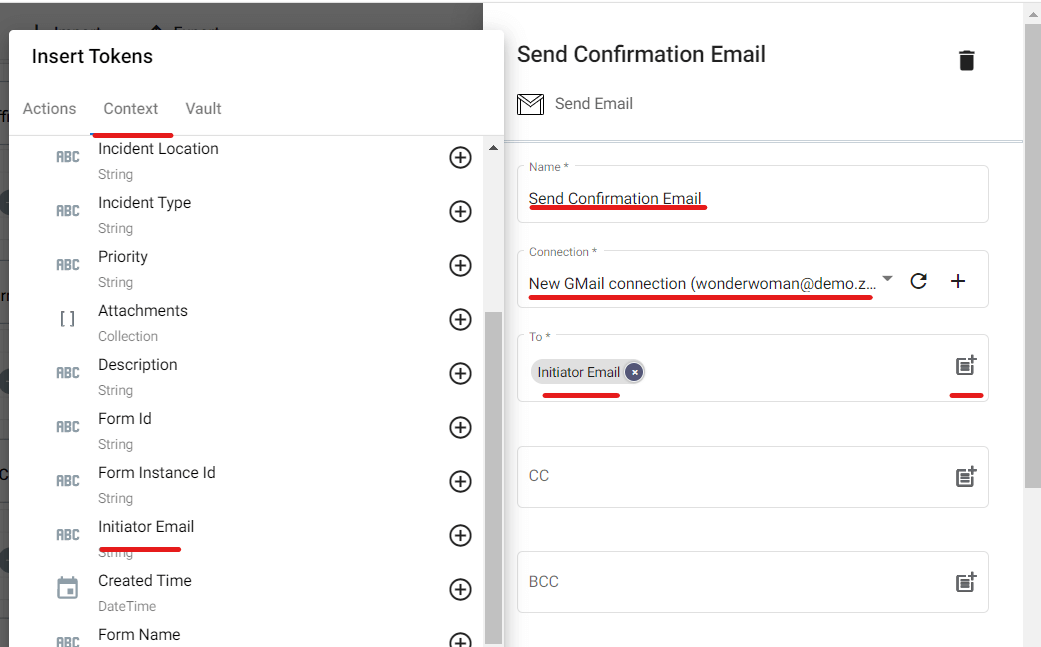
To configure this step, click the gear icon. You can choose to customize the name of the action under the Name section. In our case, we will name it “Send Confirmation Email” to make it easier to identify.
For the Connection section, select the Gmail inbox that will send out the email notification.
At the To section, click the parameter icon and then Context. From the dropdown menu, select the initiator email.
The same goes for the Subject and Body sections. Just click the parameter icon of each section and select the tokens you want to retrieve and include in the email notification.
Step 5.
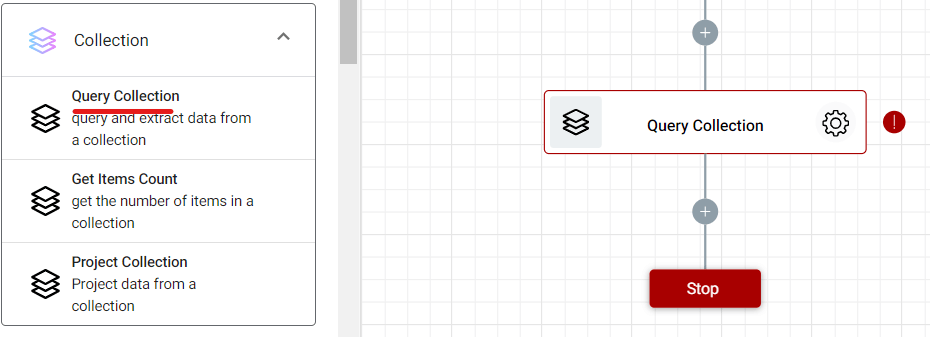
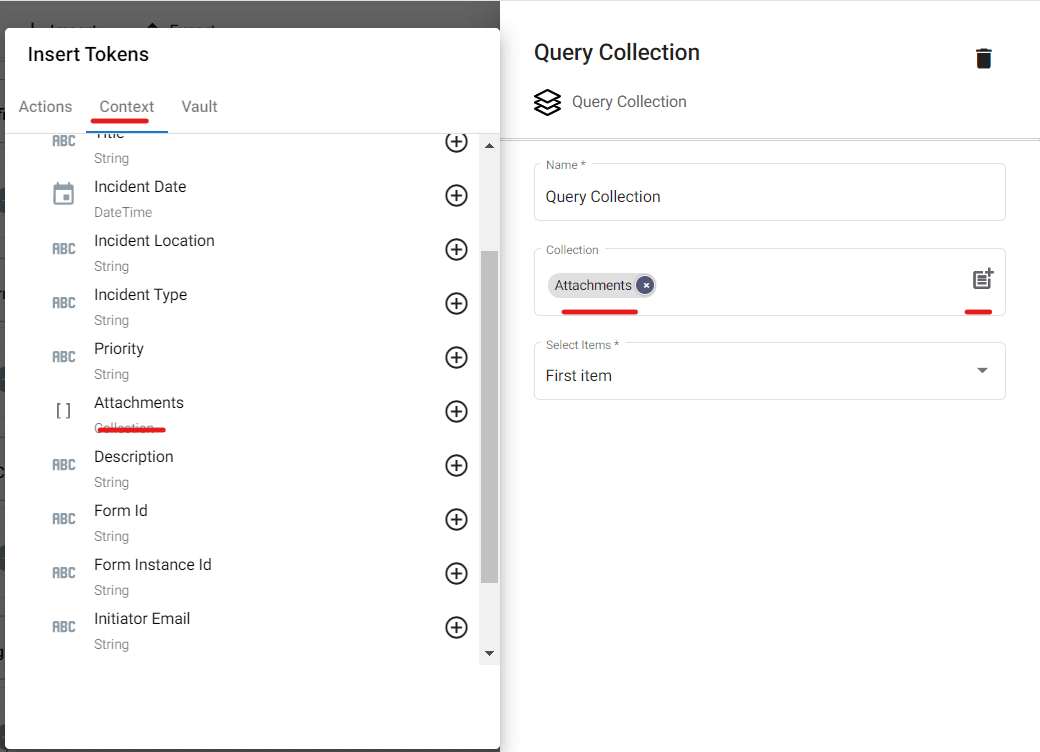
Drag and drop the Query Collection action into the flow. This action will automatically collect all the attachments coming from the Incident Report Form, and store them into the “Attachments” sub-folder created earlier.
Let’s configure this step by clicking the gear icon.
Step 6.
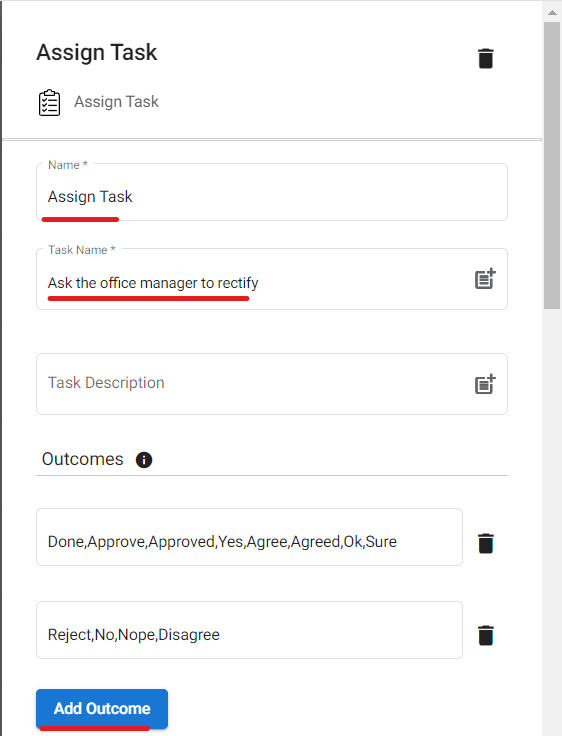
Drag and drop Assign Task action into the flow. This step will automatically assign the submitted incident report to the right Location Manager to review, and then, approve or reject.

Click the gear icon to configure this action.
You can customize the Name and Task Name sections according to your naming convention.
Add two types of Outcome for Approval and Rejection.
Scroll down and configure the task email to be sent to the Location Manager.
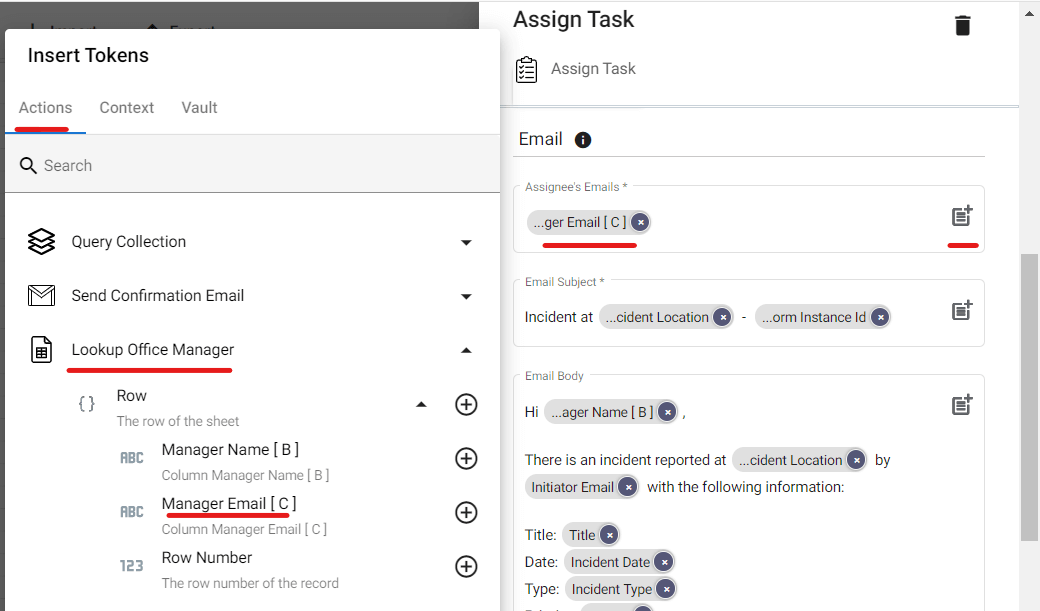
For the Assignee’s Email section, start by clicking the parameter icon. Under Actions, click Lookup Office Manager, and from the dropdown menu, select Manager Email[C].
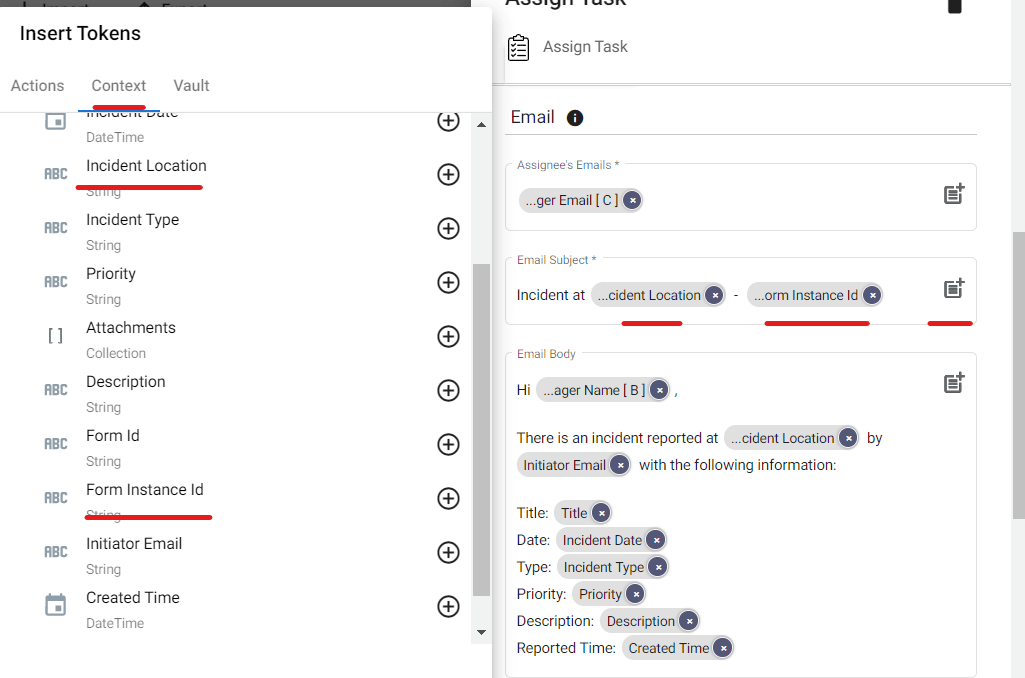
For the Email Subject section.
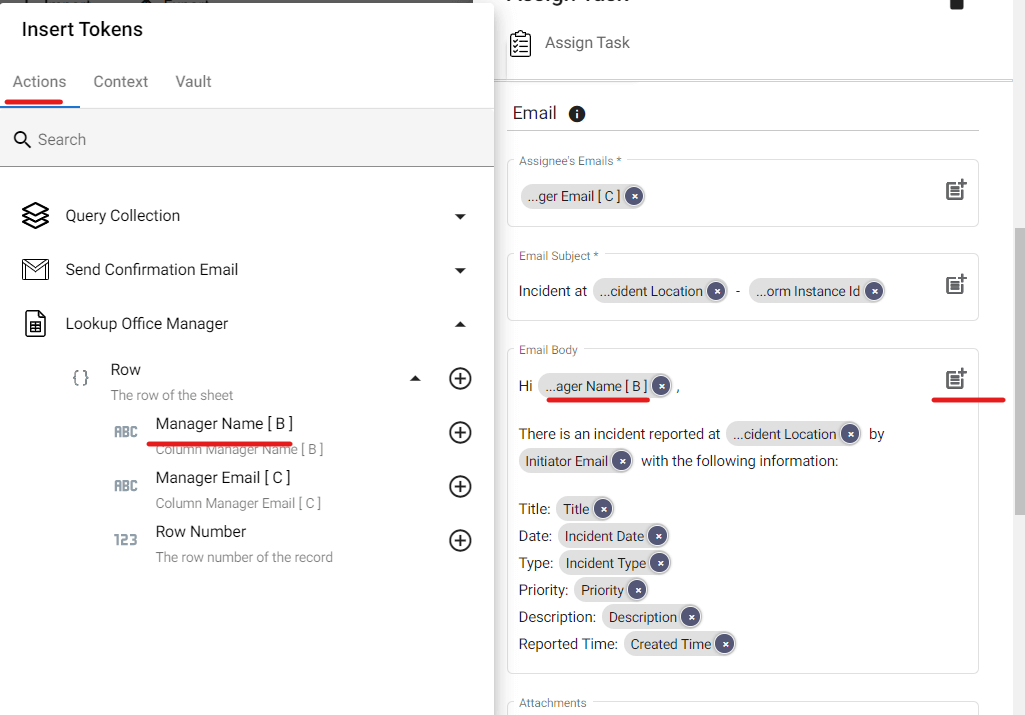
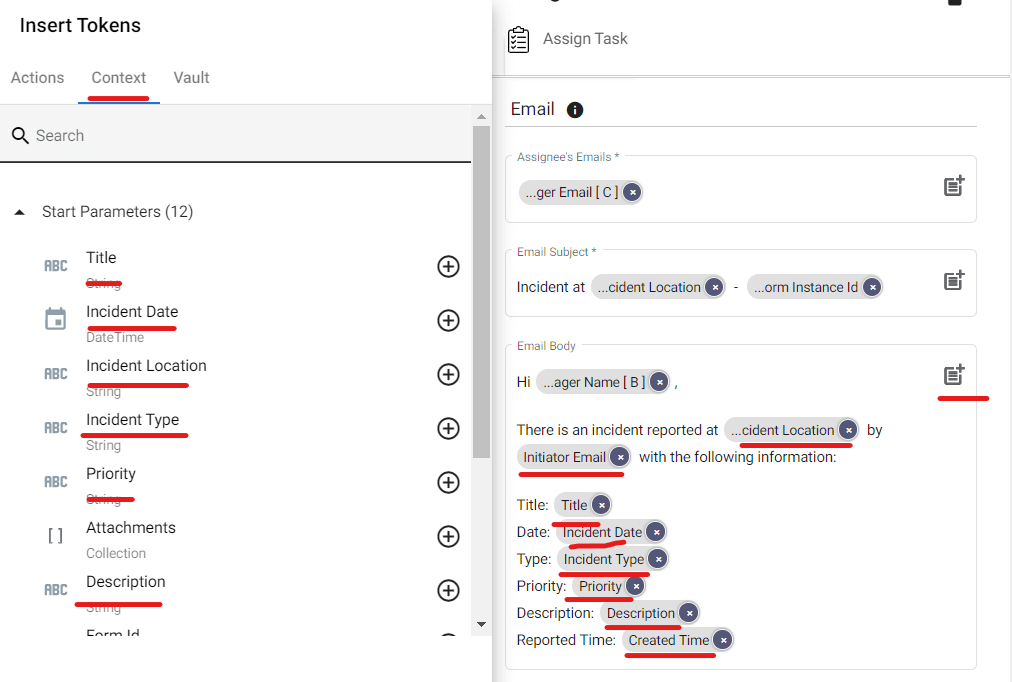
For the Email Body.
To automatically retrieve the Form attachment.


