When automating our workflows on Google Workspace, we heavily rely on Google Sheets to store data and also to lookup reference data. Say you want to look up customer information by customer id. We usually store customer information in a sheet and will need to scan through the Id column to find a match. The question is how would you achieve that as part of your workflow automation?
Well, you can easily do that with zenphi. Our Google Workspace(formerly known as G Suite) workflow automation platform has an Action called Google Sheets Lookup Rows. Like everything else in zenphi, we have done the hard work for you so that you can lookup one or more rows from a sheet by just configuring this Action.
In this blog post, we are going to demonstrate the function of zenphi’s Google Sheets Lookup Row(s) action, by creating a workflow that involves Google Sheets data search and retrieval and automated the workflow.
Read on to know all the steps and tools involved in this automated workflow. . .
How you can automatically search and retrieve Google Sheets data using zenphi
Here is the recorded video of the entire process that you can also use as a reference.
Here is the scenario:
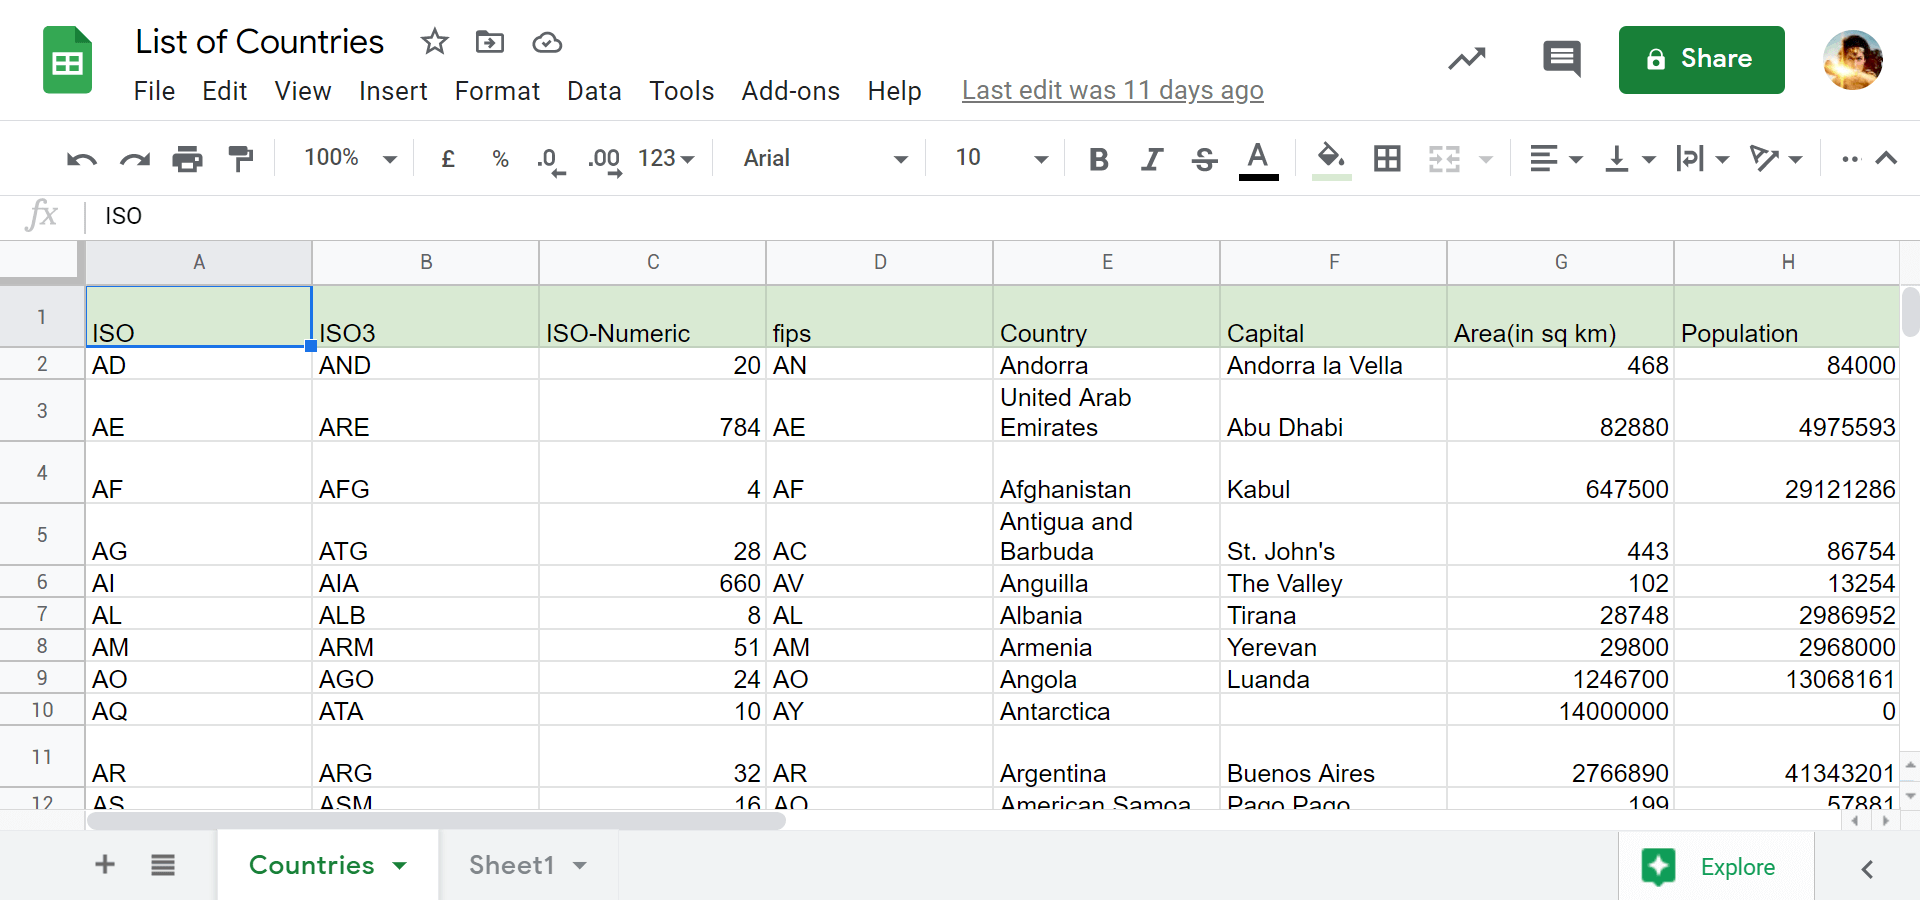
Let’s say that you have a Google Sheet containing a list of all countries and several of their information such as ISO, Language, Population, Area, and so on. As part of your workflow, From this list, you have to find all the countries that speak English and retrieve them.
Learning how to use the Google Sheets Lookup Rows action of zenphi will allow you to incorporate it into other workflows along with other zenphi features when the situation calls for it.
List of tools involved in the automated lookup process of Google Sheets Data:
Google Sheets to record and manage all data
Google Drive to store the Google Sheets containing the list of countries and their information
Here’s how the process looks like:
Make sure that your spreadsheet of all countries and their information is in Google Sheets format.
Store the Google Sheet into a folder in your Google Drive so it’s easier to trace later.
Once the automated system is triggered(on-demand in our case), it will instantly lookup the Google Sheet containing the list of countries, find the columns specified in the configuration, and then log them.
The step-by-step process of lookup and retrieval of Google Sheets Data:
Step #1:
Prepare your spreadsheets containing the list of countries and their information by making sure that the format is in Google Sheets. This is important for zenphi to recognize the file as compatible with the integration into the automation.
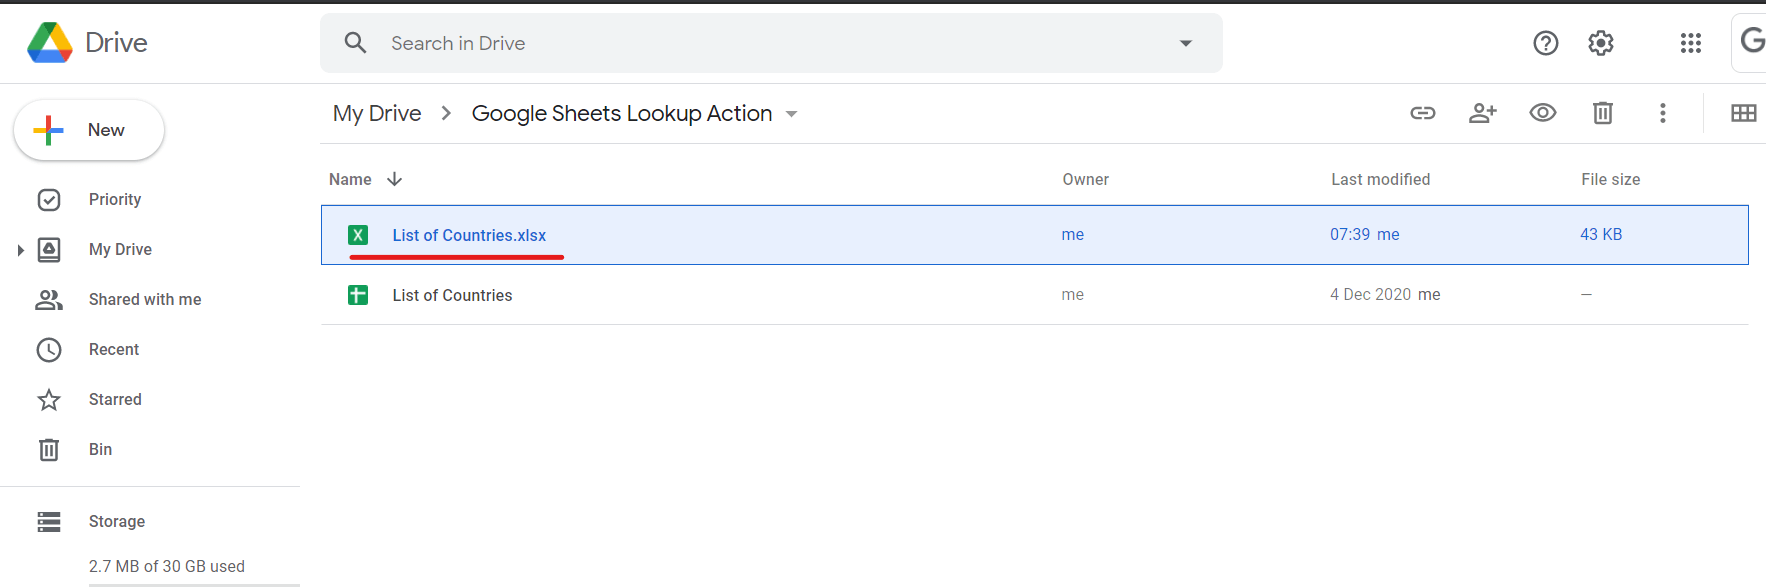
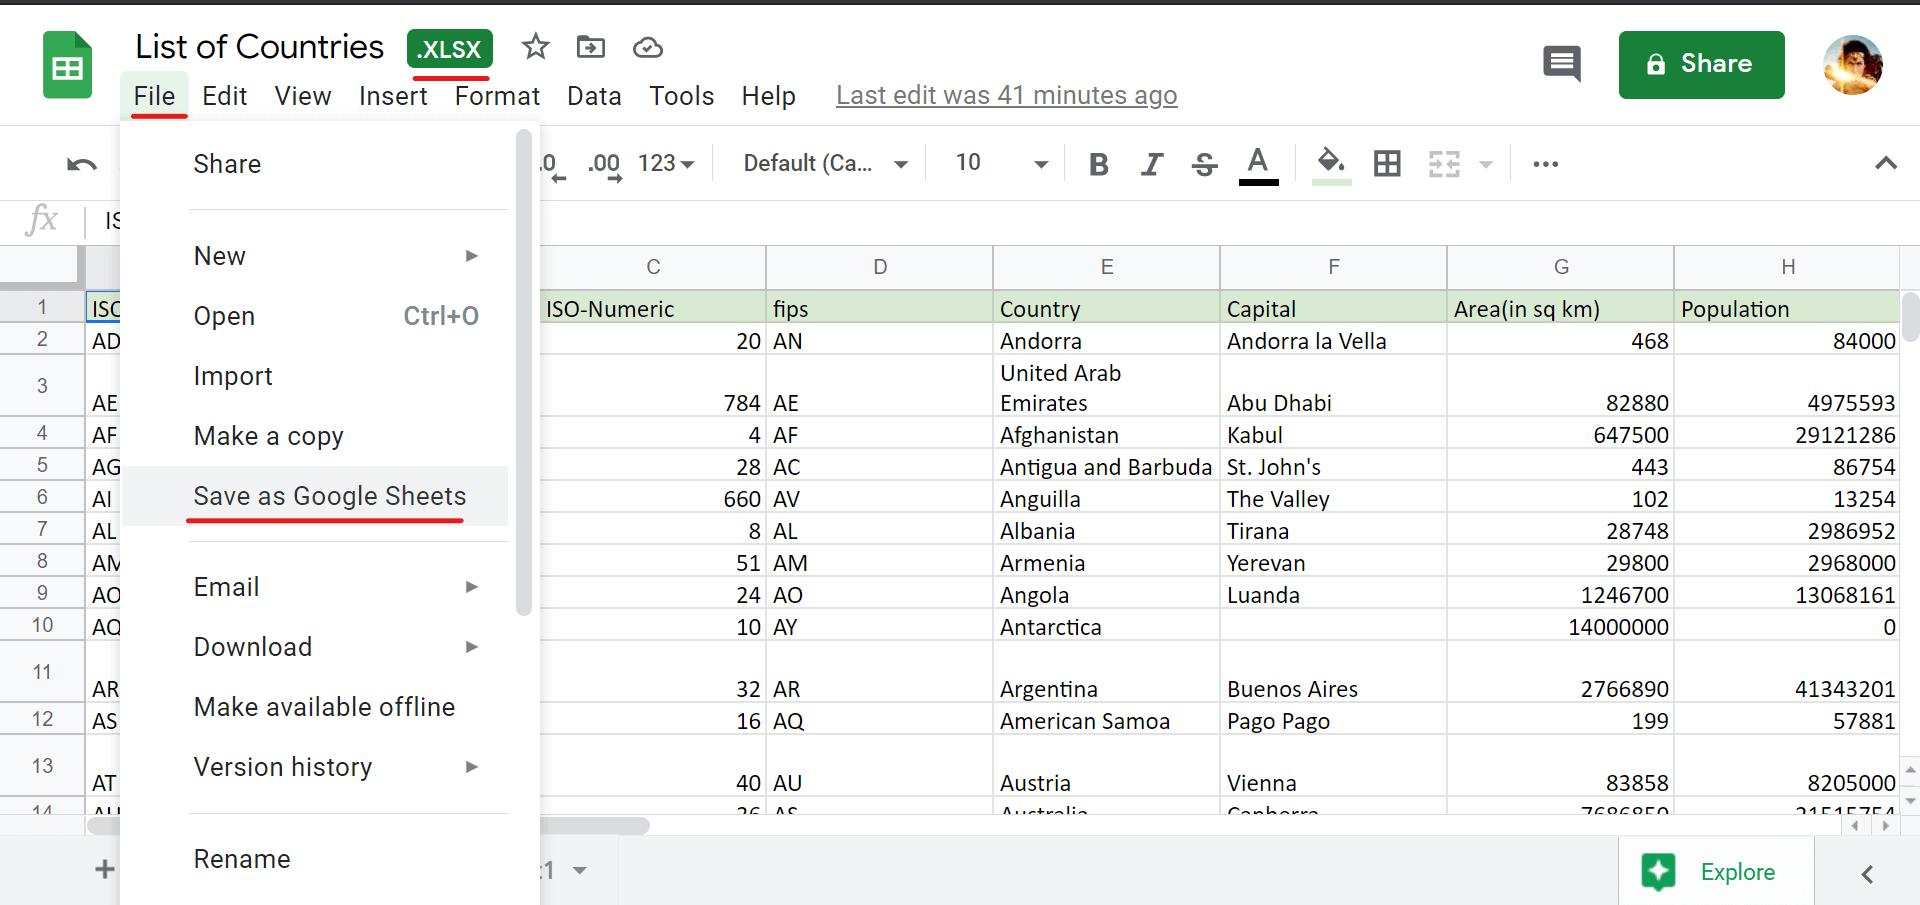
It’s because Google Drive allows you to upload and edit files on their platform without having to change the file format like the photo below. And zenphi only recognizes files formatted on Docs, Sheets, and Slides.
To turn this format into a Google Sheet, open the file and click File. Then select Save as Google Sheets. The .xlsx is a good indicator that the file’s format is not in Google Sheets.
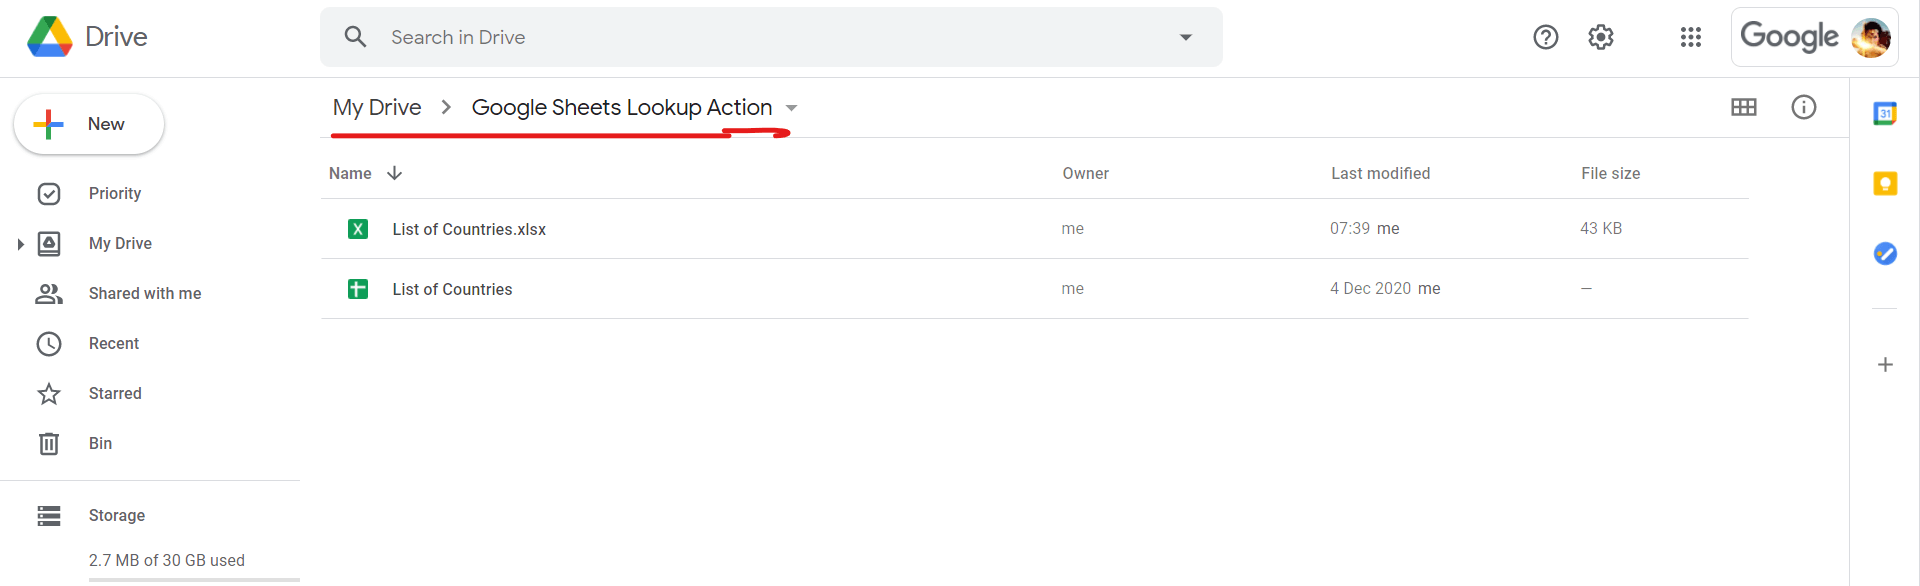
Store it in your Google Drive by assigning a folder so you can track it later easily.
Step #2:
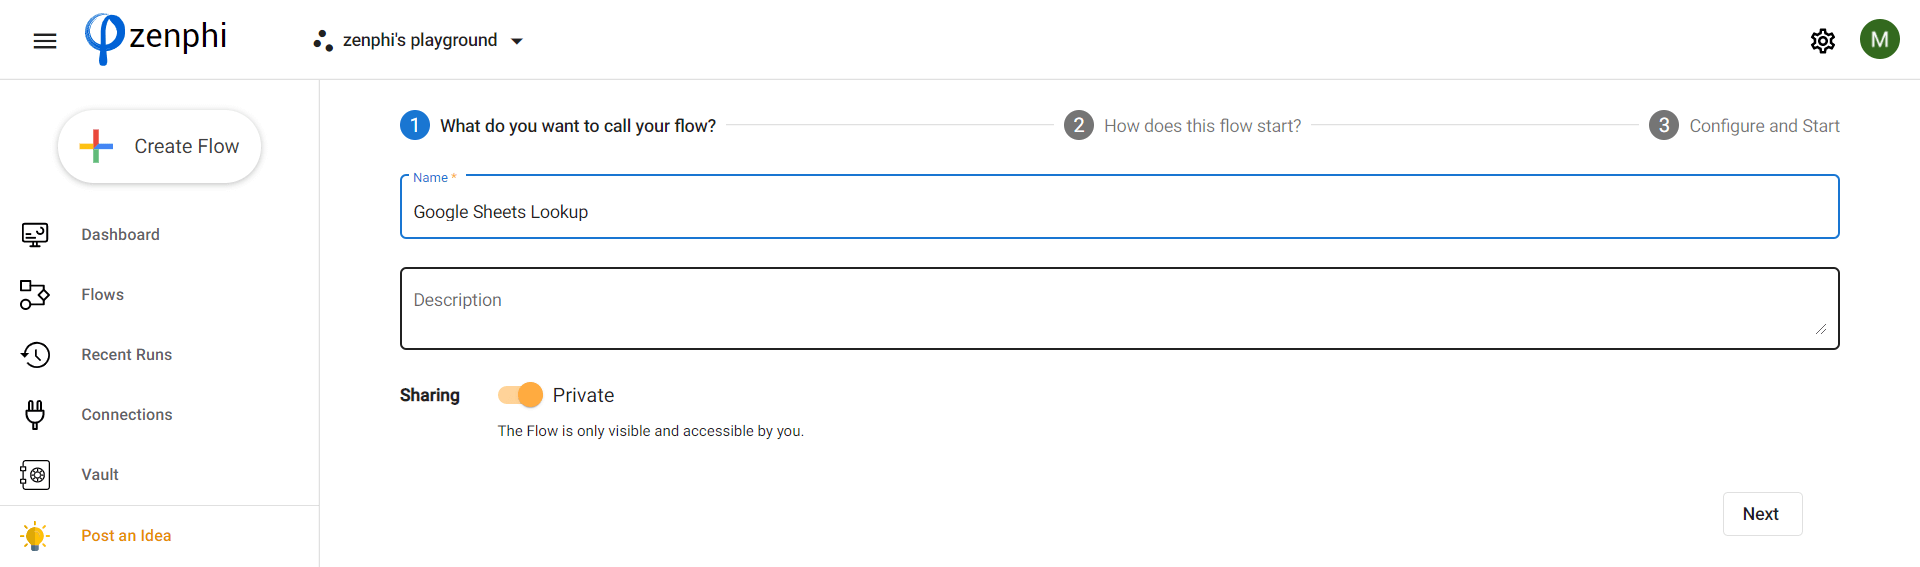
Log in to your zenphi account and create a new flow. If you haven’t yet registered, you can create a free basic account using your Google credentials.
In this scenario, we are naming the test automation workflow as “Google Sheets Lookup”.
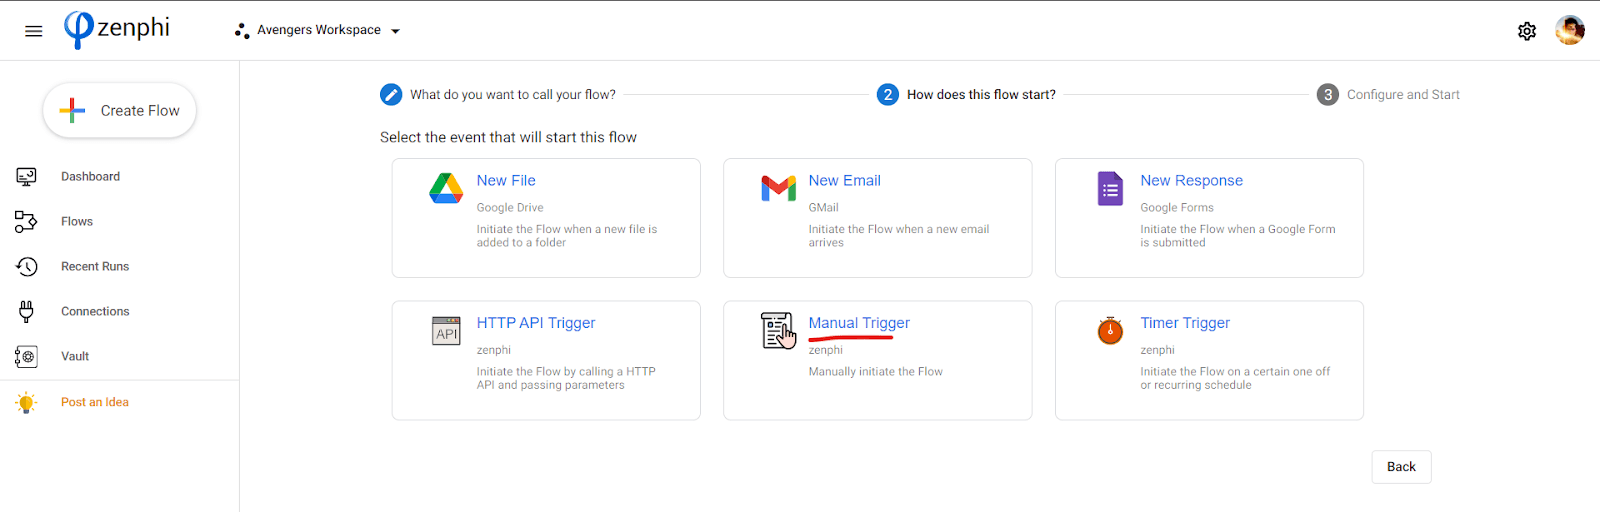
Clicking the Next button, we will arrive at the next section where we will choose the trigger action. The trigger action is what will activate this automated workflow. Let’s choose a Manual Trigger.
Note that you can choose any trigger according to the needs of your workflow.
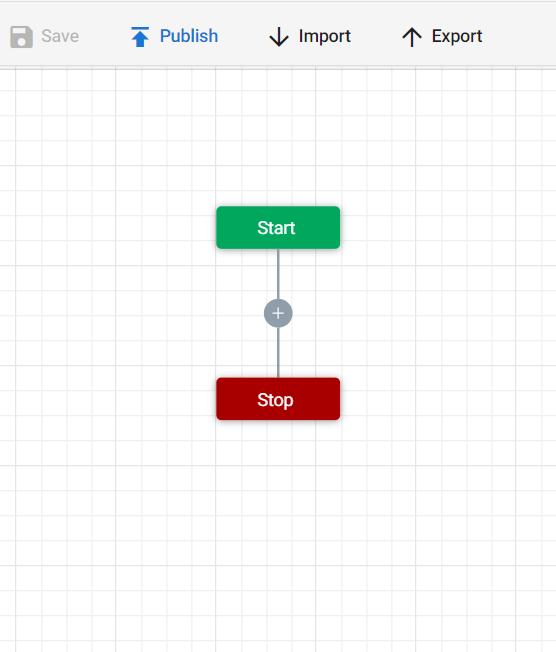
This is what our blank workflow looks like:
Step #3:
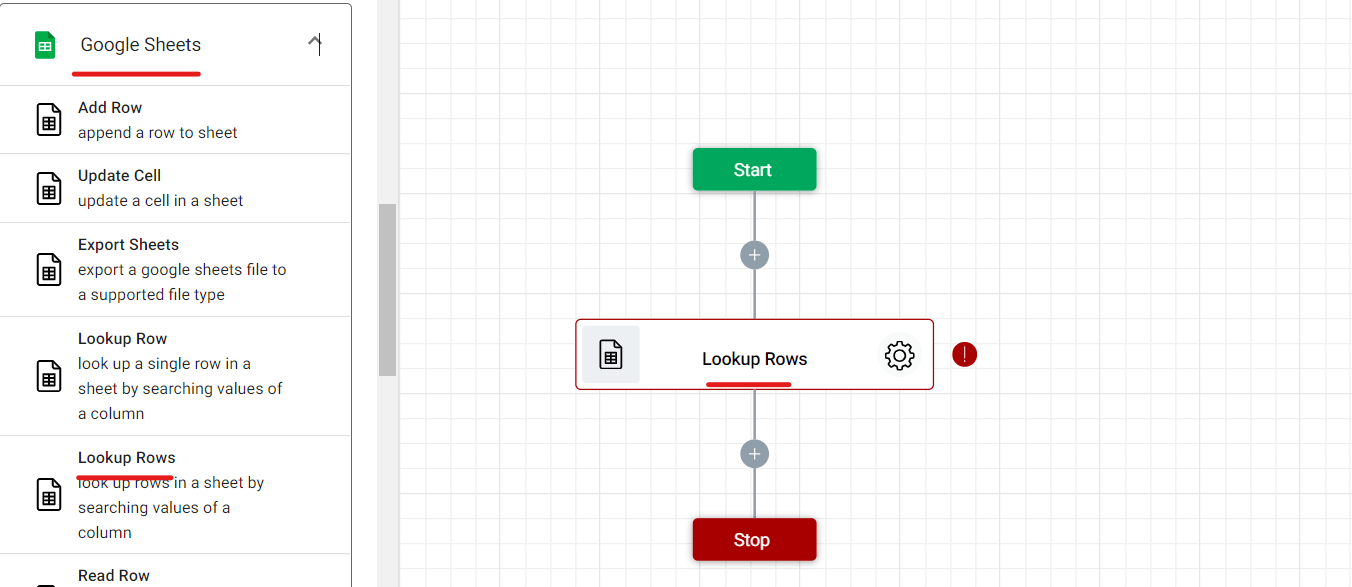
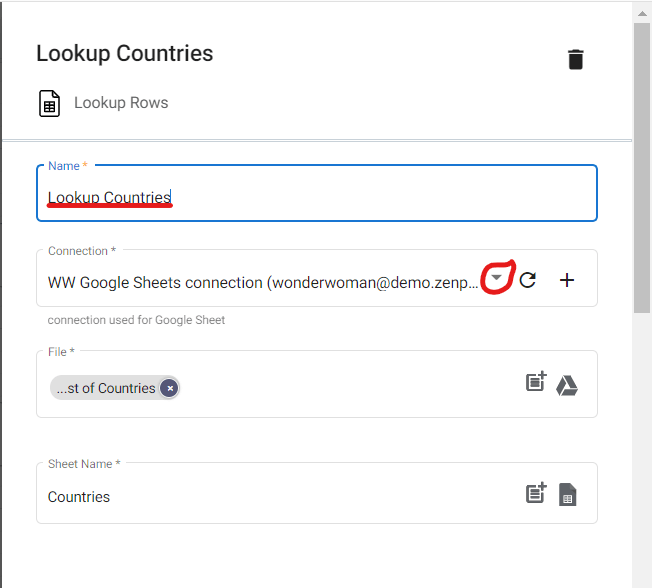
In the Designer panel, click Google Sheets, and from the dropdown list, drag and drop Lookup Rows.
To configure this step, click the gear button and name the action. At the Connection section, select the right Google Drive where the list of countries is.
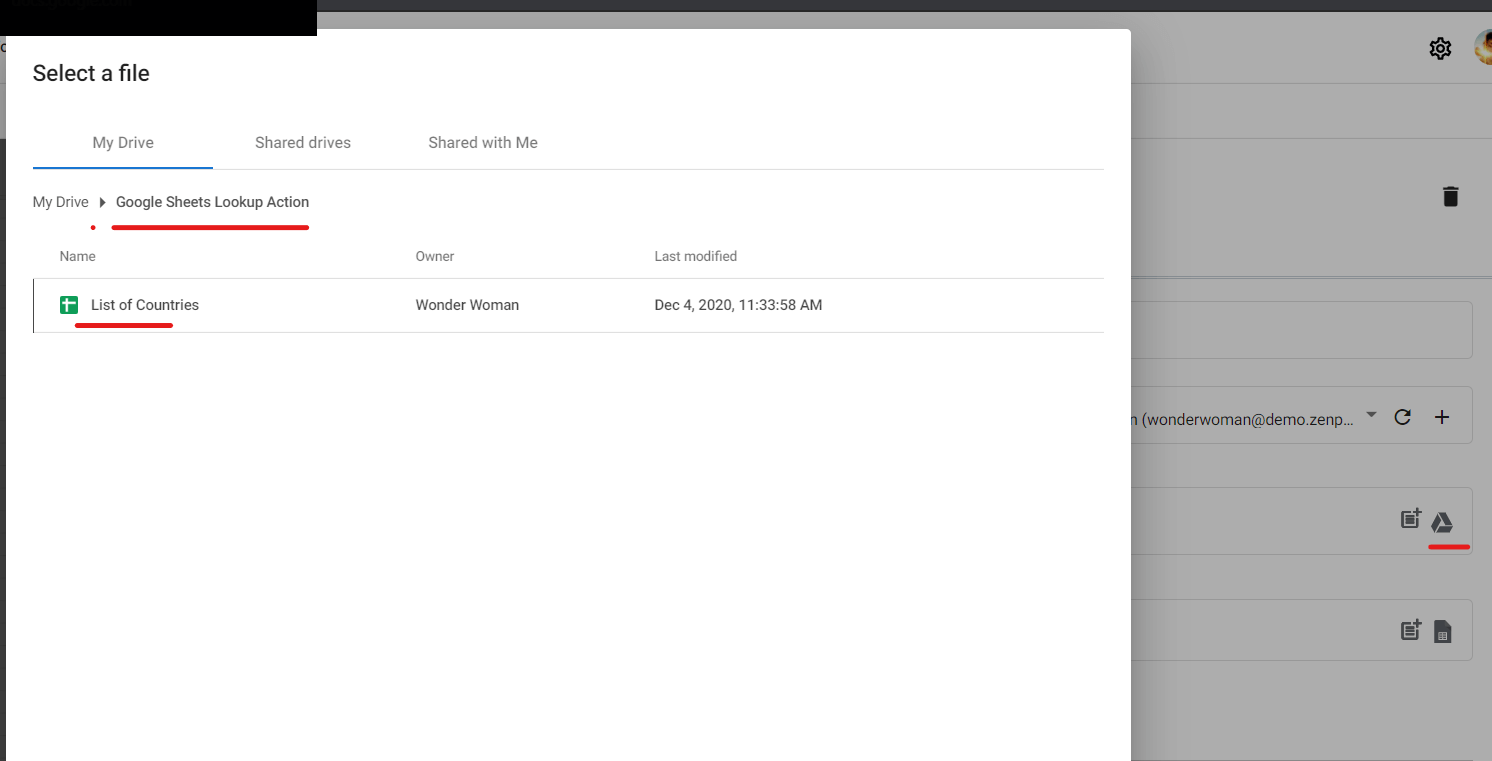
For the File section, click the Drive icon and select the Google Sheet containing the list of countries.
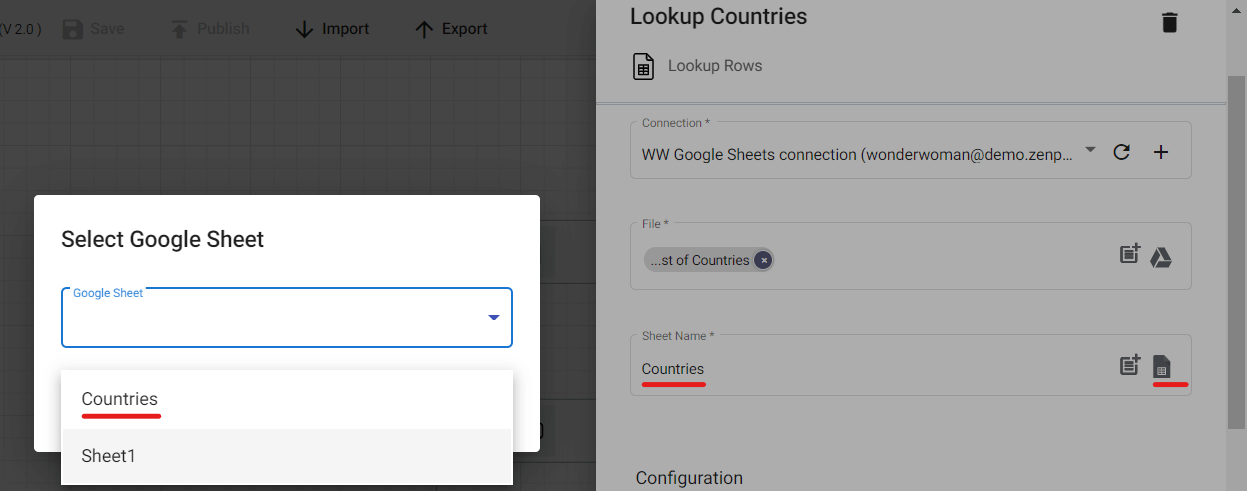
Also, make sure that the Sheet Name section corresponds to the sheet where the List of countries and their information is.
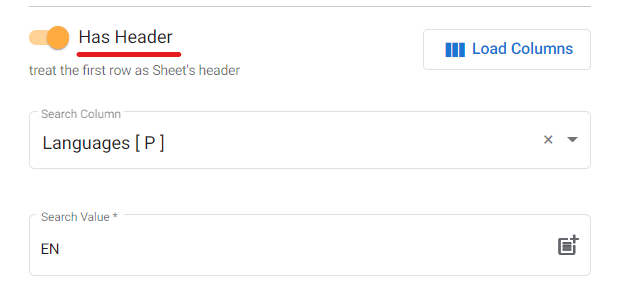
Scroll down and enable Has Header. This will treat the first row of our Google Sheets file as headers.
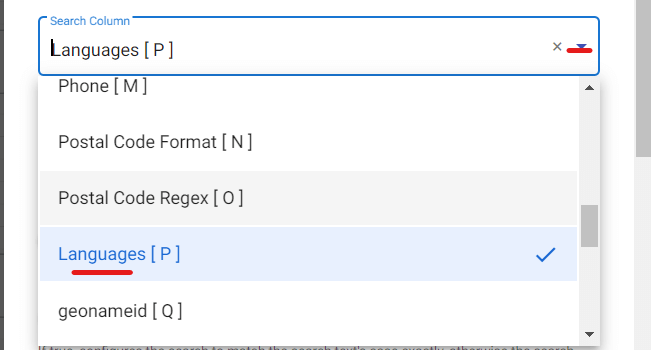
For the Search Column section, click the dropdown button and select the column whose value you want to lookup. In our case, we want the Languages[P] column.
For the Search Value, we set it to EN(English) by directly typing it. What will happen is, for every row that has en(English) in their Languages[P] column, the system will automatically retrieve their ISO code and Country name.
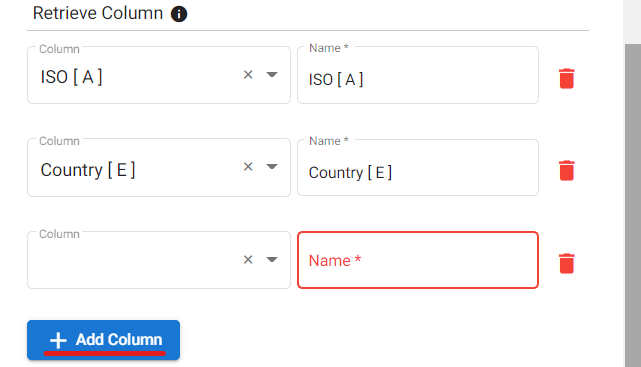
Go down further until you see the Retrieve Column portion. What will happen is, for every row that has en(English) in their Languages[P] column, the system will automatically retrieve their ISO code and Country name.
Step #4:
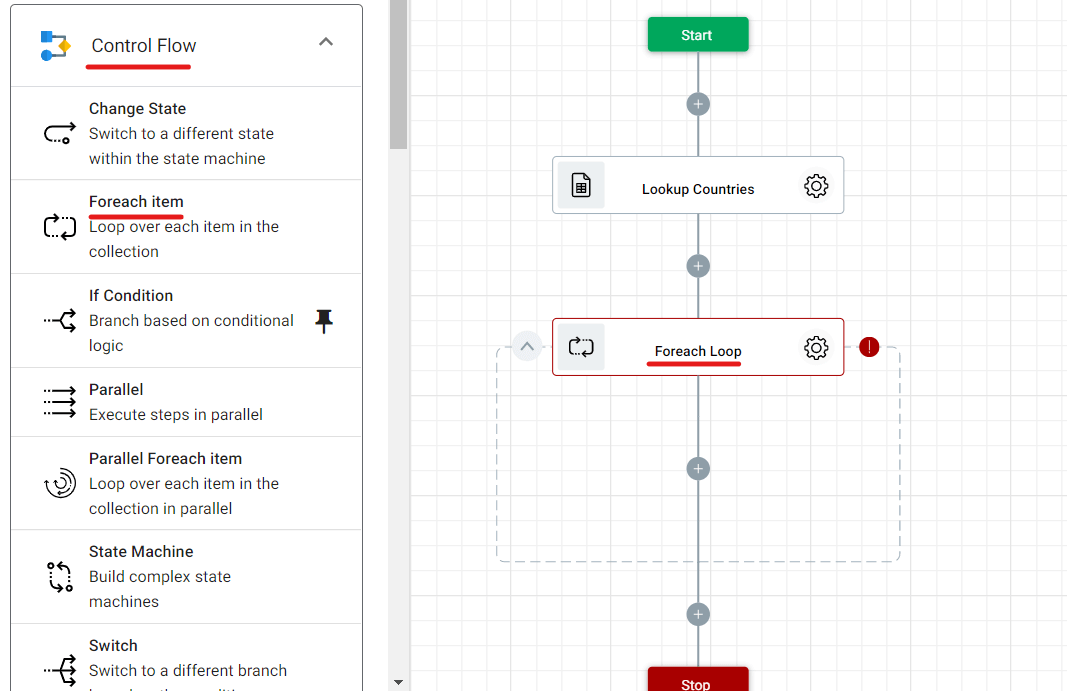
From the Designer panel, click Control Flow, and then drag and drop Foreach Loop into the workflow.
The Foreach Loop function will lookup all rows of the Google Sheets file and retrieve those that have an EN value in the Langues[P] column. This will repeat again and again until it reaches the last row containing a country name.
Let’s configure this step by clicking the gear button first.
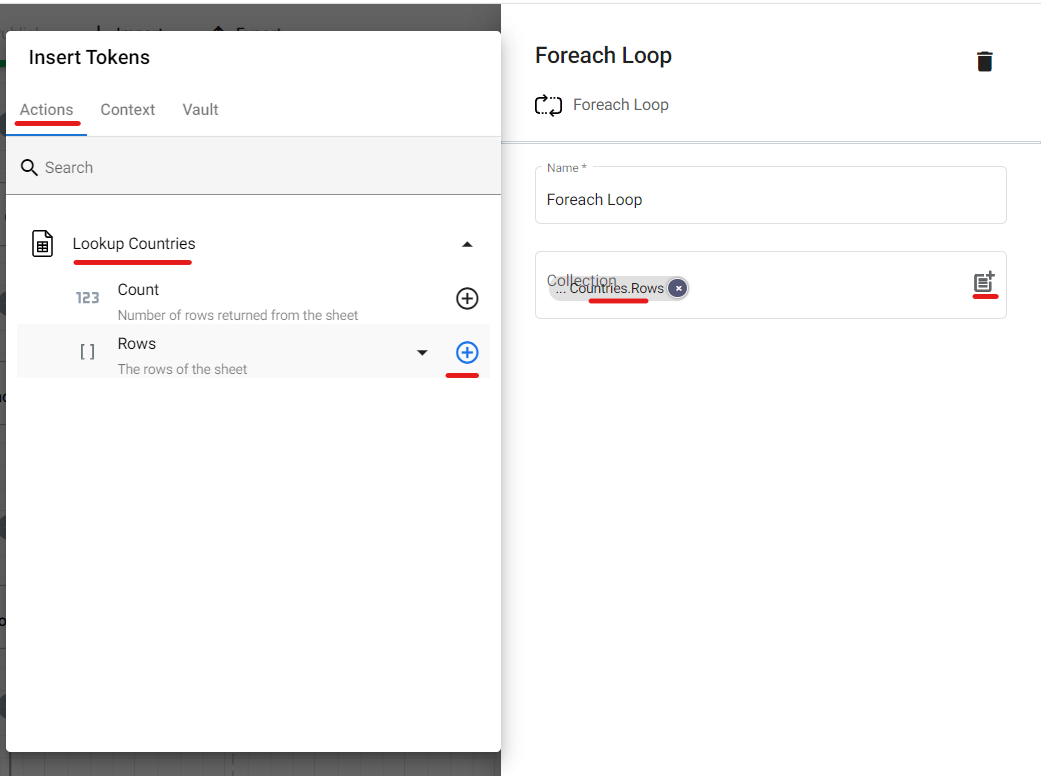
At the Collection section, click the parameter icon then Lookup Countries. From the dropdown list, select Rows by clicking the plus button.
Step #5:
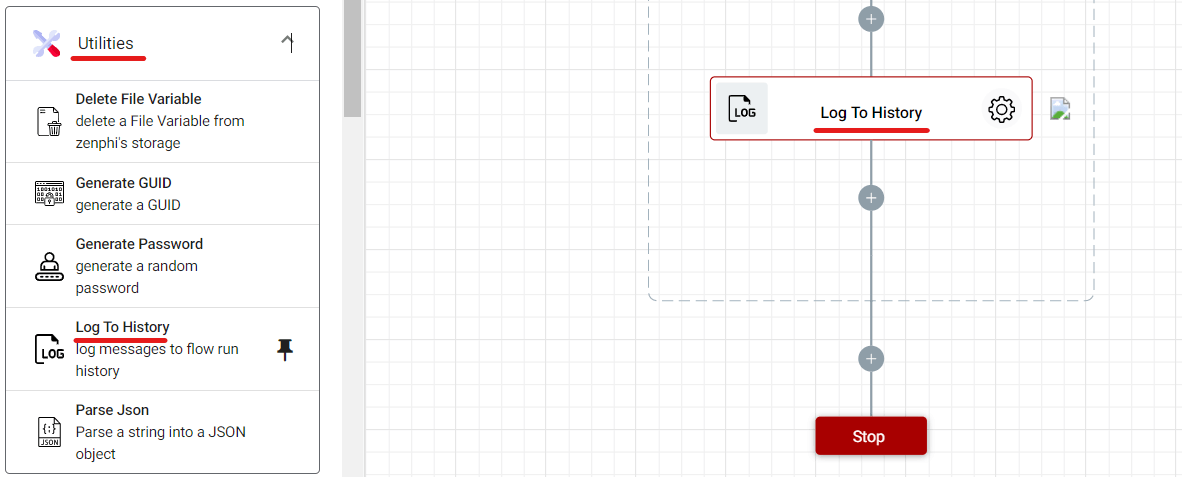
This is the last step. Go back to the Designer panel and click Utilities, and then drag and drop the Log To History feature into the workflow.
What this will do is log such as ISO code and Country name of the rows that have en value in their Languages[P] column into the system.
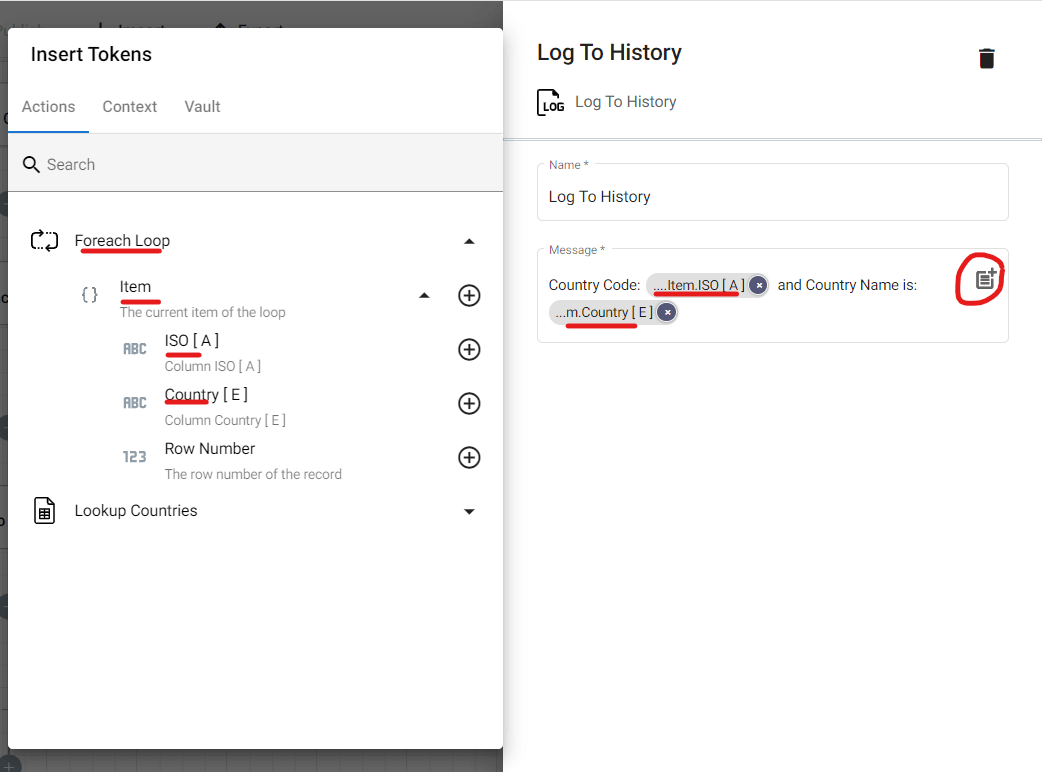
Let’s configure this step by clicking the gear button. At the Message section, click the parameter(encircled in red) icon. Click the Foreach Loop, and then followed by Item. From the dropdown list, select ISO[A] and Country[E].
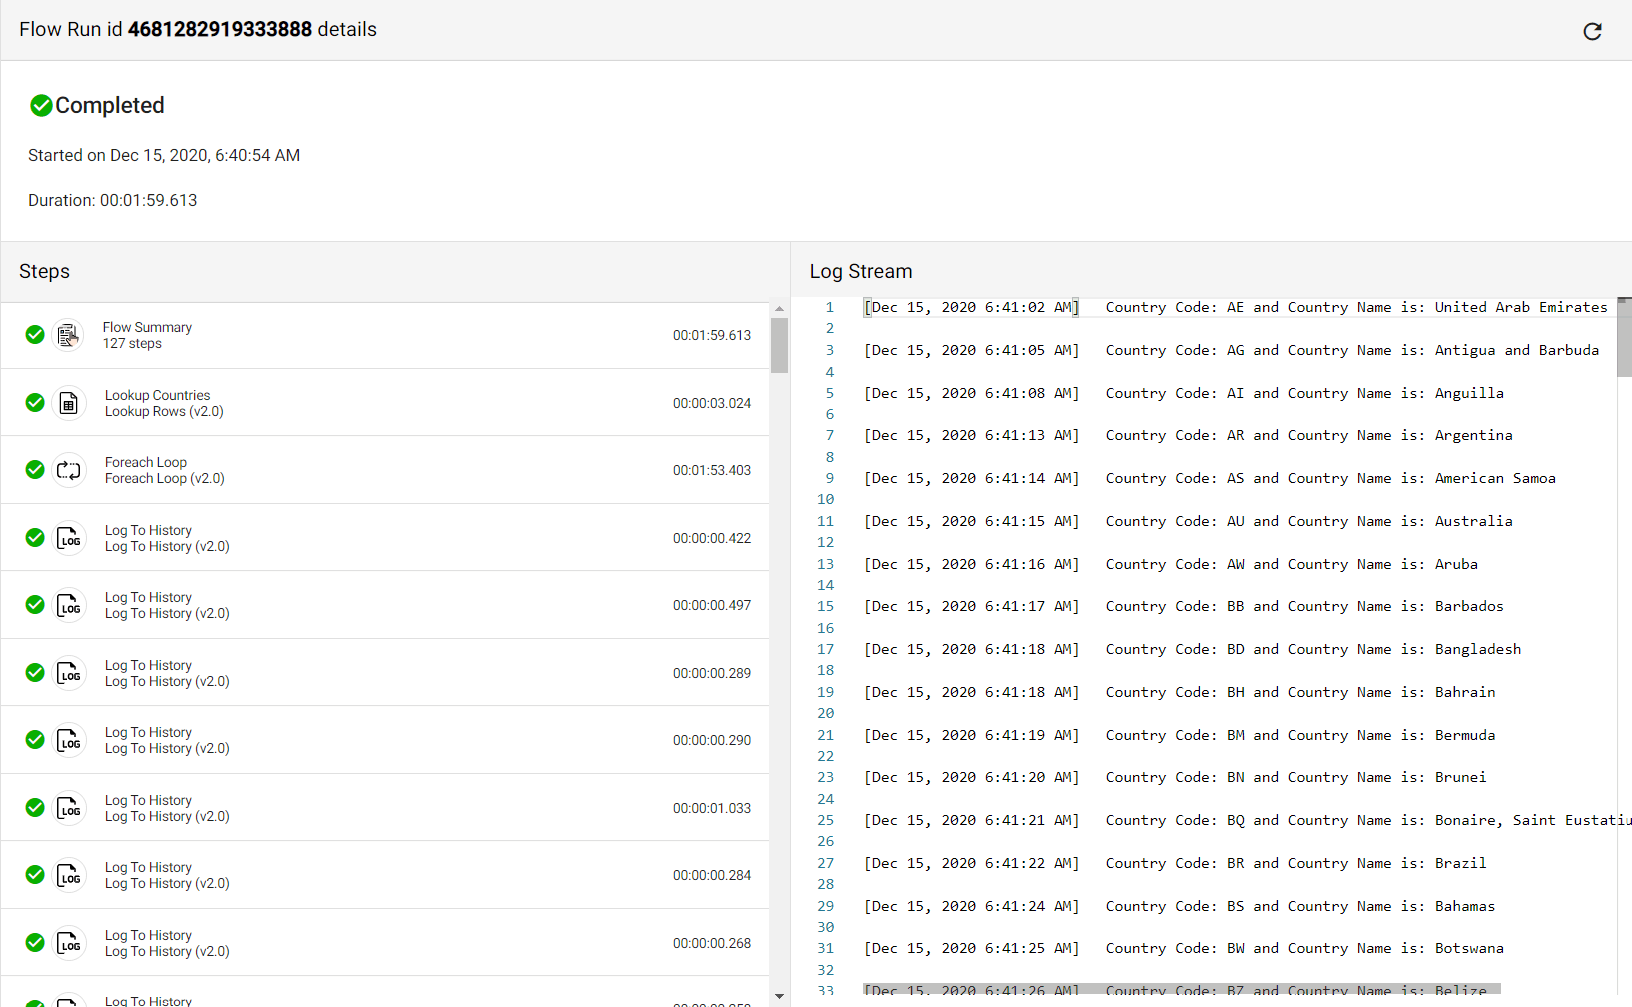
This is how the logged data looks like within the system after retrieving them.
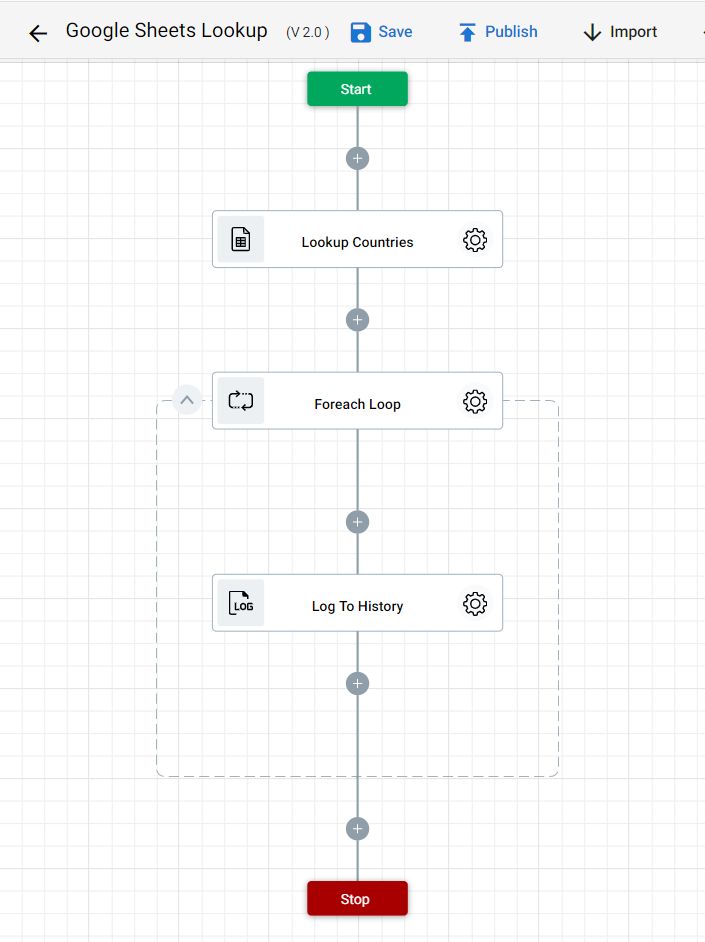
Preview of the entire automated Google Sheets Data Lookup and Retrieval.