Learn how to streamline your workflow by automating the conversion of Google Form responses into PDF documents using Zenphi. Follow this comprehensive guide to learn how to set up the trigger, generate PDFs from Google Docs templates, and send them via email effortlessly.
Who and when would need to save Google form responses to PDFs
Whether you’re an HR manager handling job applications, a support desk specialist tracking complaint submissions, or a sales team coordinator processing customer orders, you will benefit from this guide. Many processes require a straightforward task: saving multiple Google Forms submissions as PDF files on Google Drive or Dropbox. Additionally, you might need to send this file in the email to an address associated with a specific case, order, or applicant, or forward it to a third party (for example, Financial department or Delivery service).
Here’s how to do it using Zenphi in 5 easy steps.
Step 1: Set Up Your Zenphi Account
Begin by creating your free Zenphi account using this link.
Once registered, you can start building your first automated flow. This guide will walk you through integrating Zenphi with your Google Workspace account to automate workflows triggered by Google Form submissions.
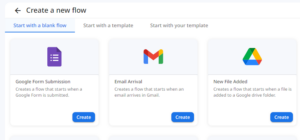
In Zenphi, a ‘flow‘ represents an automated workflow. It comprises a trigger, which initiates workflow execution—such as a Google Form Submission in this case—and subsequent actions, the steps to be executed. Unleash the potential of Zenphi by setting up your free account and accessing pre-built automation templates. Let’s get started by selecting the Google Form submission trigger, which will serve as the first step of our flow!

This is what the finished automated process will look like, to turn your Google Form responses into PDF format. By following this guide, you’ll gain a clear understanding of configuring triggers and actions within Zenphi. Customize your workflow by adding or removing steps according to your requirements, whether it involves saving documents to Google Drive, Dropbox, or sending them via email. In this example, our flow will consist of three main steps: Google Form submission, conversion of the Google Doc template into PDF format, and finally, sending the document through Gmail. Let’s get started!
Step 2: Trigger — Create the Connection to your Google Form
As we’re utilizing the Google Form trigger for this particular flow, our initial step is to establish a connection between Zenphi and the form we intend to use. This grants Zenphi permission to access the designated form, enabling it to utilize the information provided for our flow process.
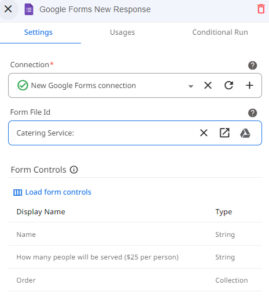
As demonstrated above, once the connection is successfully established, you can access the Form Controls for the selected Google Form by clicking on the “Load form controls” button. This action will load all the form controls from the selected Google Form, including their types such as string, boolean, collection, etc. You can then utilize this information in the subsequent actions of the flow.
Step 3: Generating a PDF from Google Form Submissions Using a Google Docs Template
The next step involves dynamically generating PDF documents based on form responses. To achieve this, we utilize a Google Docs document as a template. Using the ‘Generate Document’ action, we create a new Google Docs document based on the template and populate it with the data from the Google Forms submission. Additionally, you can utilize the output of previous actions to generate the document. This flexibility enables you to incorporate placeholders and styles effectively, personalizing your documents to suit your needs.
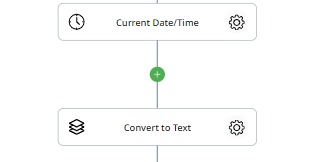
In this step, we’ve included two additional actions to ensure accurate template filling for this specific scenario. The ‘Current date/time’ action proves useful if you want to include the date of PDF creation on the generated document, particularly if the response was submitted days earlier. The following action, ‘Convert to text,’ is added for aesthetic purposes, aiding in displaying collections in a list format. Adding or removing this feature won’t impact the functionality of your flow, but it may affect how information is presented in your document. Feel free to experiment with adding or removing it from your flow if you have a form control listed as a collection, so you can observe the difference!
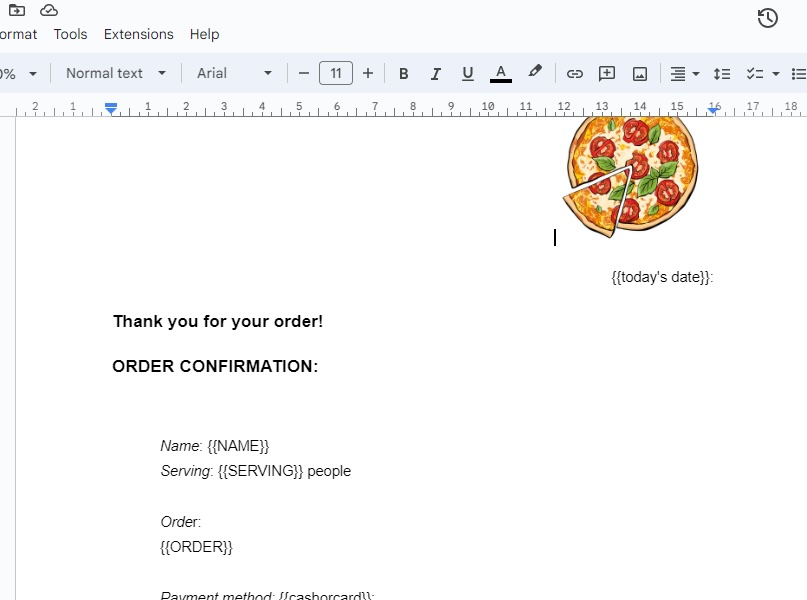
When creating your Google Docs template, remember to enclose any values you wish to replace with responses from the form within two curly brackets as demonstrated below. This ensures Zenphi knows precisely where to substitute the information. These placeholders allow for customization, and you can style each one according to your preferences; the replaced value will adopt the configured style.
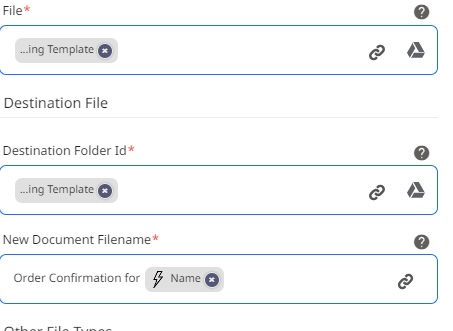
After creating the template document, return to Zenphi and add a ‘Generate Document Using Google Docs Template’ action to your flow. Begin configuring the action by either creating a new connection or selecting an existing one if you’ve already set it up. Once the connection is configured, you’ll be prompted to choose the document to serve as the template, specify its location in your Google Drive for saving whenever the flow runs, define its file name etc.
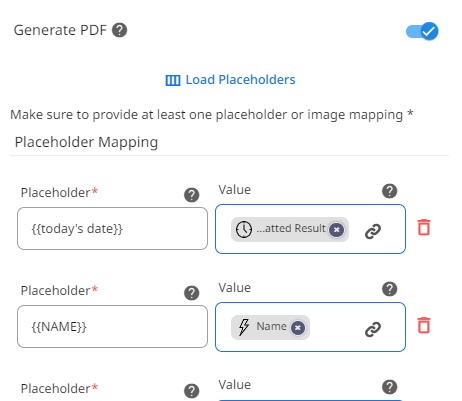
The next step involves configuring and assigning values to the placeholders within the selected template document. You can either manually input the values or use the token picker to select information from the Google Form response and/or the output of previous actions. To begin, click on ‘Load placeholders’ and indicate to Zenphi which value should replace each placeholder in your template based on its assigned text. Once you have assigned the values to each placeholder, remember to activate the ‘Generate PDF’ option located directly above the listed placeholders to ensure the document is saved in PDF format.
Once this action is completed, your PDF document will be saved in your Google Drive, and you’ll be able to access the file in future steps of your flow. If you only wish to store it in your Drive, you can stop at this point! However, if you wish to send the document via email, we still have one more step to go.
Step 4: Sending the Generated PDF as an Email Attachment
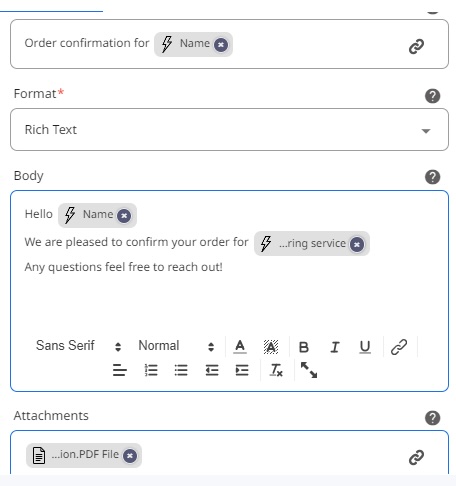
As the final step in this example, we will be sending the generated PDF document via email using the “Send Email (Gmail)” action. Feel free to modify this action if you prefer to send the file in a different manner! Configure the Gmail integration to seamlessly send PDF documents and then specify how the email will be formatted. Remember, you can access previous information from your flow using the token picker! Here, you can set up the recipient of the email, the subject, and the body. As demonstrated below, to personalize the email for each recipient, we have incorporated values from the Google Form response, such as their name and date of catering service. Don’t forget to include the previously generated PDF as an attachment at the bottom of the action.
Step 5: Customizing and Testing the Google Form – to PDF automation process
Take the next step towards transforming your workflow with Zenphi by exploring its flexibility and tailoring workflows to your specific needs. Learn best practices for testing your automated flow before deployment to ensure smooth execution. Here is how you can do it. Once published, the flow will begin executing automatically every time a Google Form response is submitted. Each execution is referred to as a ‘Flow Run.’ To view an overview of all Flow Runs, simply return to the main page of the flow.
So why wait? Empower your business today with efficient PDF automation using Google Forms and Zenphi. Start saving time, enhancing productivity, and streamlining your workflow with the guidance provided in this comprehensive guide. If you have any questions or wish to see a live demo tailored to your specific needs, feel free to book a demo meeting with our team or check out the Youtube video below for a demonstration tailored to your needs. Your journey towards streamlined automation begins now!