Learn how to use Zenphi to build a fully automated Google Workspace onboarding workflow. From Google Directory triggers to automated Slack provisioning and Gmail signatures.
Table of Contents
Streamline Your IT Operations with Google Workspace Onboarding Automation
Manual employee onboarding is prone to human error and consumes valuable IT hours. By using Zenphi’s no-code automation platform, Google Admins can automate user provisioning, group assignments, and third-party access in minutes. Zenphi can become your trusted tool for any automations around user lifecycle management in Google Workspace, for offboarding in Google Workspace and data archiving
However, in this guide, we’ll focus on one process in particular — user onboarding in Google Workspace — and explain, how you can do it step-by-step, using Zenphi.
Employee Onboarding Automation On Google Workspace With Zenphi: Step-By-Step Guide
Choose Your Starting Point
There are two ways to kickstart your automation in Zenphi:
-
Option A: Use a Verified Template
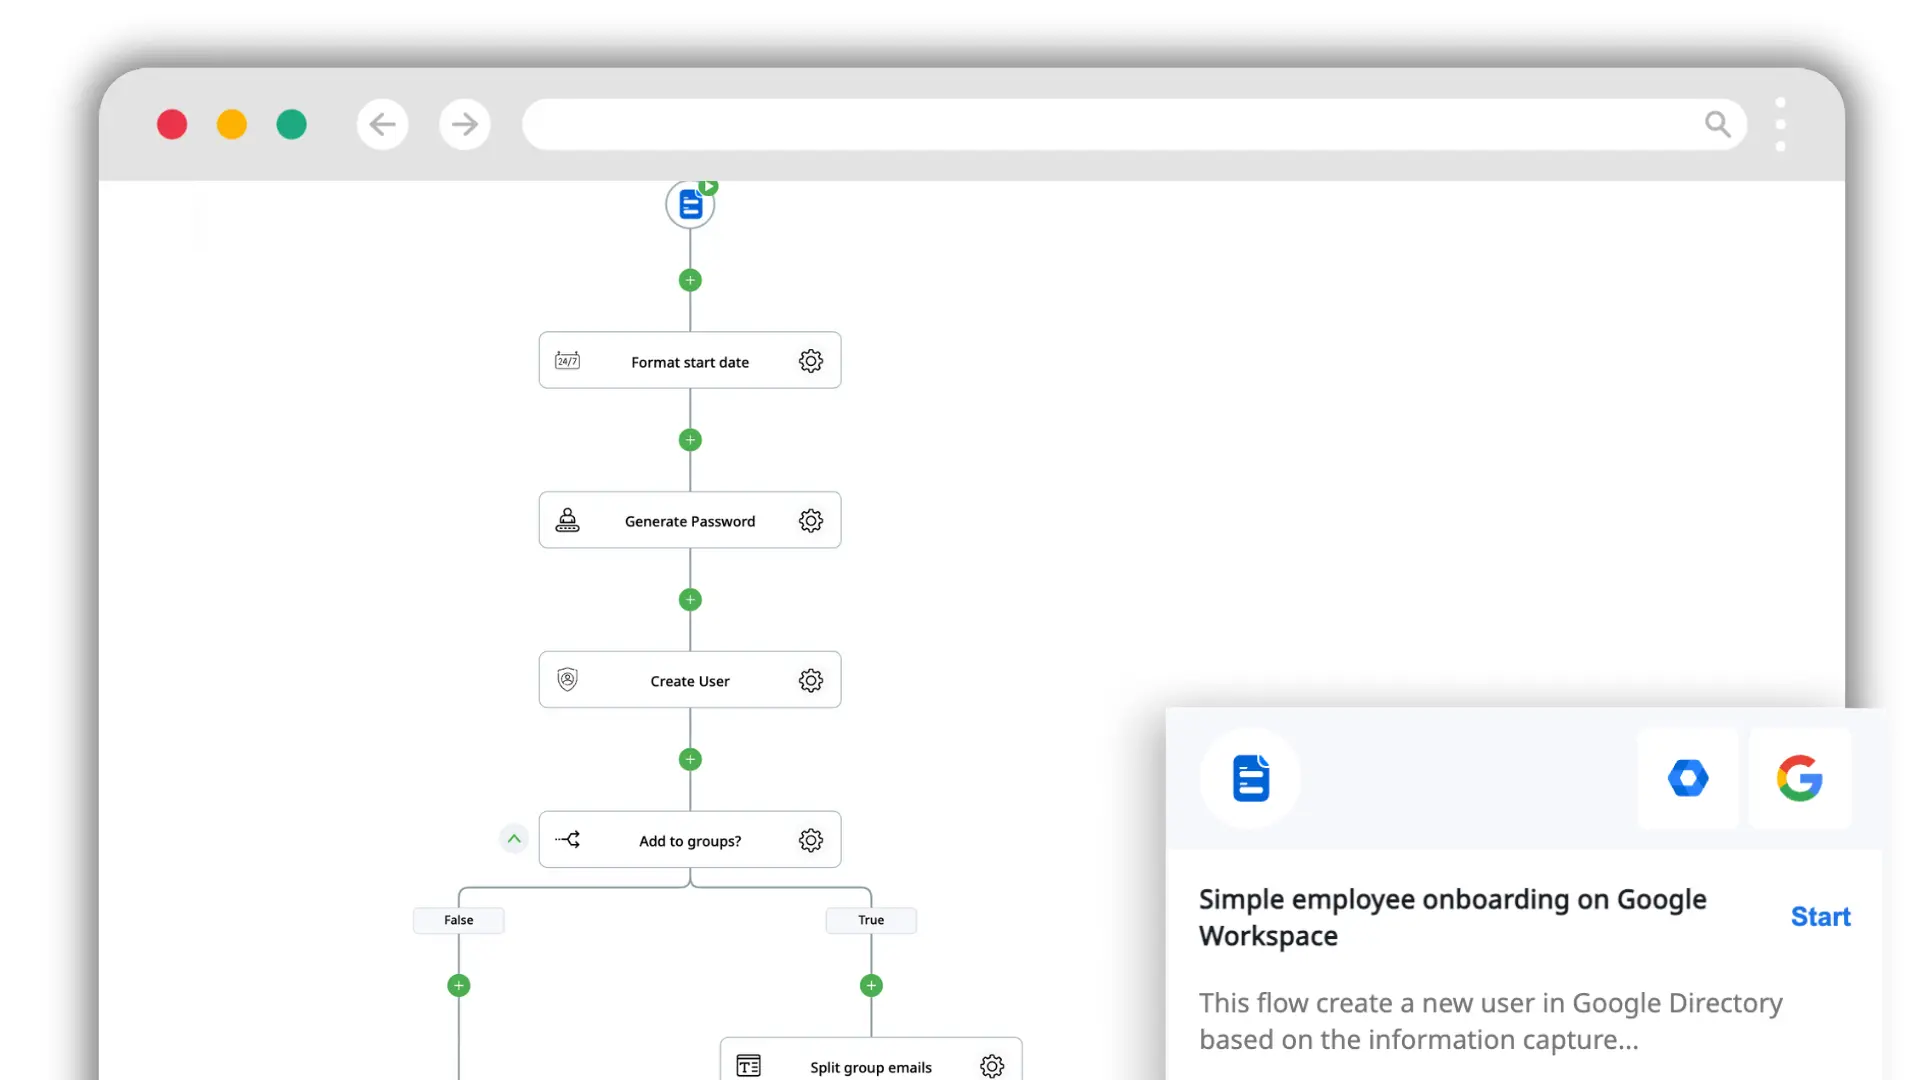
Zenphi offers a library of pre-built "Google Admin" templates.
- How to find them: Click on Start a New Flow icon and choose to start a flow from a template. Then search for "onboarding"
- Why use it: The Employee Onboarding template provides a ready-made architecture including addinga new user to relevant Google Groups, signature creation and email notifications, saving you hours of manual setup.
-
Option B: Use ZAIA (AI Automation Assistant)
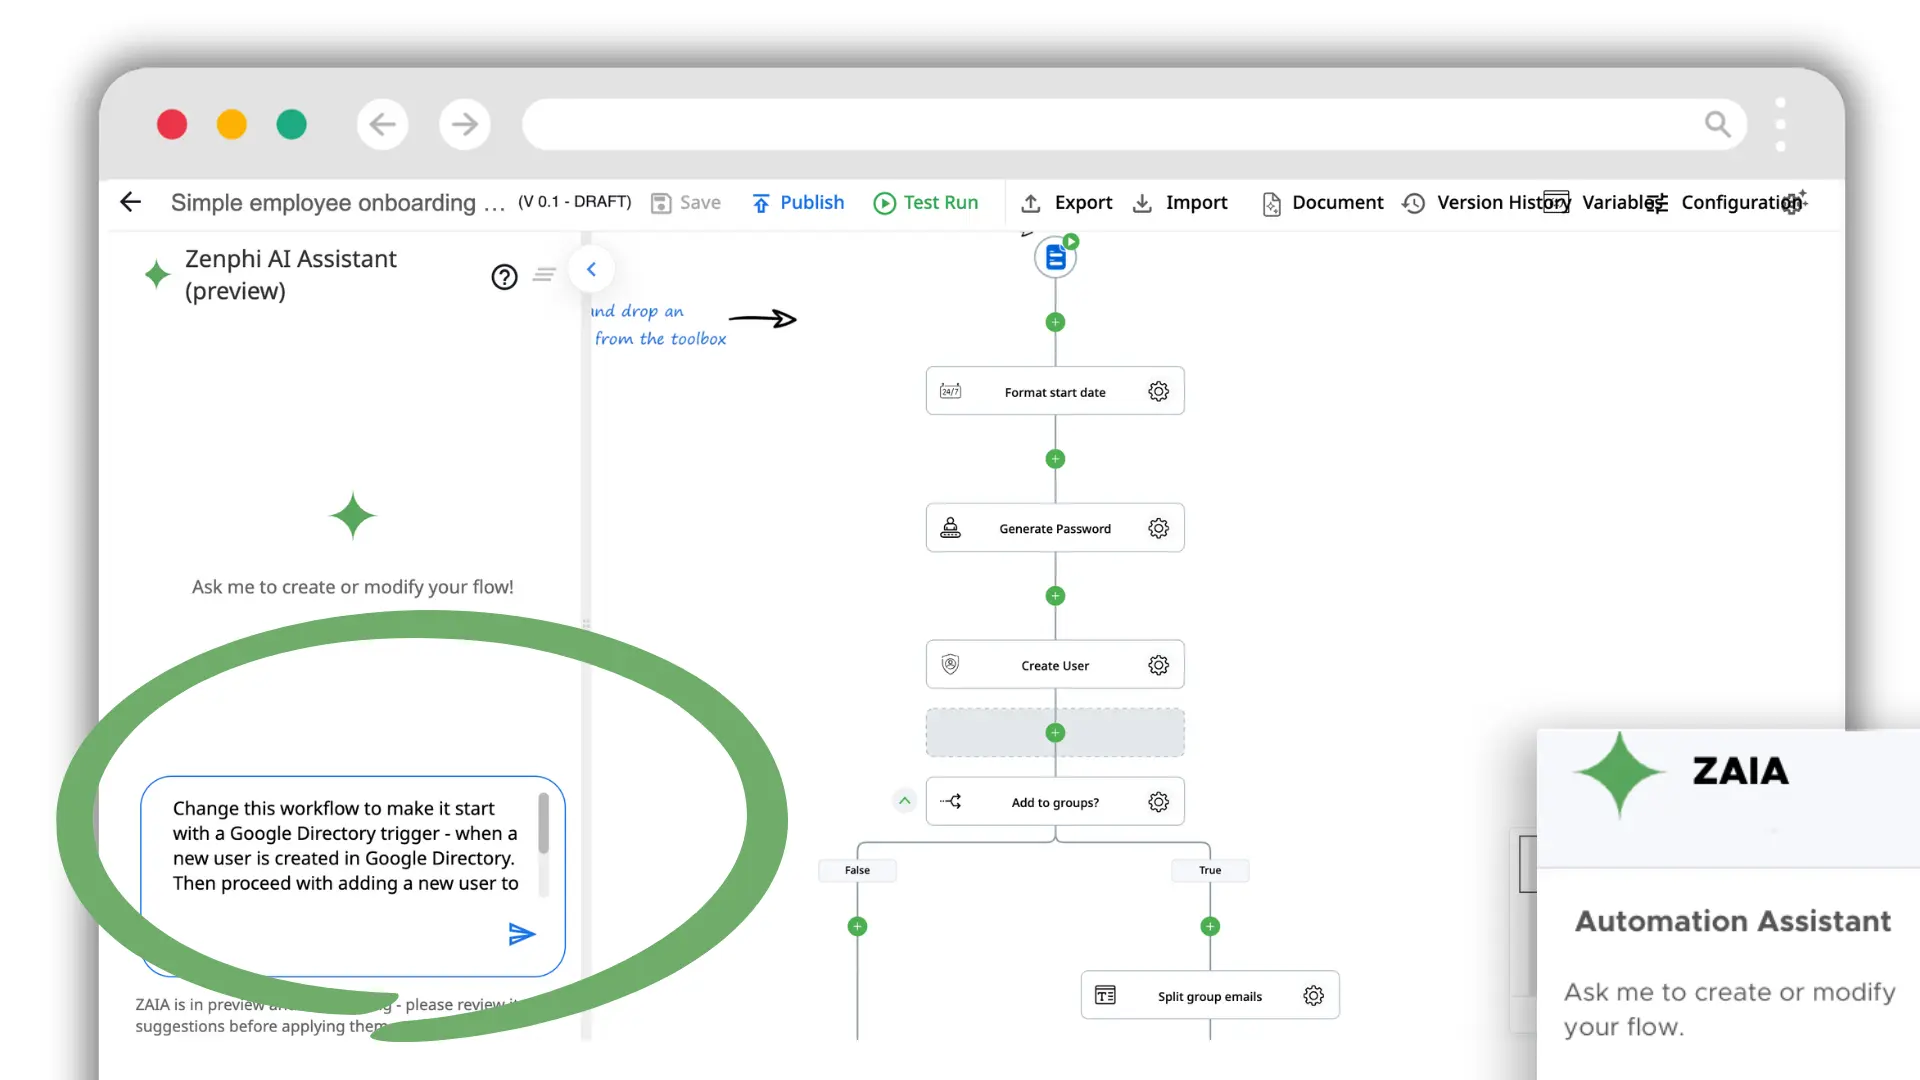
Zenphi has an AI workflow building assistant. If you have a specific process in mind, simply tell ZAIA what exactly you need it to build.
- A Sample Prompt: "I need a workflow that starts when a user is created in Google Directory, adds them to a Department group, and sends a welcome email."
Zenphi is your #1 Google Admin tool and the most flexible platform to automate employees onboarding and offboarding, access provisioning, Shadow IT detection, file sharing audits monitoring automation and so much more. Contact us to get access to best practices your peers are using today!
Define Your Trigger
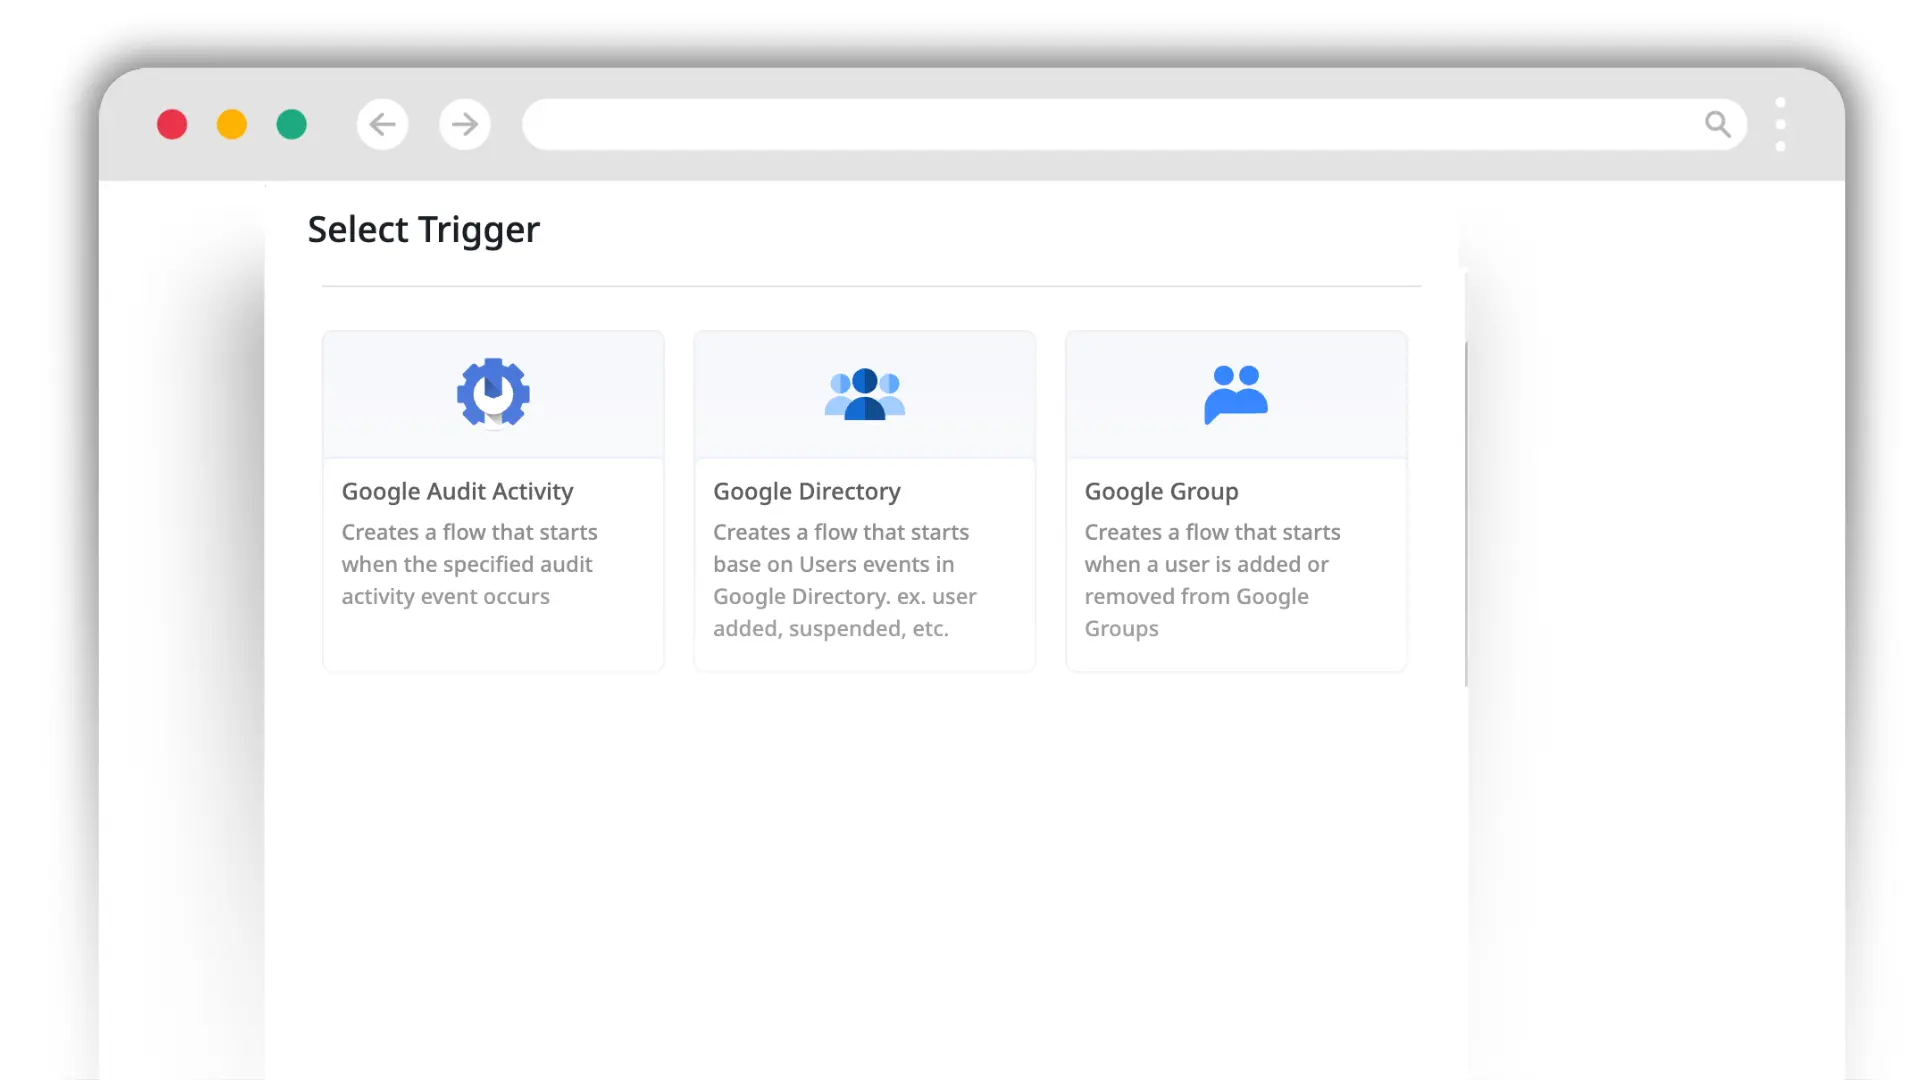
The “Trigger” is what tells Zenphi to start the process. You can switch triggers at any time:
-
Google Directory Trigger
Listen for the "Create User" action. The moment an admin creates a user in the Google Admin Console, Zenphi takes over.
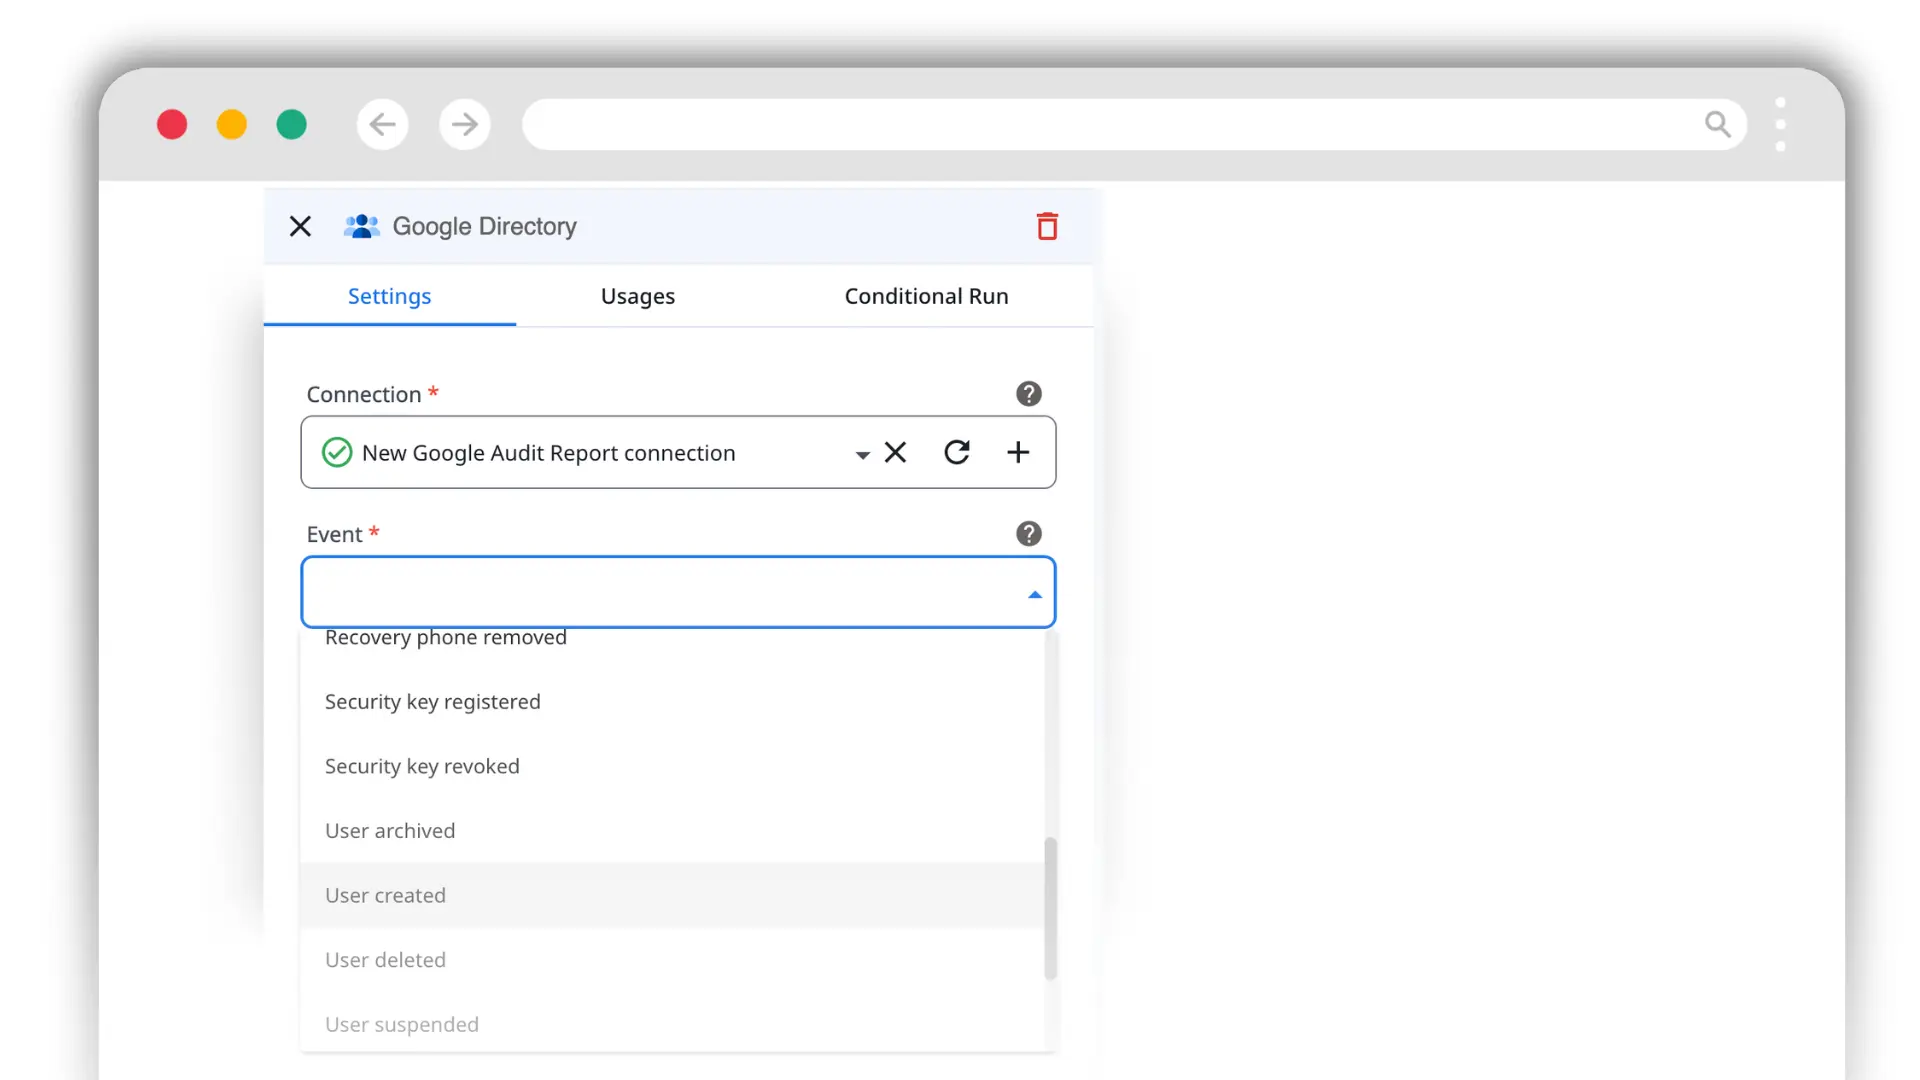
-
HTTP Trigger
Best if your "Source of Truth" is an external HRIS (like Workday or BambooHR). It receives data the moment a hire is finalized in your HR system.
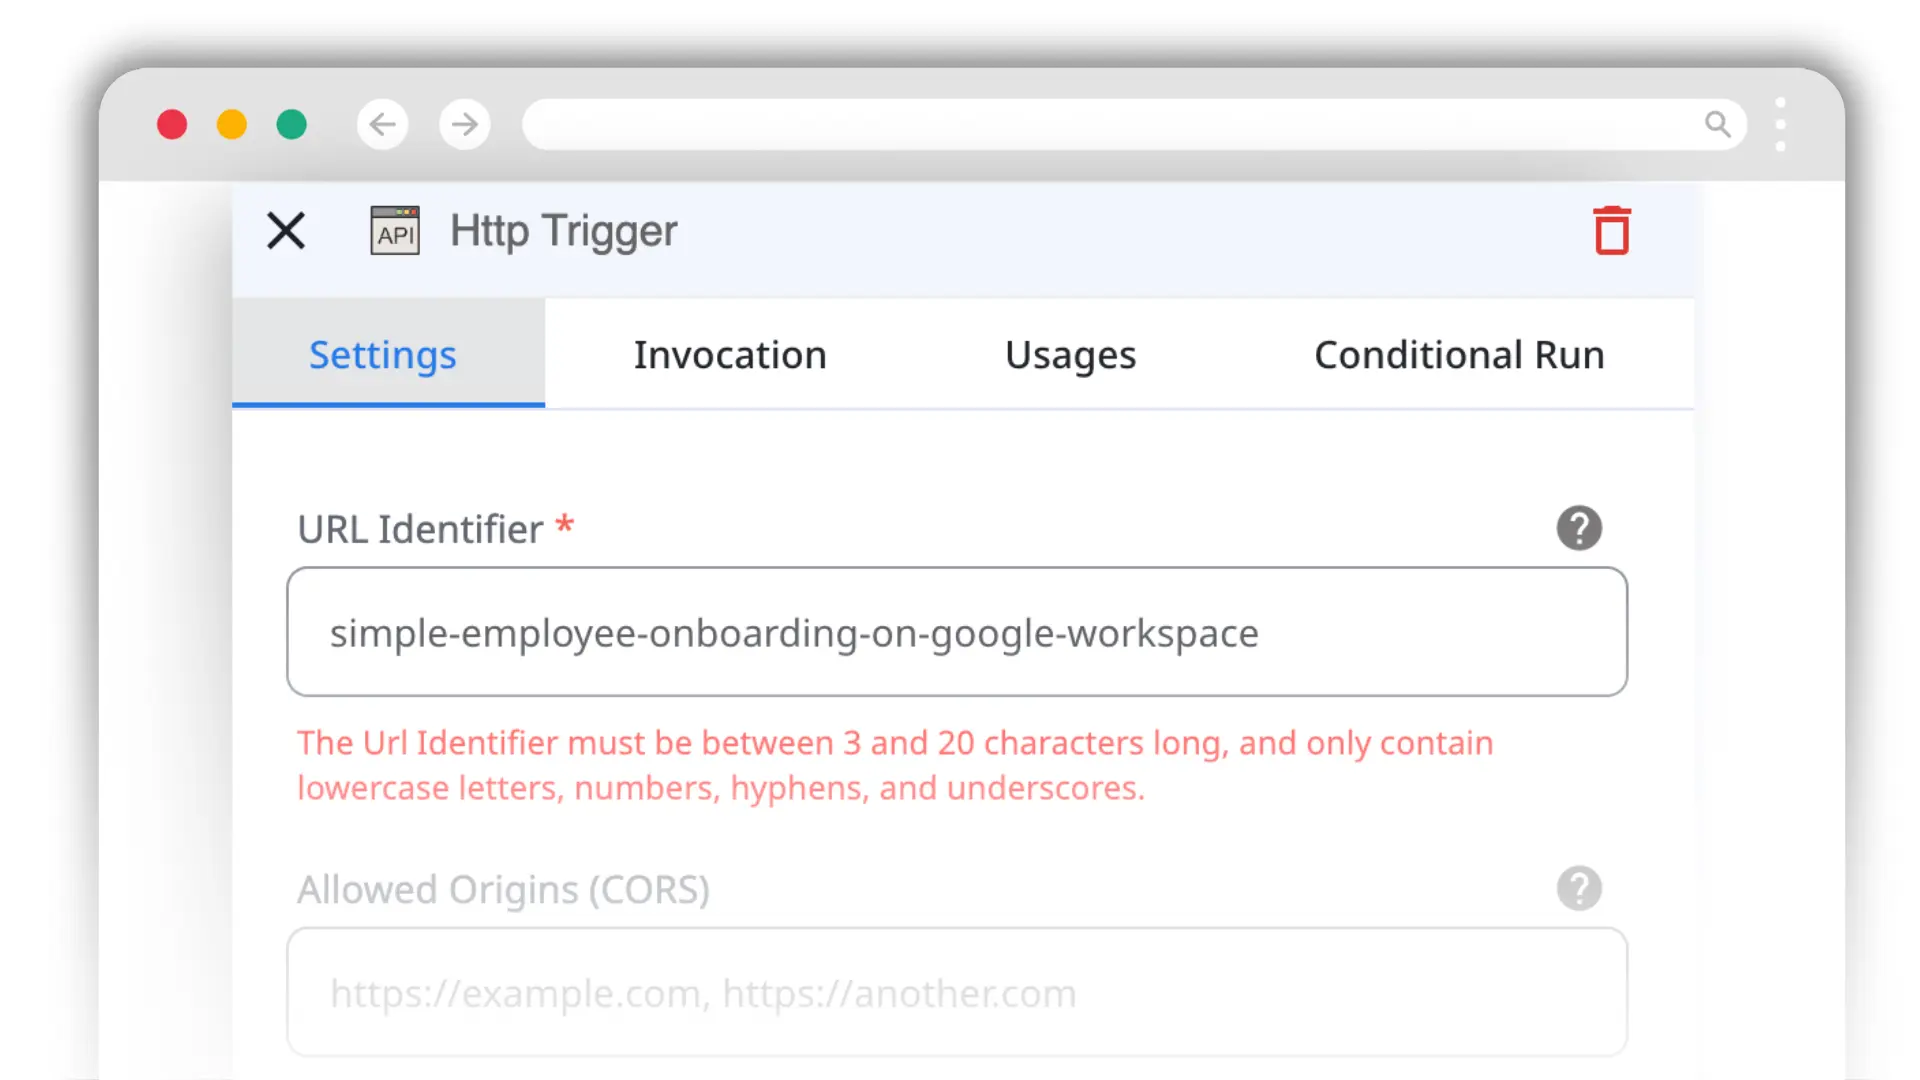
-
Form Submission
Ideal for smaller teams where a manager fills out a simple Zenphi form to request a new hire setup.
Intelligence & Group Assignments
Next standard step – is to add a user to Google Groups. Unless, HR requests specifically to not add a user to Google Groups.
-
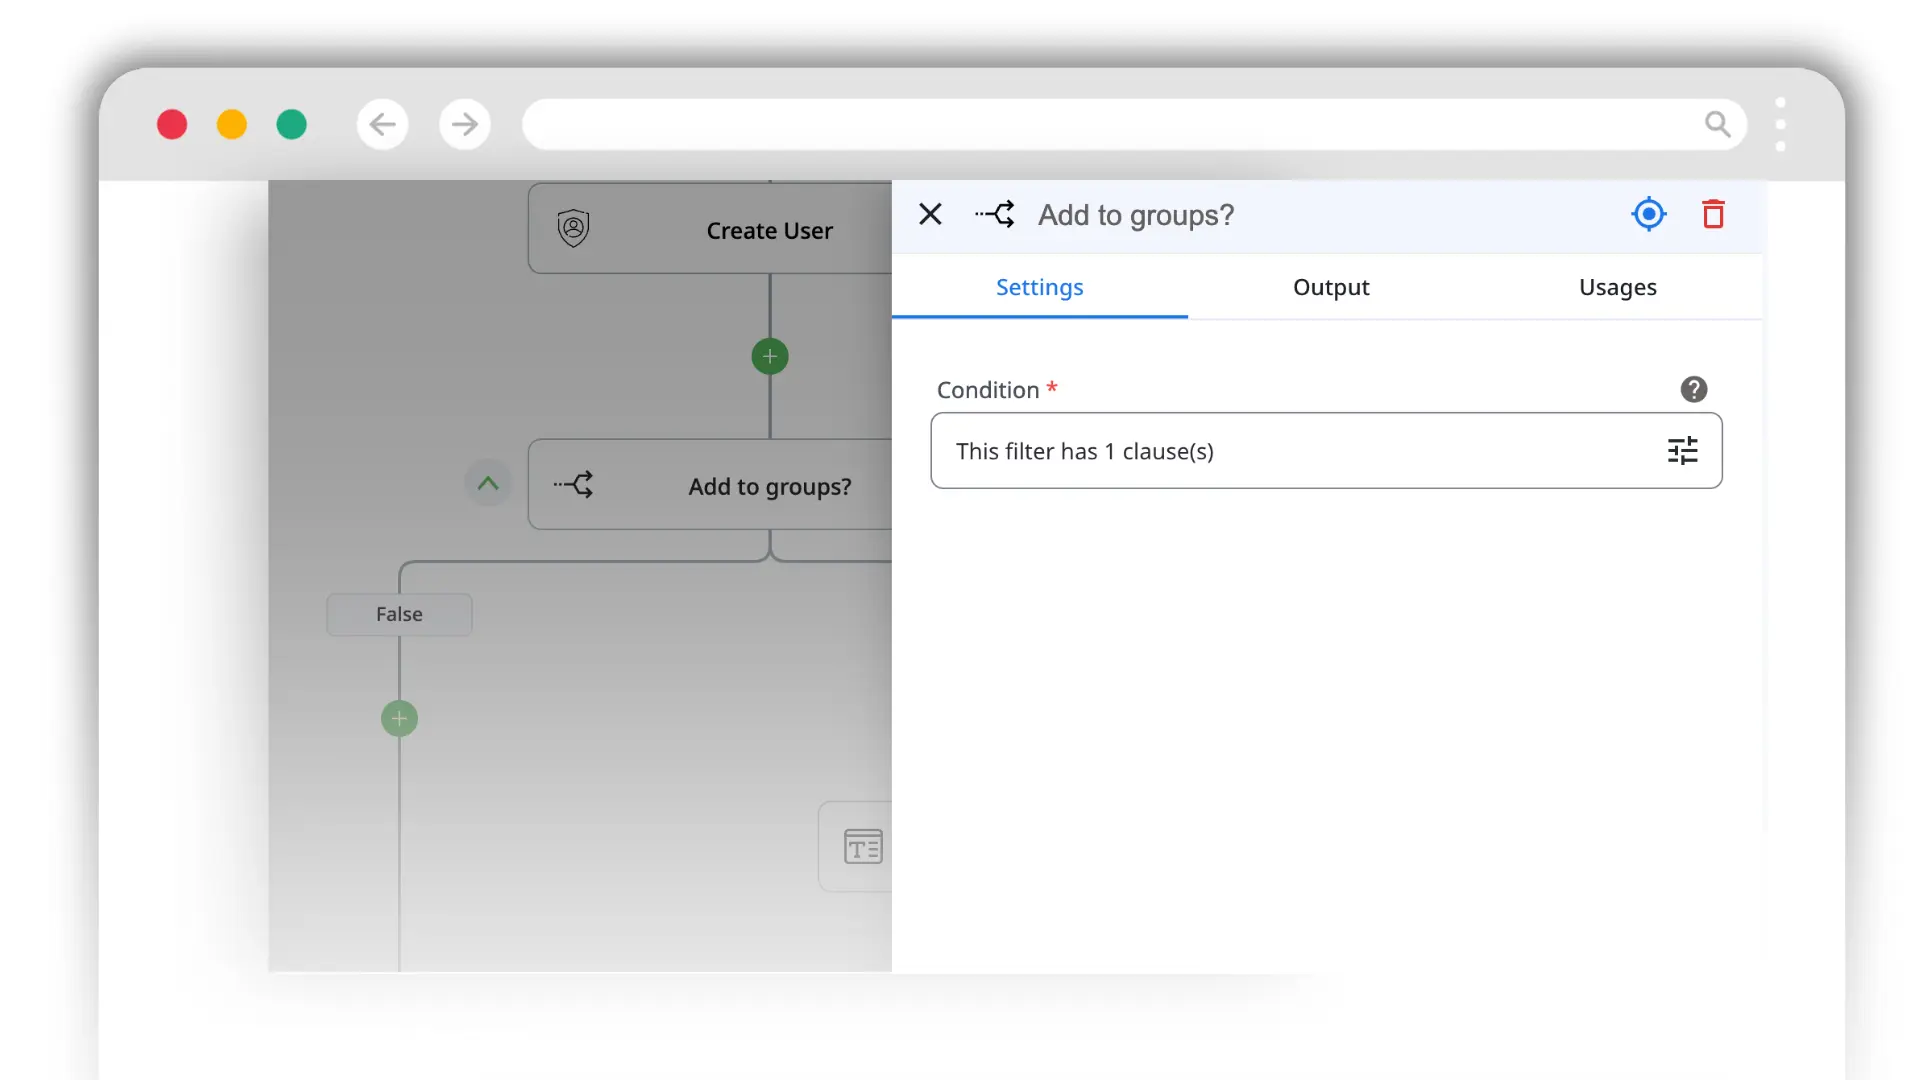
Set up a Condition
The beauty of Zenphi is that you can set up this If Condition easily and specify the Clause with a reference to a trigger Form or a setting in Google Directory.
-
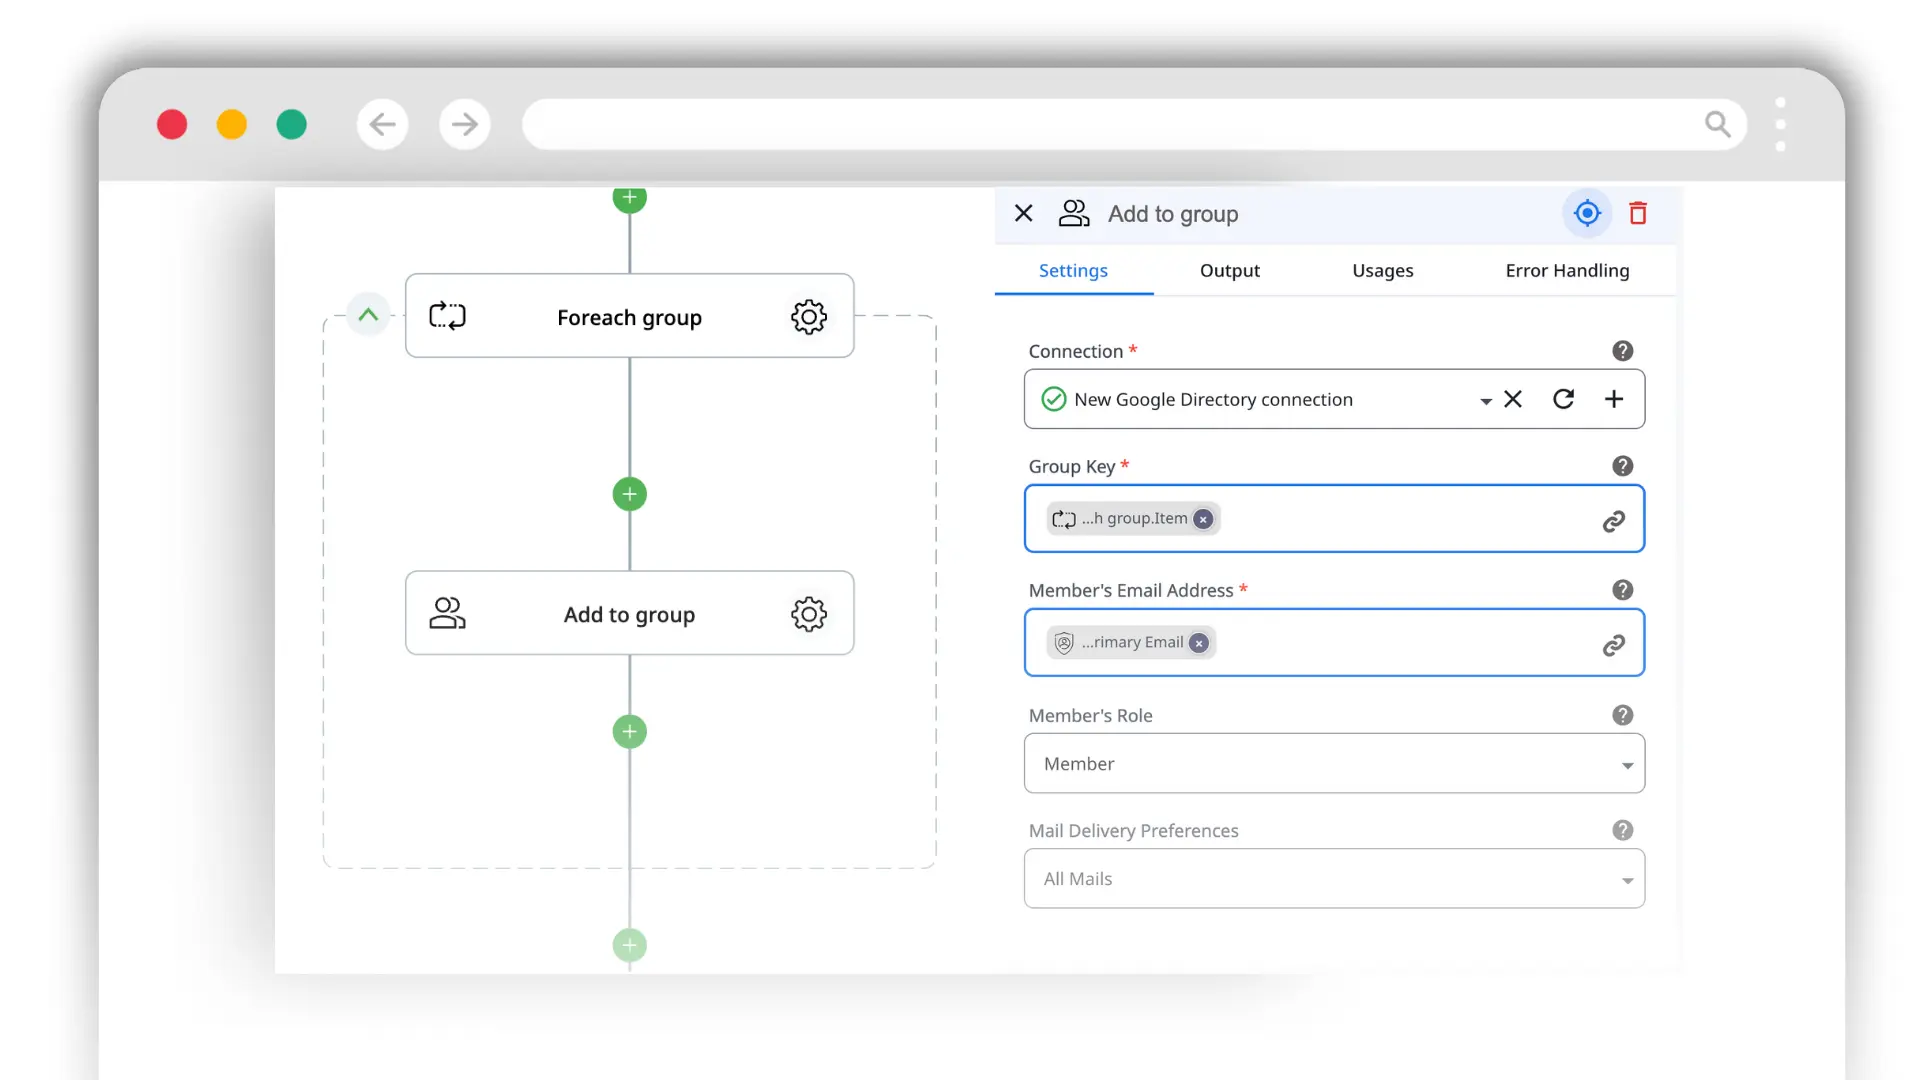
Perform an Action on a List
In case the answer to a question "Do we have to add a User to Google Groups" is Yes — all you need to do is to perform an action on a list and add a user to all the necessary groups. You can easily specify a Group's Member role here and what Group emails they're entitled to receive.
Calendar & Third-Party Tools
With Zenphi, you can get a new hire integrated into the team culture immediately:
-
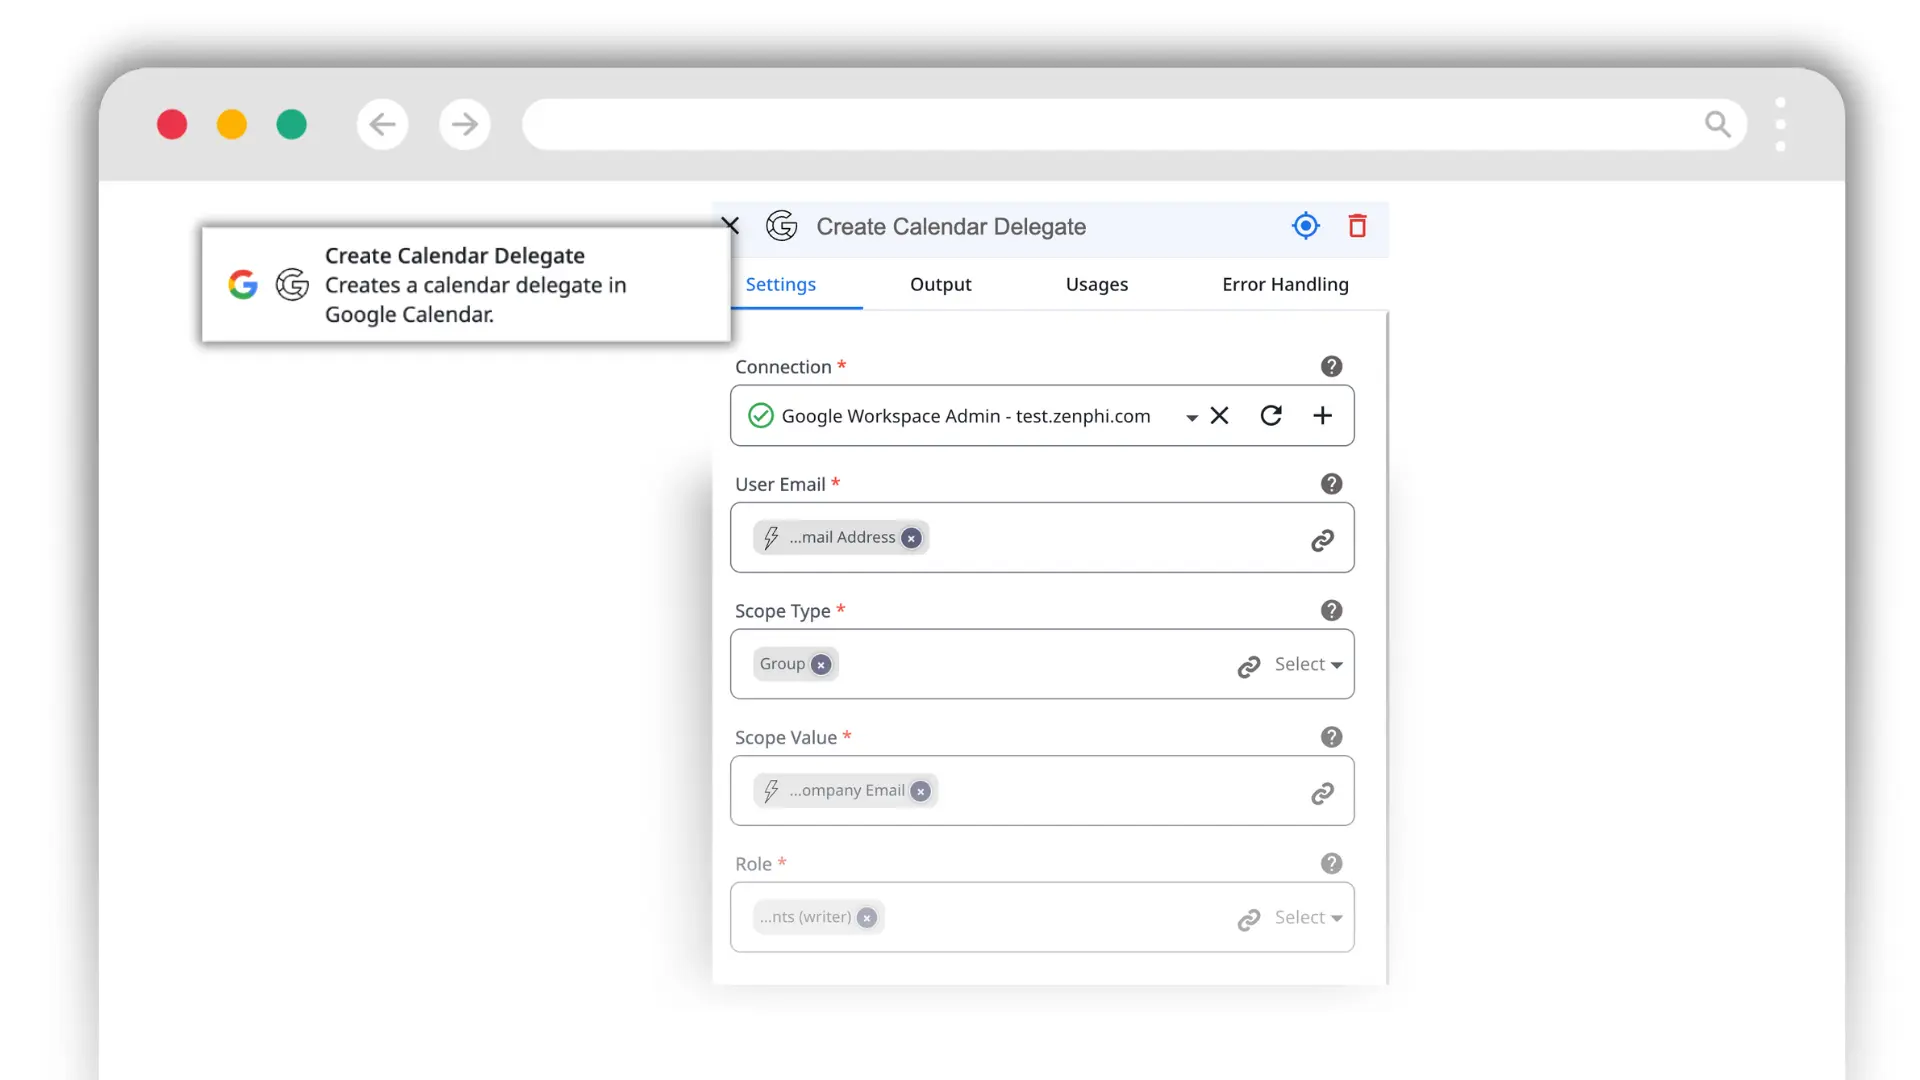
Add To Group Google Calendar
Use the Create Calendar Delegate action to add a user to department-wide calendars with specific permissions. In this action you can specify a Role: Busy/Free Reader, Event Details Reader, Writer, or Owner.
-
Adding to Third-Party Tools
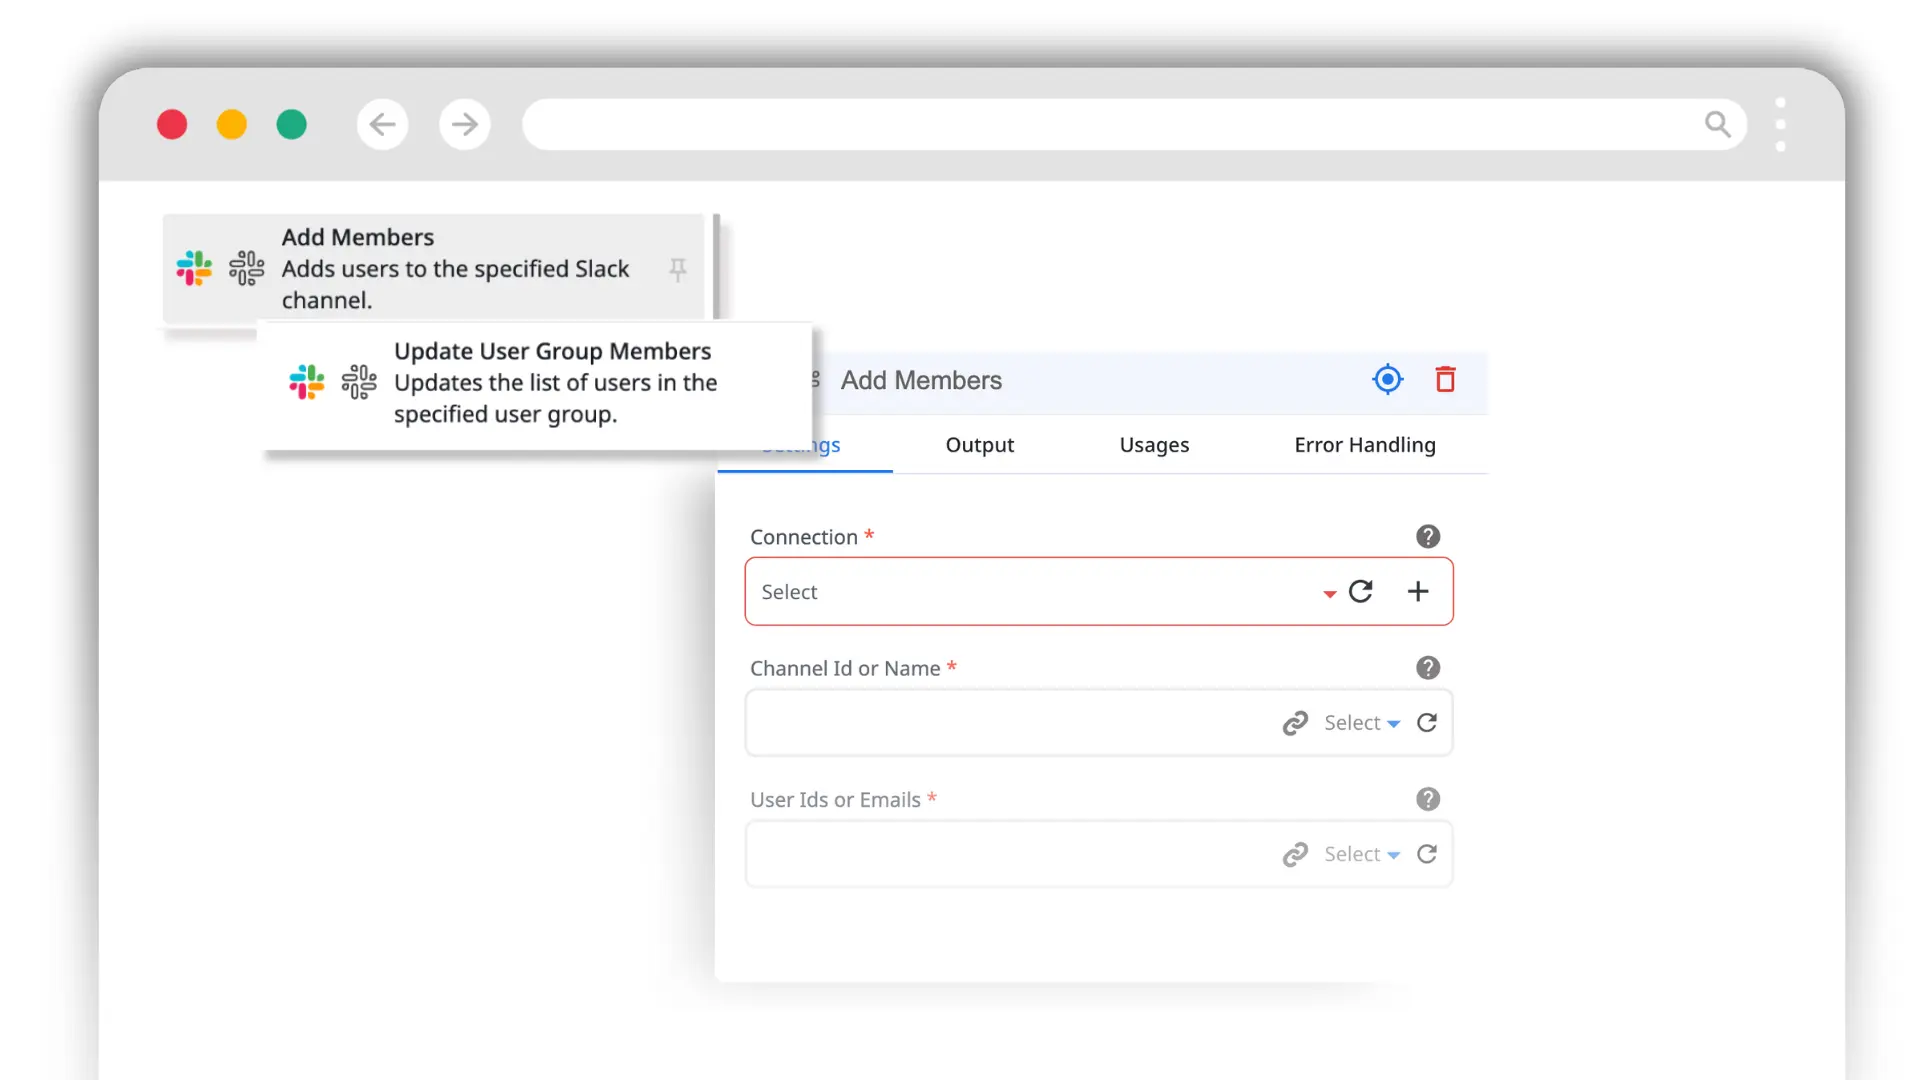
You can use Zenphi to also add new users immediately to selected third-party tools, like Slack. To do that, just search for the tool name in the Actions toolbox and see if adding a new user action is available. If the action is there, you'll be able to set it up by adding a new user's email from the Trigger or one of the following steps (like Create a User), and set up relevant permissions or roles.
For example, if you're adding a new hire to Slack channels, you can use Add Members action, or Update User Group Members if there's a specific group of department-based Slack channels.
Human-in-the-Loop Approvals
Many companies have a certain approval step within their onboarding workflow. For example, a manager’s sign-off is needed to provide a newcomer access to certain tools or for adding them to a project. Let us show you how to set up this approval workflow as a part of your onboarding using Zenphi. We’ll be using a Jira example — let’s assume, if a new hire is a part of IT team, they need access to Jira, but it has to be approved by a manager. You can certainly set up this approval automation for any other scenario — you’ll see how easy it is to do it with Zenphi
-
Does It Need To Be Approved?
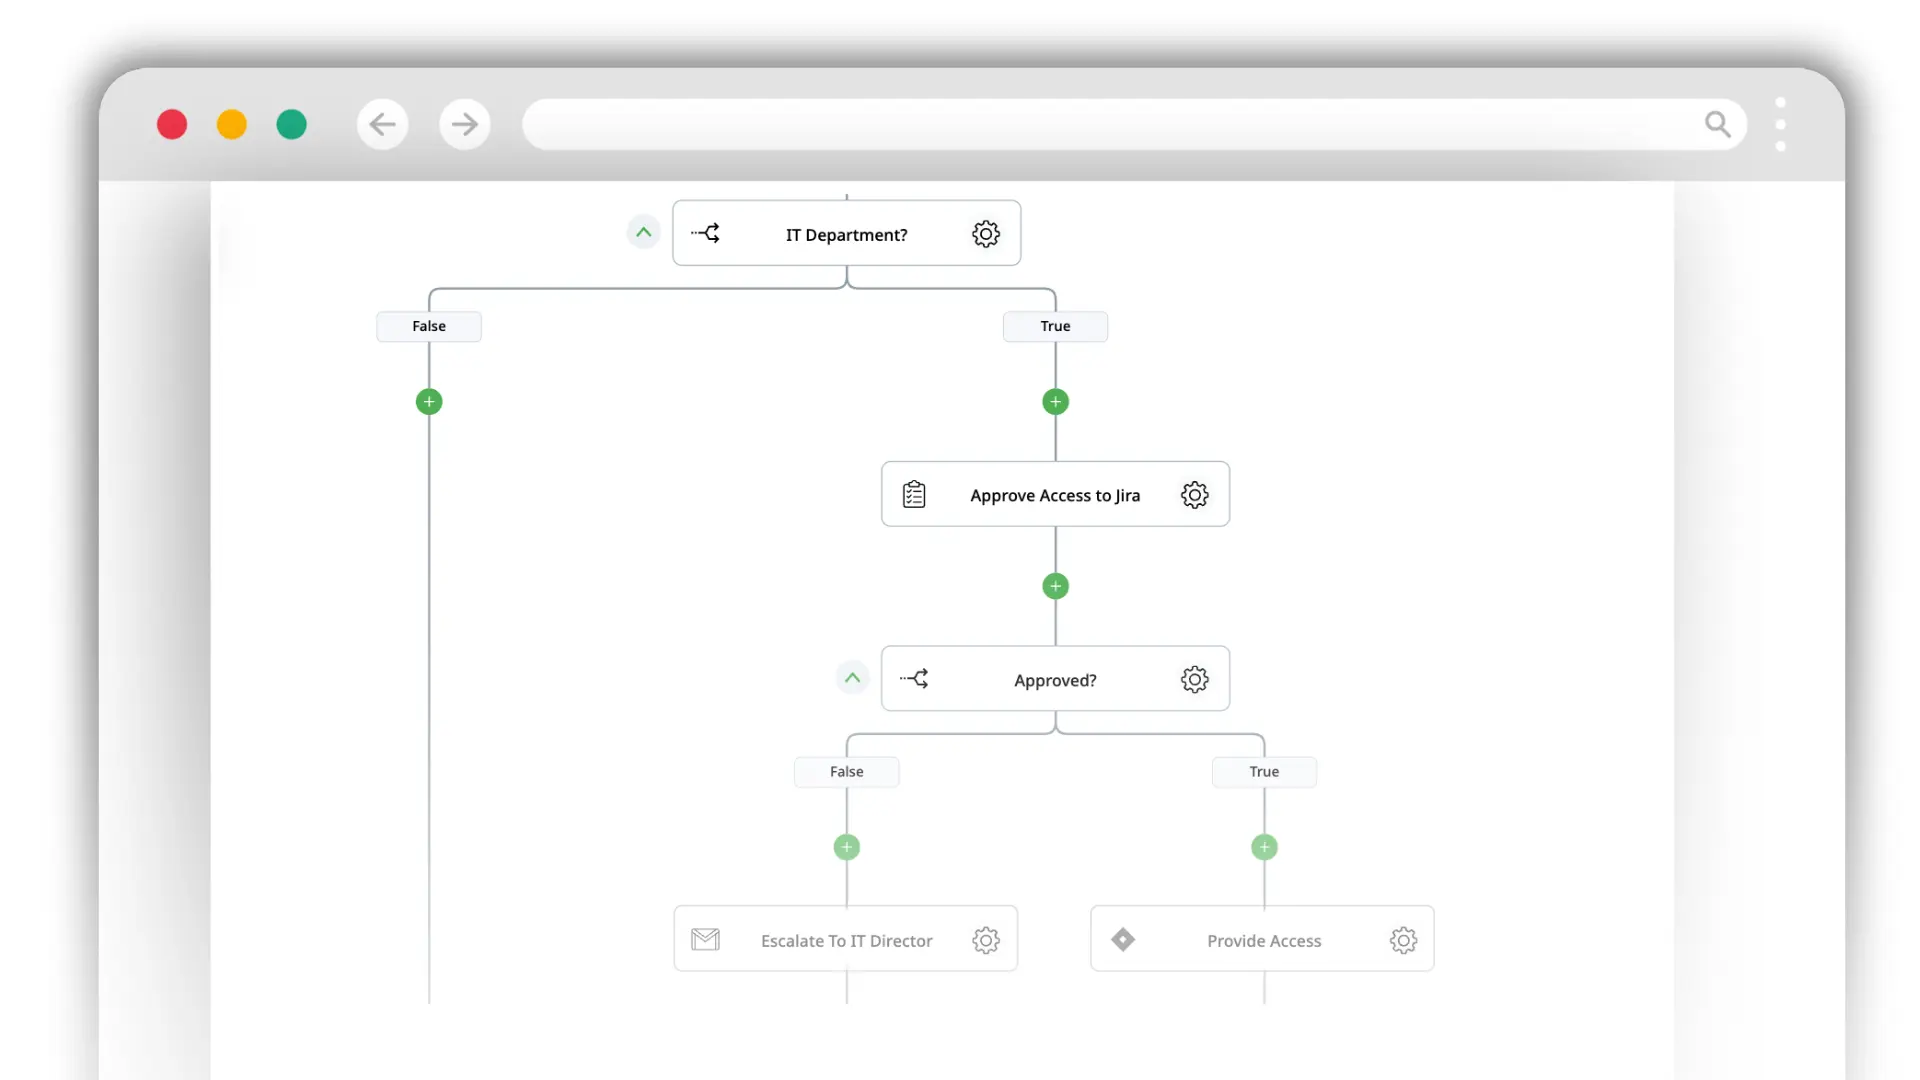
Just like before, we set up an If Condition — in our case, If this new hire a part of the IT Team? Clearly, you condition can be different. For example, Do they belong to a special Very Important Persons Google Group (aka, are they a C-Suite)? Or Are they full-timers or contract workers?
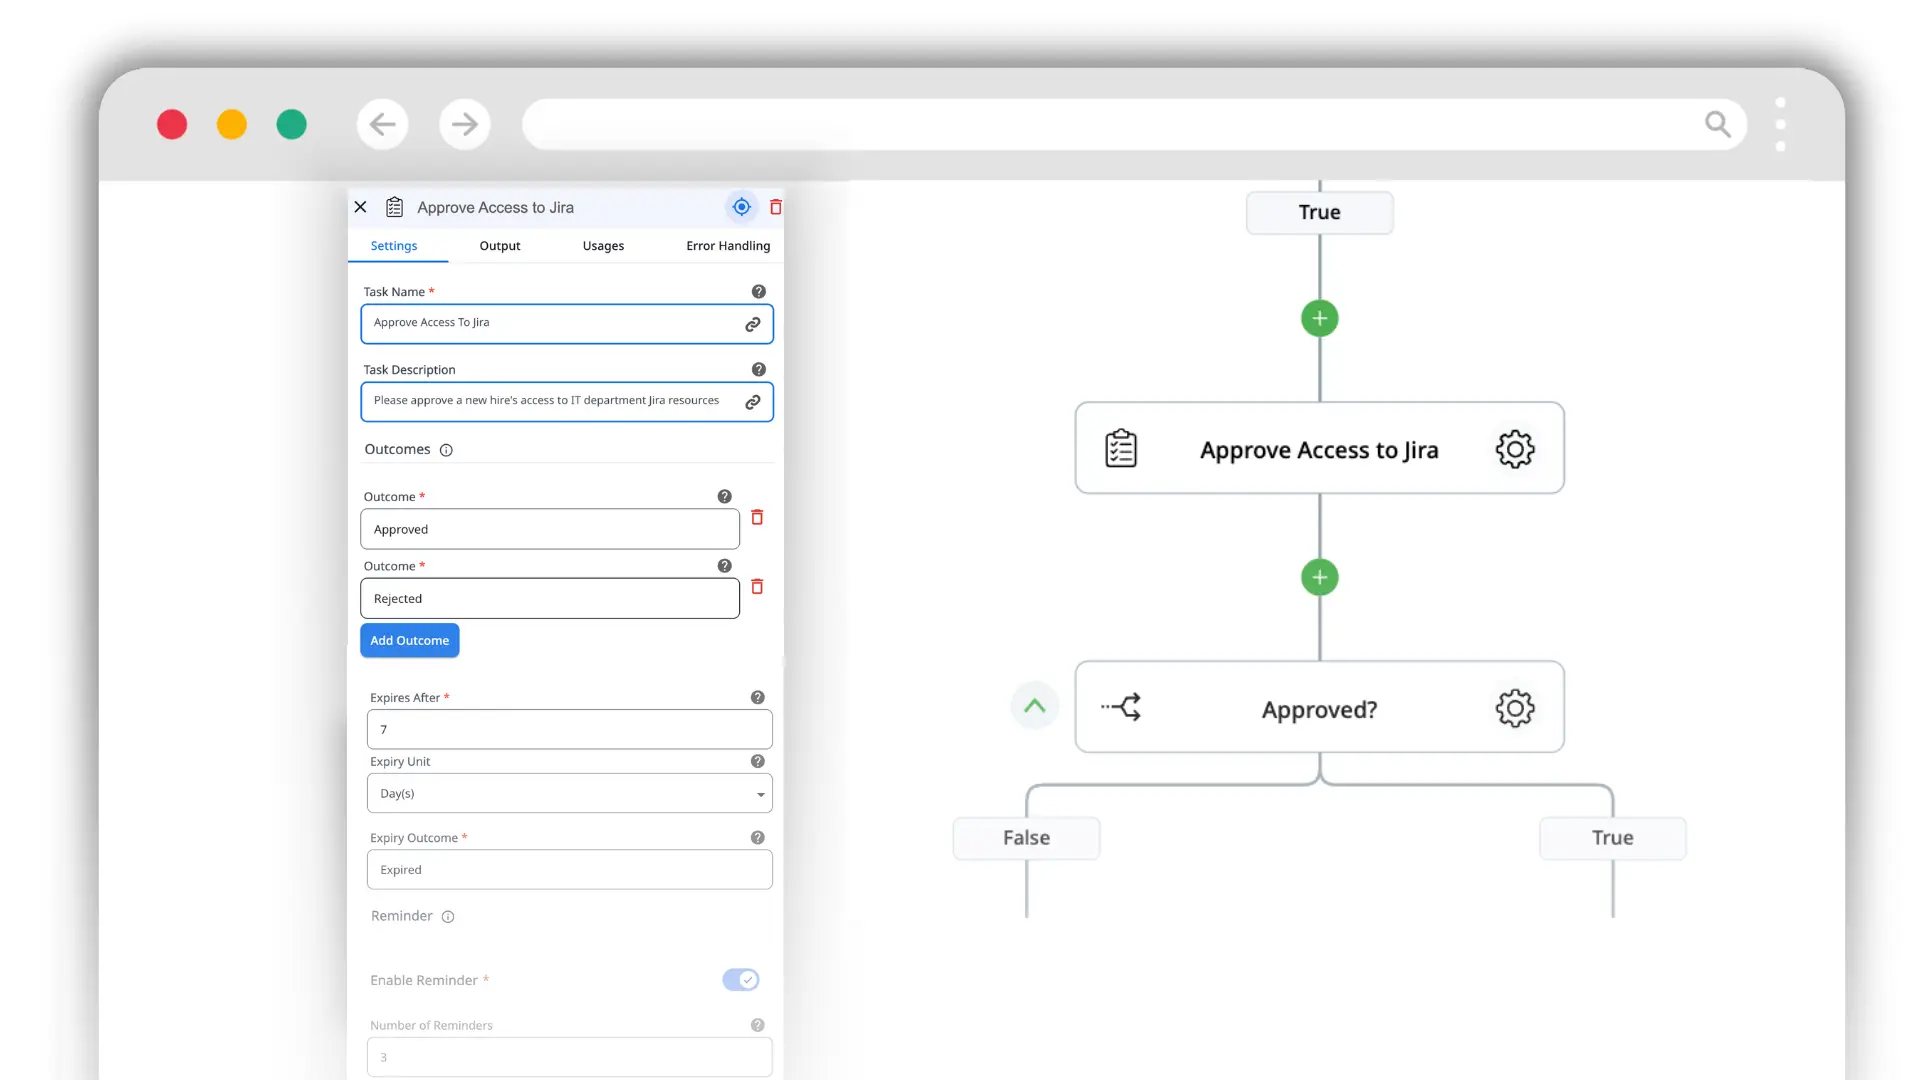
After the Add Condition, you can use Assign a Task action — to create an Approval Task. Next, you can add another conditional logic — what to do if access is approved. And what action to perform next if access is denied or Approval task expired (we'll get to it below).
-
Setting Up Approval Task
Zenphi's Approval Task action is very helpful. Here' you can specify how many reminders you need to be sent automatically, what should be the outcome of approval process (Approved, Rejected, Escalated, Unsure, etc.) There're no hard-coded outcomes, so you can design your approval task according to your needs. You can even set up the escalation period!
The Professional Finish
To finalize the onboarding a new user in Google Workspace, you can add some steps that are not necessary but considered to be a best practice.
-
Email Signature
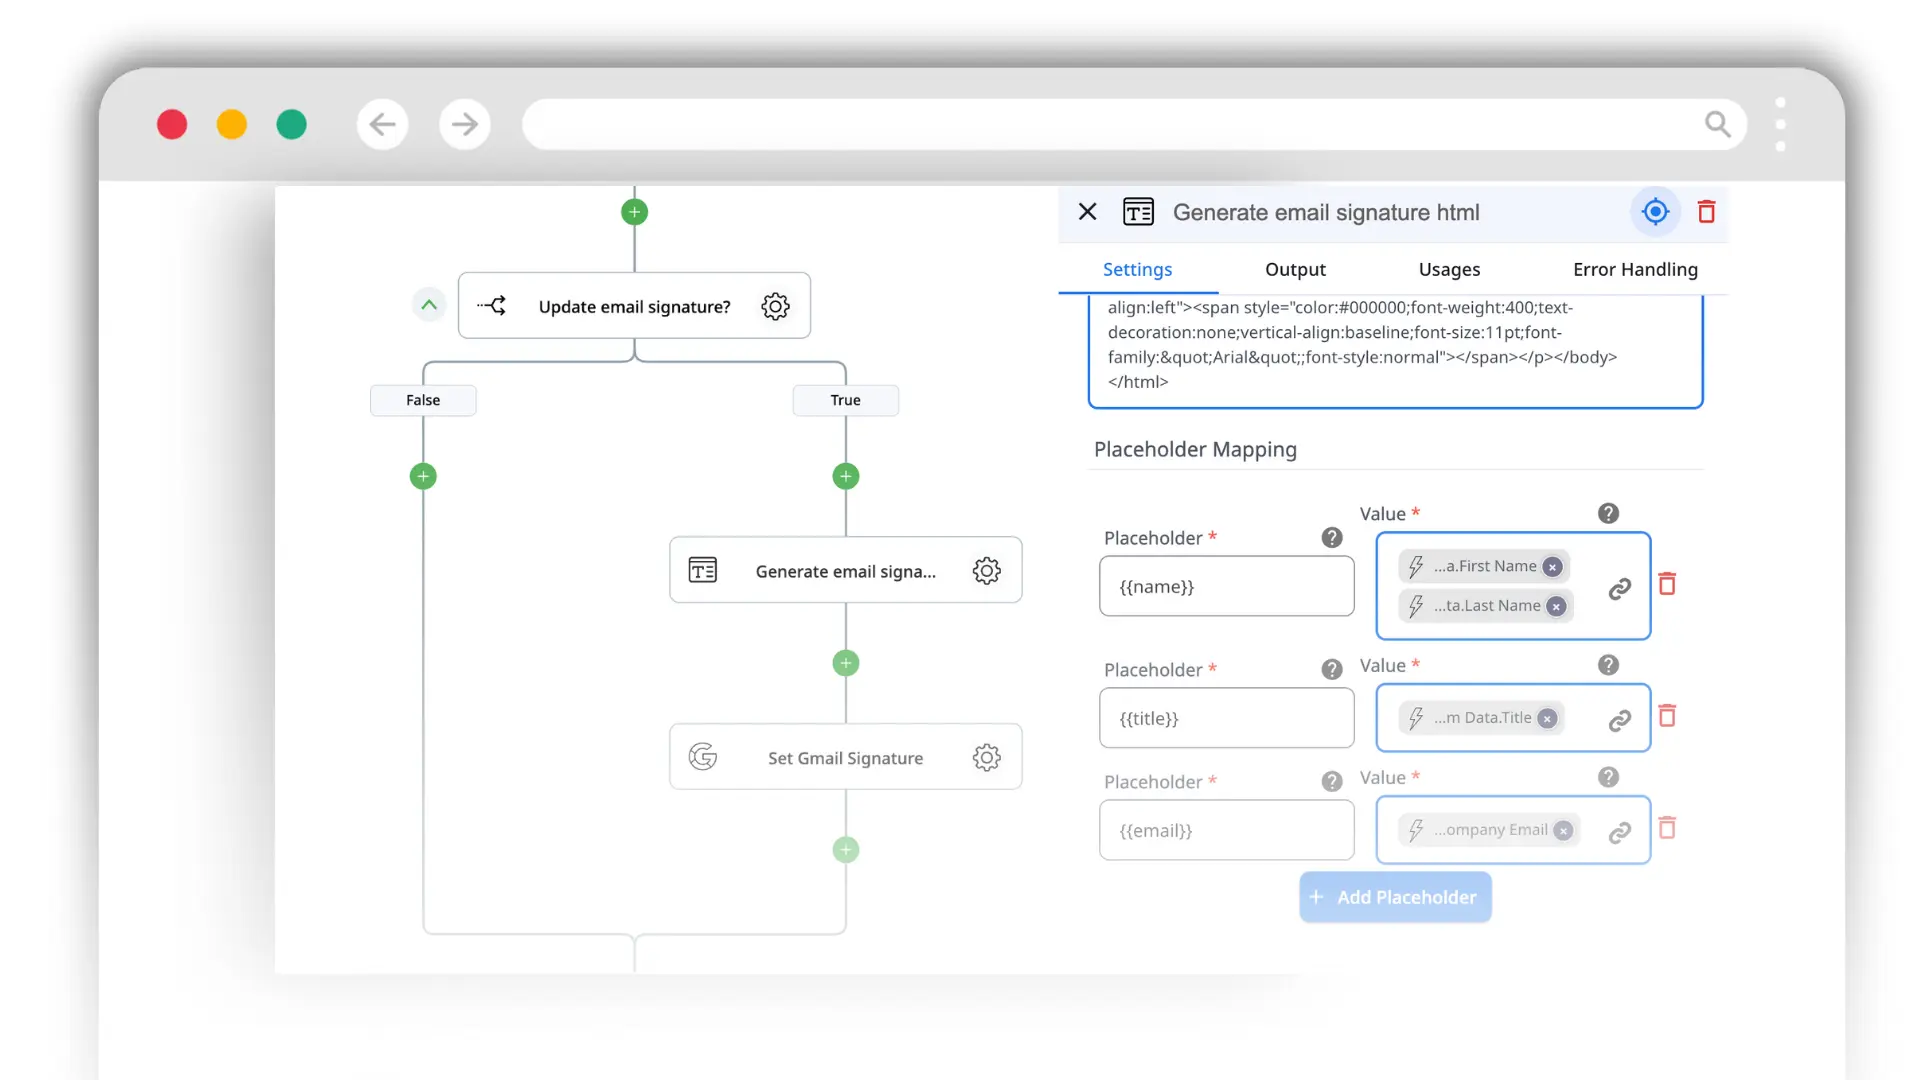
Use the Replace Placeholder Action (in our screenshot renamed to Generate email signature html) and Set Gmail Signature actions to map signature elements (like job title, department, email etc.) and automatically apply the company-branded HTML signature to the new user's account.
-
The Welcome Email
Send a final confirmation to the employee's personal email containing their new credentials, first-day schedule, and a welcome note from their manager.
Pro Tip: Architecture Matters
To wrap up our onboarding a new user in Google Workspace with Zenphi guide, there’re few things we’d like to remind you, as they will clearly impact the way you approach the automation project, and the outcome of the digital transformation.
-
The order of your workflow depends on your Trigger
As we explained, Zenphi is the most flexible tool you'd ever use. There are several ways to trigger a new user onboarding in Google Workspace using Zenphi. You should choose one that aligns with your internal policies, existing best practices and the way your company want to structure the automation.
You can start with listening to the HRIS event. In this case, your first step should be Create User in Google Workspace. You can also start with a Form submission — here, creating a new user in Google Workspace would be compulsory as well.
However, if you start with the user creation event in Google Directory, your focus would be on provisioning (adding to Slack, Groups, and Folders).

