A step-by-step guide on how to create personalized PDF and email them automatically to your recipients. No coding needed
Table of Contents
Use cases for PDF-to-Email Workflow
Automating Gmail emails with a personalized PDF attached to them is a task that is highly relevant to every marketing, HR or legal department. In this step-by-step guide we’ll explain how to do it efficiently using your company’s Gmail account, Zenphi and AI models that are included in all our subscriptions. This guide outlines steps to set up triggers (when PDF should be created), setup your AI models, and effortlessly send emails with attached personalized PDFs.
Step 1: Set Up Your Zenphi Account
Begin by creating your free Zenphi account using this link.
Once registered, you can start building your first automated flow. In Zenphi, a ‘flow‘ represents an automated workflow. It comprises a trigger that initiates the flow, and subsequent actions — the steps to be executed.
Step 2: Choose a trigger
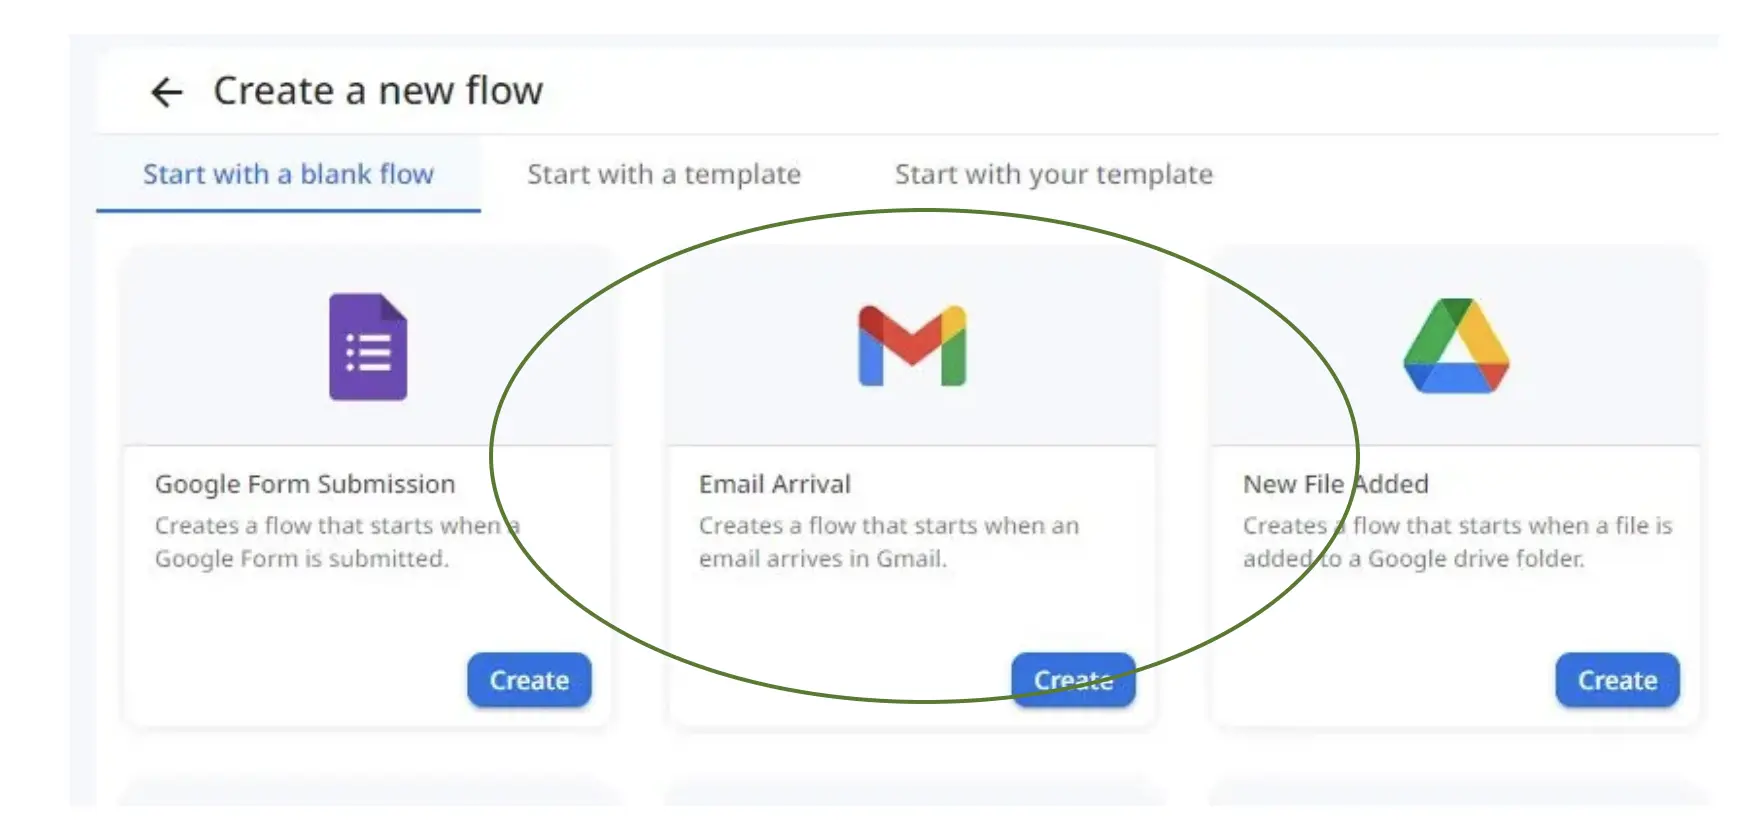
A trigger can be any event that you believe would kick-start your flow. For example, you want a PDF to be created and sent after a Form submission. We have a separate guide on this. For this tutorial we have chosen a different use case: when we want to create a PDF and email it as a response to a received email. For instance, after and order is placed. Or somebody sent you a request to share with them a personalized educational schedule.
In this case, the triggering event will be an email received.
Let’s get started by selecting the Gmail (New Email) trigger, which will serve as the first step of our flow!
Zenphi is a go-to platform for teams, operating with Google Workspace environment, and looking to leverage the power of the tools they’ve got used to: Sheets, Drive, Gmail, Forms. Zenphi allows your team to automate any process without switching platforms, natively and securely within Google Workspace environment — no coding required.
Step 3. Create the Connection to your Gmail Account
As we’re utilizing the Gmail (New Email) Trigger for this particular flow, our initial step is to establish a connection between Zenphi and the email account we intend to monitor. This connection empowers Zenphi to monitor the inbox actively (inbox automation), extracting pertinent information from incoming emails. With each new email, Zenphi springs into action, initiating the flow automatically.
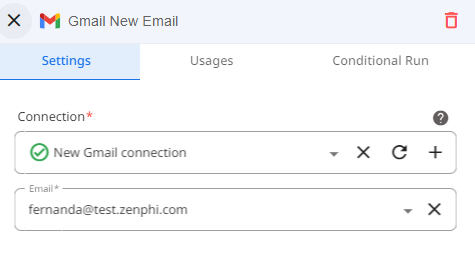
Once the connection is successfully established, data becomes accessible, including subject lines, text bodies, HTML content, and more, from incoming emails in the designated Gmail account. You can then utilize this information in the subsequent actions of the flow (for example, for automating Thank You email flow).
Step 4: Create your AI Model
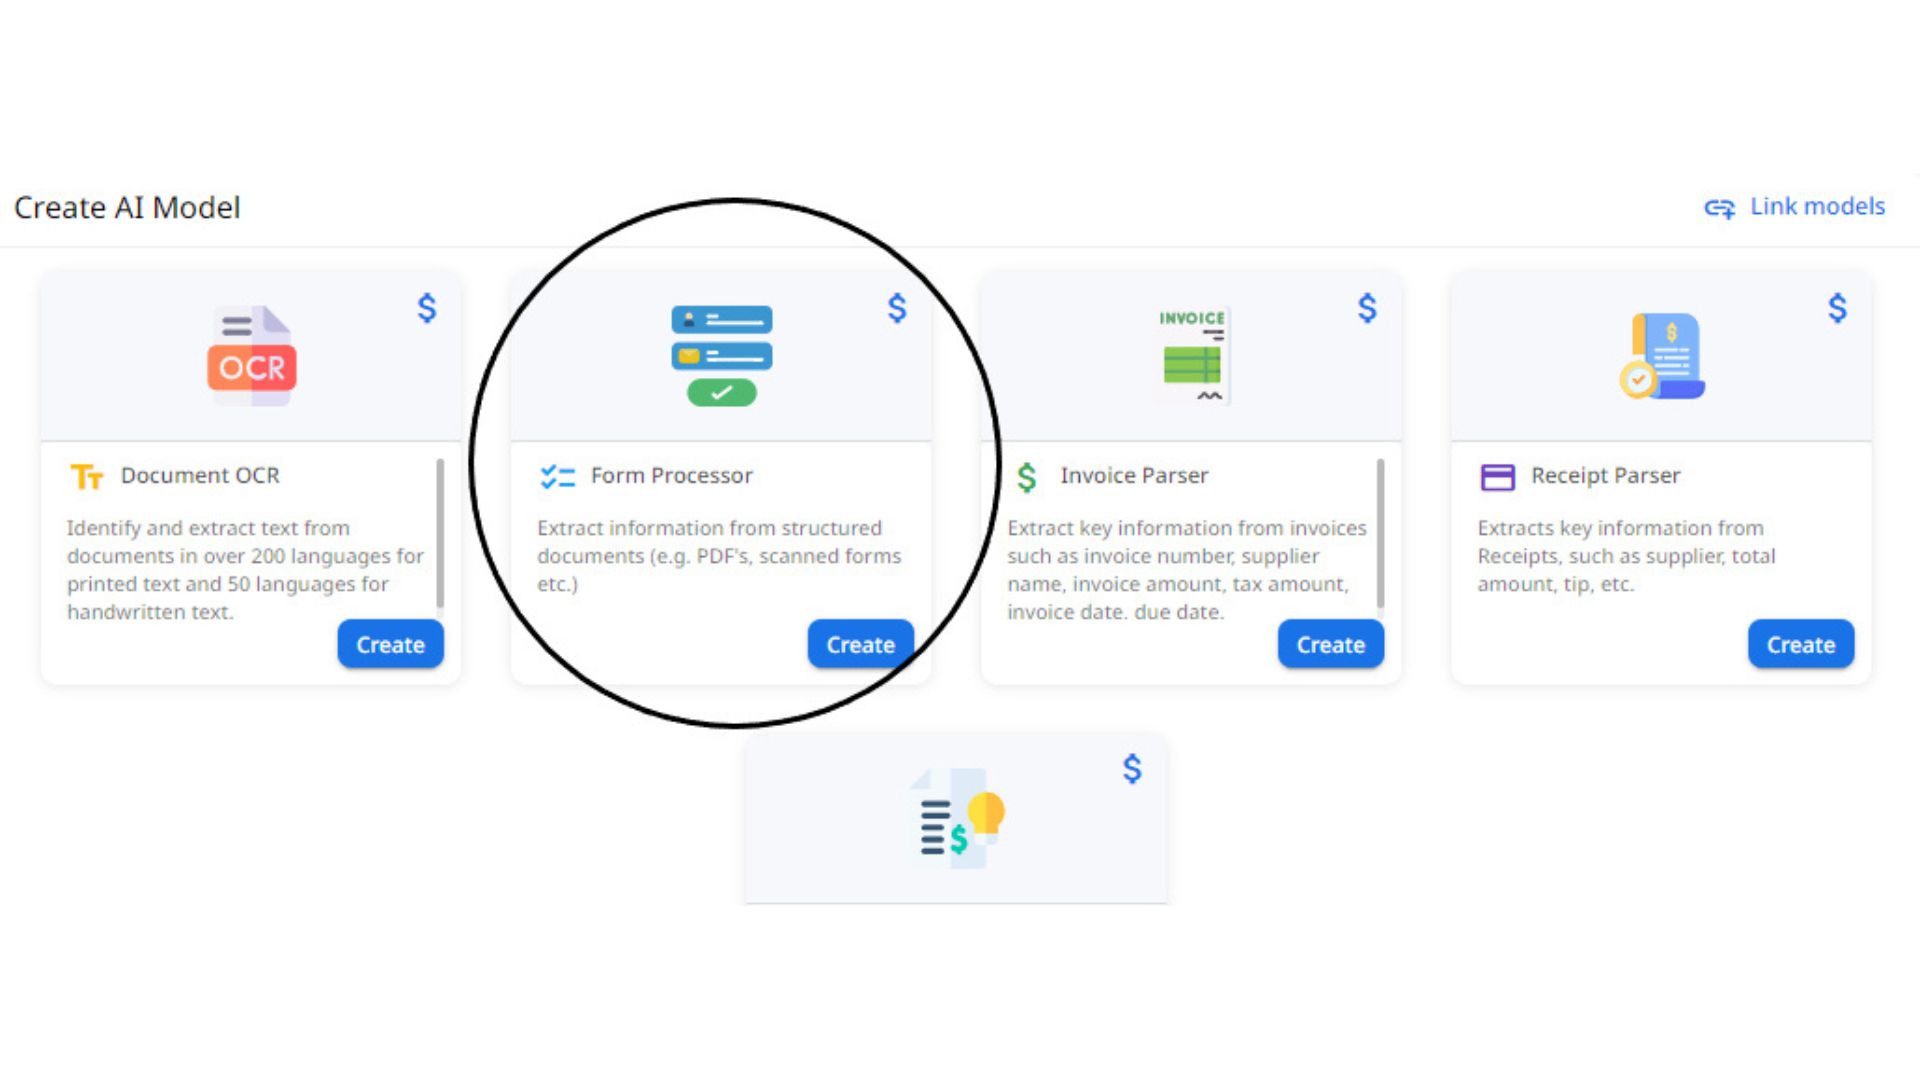
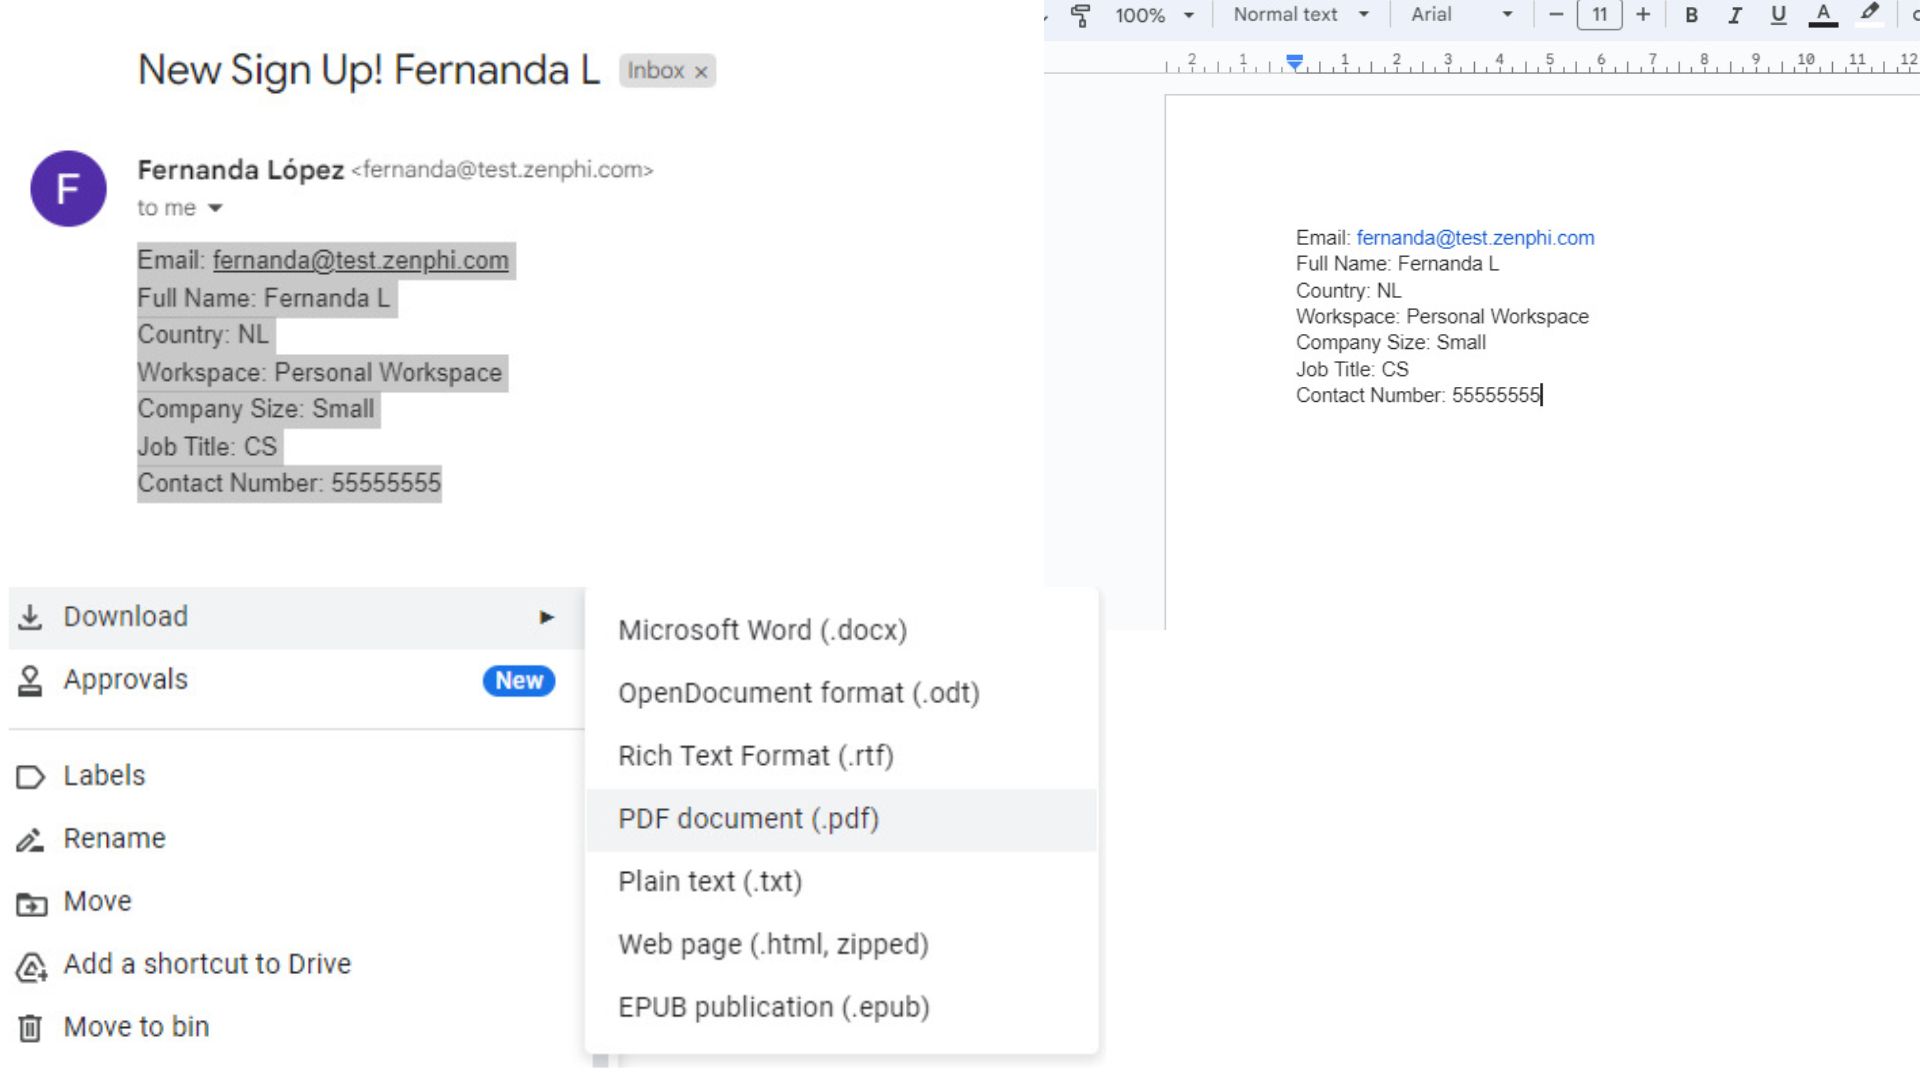
Begin by navigating to your process space and accessing the “AI Models” section. In this demonstration, we’ll utilize the “Form Processor” model. Simply initiate the model creation process by clicking on “Create” to commence building your model from the ground up. This model is specifically designed to parse PDF documents and extract relevant fields. To generate the PDF document for your model, seamlessly replicate the content of an existing sign-up email’s text body onto a blank Google Doc. Subsequently, download the document as a PDF to complete this step.
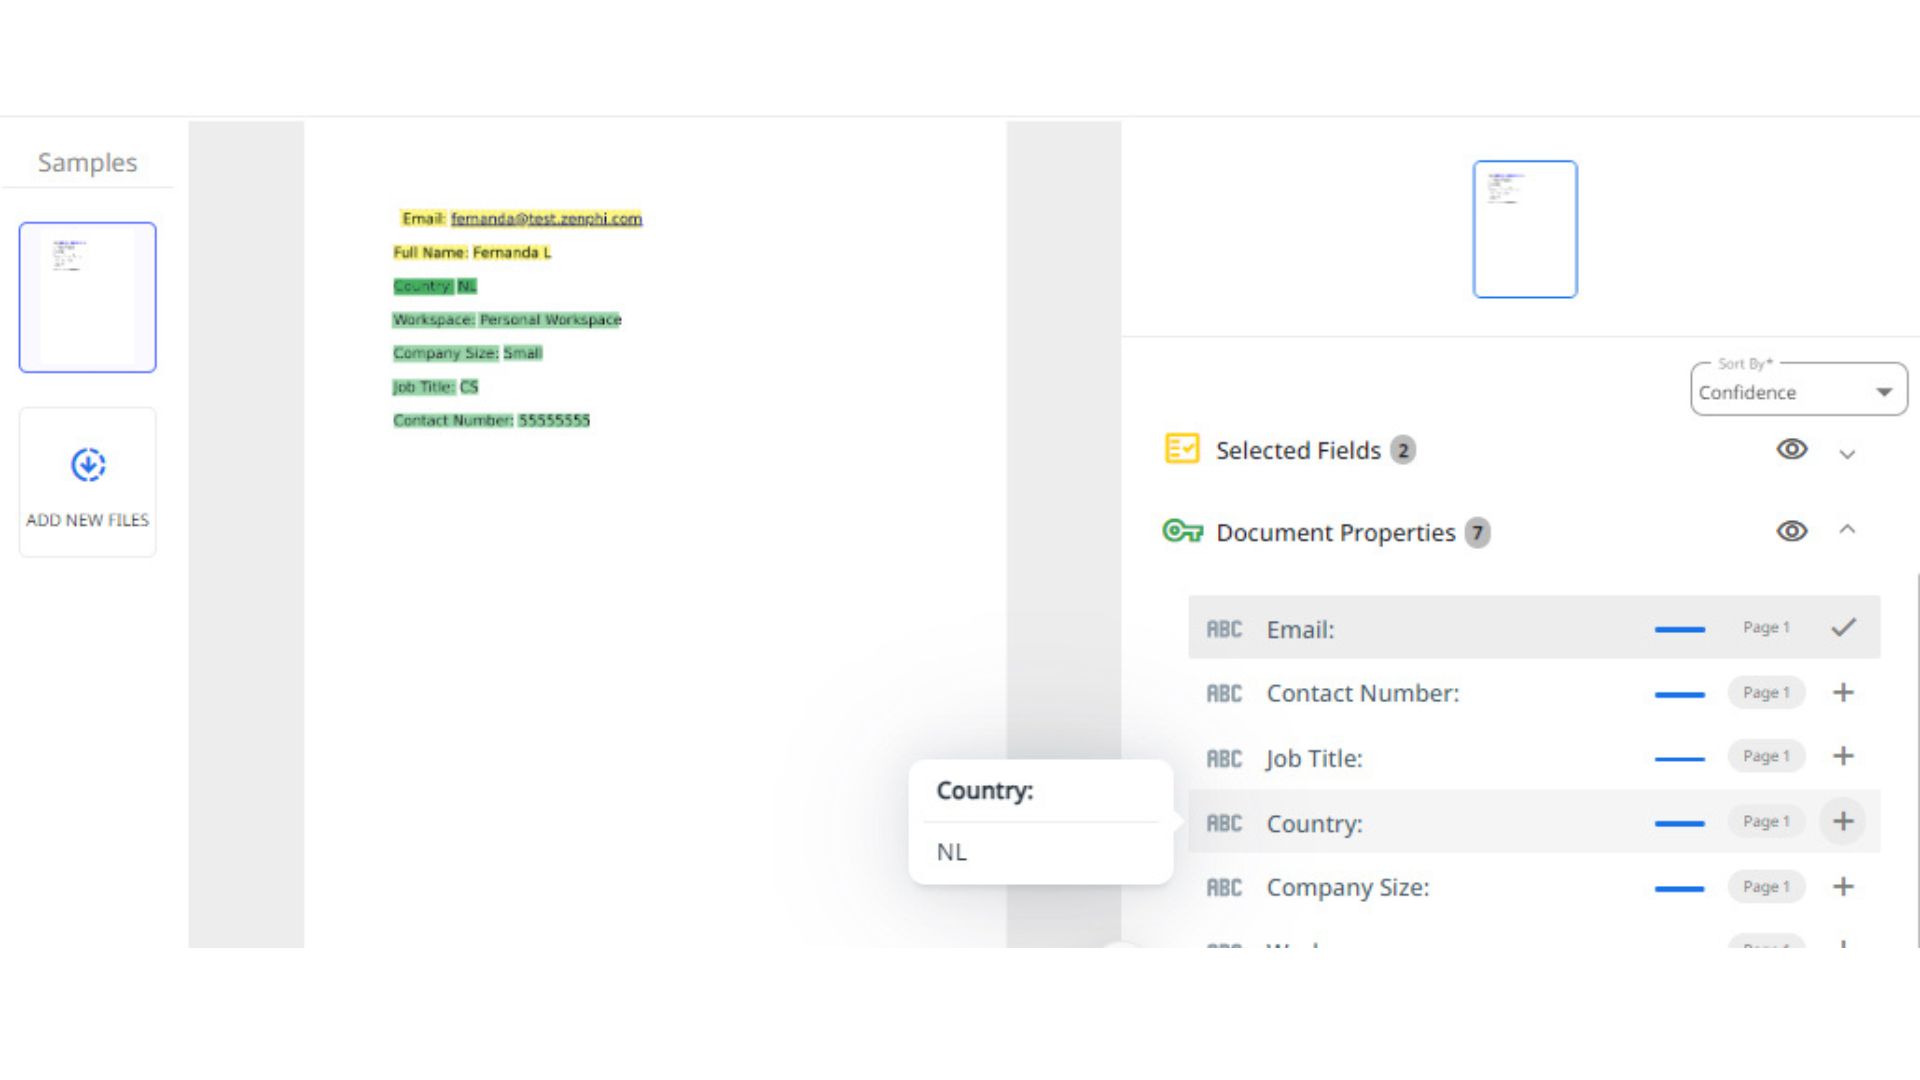
This exported PDF file will be used inside our AI model. Simply click “Add New Files” and add the created document. The AI model will then read the PDF and identify different properties within the email, creating a pattern for each field based on the answers provided by the person who signed up. Navigate to the “Document Properties” menu to select the desired fields.
To add an action, simply click the “+” button adjacent to the page number. Ensure to select all relevant fields necessary for composing your email, as these will be gathered from each email processed by the model. Finally, assign a name to your AI model, save it, and you’re all set to implement it seamlessly into your workflow!
Video Guide On Setting Up The AI Model From Scratch
The beauty of Zenphi, is that you are not limited to the models that are pre-defined by the platform — you can always set up your own AI Model or even connect your OpenAI or DeepSeek models using API keys. If your use case is not covered by the available AI models, please refer to our step-by-step video on setting up the AI Model from scratch.
Step 5: Setting Up The If Condition
The initial action employed is an “If Condition,” designed to execute different branches based on whether the established condition holds true or false. This condition serves as a filter, ensuring that the entire flow process runs only when an email corresponds to a new sign-up, as in your case we’re sending out Thank You emails automatically upon every sign-up event.
To achieve this, a clause has been configured to trigger the true branch exclusively if the email’s subject contains the phrase “New Sign Up.” Should this phrase be absent, Zenphi proceeds to exit the flow. As mentioned previously, you’re able to access information from incoming emails in the selected inbox. So feel free to modify the clause according to your needs, whether it involves using the subject, the text body, or when the email is from a certain person. Simply utilize the token picker icon located on the right, enabling you to seamlessly insert data from preceding steps.

Step 6: Crafting The PDF Document
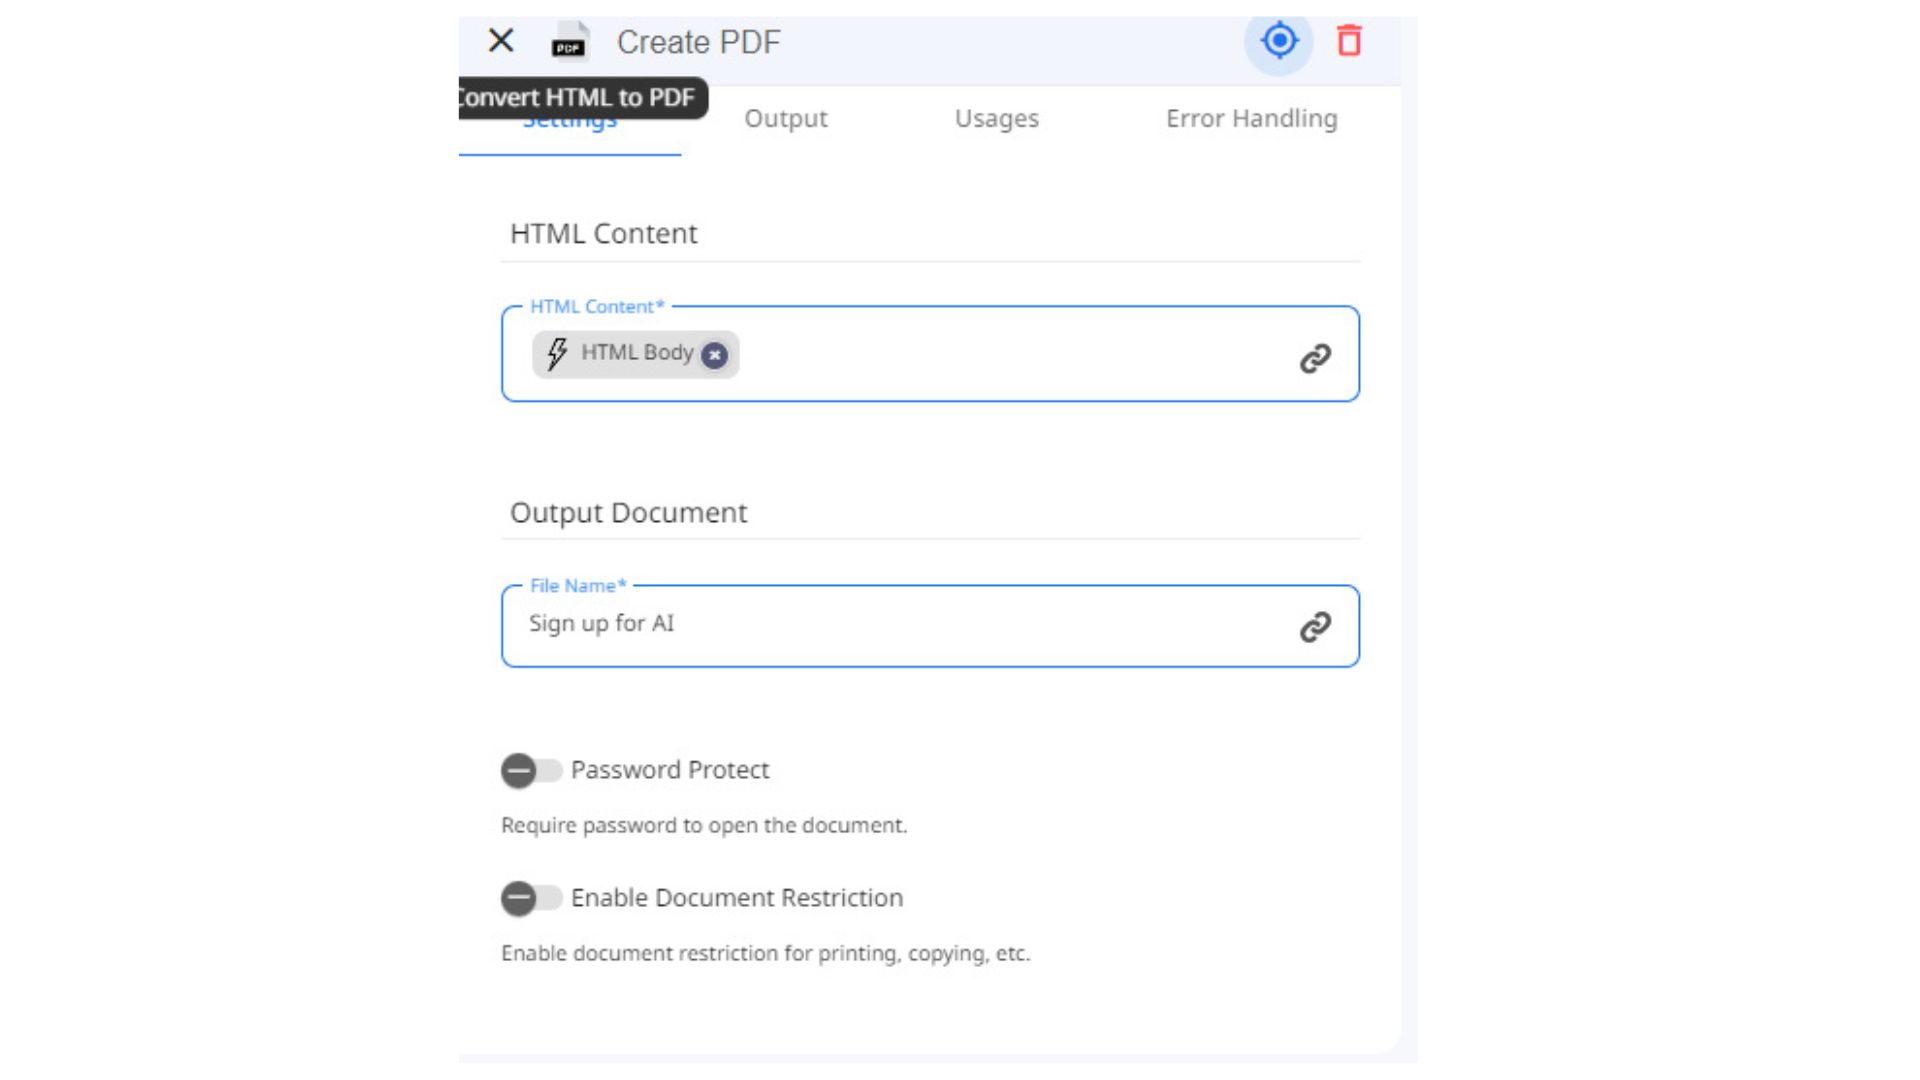
The next step in our workflow is the “Convert HTML to PDF” action . This will facilitate the transformation of the HTML body of the received email into a PDF format, which can then be analyzed by our previously configured AI model. Utilize the token picker feature to select the HTML body of the email from the trigger, ensuring accurate conversion.
While this action enables you to name the generated document and access it in subsequent steps, it’s important to note that the document is not stored permanently. So if needed, remember to add actions like “Save to Drive” to ensure you can keep track of all these documents. Additionally, you have the option to enhance security measures by password-protecting your document or implementing specific restrictions as needed.
Step 7: Implementing the AI-based PDF-to-Email Model
Now we can finally implement the AI model created at the beginning of our process! Just to remind you: we need to send an automated Thank You email upon every sign-up using a Gmail account.
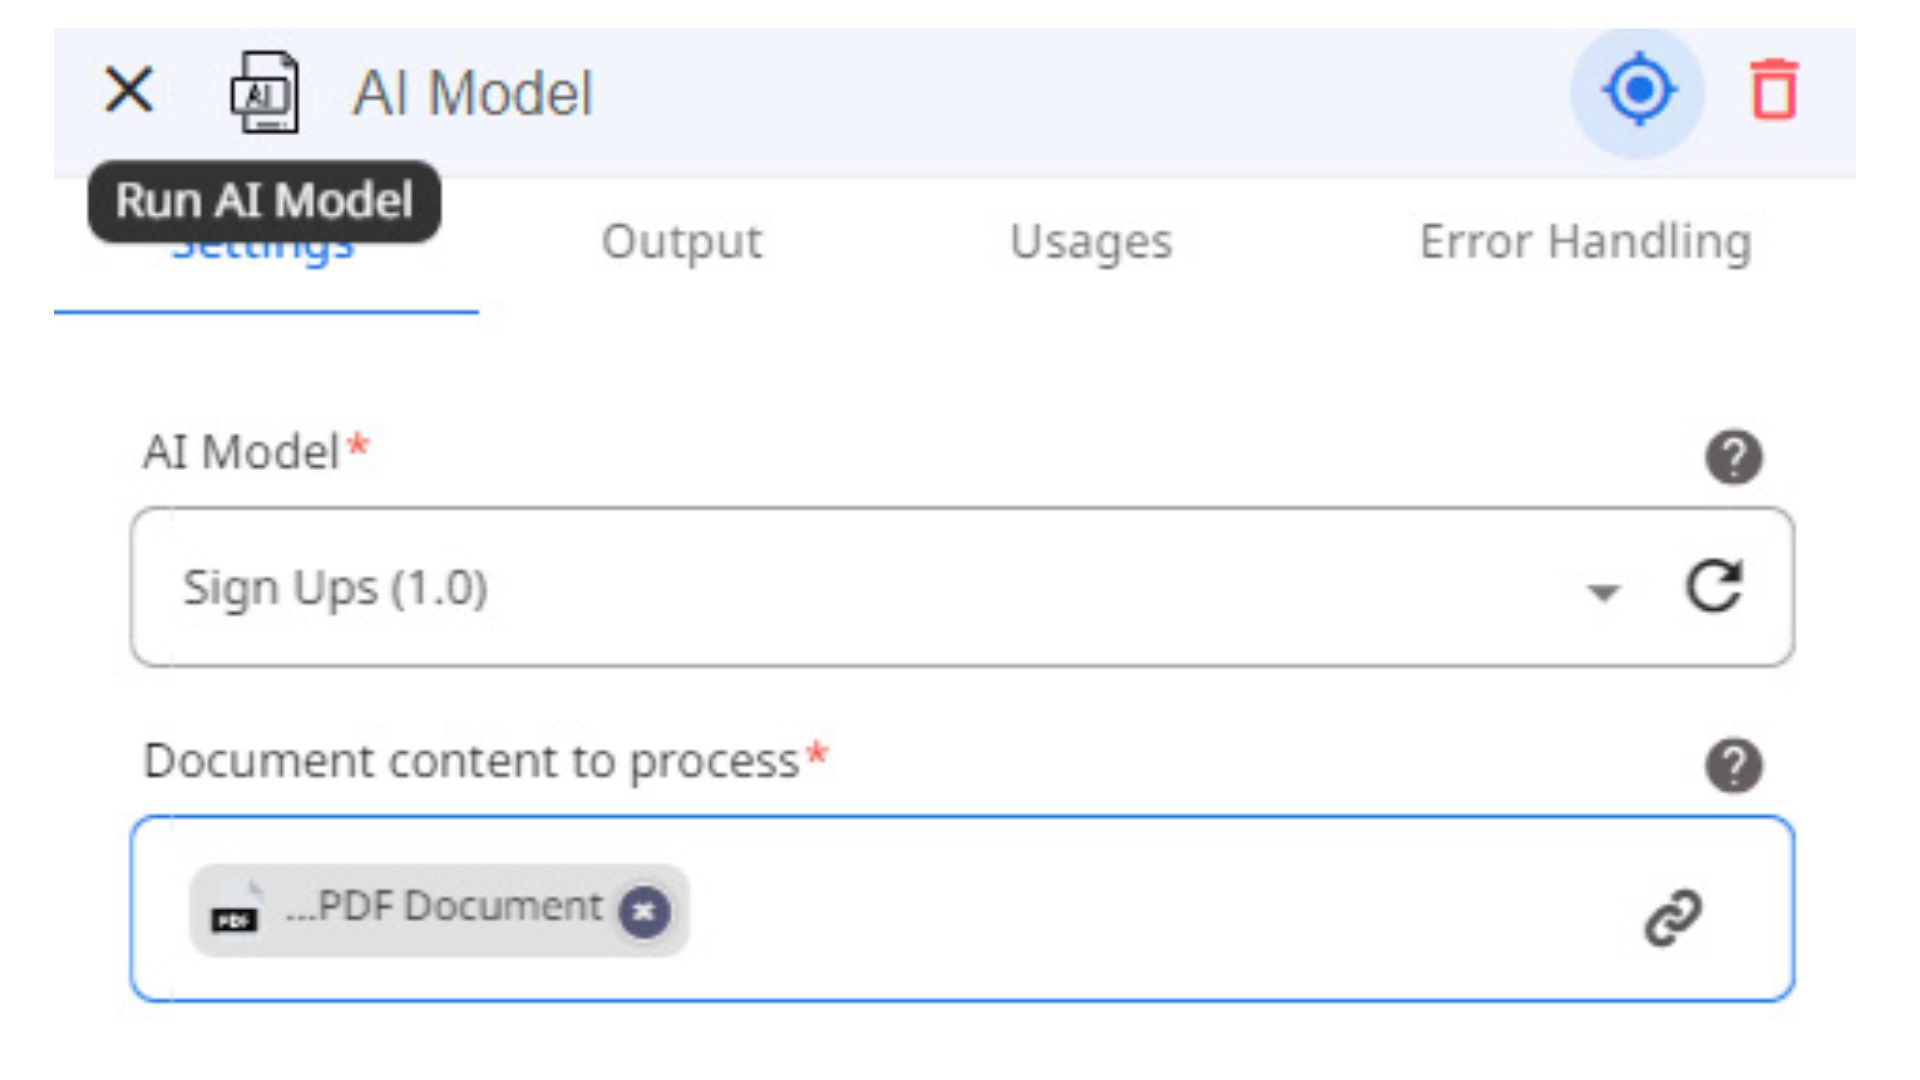
Add the “Run AI Model” action to your workflow as the subsequent step. If your AI model was constructed accurately, it will be available in the drop-down menu. From there, designate the file that will be analyzed by the AI model. In this instance, we’ll select the PDF generated in the preceding step.
Step 8: Sending Email
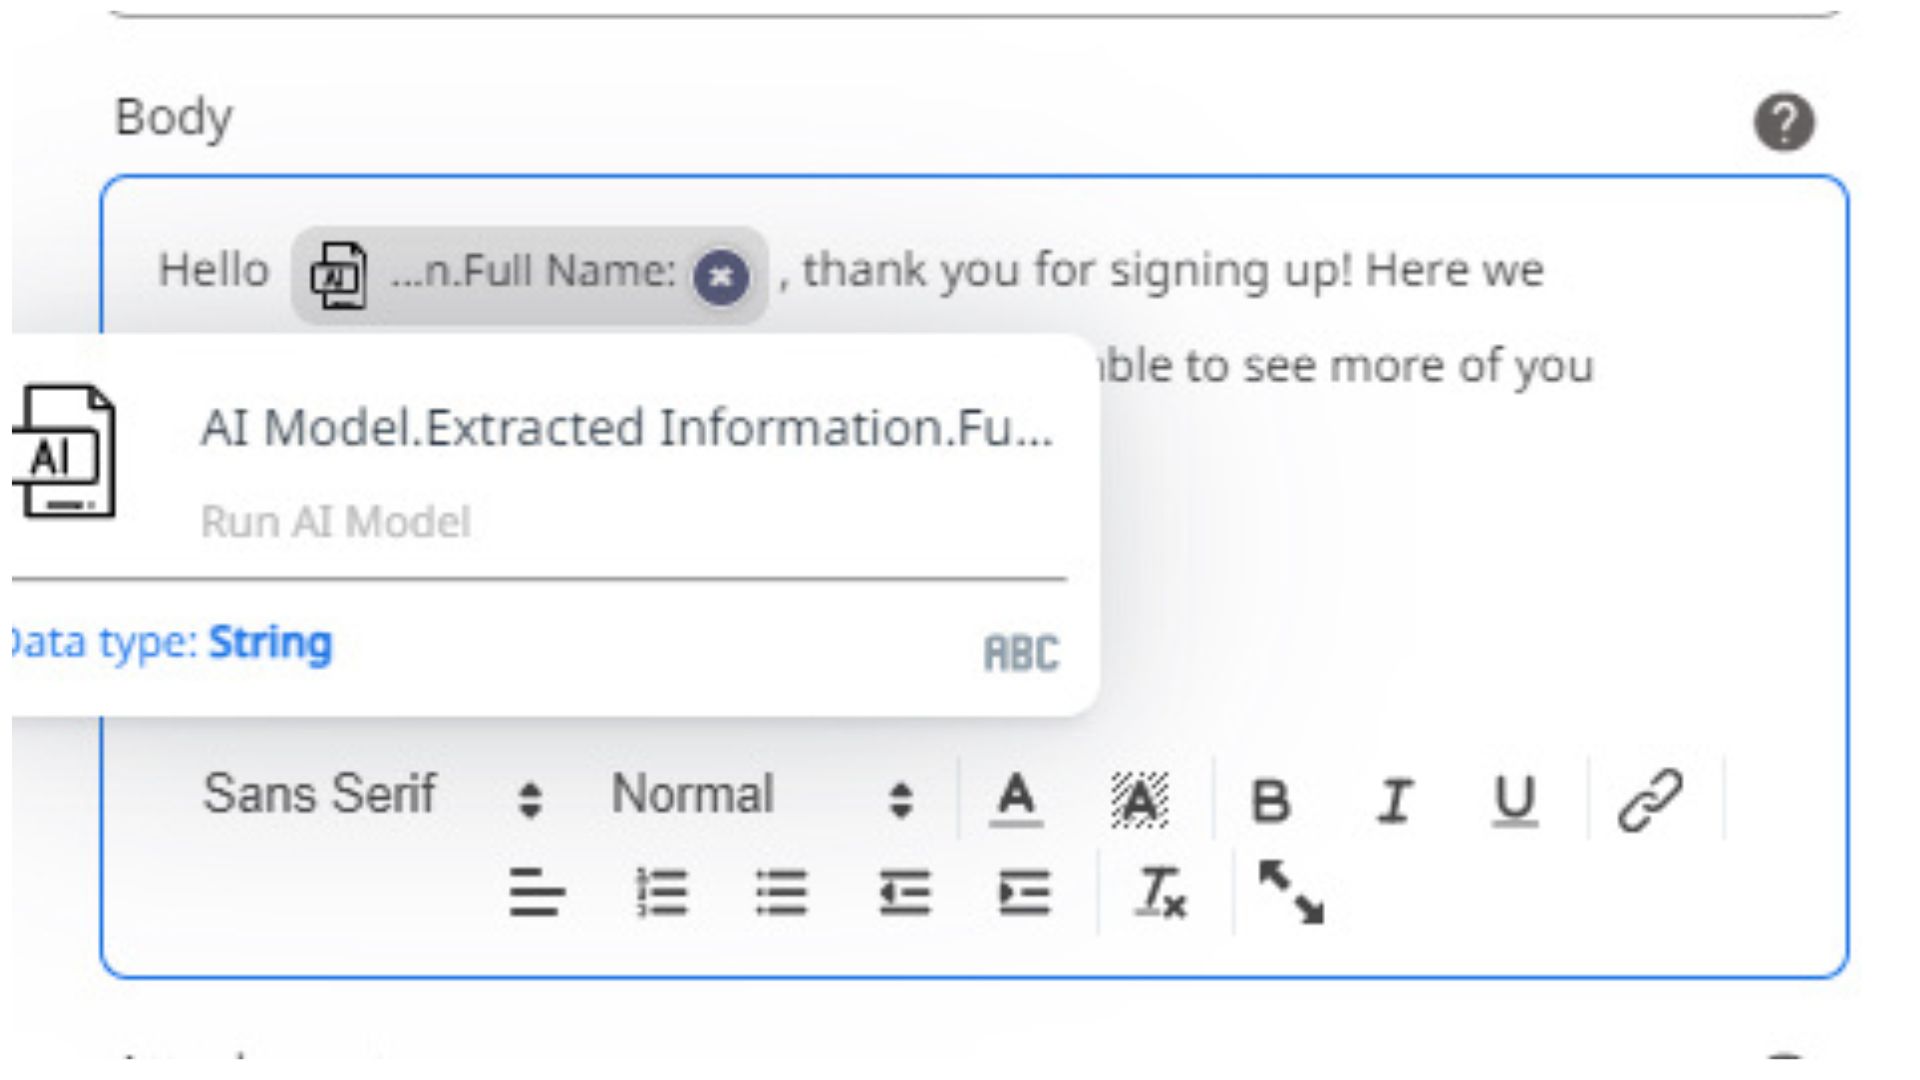
For the concluding step in our flow construction, we’ll employ the “Send Email (Gmail)” action. Since the AI model returns the email and full name of the person who signed up, we can use these values in our email using the token picker. Incorporating these tokens will lend a more personalized touch to your email.
Step 9: Customize & test PDF-to-Email flow
The final step would be triggering the flow manually and make it run once to make sure everything’s correct. Check workflow logs as well.
You can also read our guide on how to automate a task of sending out confirmation emails upon Google Forms submission. Or how to automatically send out different emails based on Google Forms Control value.
We hope this guide has provided valuable insights into automating your workflow with Zenphi.
Take Control of Your PDF To Email Workflows
Manual PDF to Email workflows wastes time. Automate your Gmail processes and start sending professional PDFs — faster, smarter, and more securely.

