Are you looking to make distance learning for your students more interesting? If yes, then consider gamifying learning methods for them. Gamified learning is easy if you are using Google Workspace for Education.
Also, automating your gamified activities helps you save time and effort. Imagine creating fun learning activities for your students minus the usual hassle. With automation, you can collect quiz scores and grade their works automatically.
Automate Your Gamifying Learning Process with zenphi
How to Use Google Forms to Automate Gamification in Education
In this example, we will go through a step-by-step process of setting up a gamified online quiz. This workflow will automatically collect scores and award students with level badges. After that, send a “thank you” email to all quiz participants. Here, you will learn the basics of setting up fun online quizzes and automate them. The end result is a more interactive method of teaching without the hassle.
Using Google Sheets to collect the quiz responses and scores
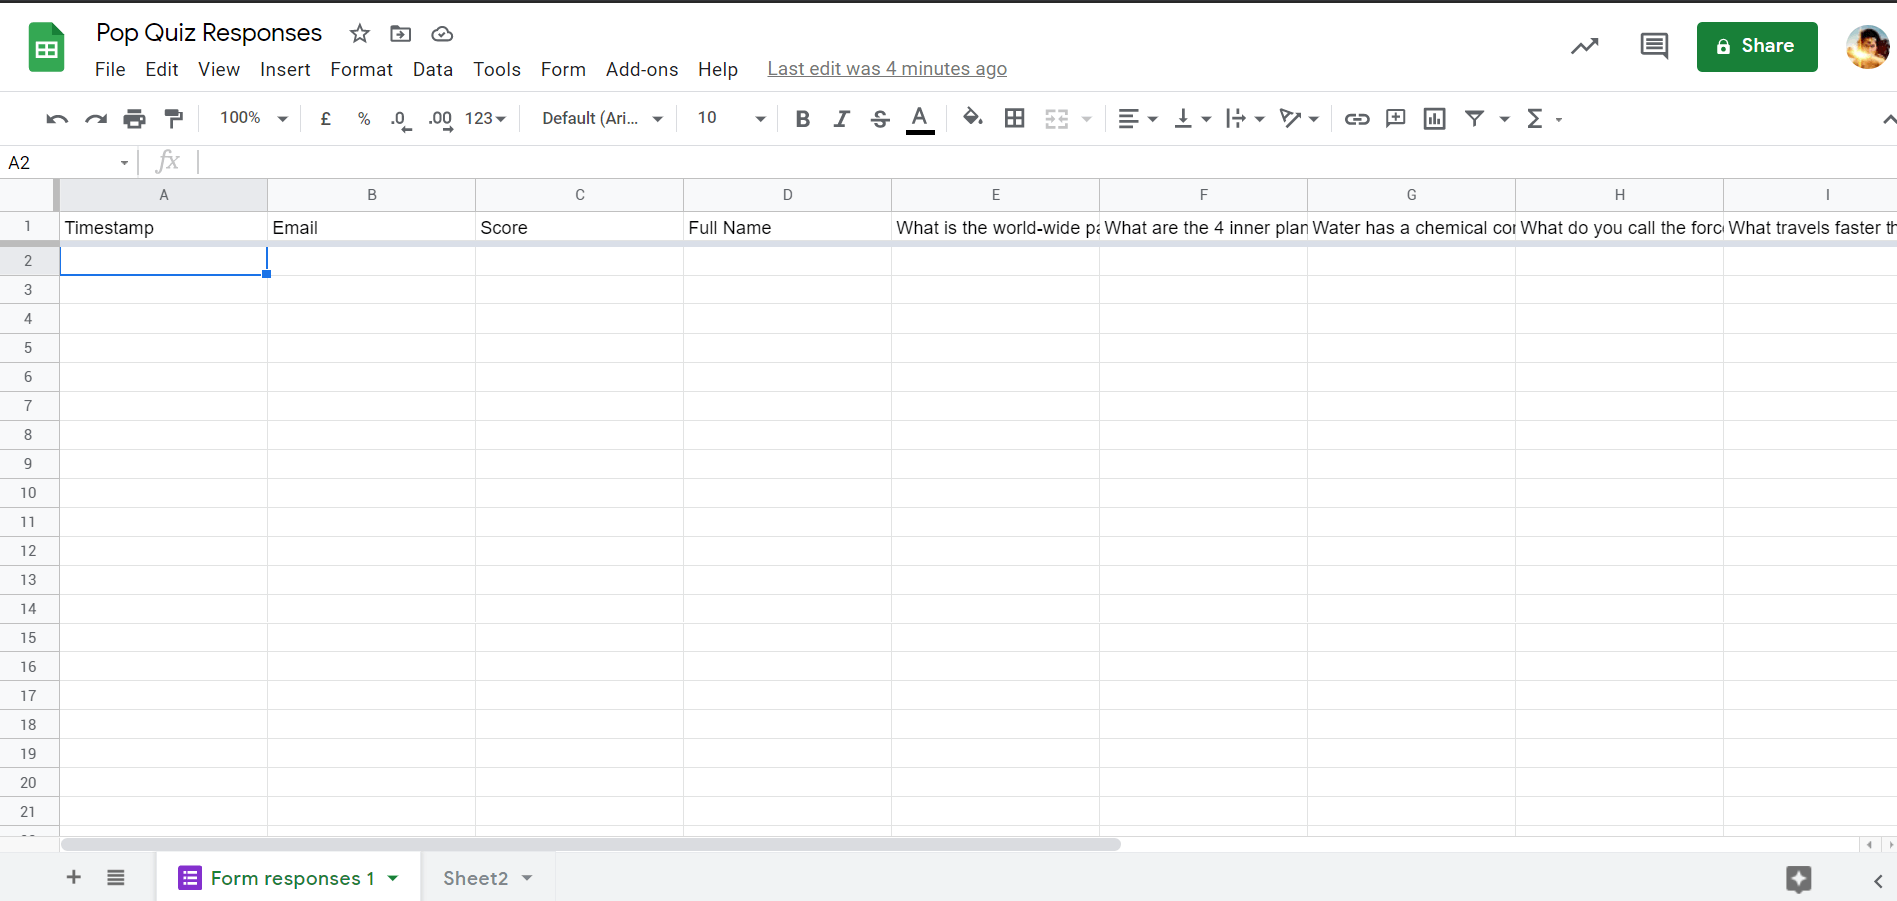
Creating the gamified quiz with Google Forms
Go to your Drive, create a folder where you will store all the files you will create for this automated flow.
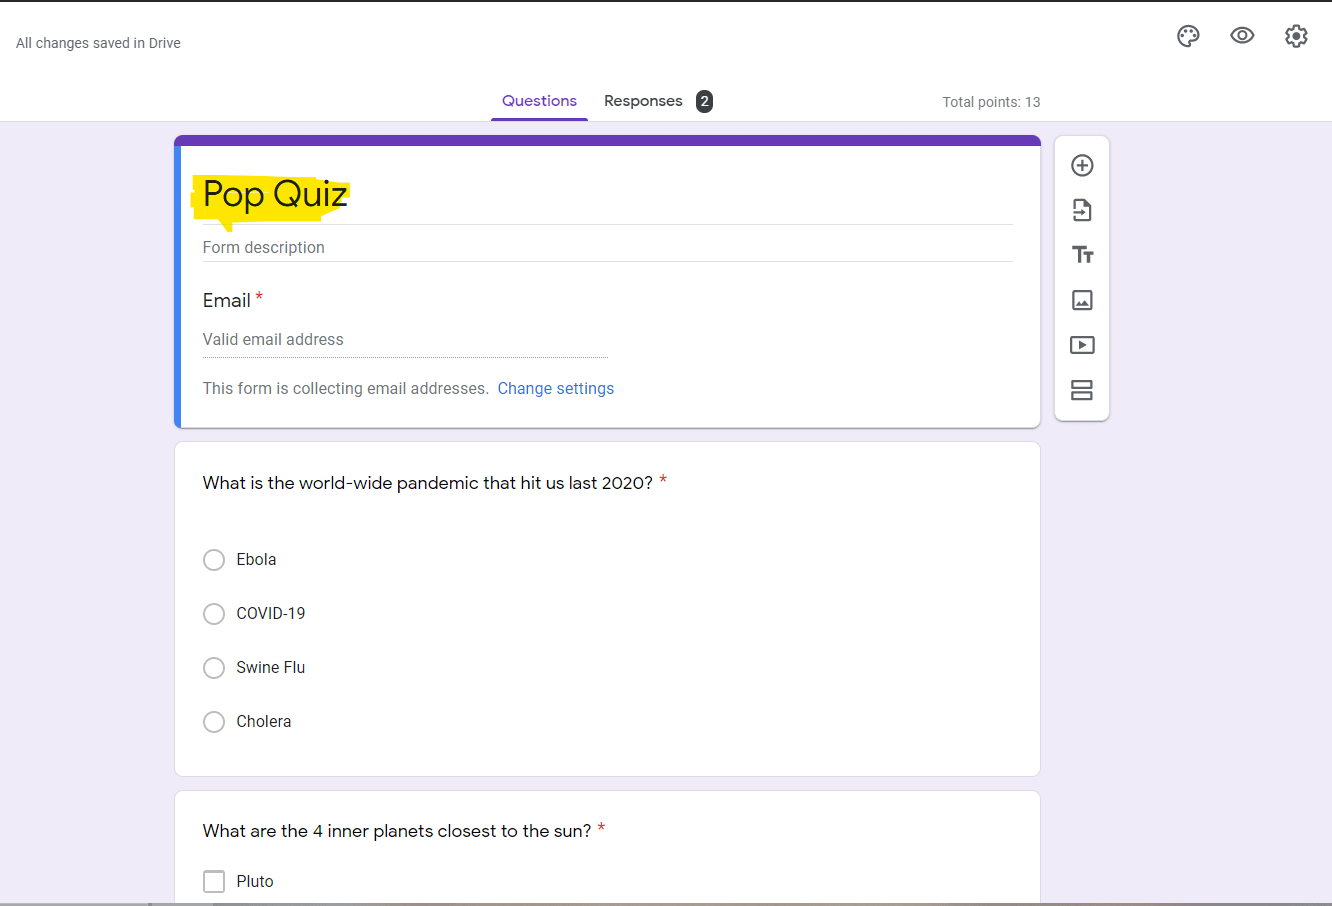
If you click the question, you can see at the bottom part the Answer key. You can use it to add a point system and specify the right answer for each question.
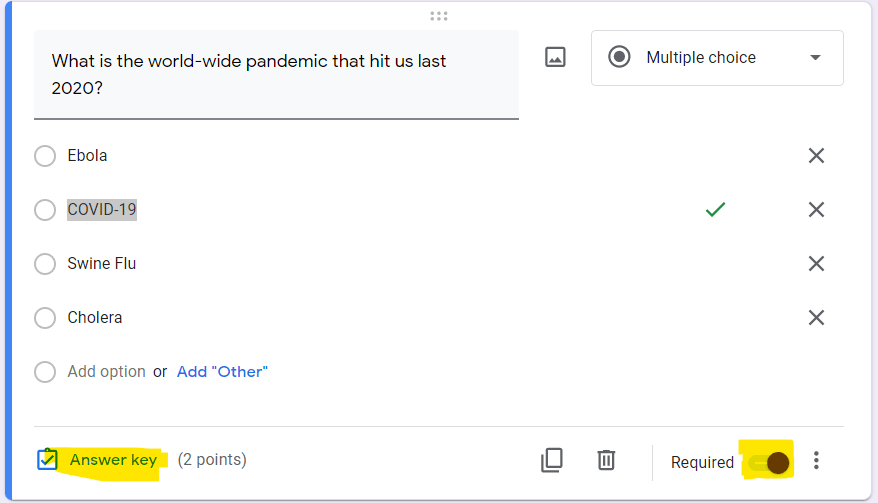
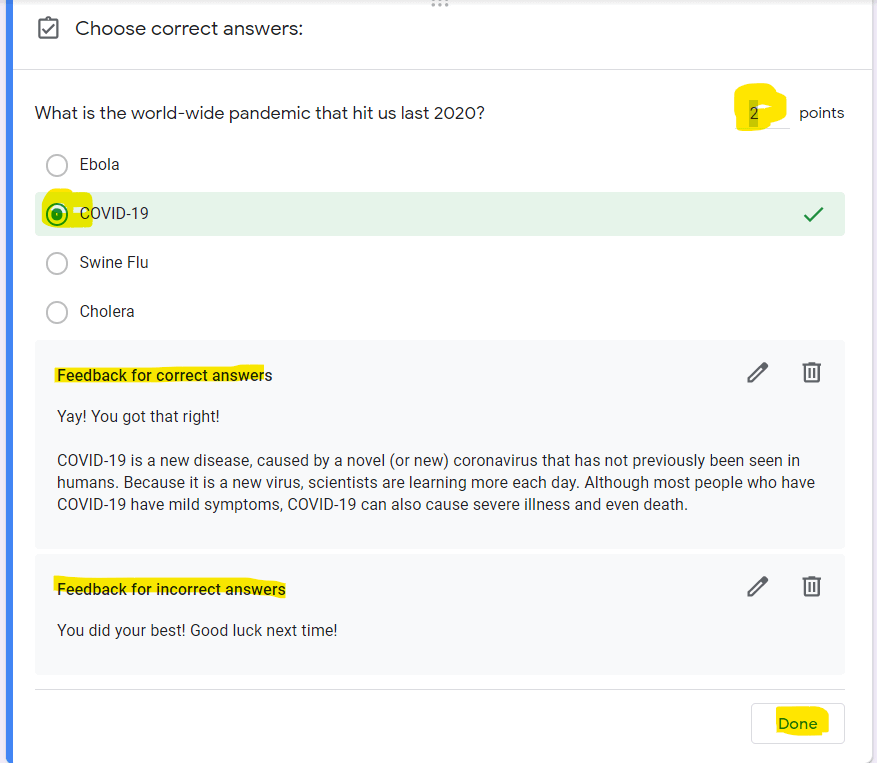
You can also provide feedback for correct and wrong answers.
Once done assigning points and configuring the feedback, click Responses. Next, click the Sheets icon and select Existing spreadsheet. Hit select. Then, find the “Pop Quiz Responses” we prepared earlier.

Uploading the quiz badge
Upload your badge of choice and make sure it has a good quality.

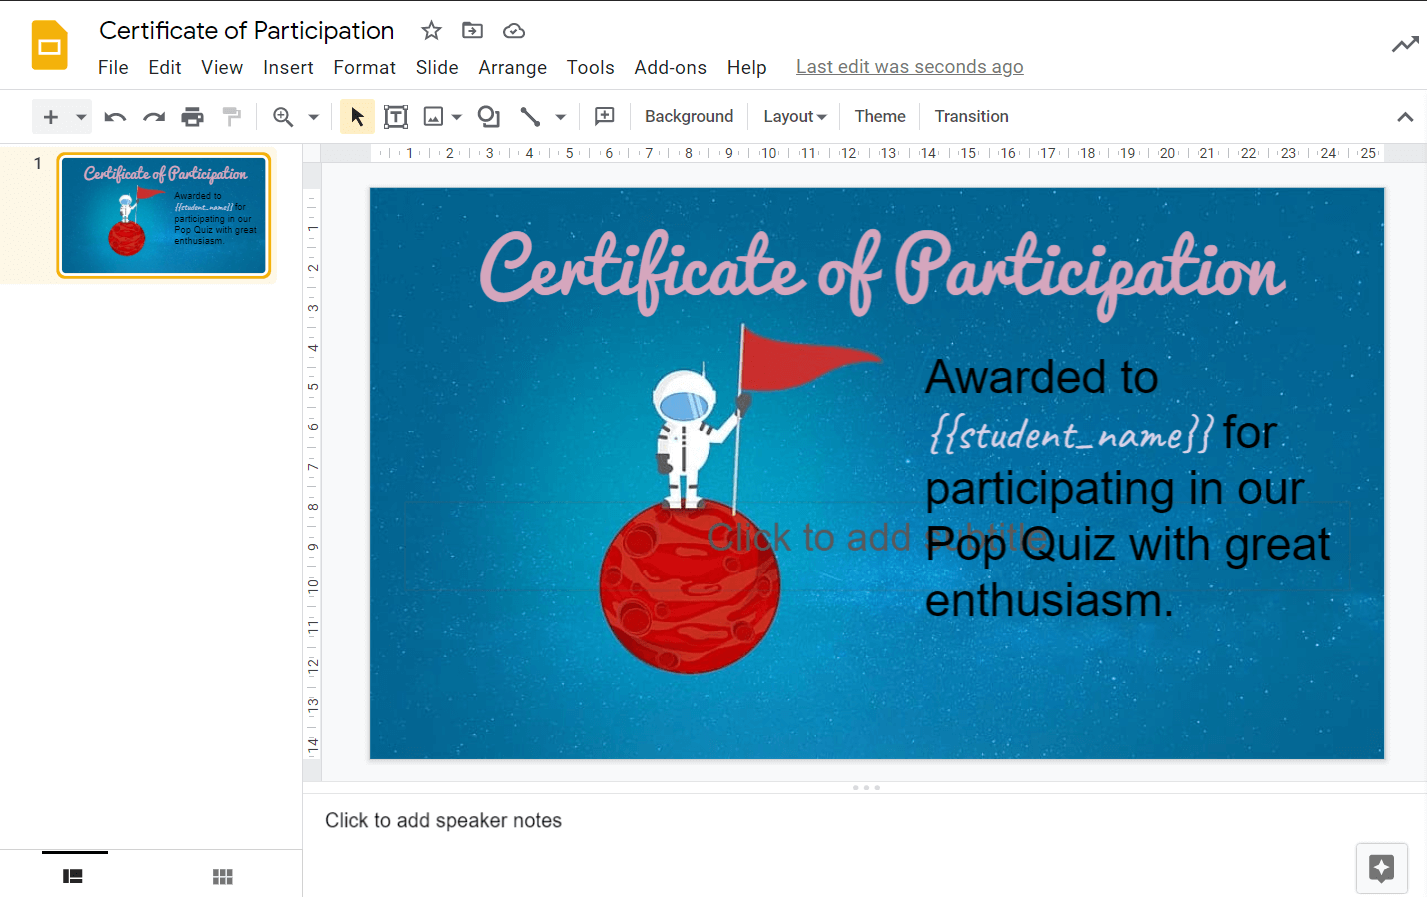
Creating a Certificate of Participation template
Connecting All the Tools for Gamifying LEarning Process Automation Using zenphi
The second and most important stage of our gamifying learning process automation. Here, we are going to connect all the tools we used earlier.
This way, we can collect scores, send out badges and certificates minus the manual effort.
Generate Certificate Template
Let’s start by signing in to our zenphi account. Follow that by creating a new flow and selecting Generate Certificate Template.
Selecting this zenphi automation template will allow you to send out badges and certificates with one click. Once all the responses and scores are in, zenphi will then examine the spreadsheet. It will then pull out names and email addresses and start the emailing process.
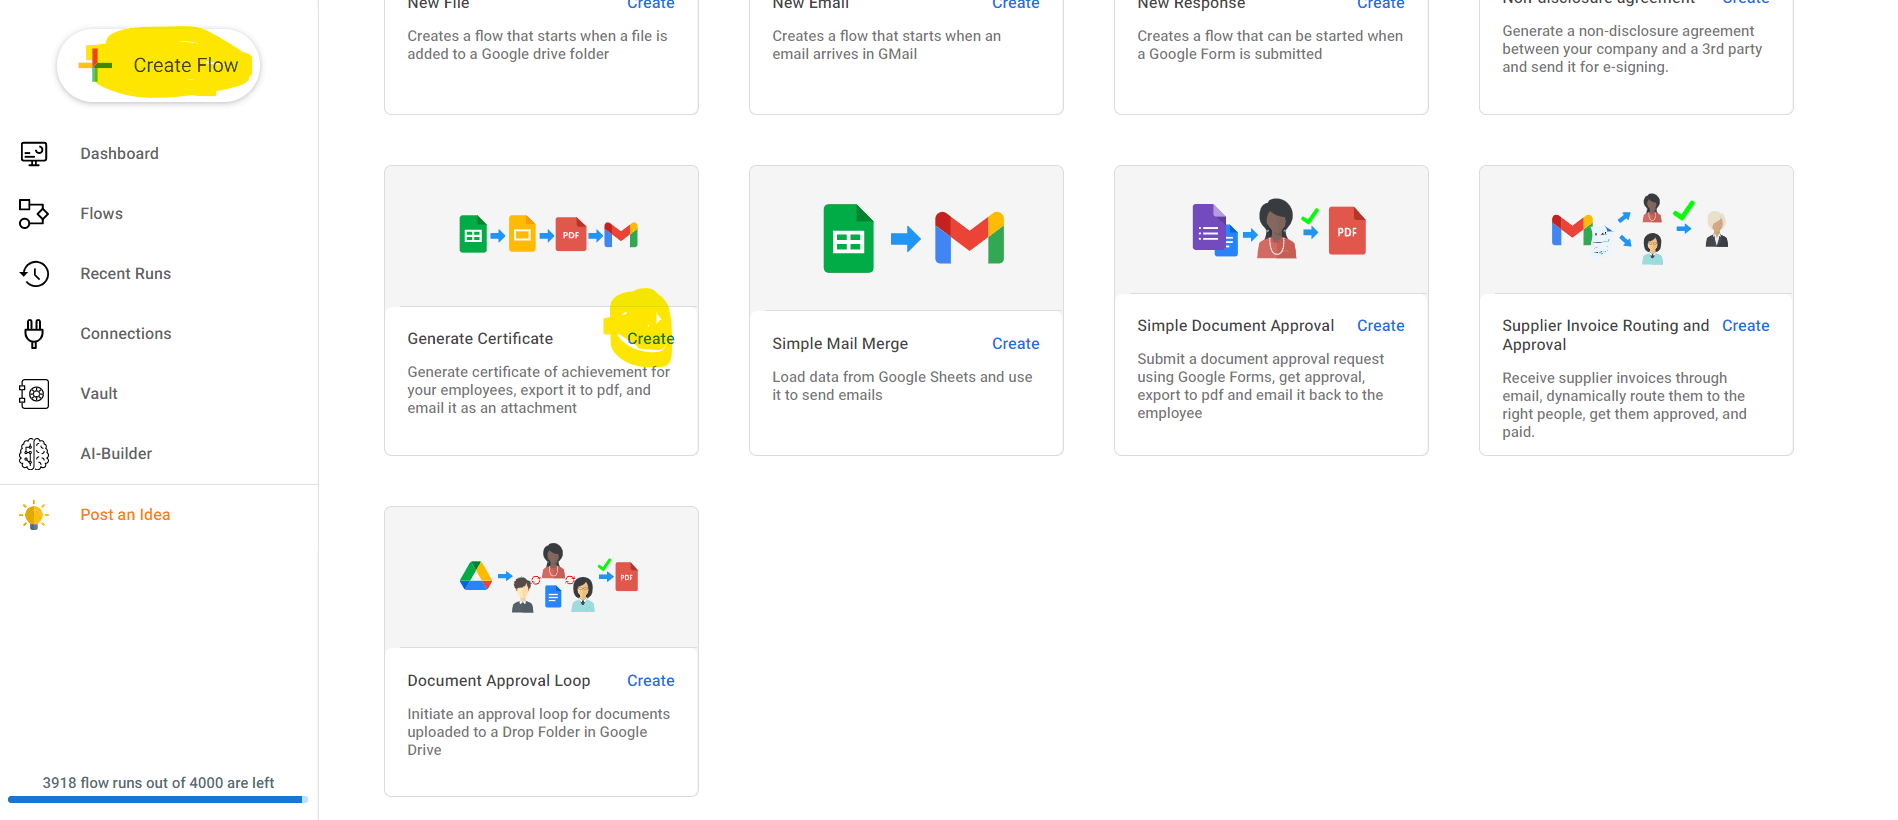
Hit create and we will arrive at the template configuration phase. We will make sure that all the Connection fields point to the right Workspace account, a.k.a. the account housing all the files we created earlier.
If this is your first flow, click the + button at the corner of the Connection field. Then, select the Workspace account, and authorize.
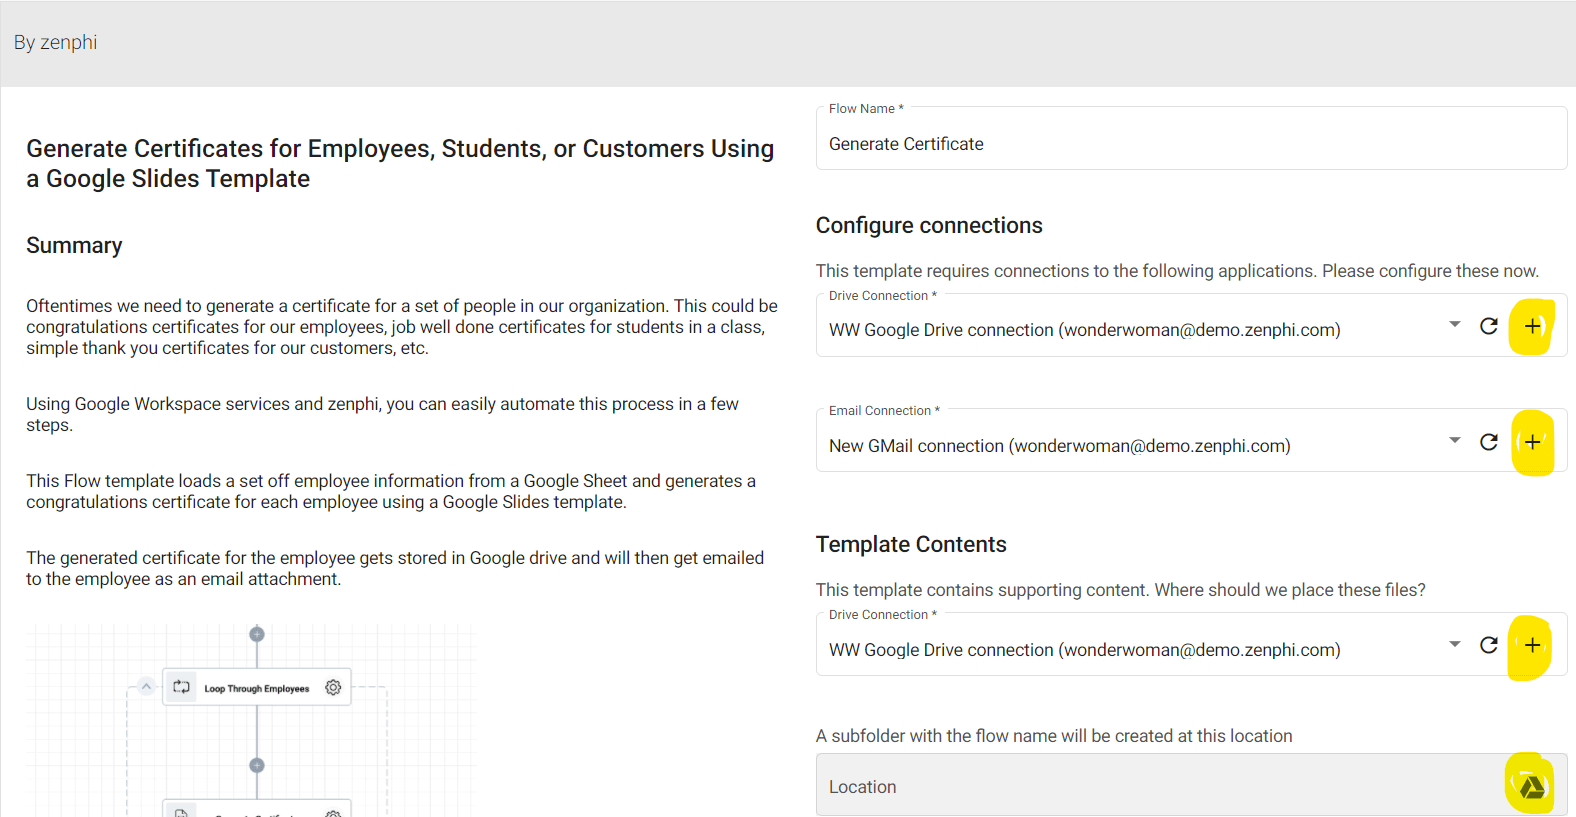
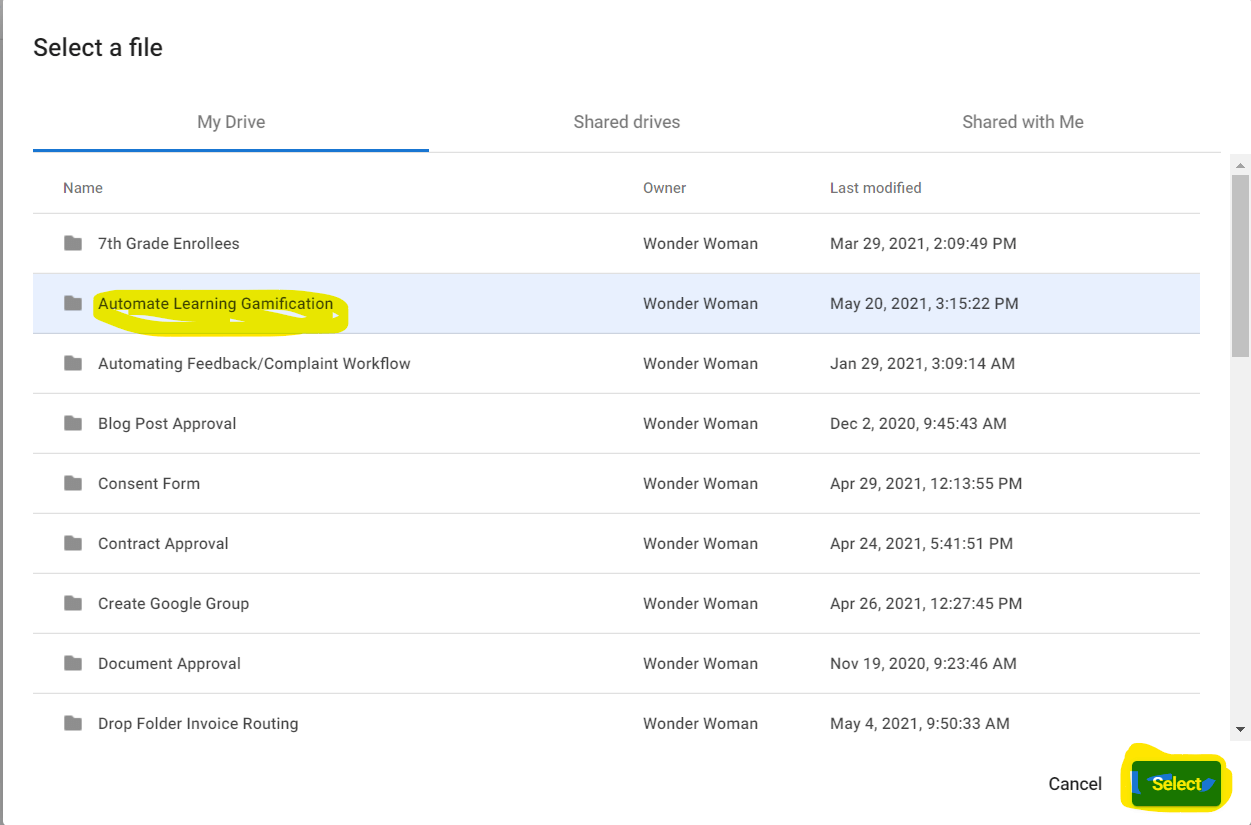
In the subfolder field, click the Drive icon. Follow this by selecting the Gamification in Education folder housing all the files we created earlier. And then, hit Use This Template.
This is what the Generate Certificate template will look like. We are going to modify some of the steps and add other actions along the way to gamify this flow.
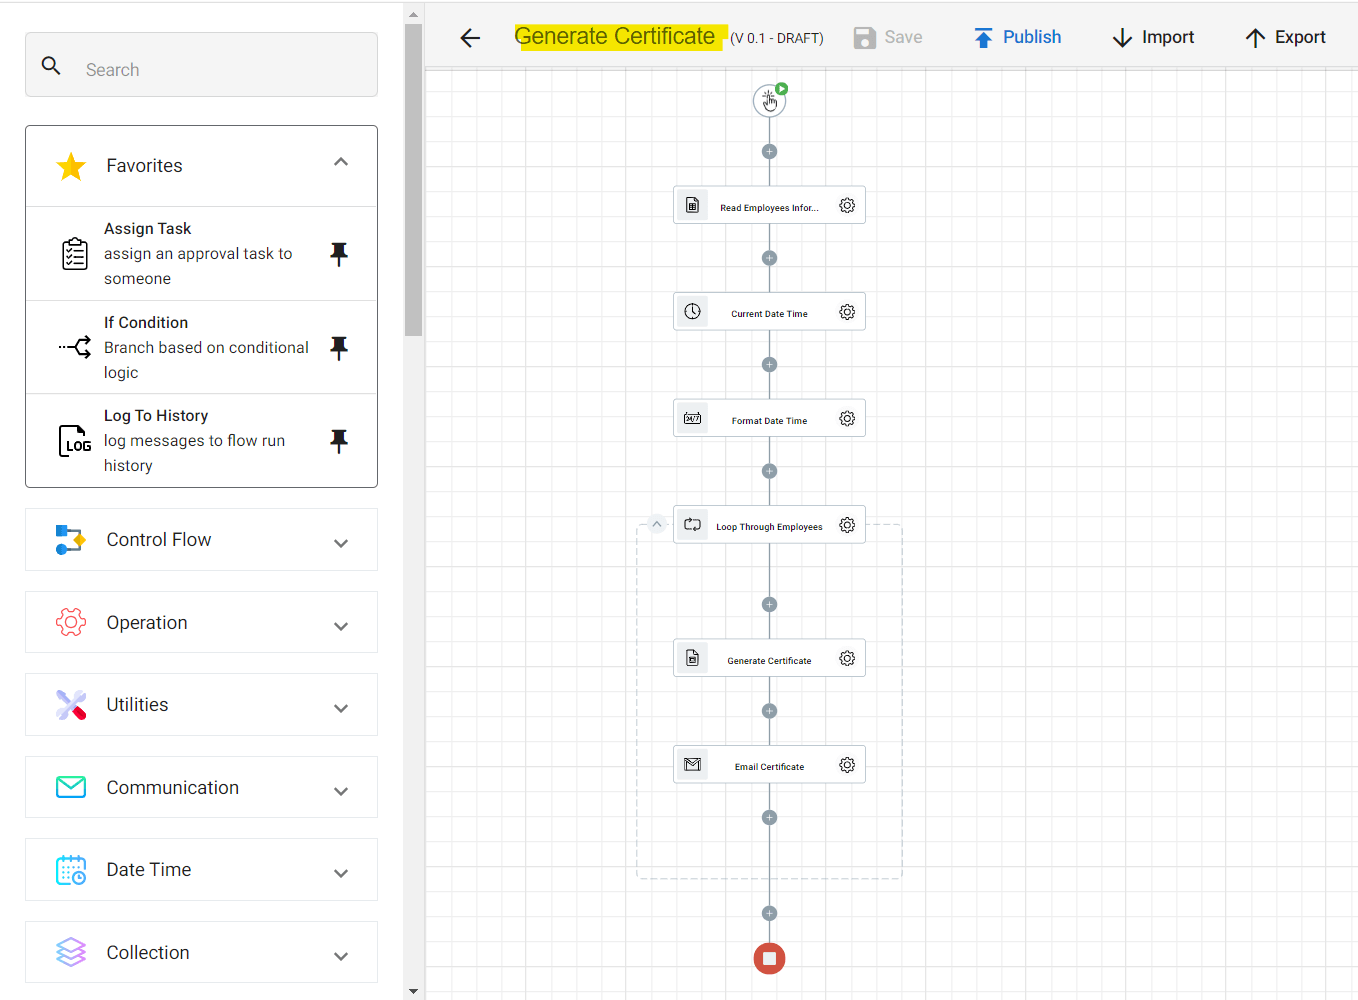
Read Rows Action
We can find the Read Rows action under Google Sheets in our Designer panel. You can choose to edit the name of the action by double-clicking. And to configure it further, click the gear button.
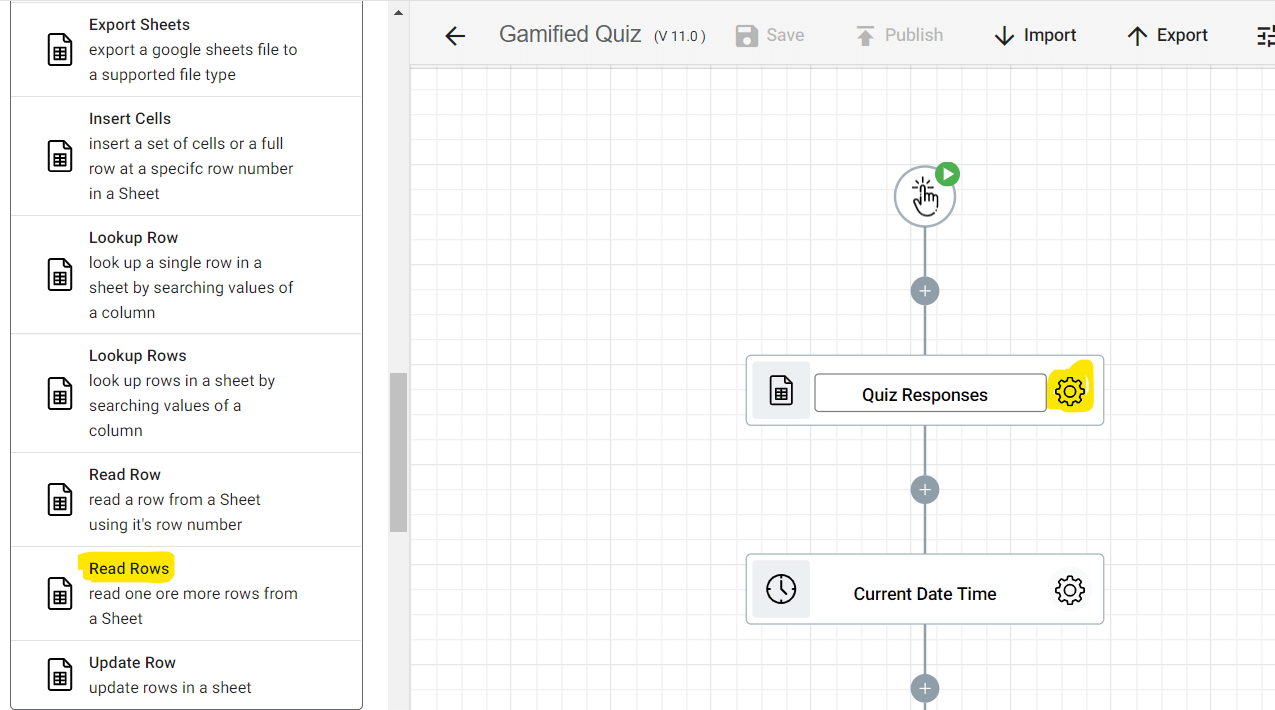
Let’s point to the right spreadsheet in the File field by clicking the Drive icon. And then, select the “Pop Quiz Response” file from earlier.
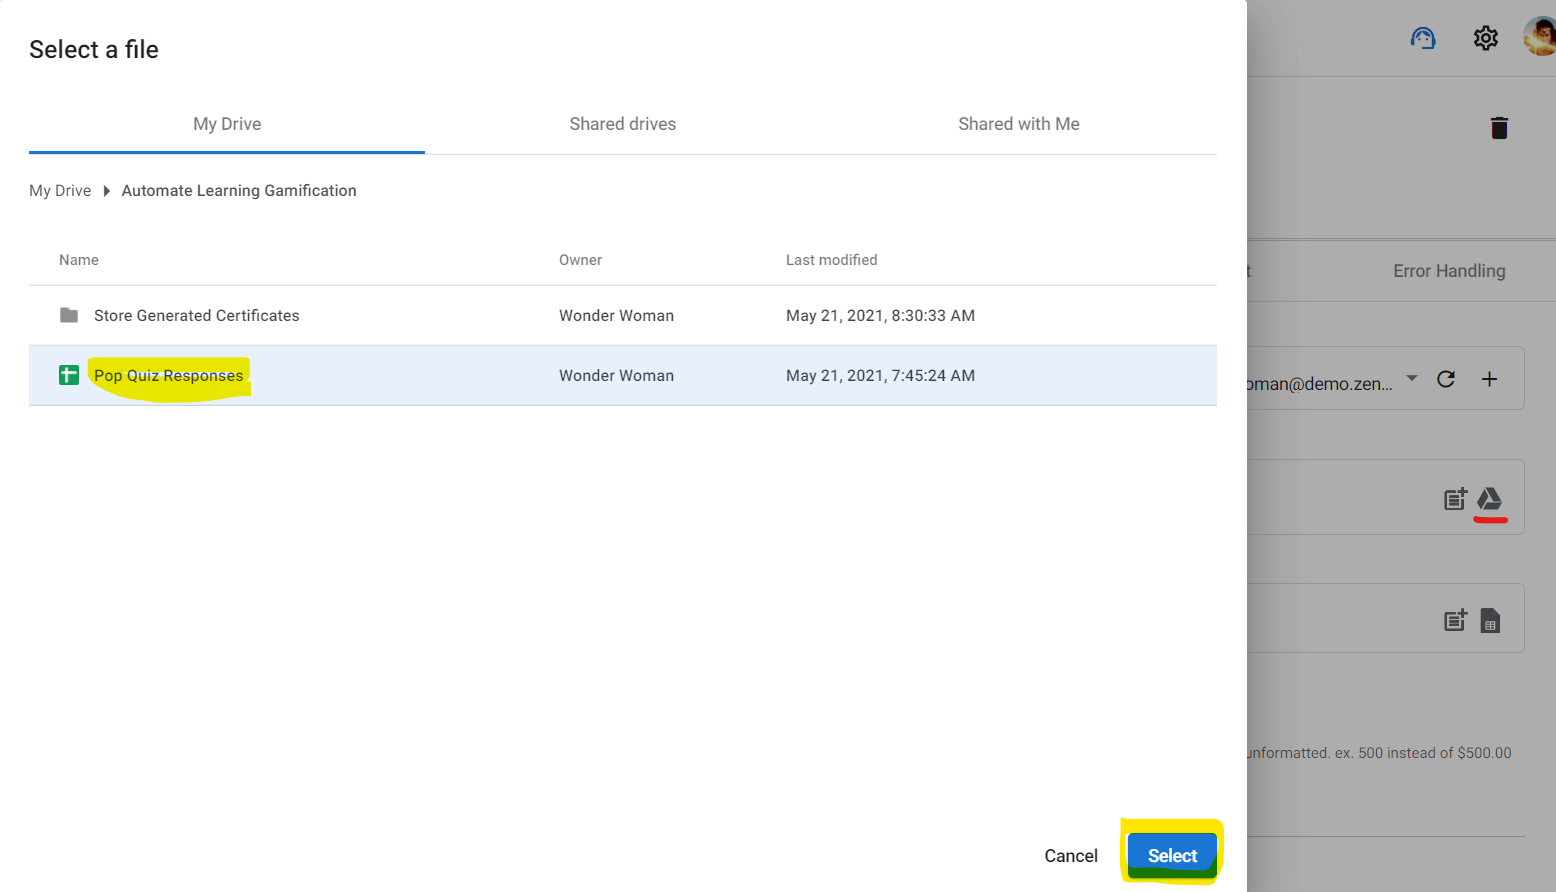
Select the right sheet for the Sheet Name field.

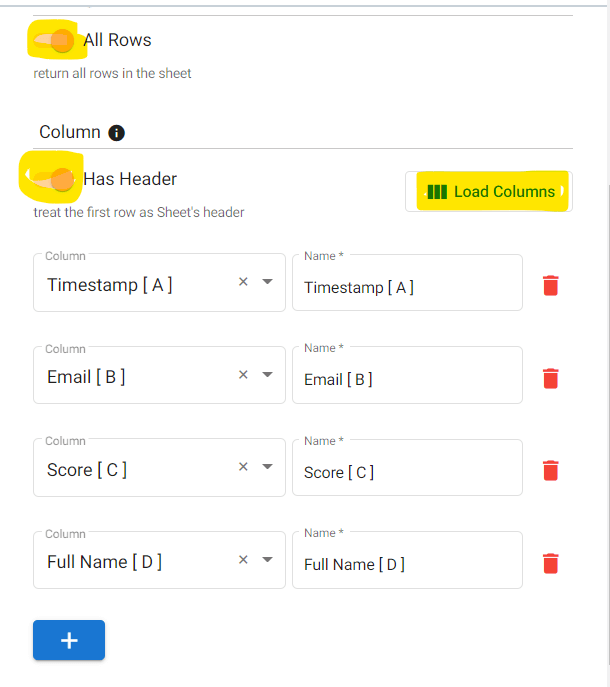
And if we scroll a bit further down, we will arrive at the Rows section. Here we will enable All Rows, and it will return all the row information in our spreadsheet. While the Has Header will treat the first row of our spreadsheet as headers or column titles. And clicking the Load Columns will load all the columns.
We can choose to delete some of the columns and just get what we want to recall later.
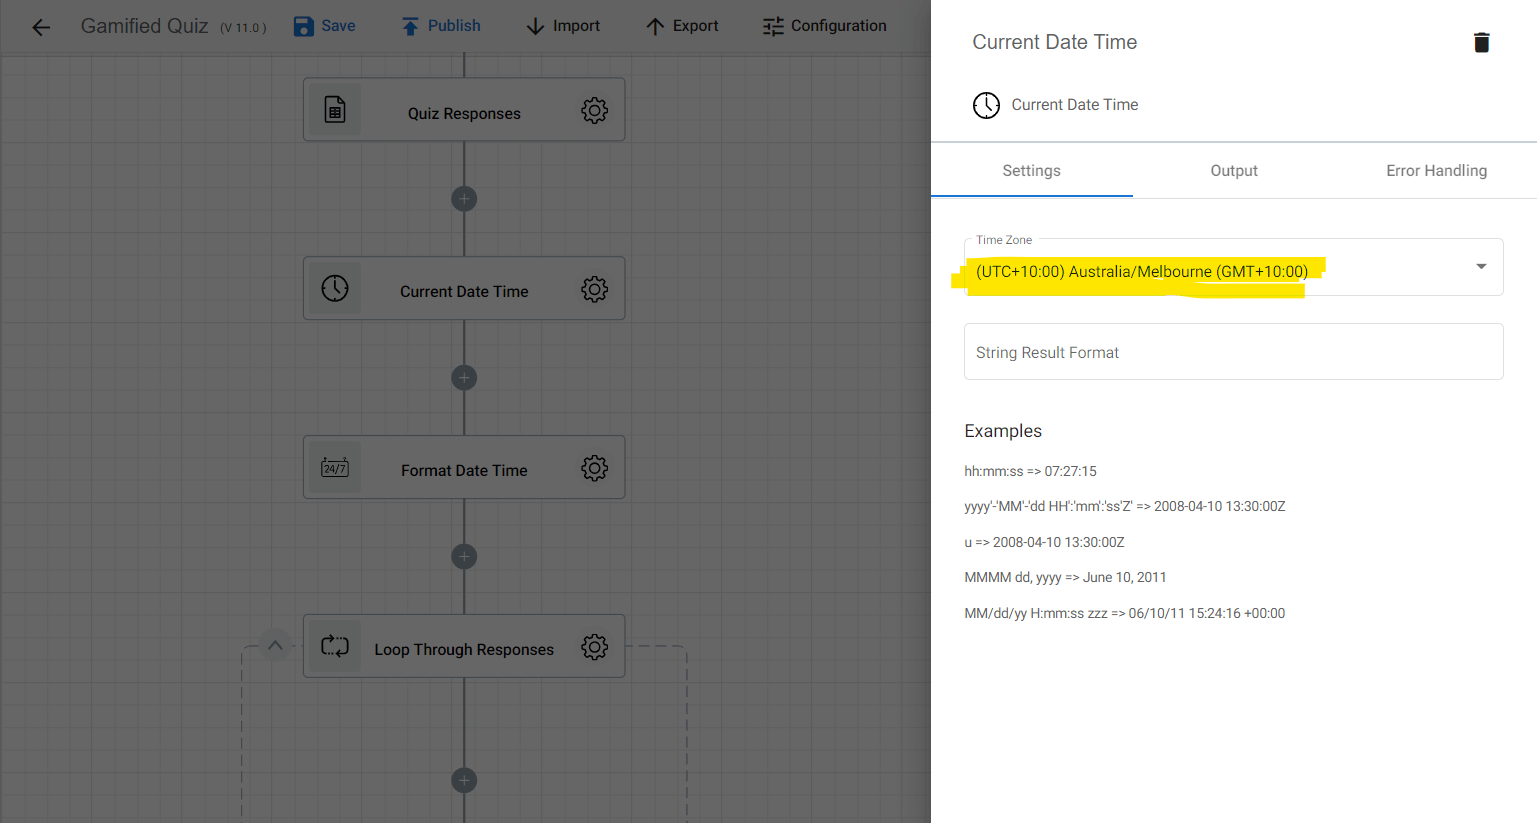
Current Date Time
This particular action is under Date Time in the designer panel. What this action does is record the date or time the flow started.
Format Date Time
Still under the Date Time section, Format Date Time action formats date and time value to a string. This action will allow you to automatically log the date and time value into any file or document.
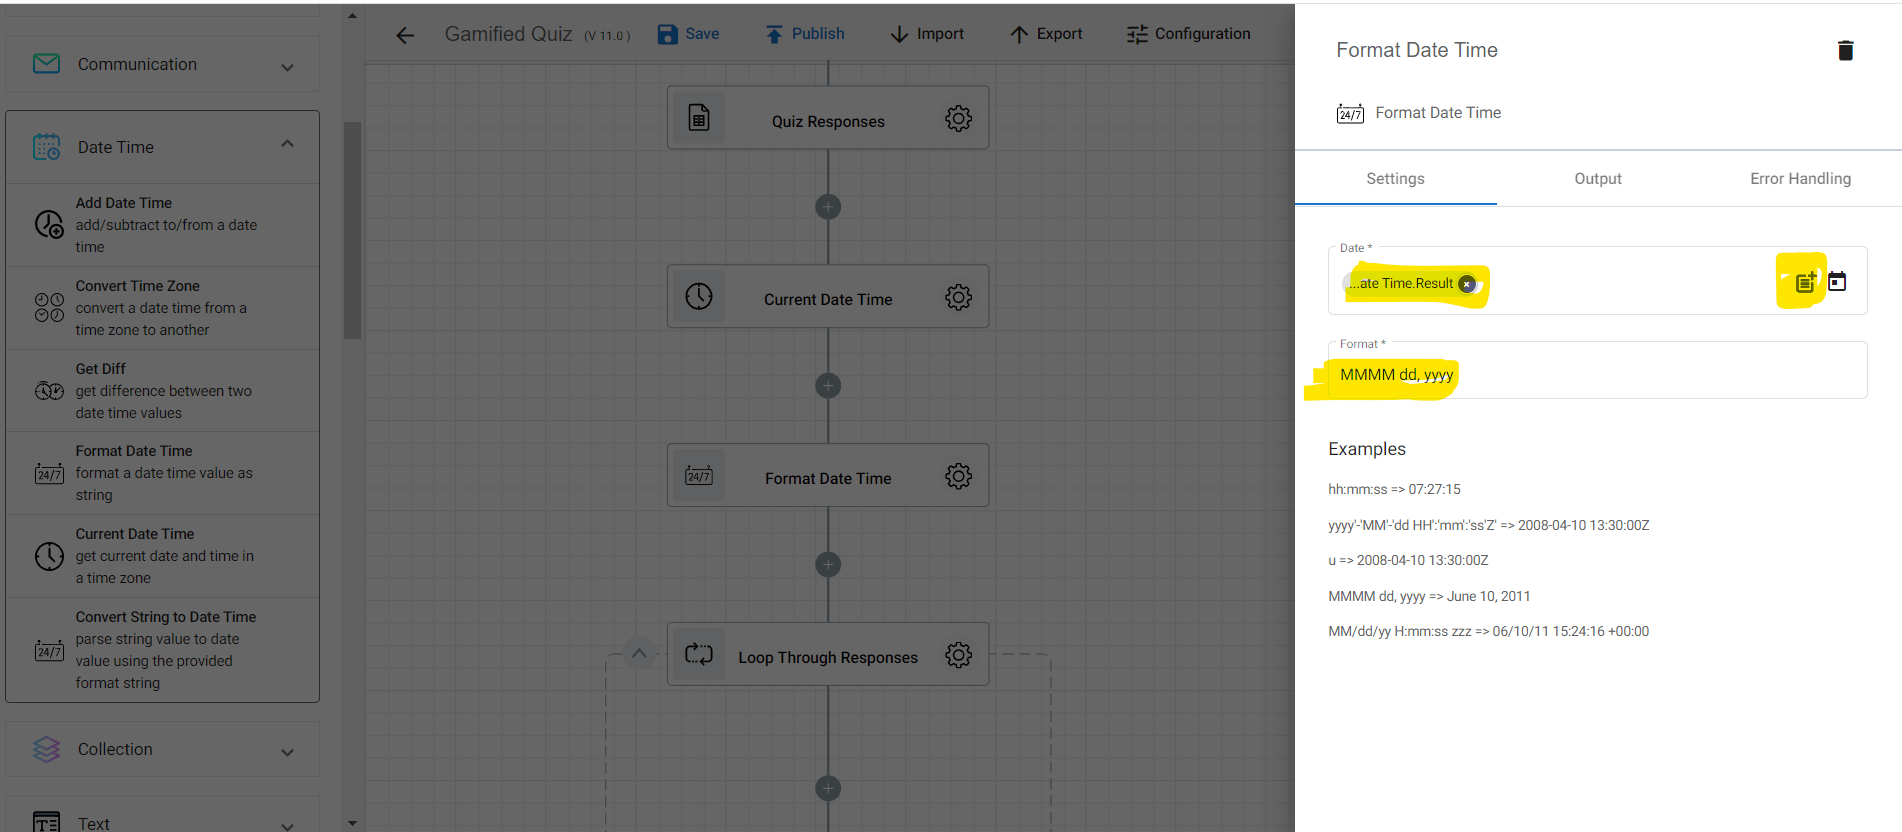
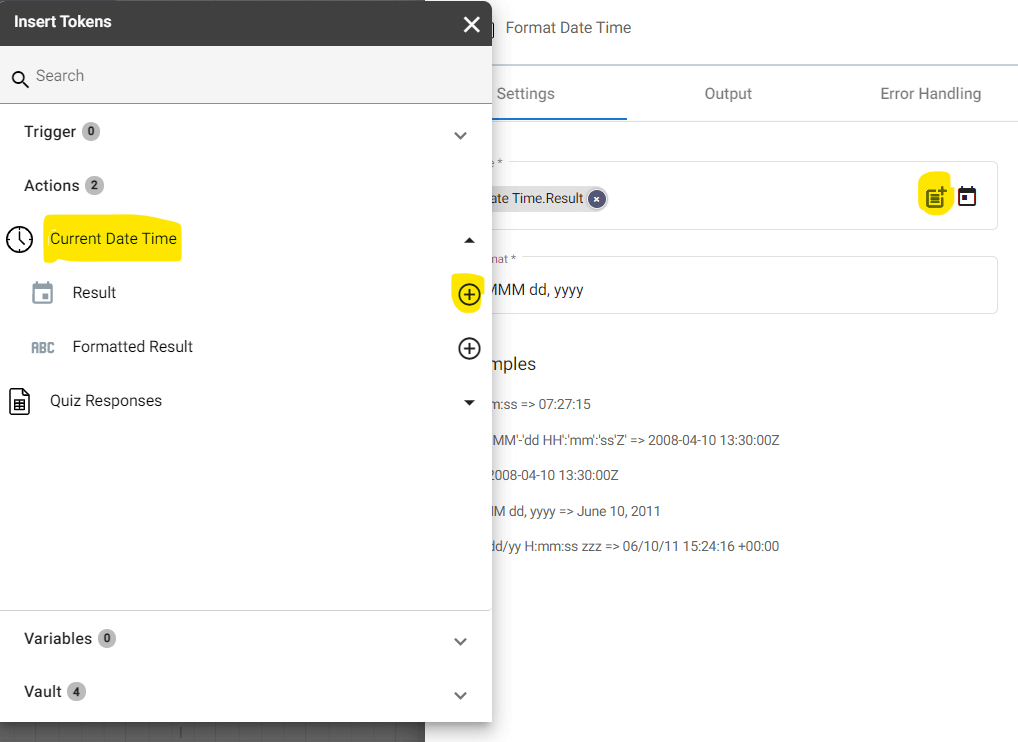
When configuring this action, click the parameter icon in the Date field. And in the tokens panel, click Current Date Time and select Result.
Foreach Item
The next building block of our Gamifying Learning process is the Foreach Item. And it is under the Control Flow tab. This action goes through each row of our spread when we need to recall information.
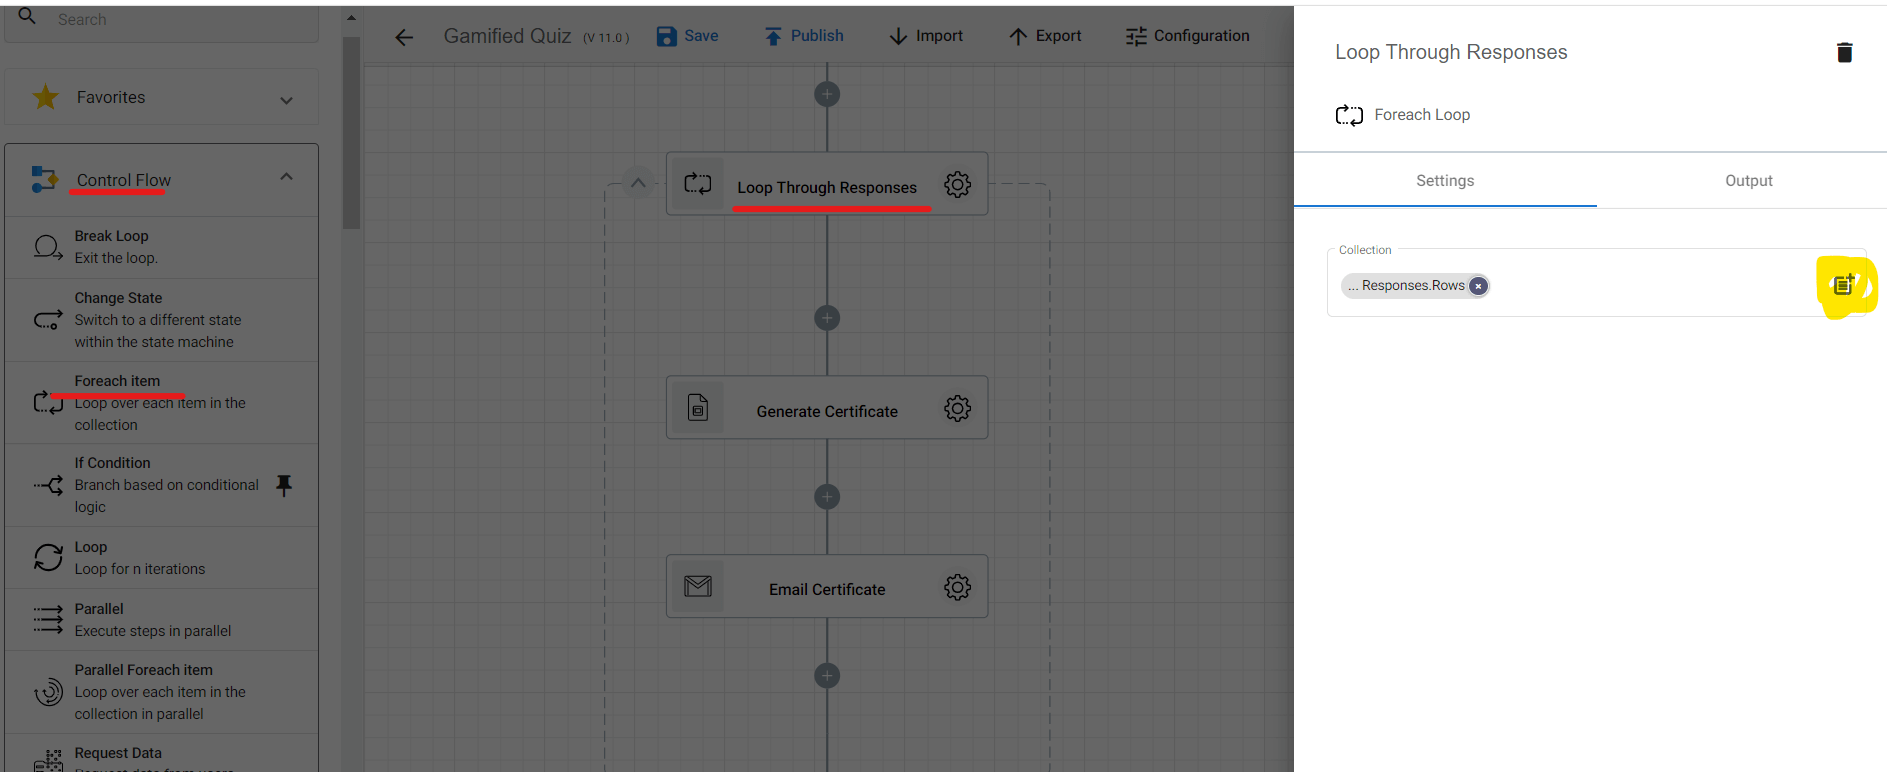
To configure Foreach Item, open the gear button. Then, click the parameter icon in the Collection section. And when the tokens panel slides in, click Quiz Responses and select Rows.

Generate Slides
This action will automatically generate the certificates using the Slides template. Each certificate will then be imported as a PDF file. Note that we changed the name of the action for the sake of naming convention.
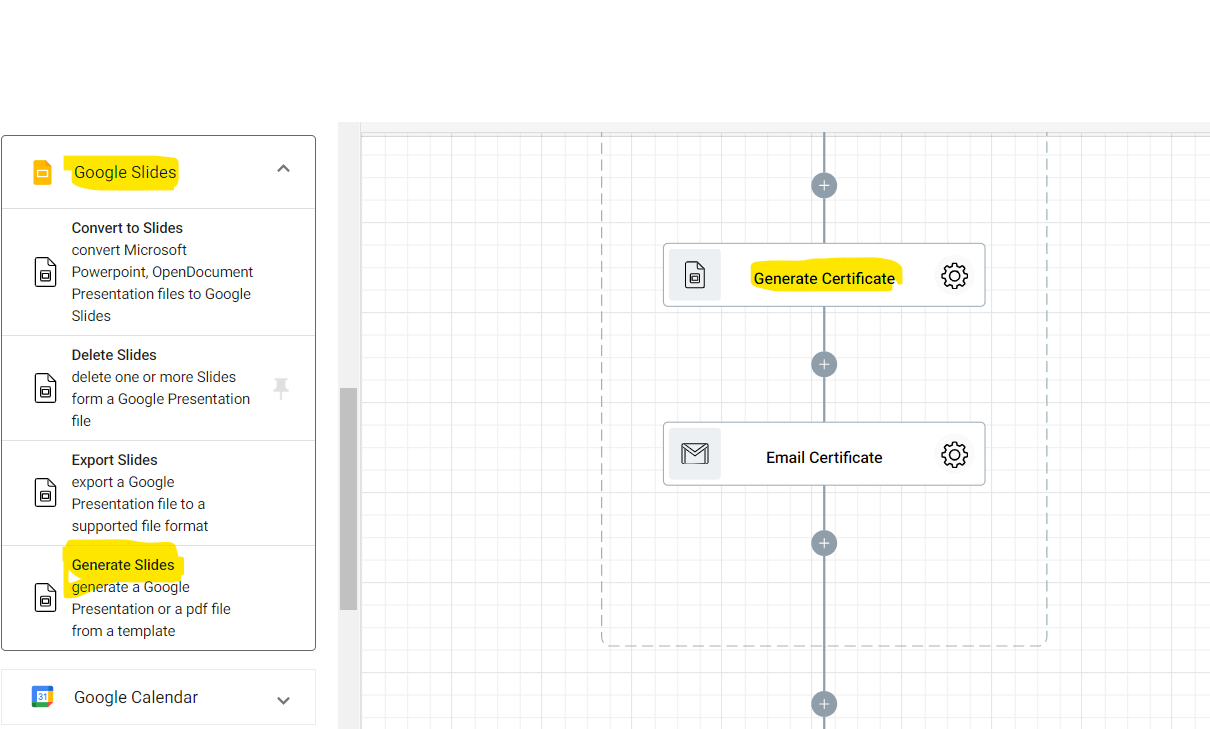
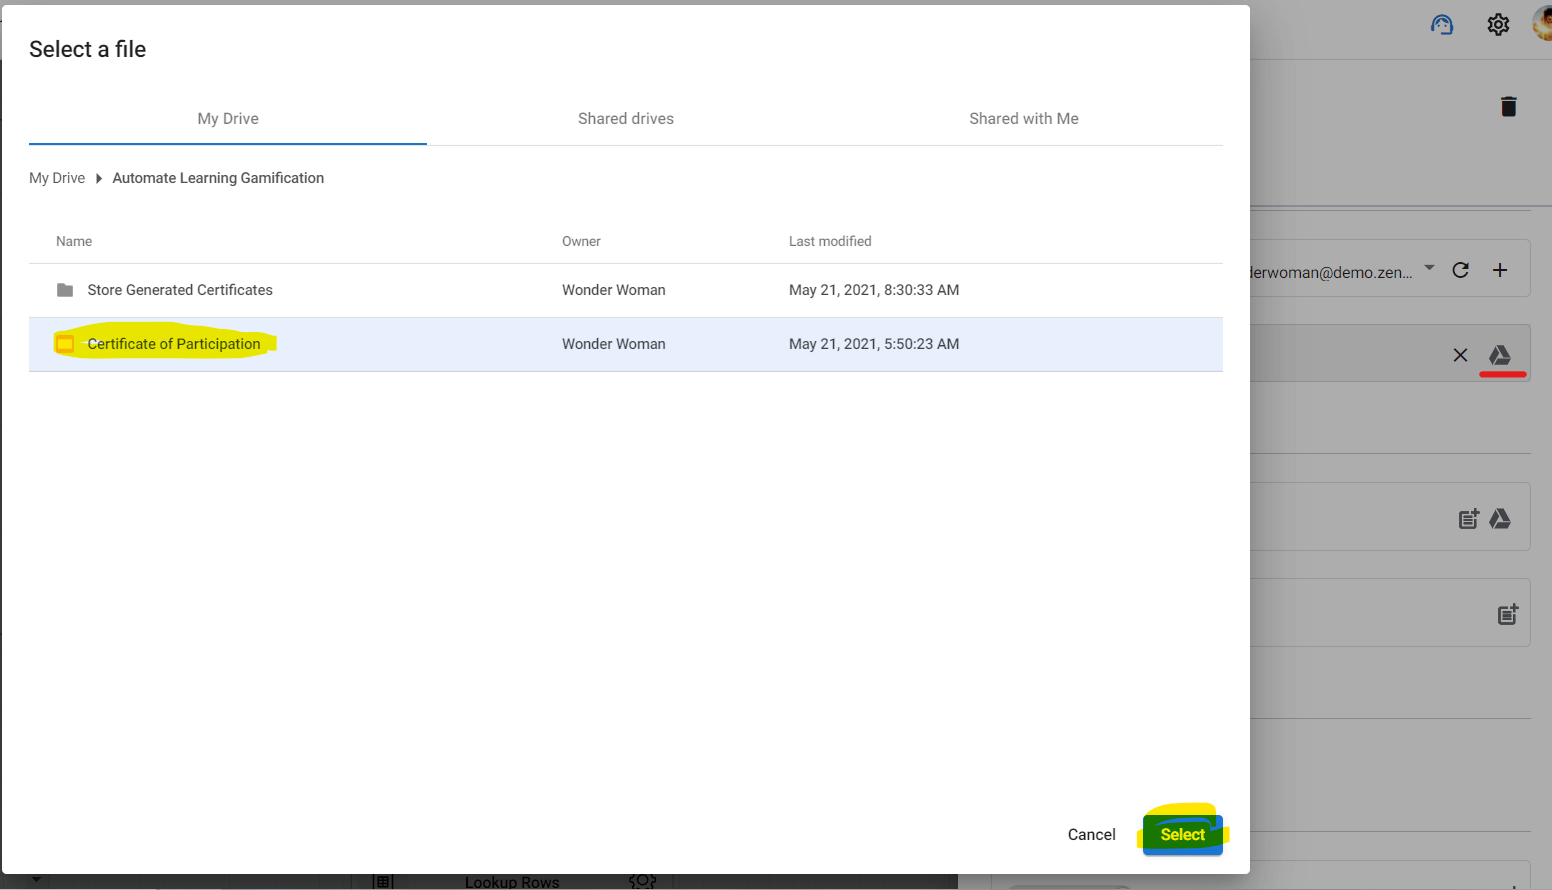
Next, we will open the settings section by clicking the gear button. In the File field, click the Drive icon. And then, select the Certificate of Participation template from earlier.
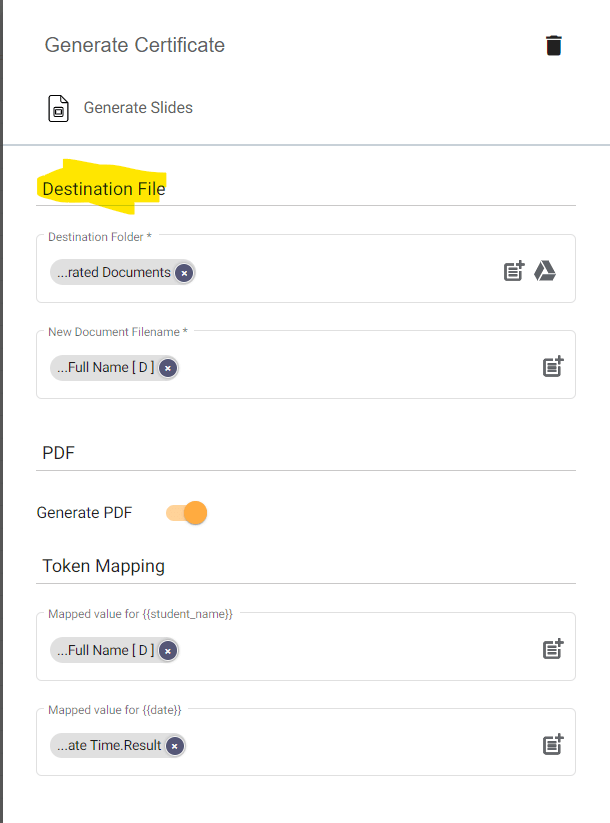
And if we scroll down a bit further, we will arrive at the Destination File section.
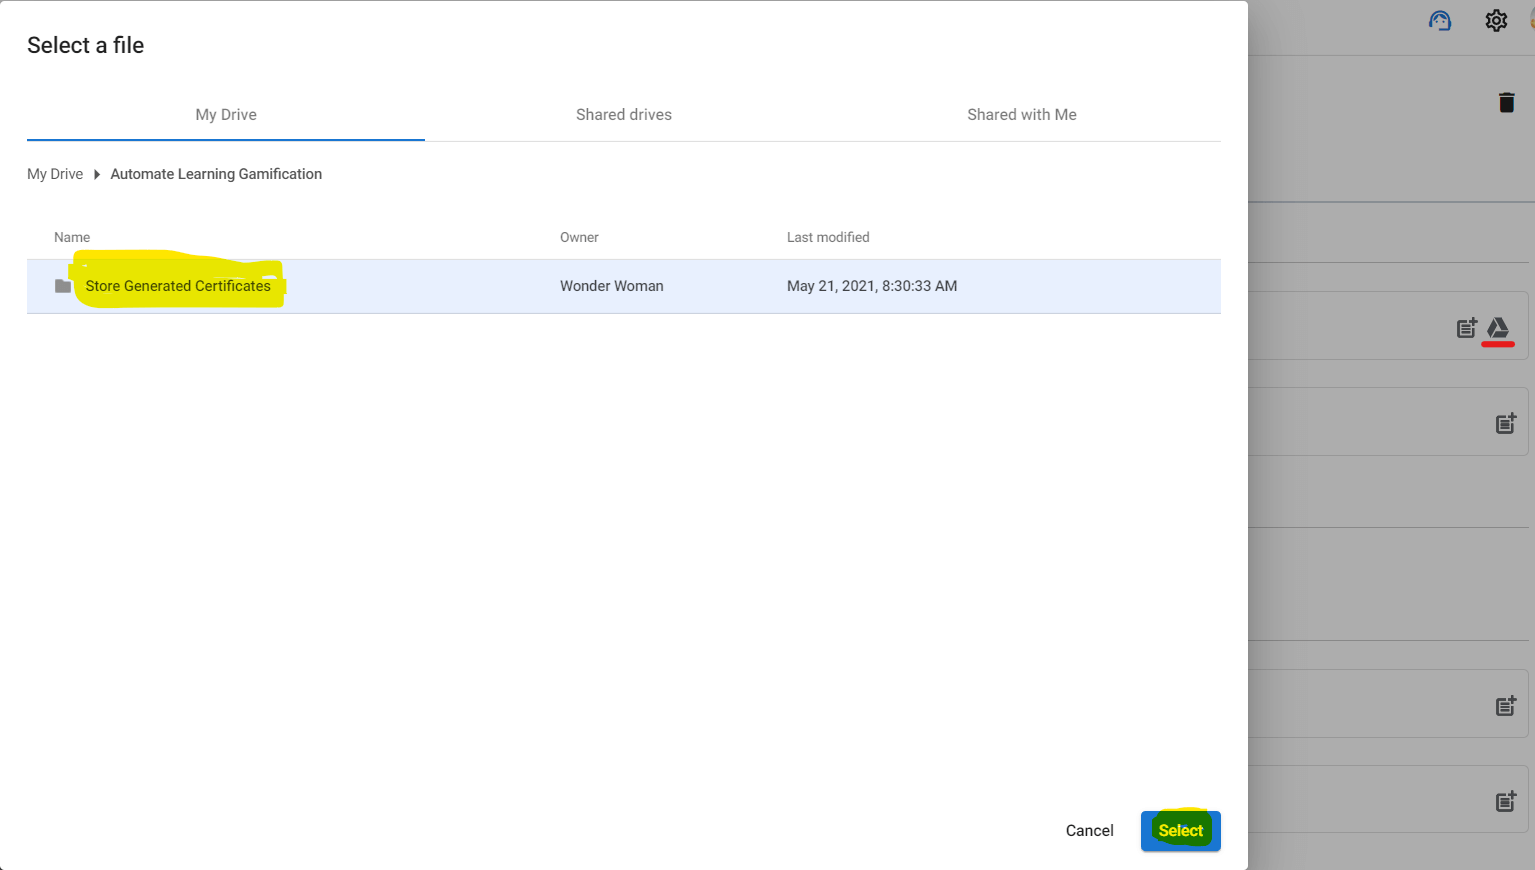
In click the Drive icon in the corner of the Destination Folder field. And then, select the Subfolder we created earlier. This folder will house the certificate we are going to generate later.
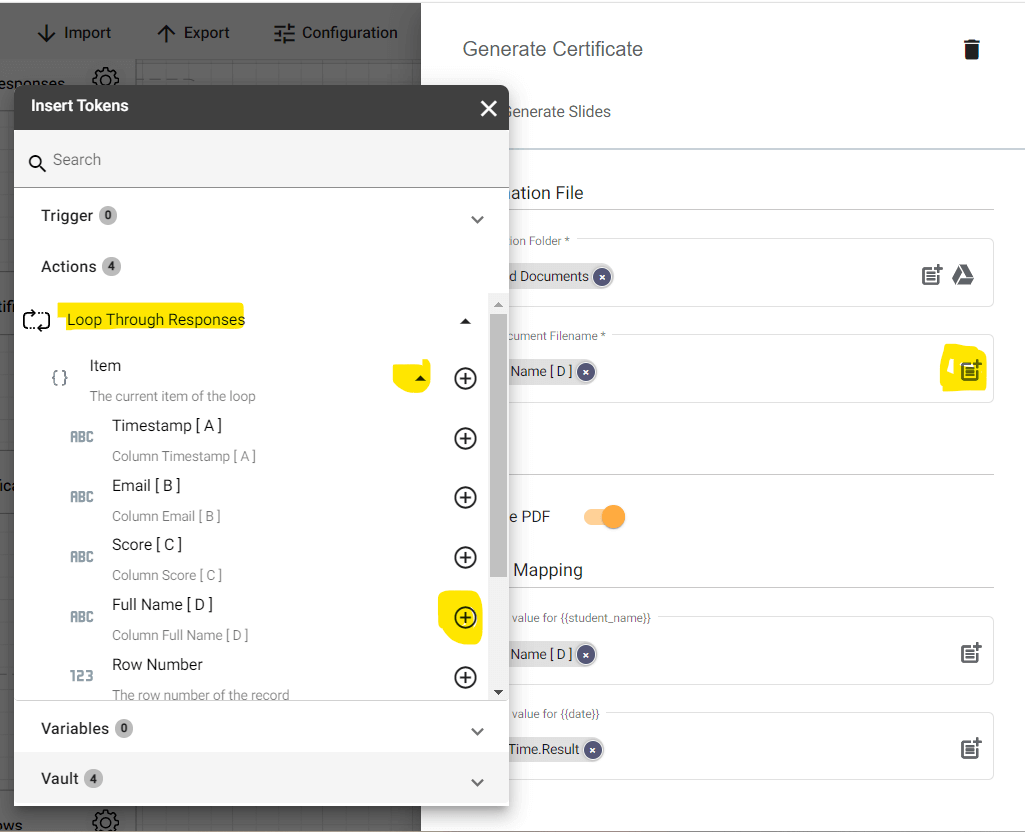
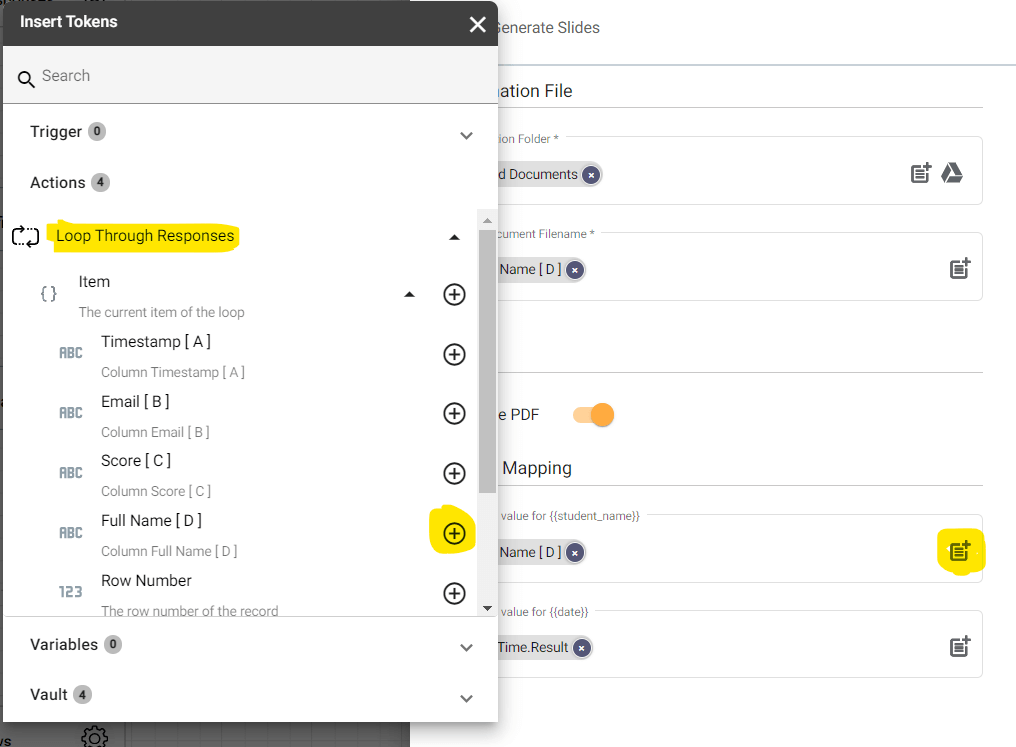
Click the parameter icon in the New Document File field. And then, select Full Name[D] under Loop Through Responses. This will name the generated PDF file with the name of the student.
In the PDF section, let’s enable the Generate PDF button. This means that every document we generate using the Slide template will be imported into a PDF file.

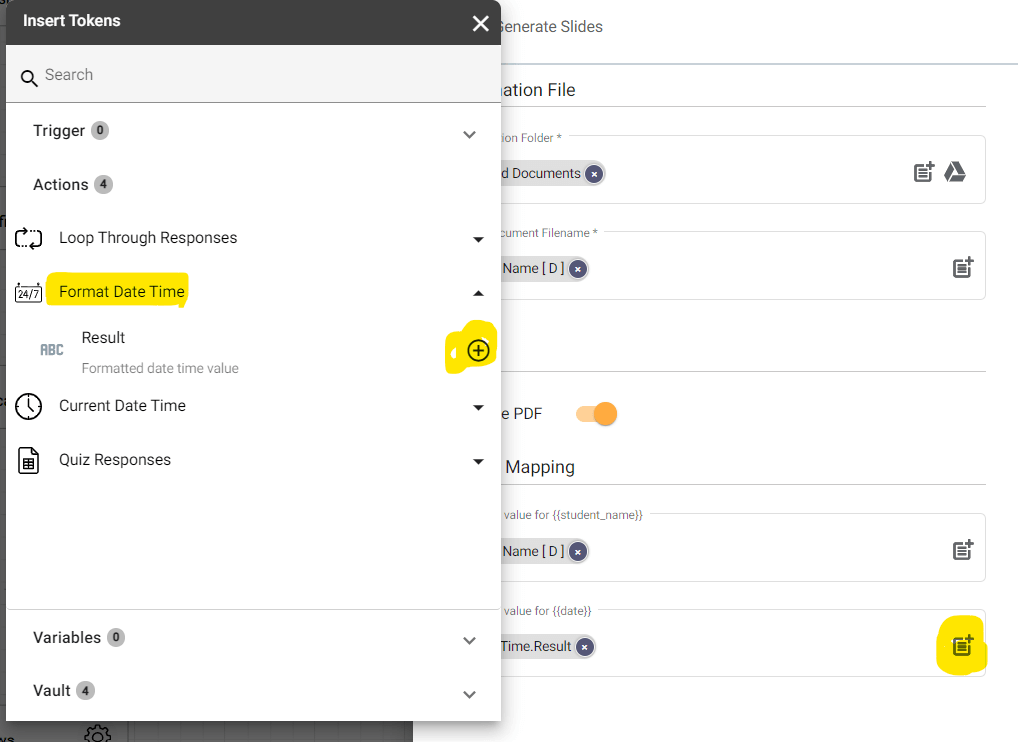
Let’s go and configure the Tokens Mapping section. If you remember the double curly parentheses({{}}) we added in our Certificate template? The value we are going to add will populate the blank fields inside the curly parentheses.
To get the right value for {{full_name}}, click the parameter icon. And under Loop Through Responses, let’s select Full Name[D].
And for the value of {{date}} select Result under Format Date Time.
Send Email Action
This action will allow us to automatically send emails and also attach a file(s). And with the Foreach Item in place, it will send emails to the right recipients until all rows are done.
Let’s configure this action by clicking the gear button.

In the To field, select Email[B] under Loop Through Responses.
![Configure the "To" field by selecting "Email[B]" under Pop Quiz Response in the token panel.](https://zenphi.com/wp-content/uploads/2021/06/Gamification-in-Education-29..png)
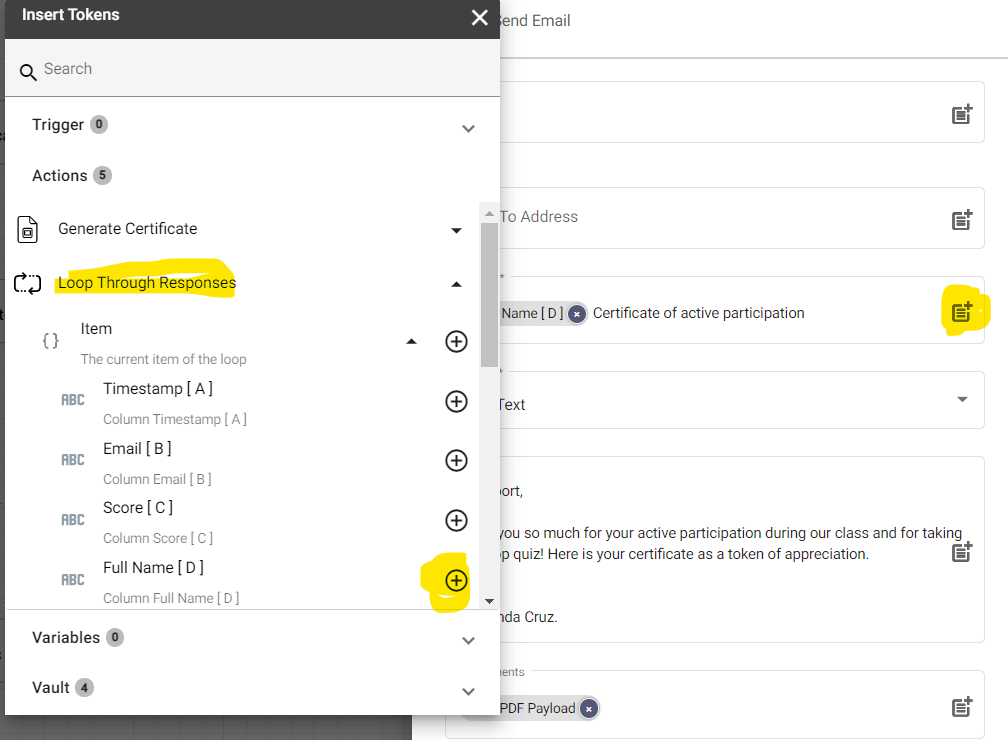
In the Subject field, select Full Name[D]. You can also choose to input some details or a few words.
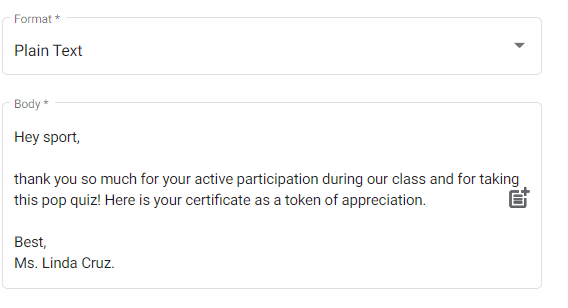
For the Email Body, we can write simple greetings and praise for the student receiving the Certificate of appreciation.
Lastly, we need to configure the Attachment section. This will automatically attach the Certificate to the outgoing email.
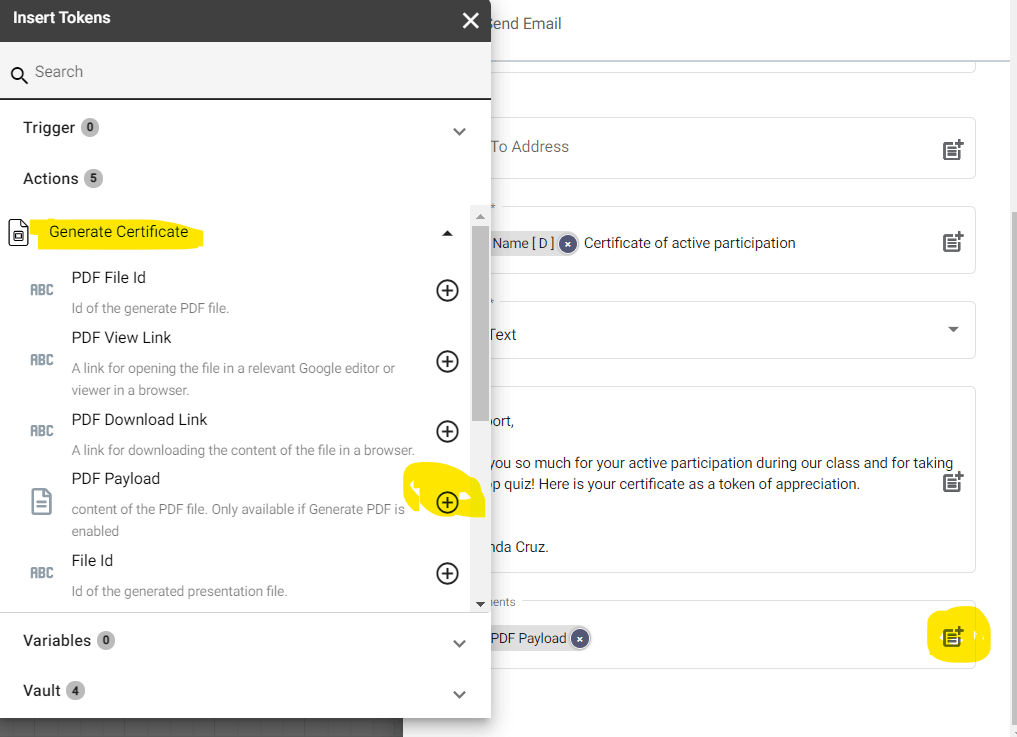
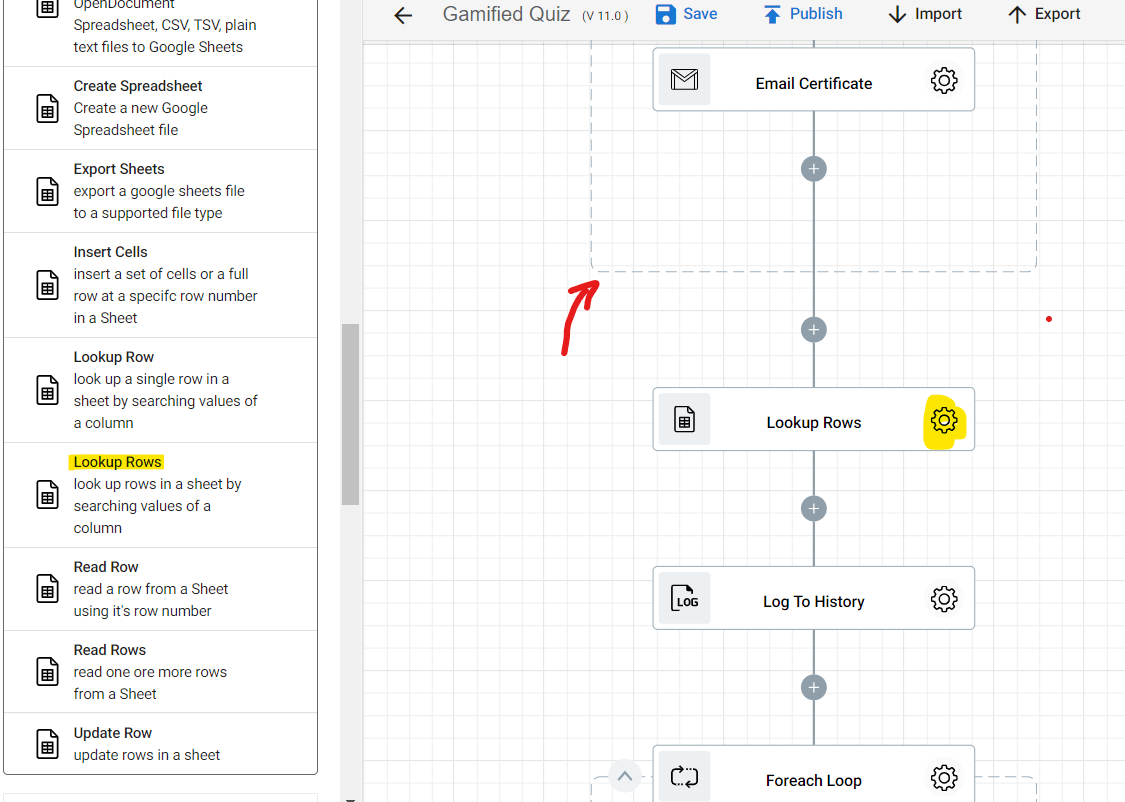
Lookup Rows
Lookup Rows allows us to at multiple rows of our spreadsheet and retrieve the value we are searching for. This action is not part of the flow template, so we have to drag and drop it to the flow itself. Also, we need to make sure that we place this action outside of the Foreach Item Loop(faint dash lines).
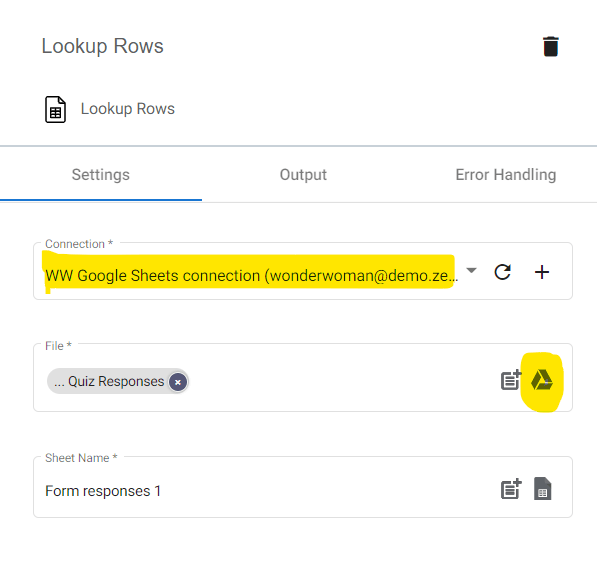
Select the right Google Workspace account in the Connect field.
In the File field, click the Drive icon and find our Pop Quiz Response file from earlier.
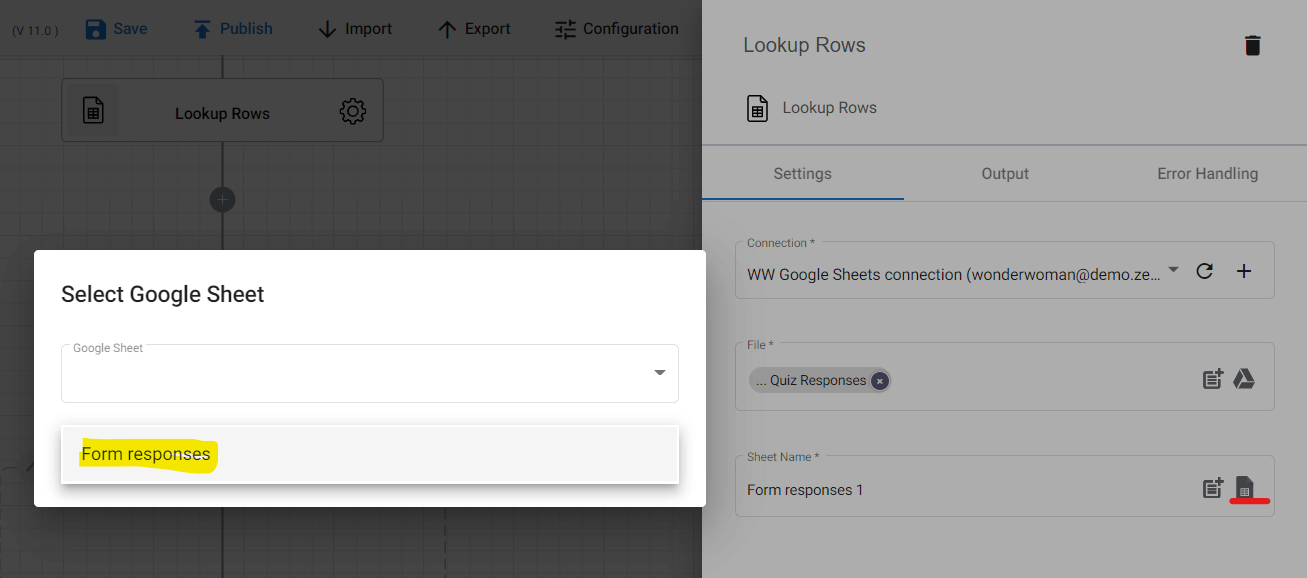
Again, let’s make sure we are pointing to the right sheet in the Sheet Name field by clicking the parameter button. Then, select the right sheet where all the form responses are loaded.
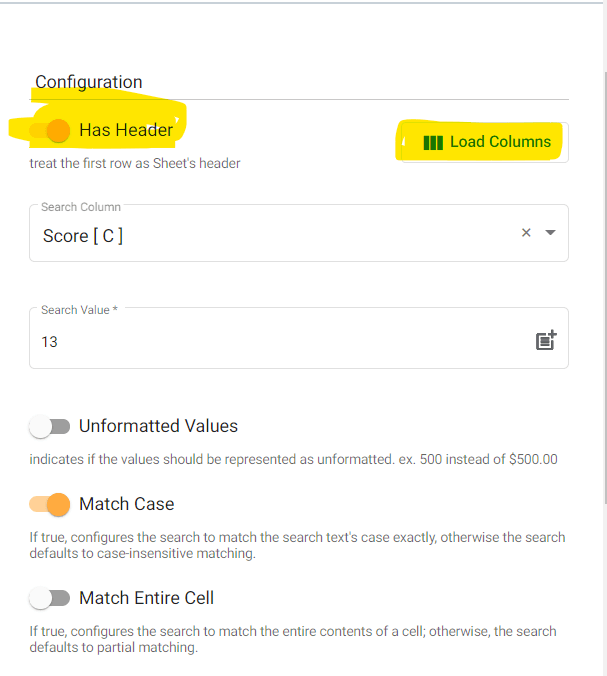
In the Configuration section, let’s make sure to enable Has Header. It will treat the first row of our Pop Quiz Responses spreadsheet as headers or column titles. And if we click the Load Columns button, it will automatically retrieve all the column headers in the spreadsheet. It will also include their corresponding values.
In the Search Column field, let’s select Score[C] and input 13 in the Search Value. This means that when the flow runs, it will look at our spreadsheet and retrieve the rows that have the value of 13 in the Score[C] column.
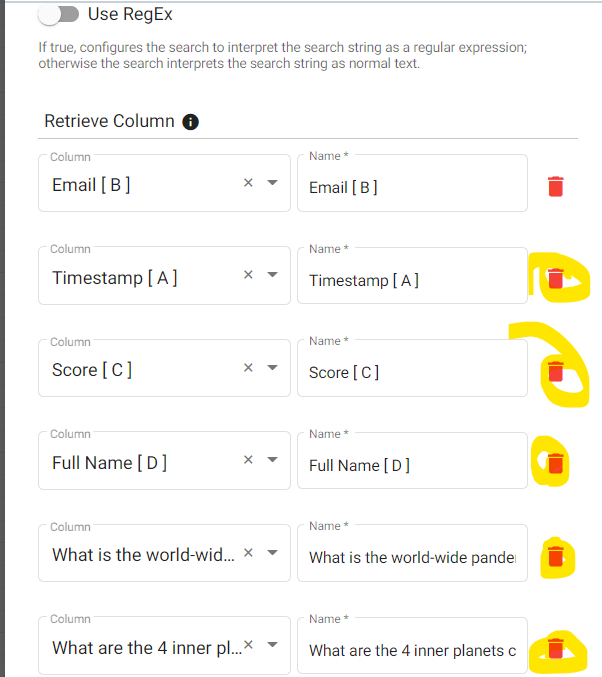
Let’s go down a bit further and we’ll get to the Retrieve Column section. Here, we will delete the rest of the column headers aside from Email[B].
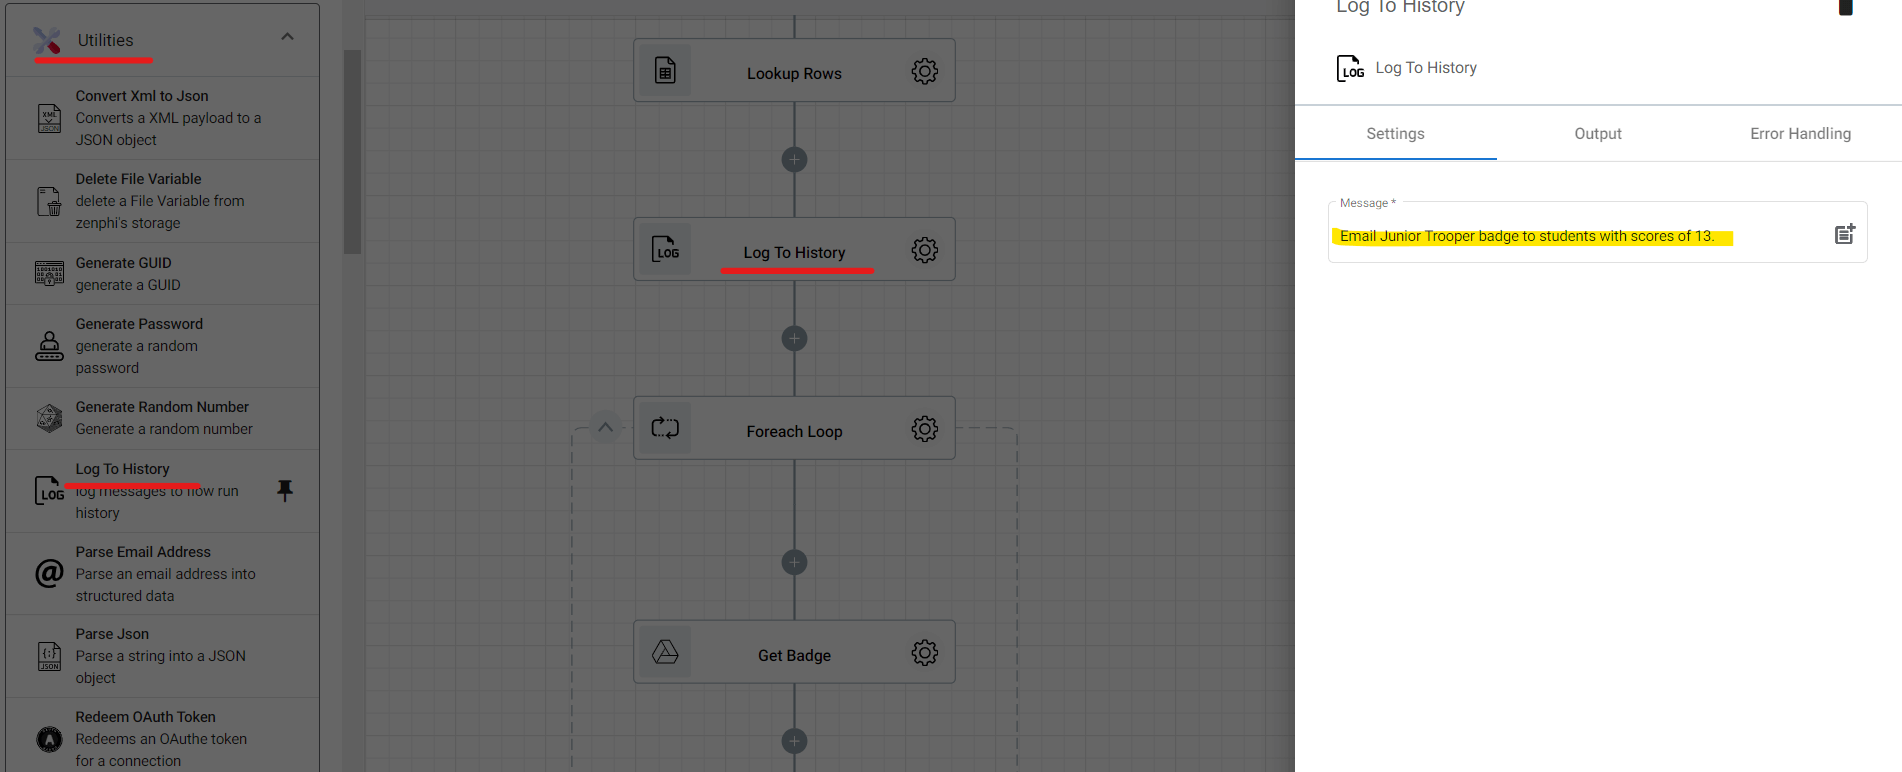
Log To History
The next action we are going to drag and drop is Log to History. This action will record the rest of the actions’ sequence into the log stream.
The Log to History is very helpful when we need to retrieve a value or doing debugging tasks.
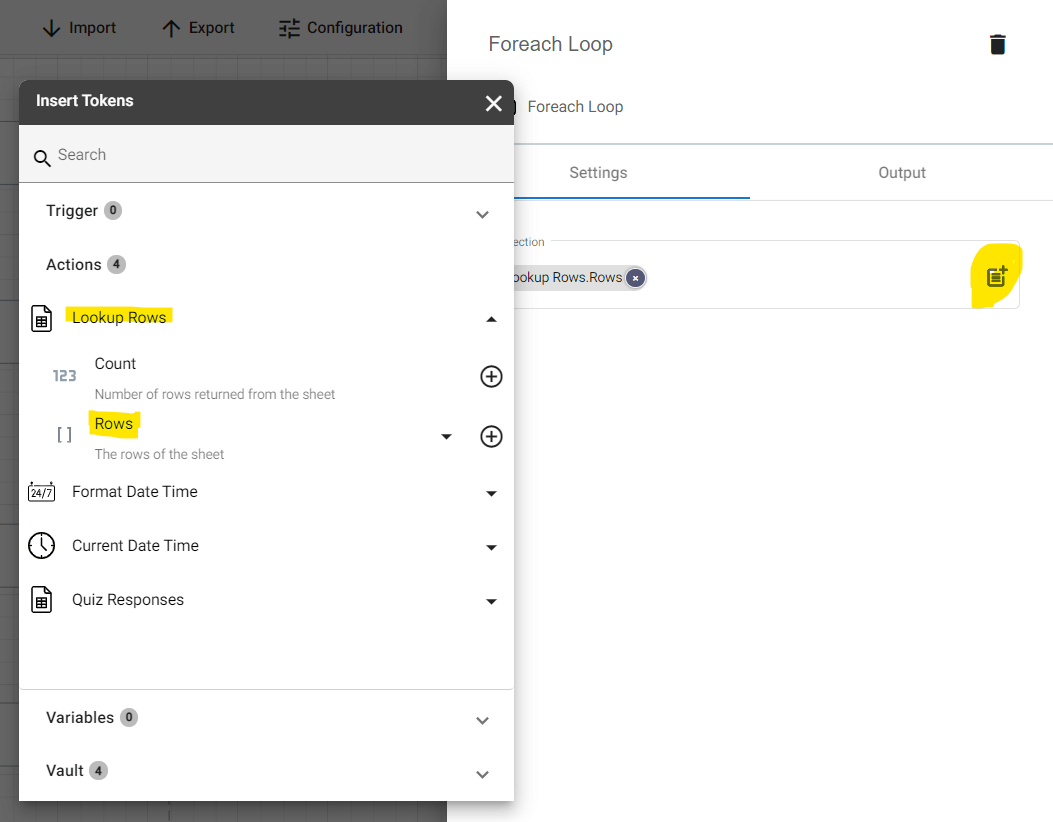
Foreach Item
Again, let’s drag and drop another Foreach Item action into our flow and then configure.
Get File Content
The Get File Content action found under the Google Drive tab will read and retrieve files. Let us drag and drop this into the flow, right inside Foreach Item’s area of responsibility, and then configure.
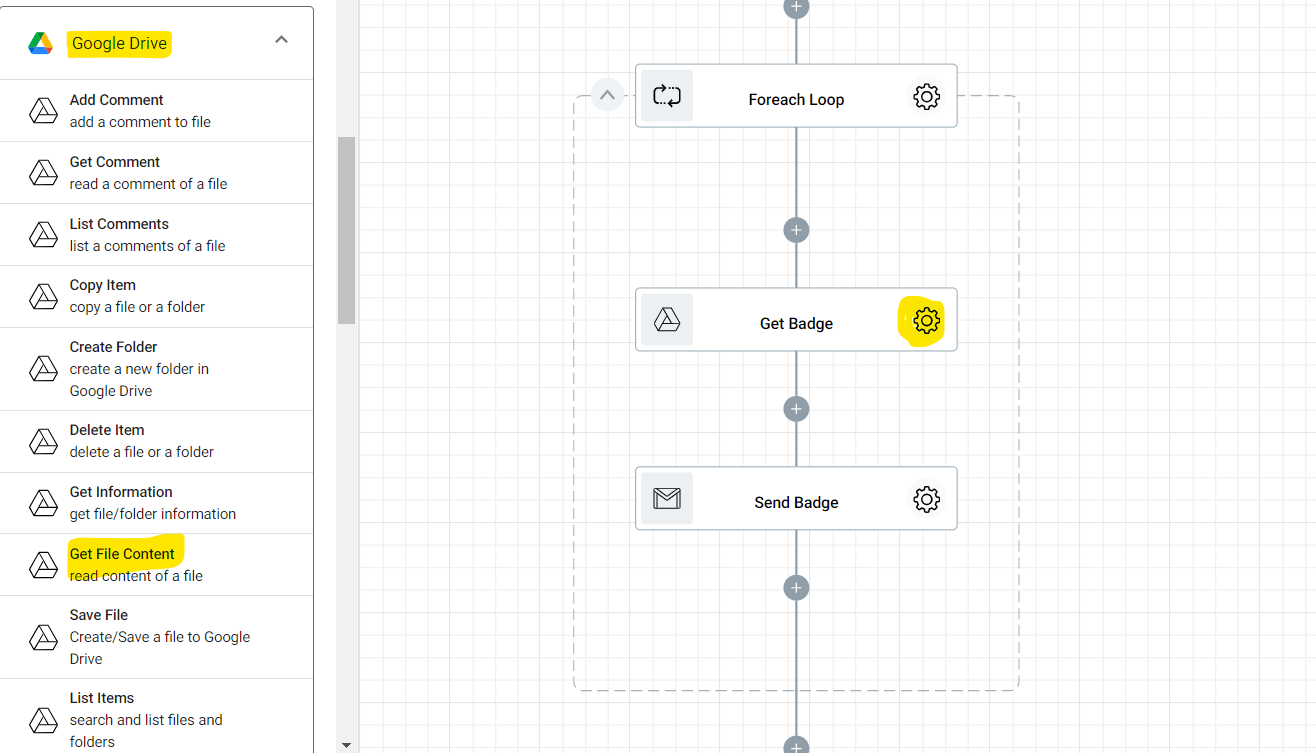
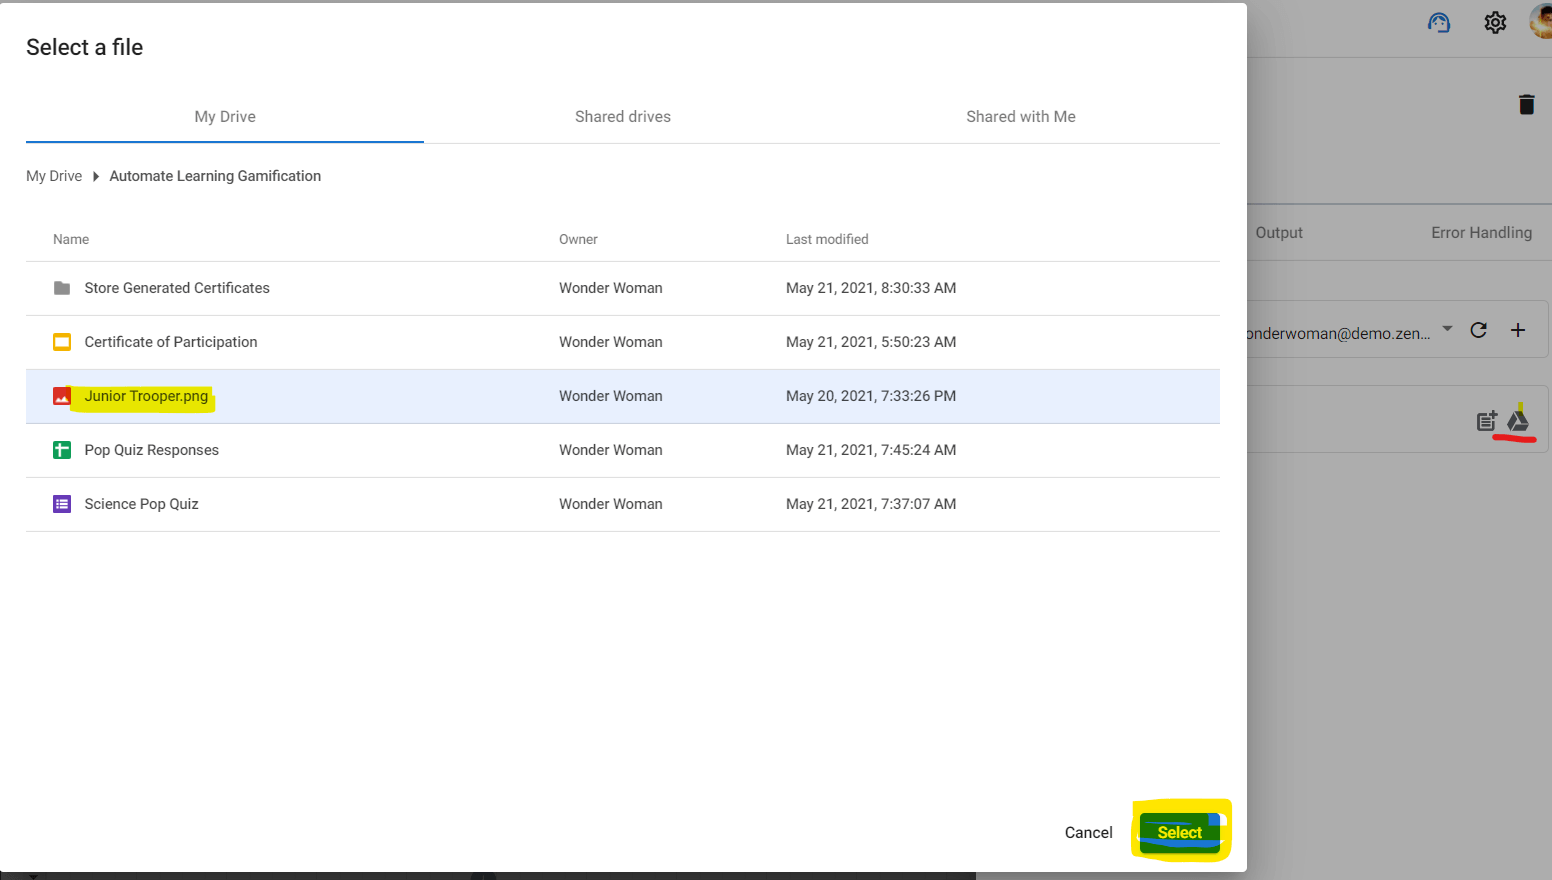
In the File field, let’s click the Drive icon and select the badge we uploaded earlier.
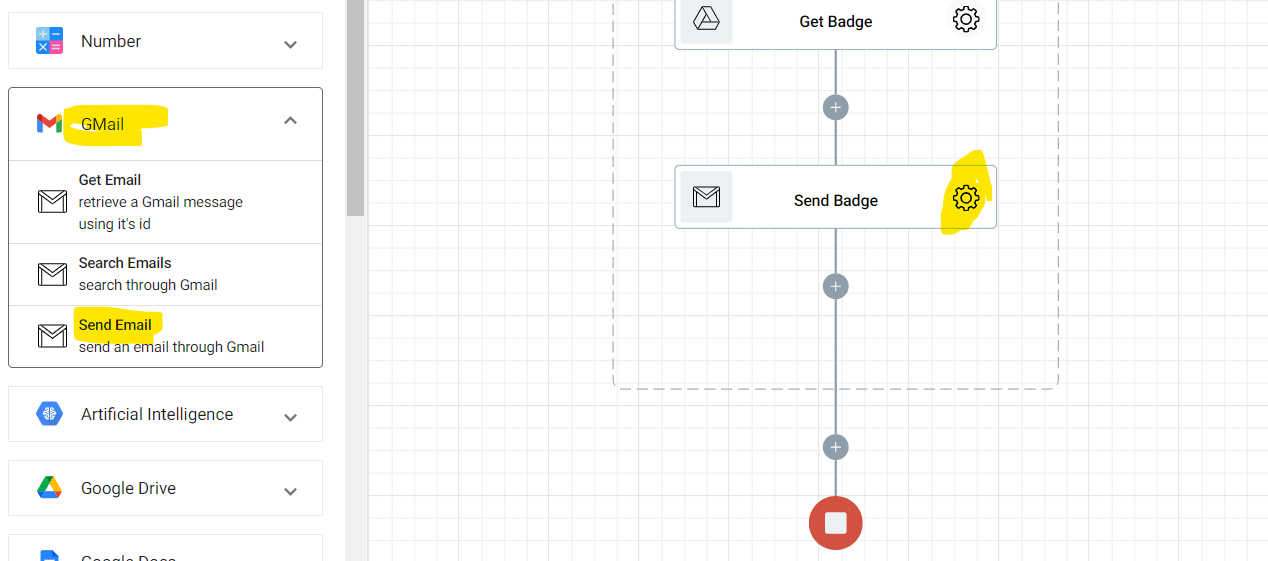
Send Email
Lastly, drag and drop Send Email action and configure.
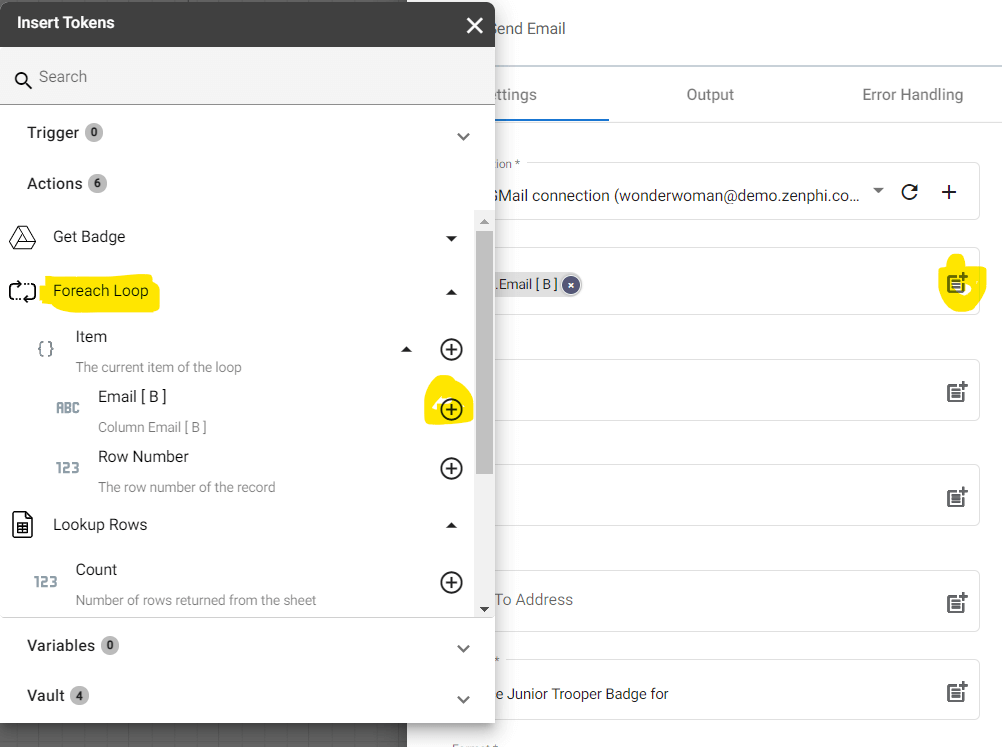
In the To field, select Email[B] under Foreach Loop.
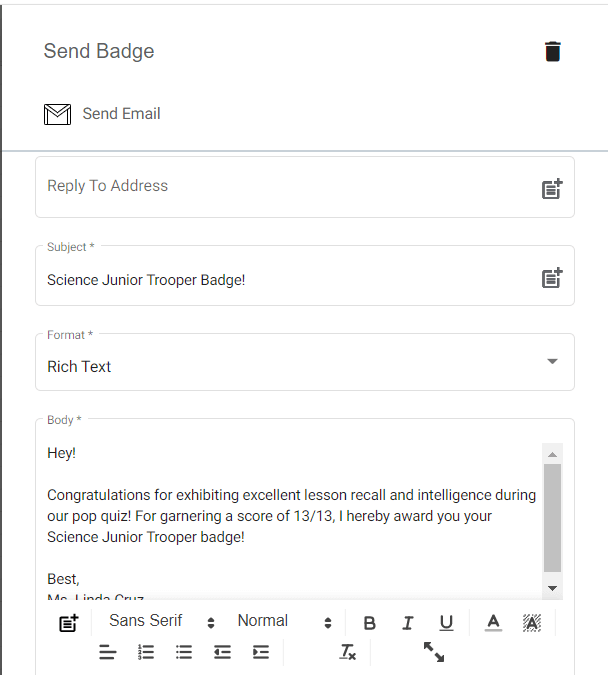
In the Subject and Body field, we can manually input the text we want to include in the outgoing email.
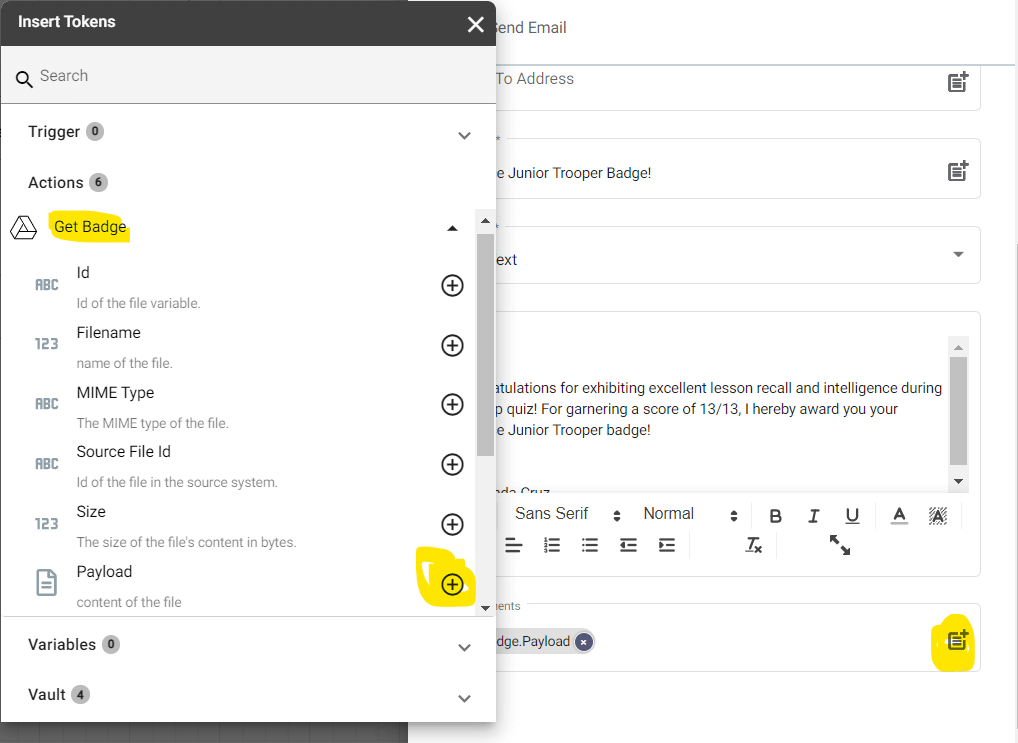
Lastly, the Attachments field. Let’s click the parameter icon and select Payload under Get Badge/Get File Content.
This will retrieve the Reward Badge file and attach it to the email.
Hit Save and Publish once you are done configuring all the actions and ready to test it.


