Do you want to make distance learning easier for your teaching staff? Then buckle up because Google Workspace for Education can help. With Google workflow automation, your teaching staff can focus more on teaching.
Automating Tasks on Distance Learning Platforms like Google Workspace for Education
- Enrolment. Even using digital tools like Google Apps, you still need to carry out data entry. Automating your distance learning enrolment on Google Workspace minimizes the effort of manually updating your spreadsheets every time a new enrolment form comes in.
- You can now onboard and offboard students at the beginning and end of the year in a breeze. By automating your student onboarding workflow, you can now create hundreds of student accounts within your admin console.
- Create personalized emails for parents and guardians without having to type and send them individually.
- Simplifying the approval process for employee sick leaves and paid time off.
- Automatically create Google Classrooms and sync student rosters.
How to Start Automating Distance Learning Admin Tasks
Automating Distance Learning Award Certificates Creation Process Using zenphi
One of the repetitive tasks teachers perform is creating student award certificates. And I can bet our entire team’s salary for this month that it is something that most teachers perform manually. Typing and copy/pasting information into the award template, and then repeat. It is nothing if it is just a handful of students, but what if you have to do it for each grade level? I can already imagine the hours upon hours of manual work you would have to dedicate and the breaks you have to sacrifice to get it done.
Tools to Automate Your Certificate Creation in Distance Learning with Google Workspace Education
- Sheets for the list of students who are going to receive awards.
- Slides to create the certificate template.
- Drive to store the list of students, certificate template, and the newly generated certificates.
- zenphi to automate the certificate creation workflow.
Distance Learning with Google: A Step-by-step Guide to Automating Certificate Creation Using zenphi
Below is the step-by-step tutorial of how you can create an automated workflow for your distance learning certificate creation within zenphi.
Step #1:
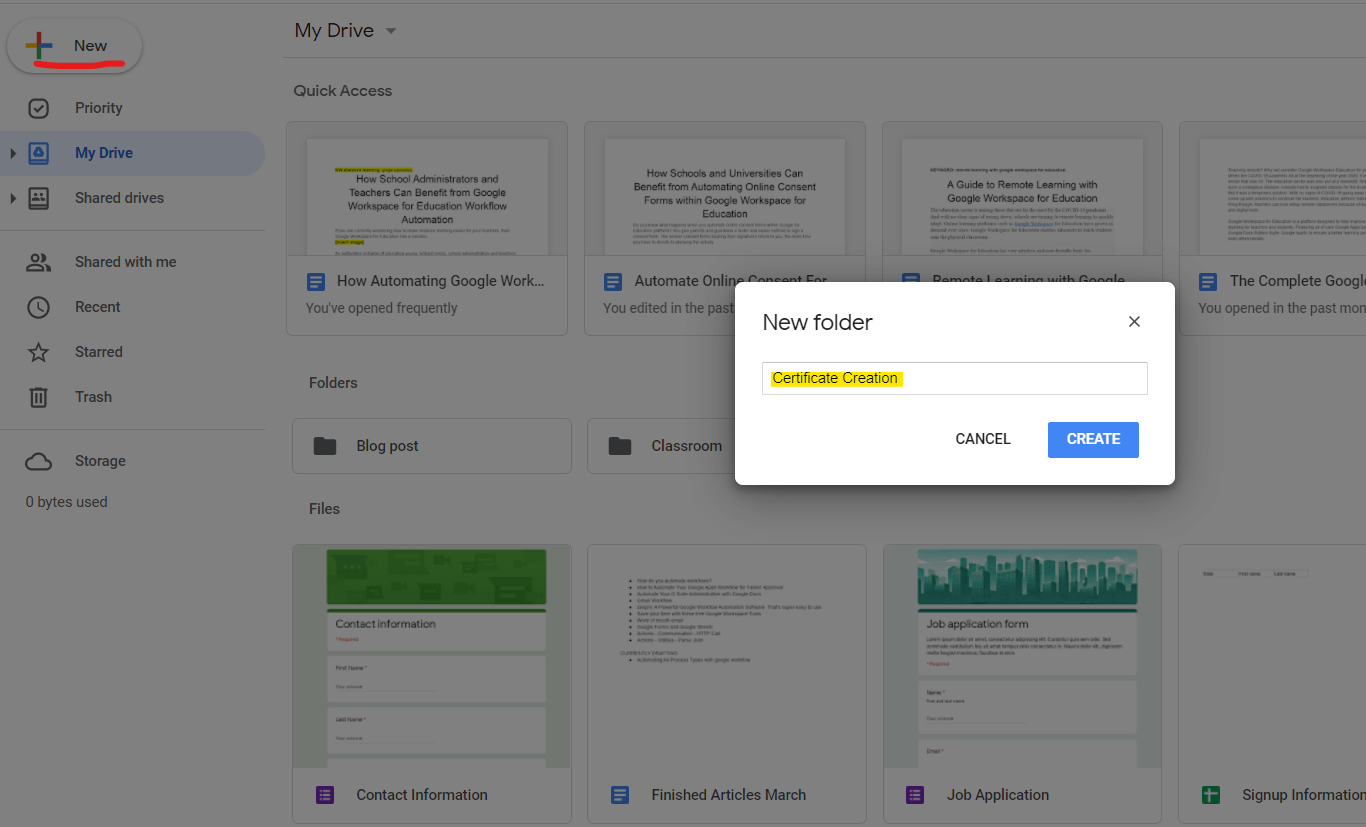
You need to log in to your Google Workspace for Education account and then go to your Drive. There, click + New button at the top right of your screen and create a new folder. This is where we are going to store all the documents and files we are going to need for the flow.
Step #2:
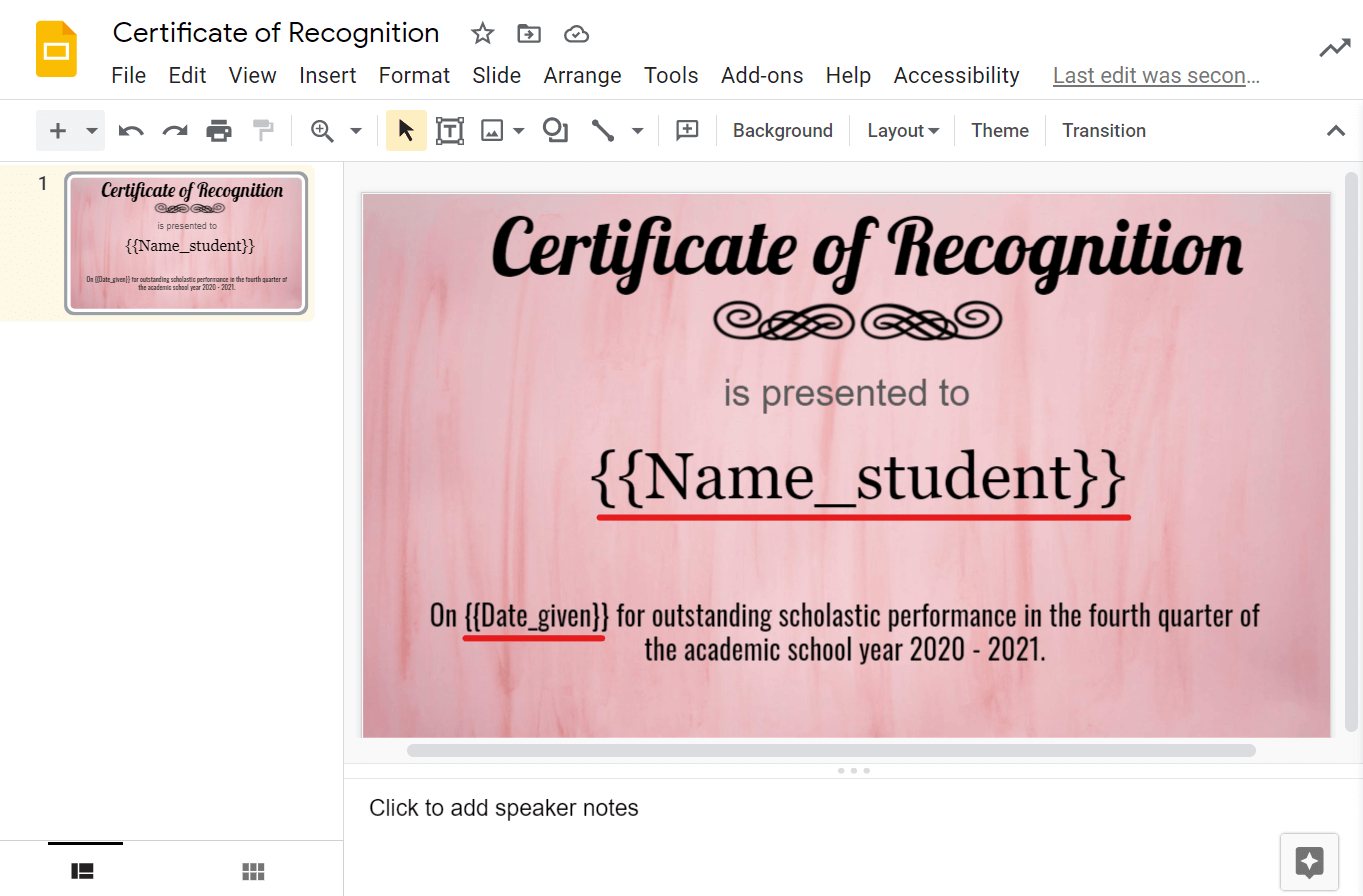
Within the new folder, click once more the + New button, this time select Slides. We are going to create the certificate template. Now, you can start designing it however you want.
Also, make sure to put curly parenthesis on areas you want to populate automatically.
Step #3:
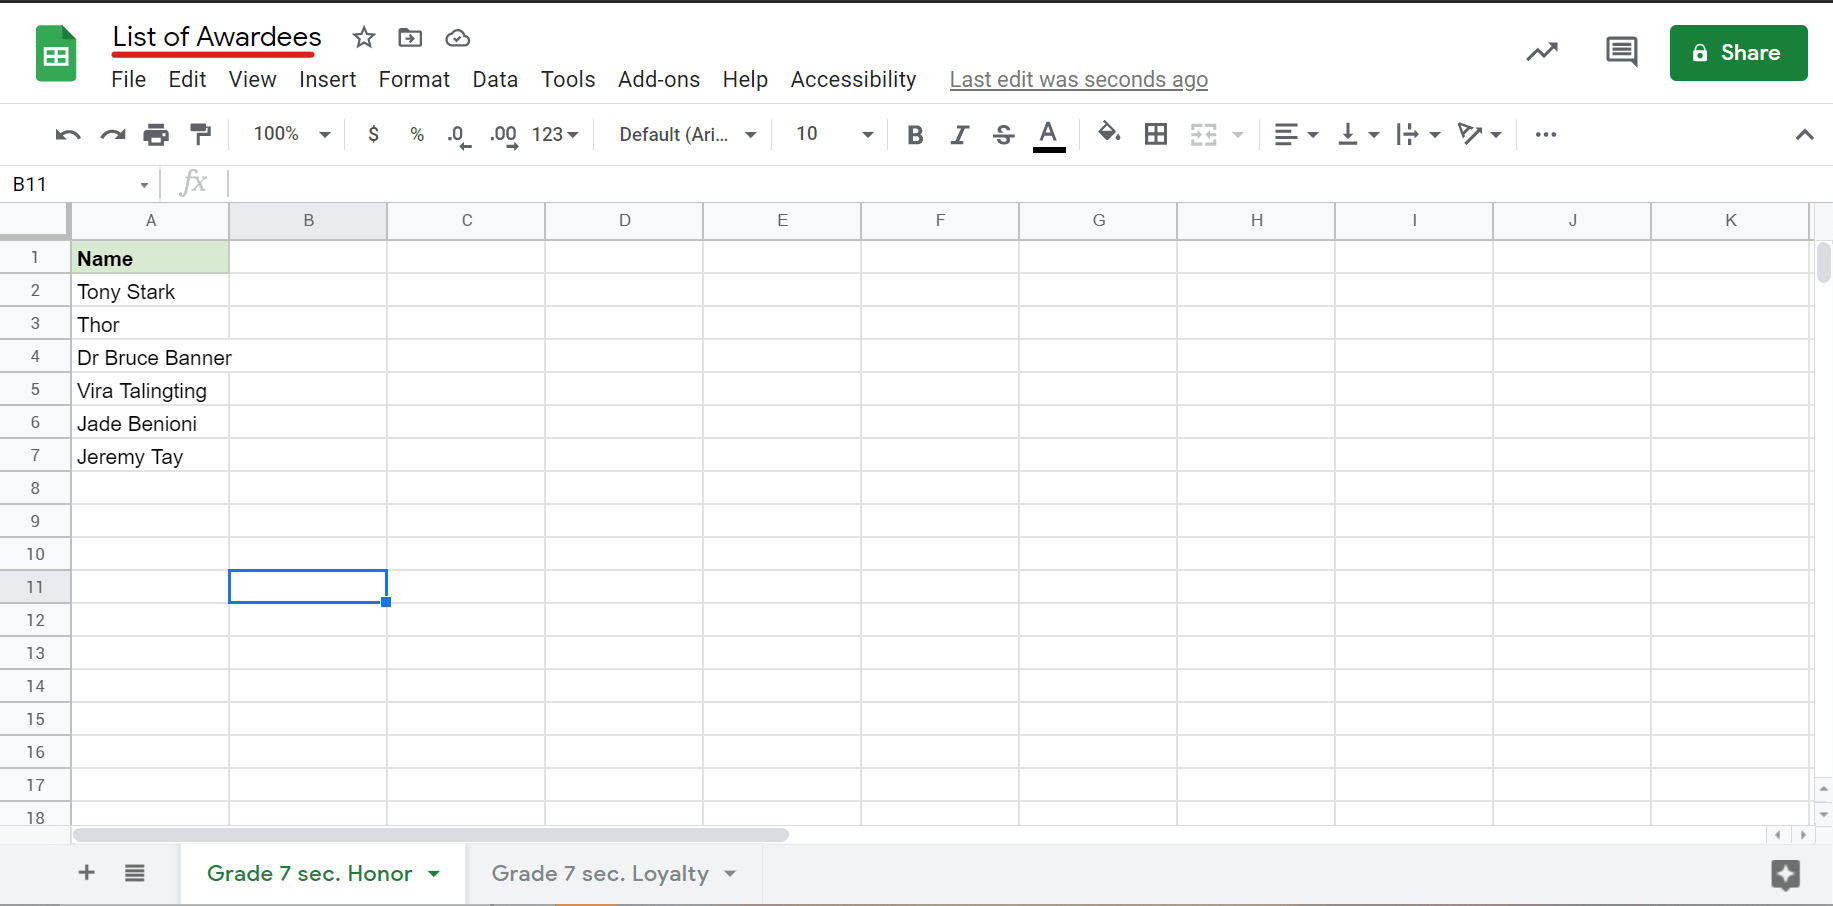
Now, using Sheets, create a list of students who are going to receive the award.
Step #4:
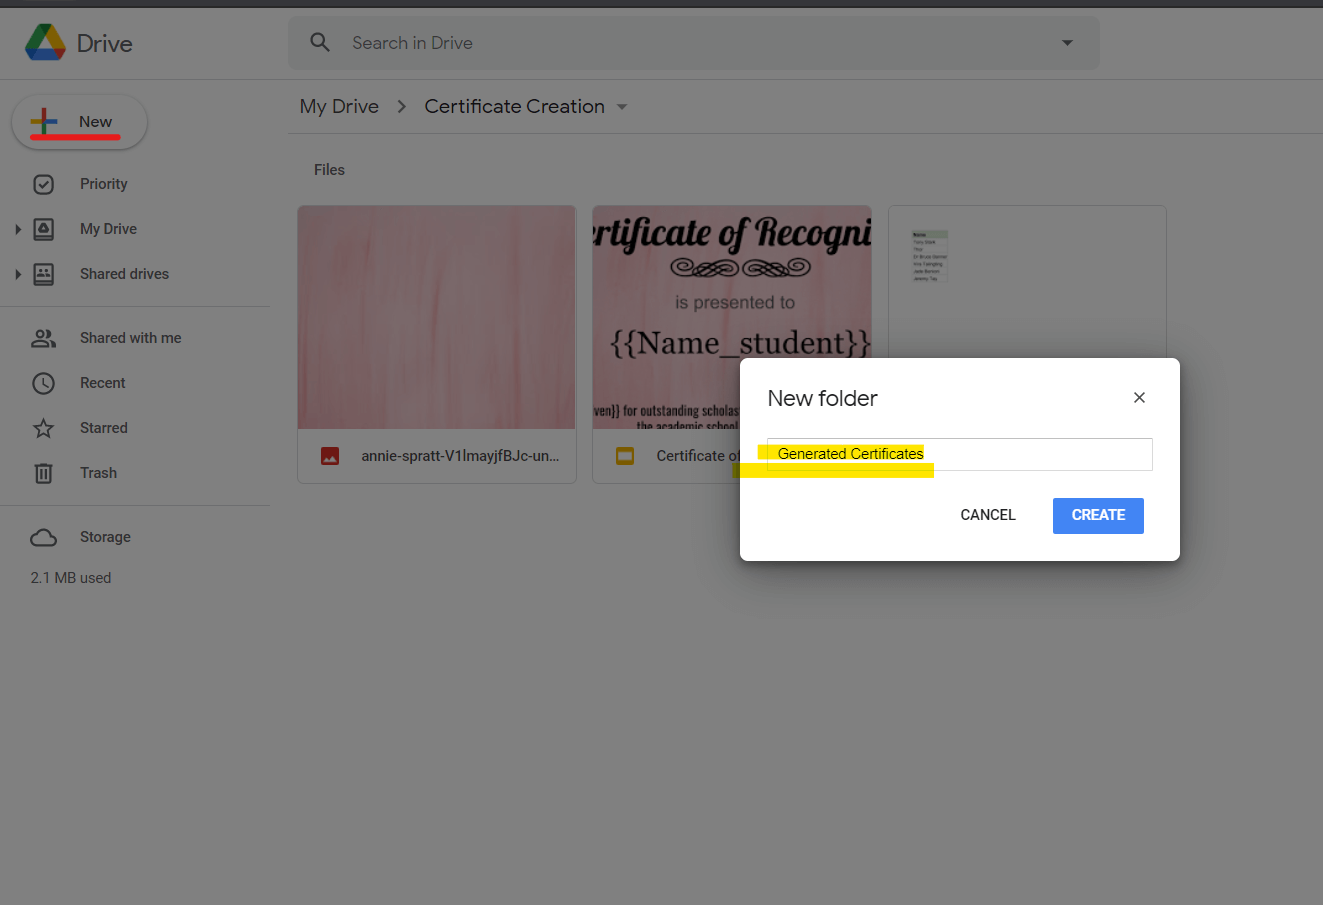
Next, create a sub-folder that will house all the newly-generated certificates.
Step #5:
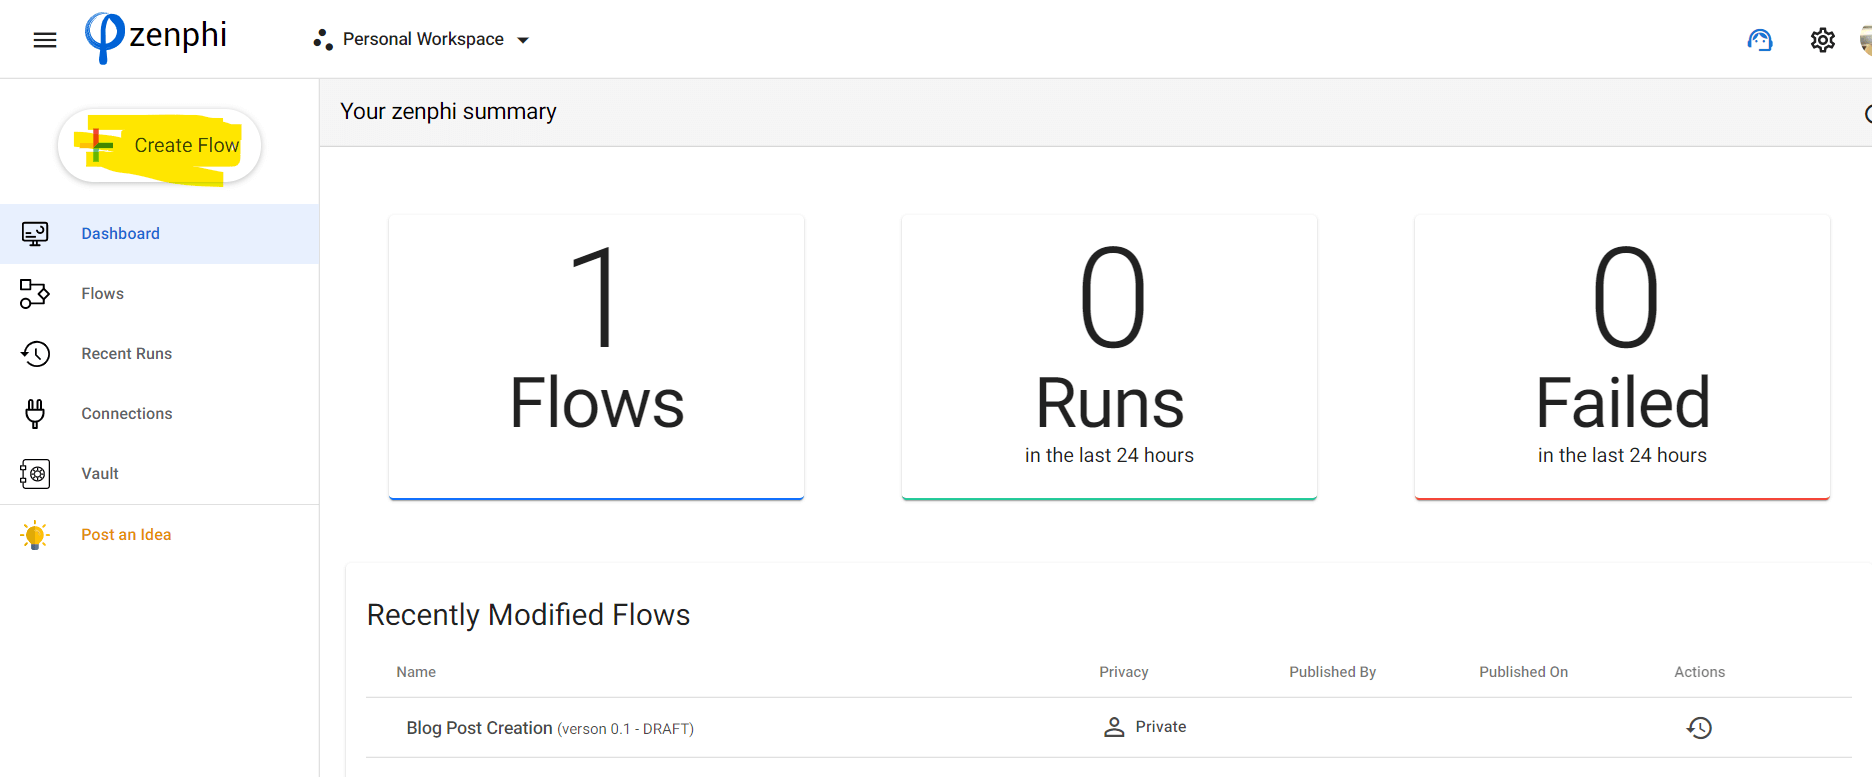
Log in to your zenphi dashboard using your Google Workspace for Education account. You can signup for a free basic account if you haven’t got one yet. And then click + Create Flow button at the top right of your screen to get to the next stage.
Step #6:
Time to select your trigger action. In zenphi, we have several different actions ranging from inbox-watching such as form responses and incoming emails.
You can also choose a trigger to run on a regular schedule and another that can be triggered manually. In this case, we are going for the Manual Flow, this means this flow will only run when you click the play button.

And this is what our blank flow looks like:
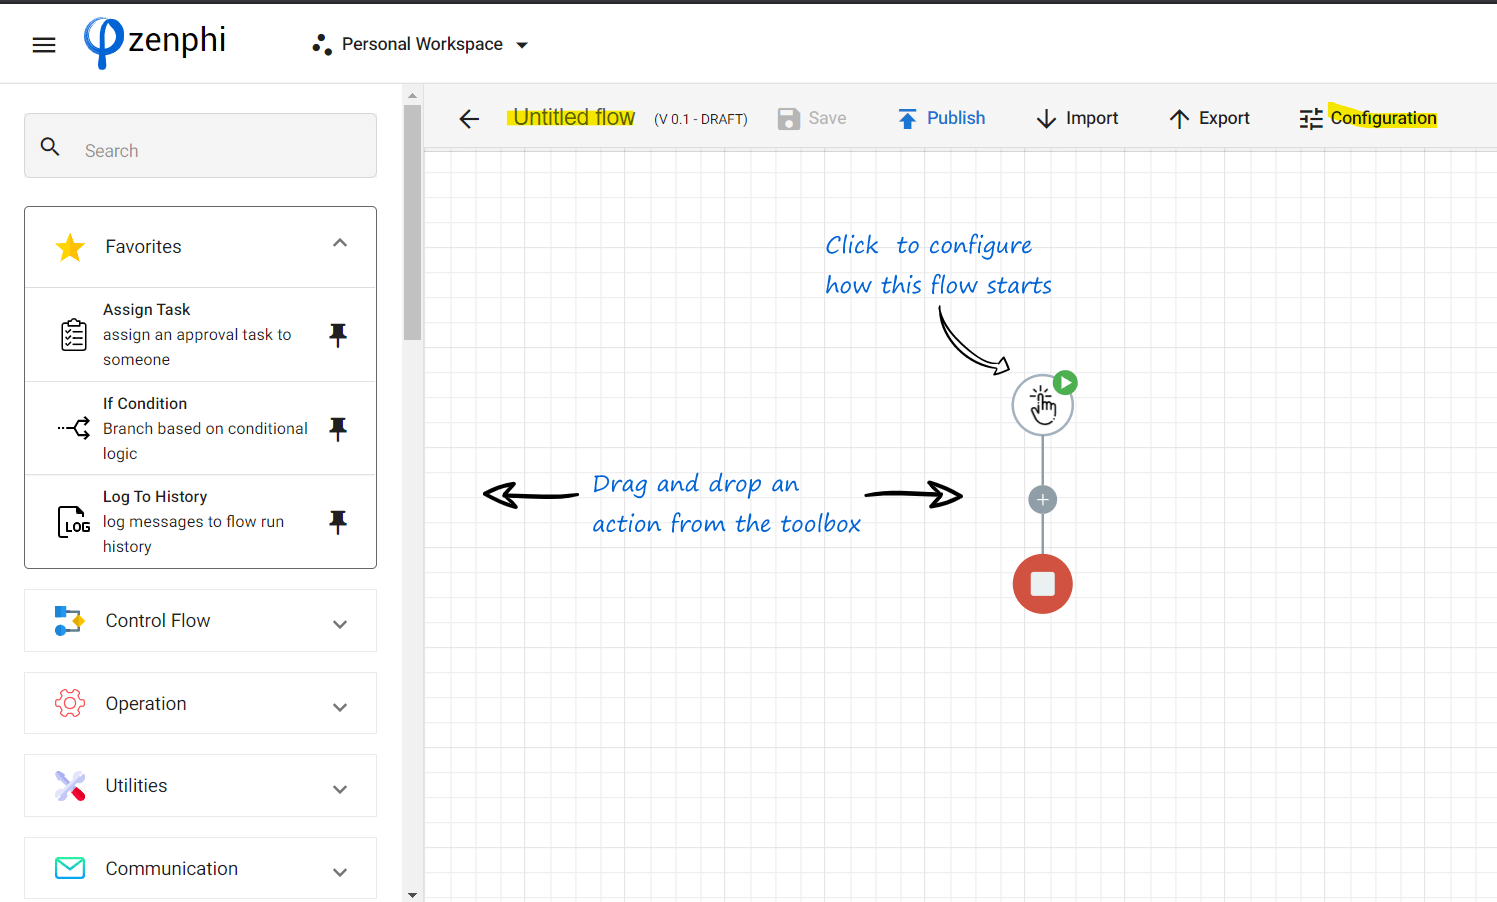
Also, you can click the configuration section to assign a name to this new flow.
Step #7:
Now, it is time to drag and drop the necessary actions to build our automated certificate creation workflow.
First, go to the Designer panel and click the Sheets icon. Then from the dropdown menu, drag and drop the Read Rows action into the empty flow.
Next, click the gear button to configure this action.
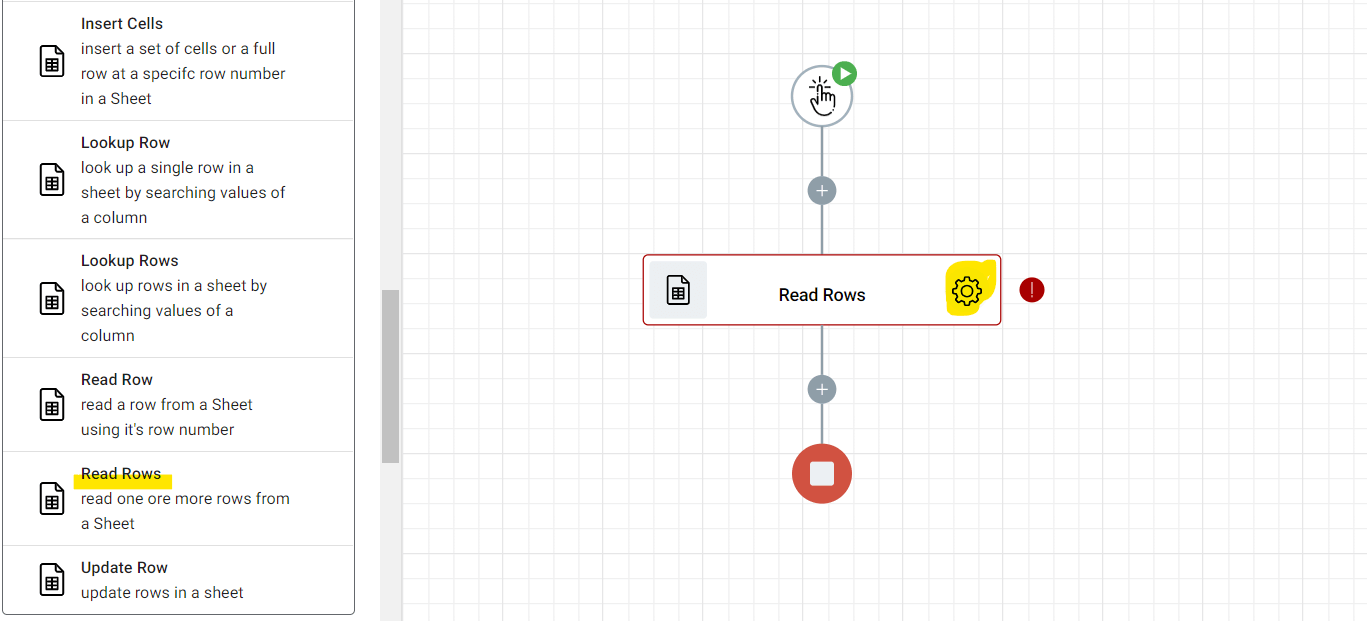
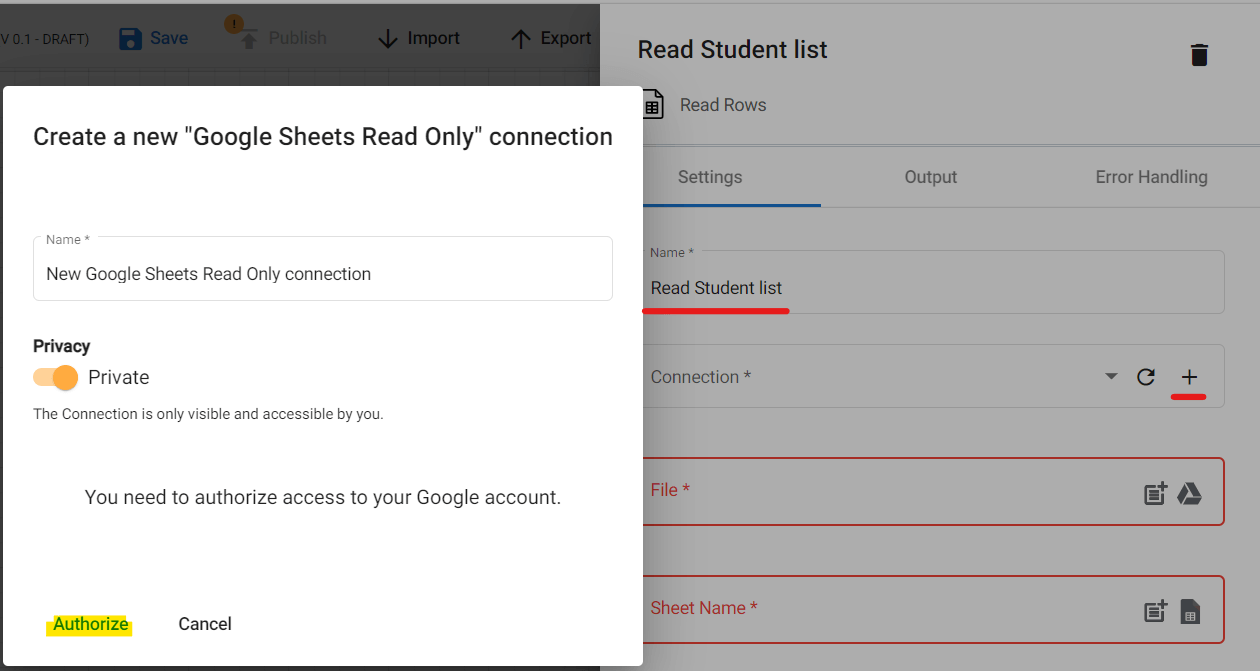
You can leave the Name field the way it is, but you can also assign a name for the sake of naming convention.
As for Connection, if this is your first flow, you can click the + button to add a new one. In zenphi, Connection is the element that lets you interact and connect with any Google Apps like Docs, Sheets, Slides, Drive, Gmail, and more.
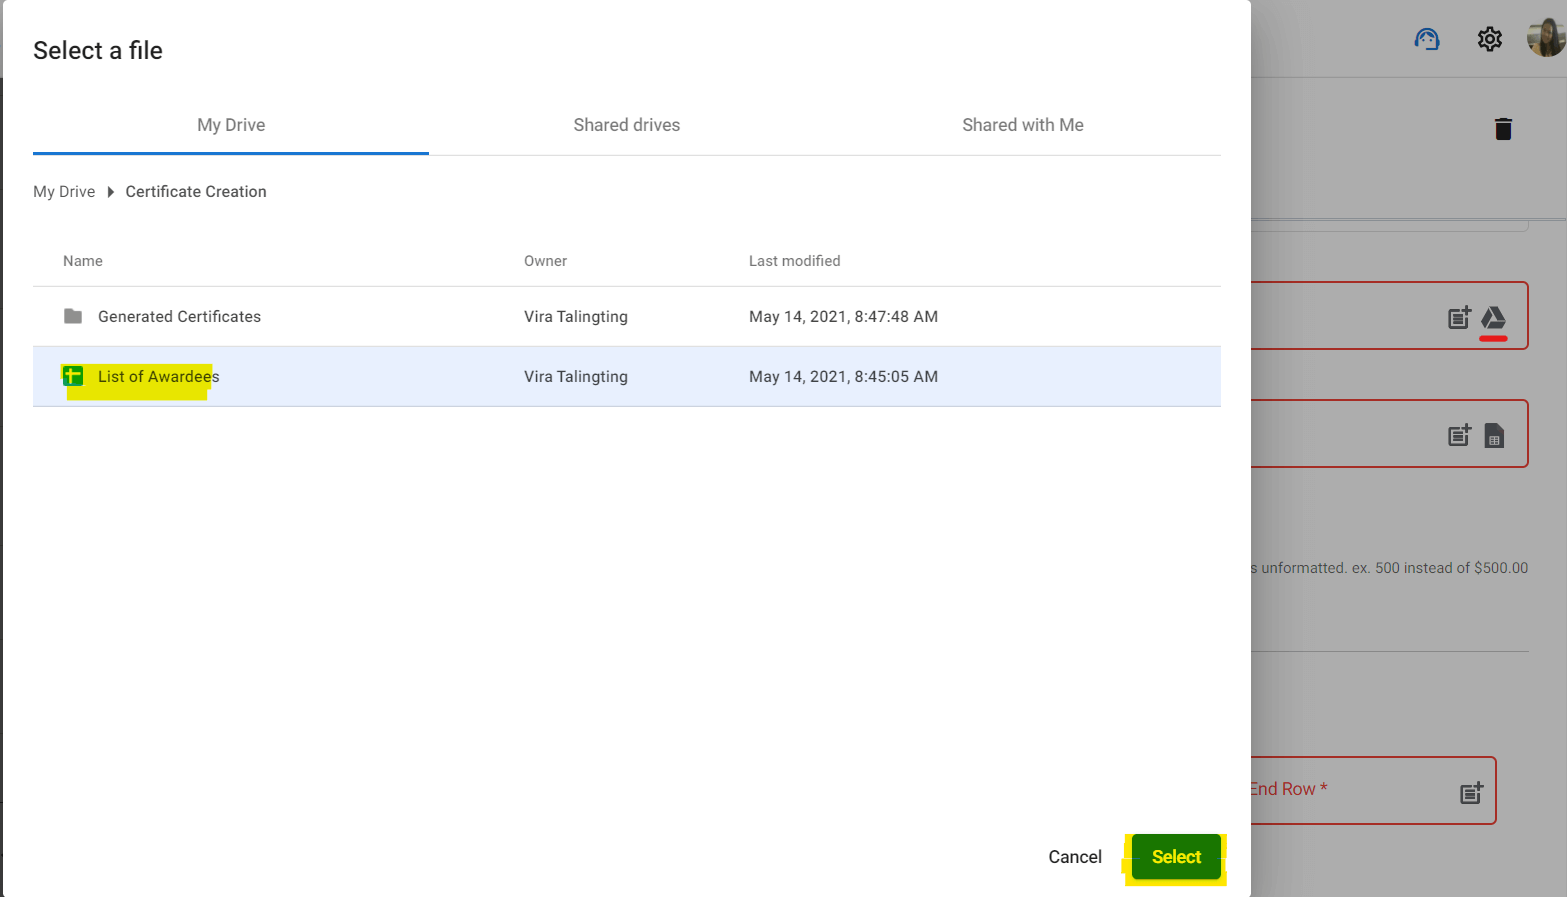
At the File field, click the Drive icon and select the List of Students file from earlier.
Let us make sure that we selected the right sheet in the Sheet Name by clicking the Sheet icon and selecting the “Grade 7 sec. Honor”.

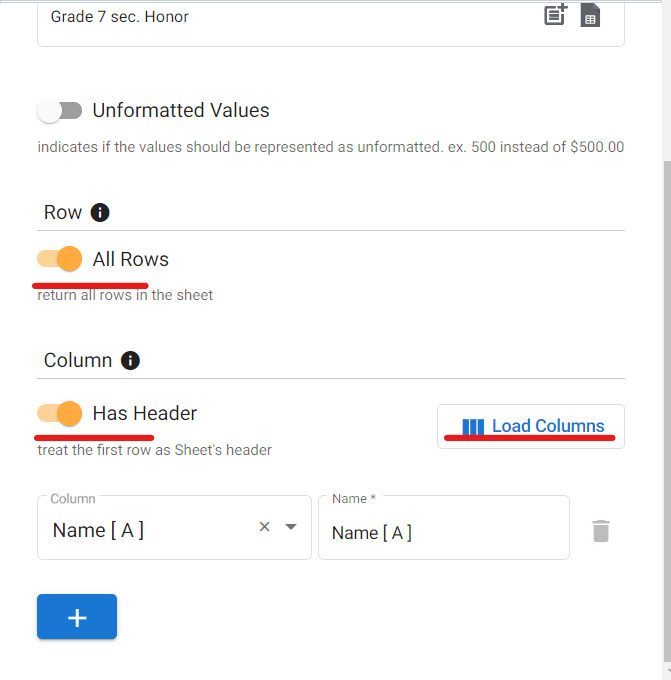
If you scroll a bit further down, we will arrive at the Row section. Then, enable All Rows, this allows all the rows in our spreadsheet to be retrieved when we need to. And if we enable Has Header it will treat the first row of your spreadsheet as headers or column titles.
Next is to click the Load Columns button, it will load all the columns within our spreadsheet and their corresponding values.
Step #8:
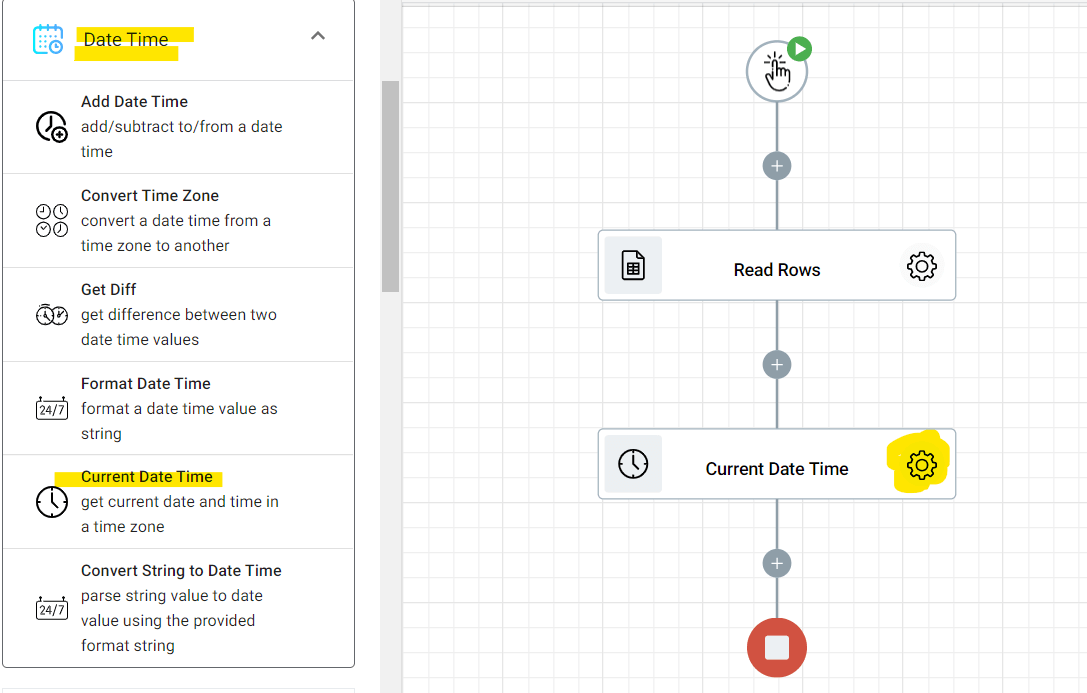
The next action we are going to use is Current Date Time under Date Time in the Designer panel.
Again, click the gear button to configure this action.
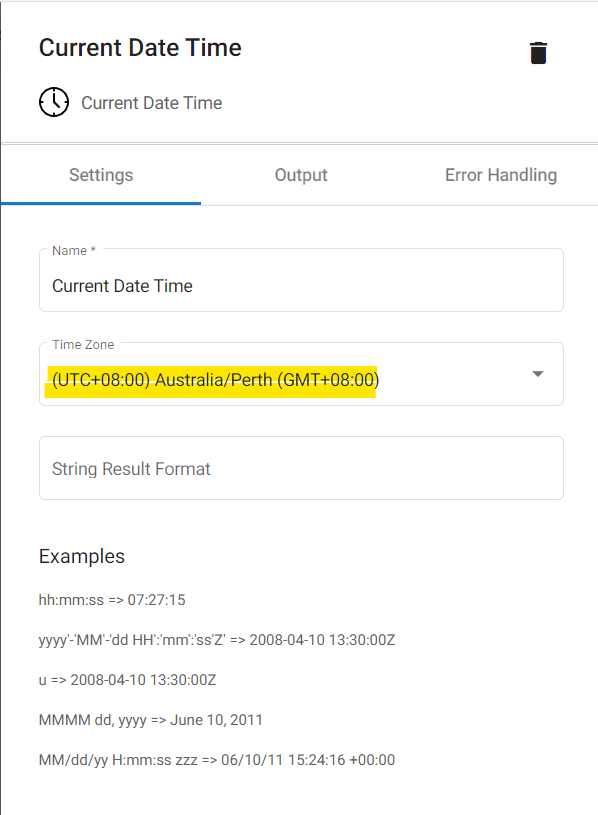
We will opt to leave the Name field as it is and then choose the time zone we want in the Time Zone field.
Step #9:
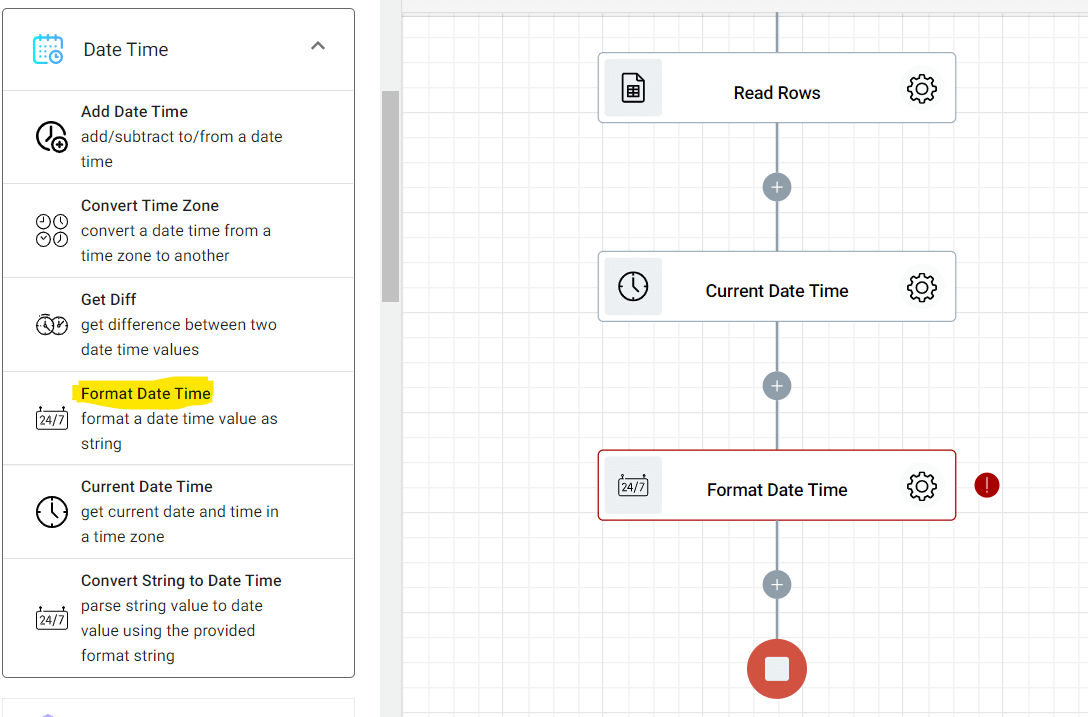
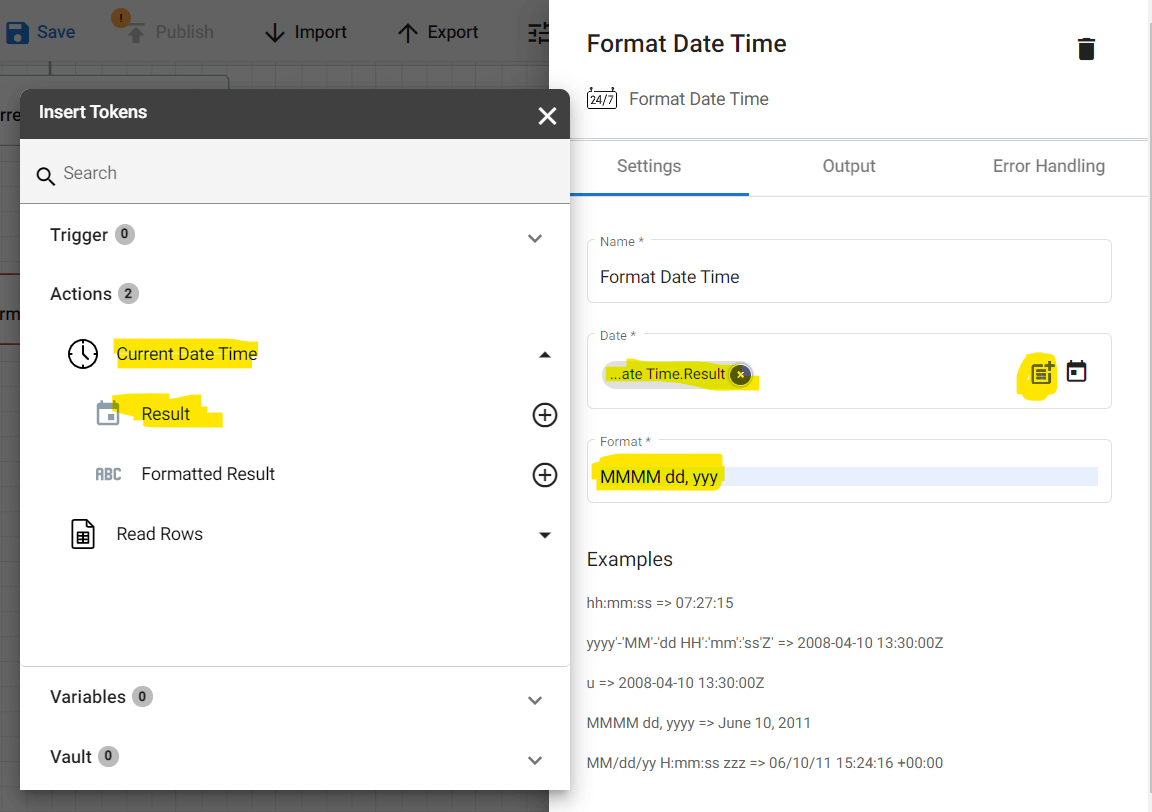
Still, under Time Date, let’s drag and drop the Format Date Time action.
And when configuring this action, let’s directly head to the Date field and click the parameter icon. From the Tokens panel, click Current Date Time and select Result. Also, we will set the date format in the Format field.
What this action will do is automatically log the date-time value when you generate the certificates.
Step #10:
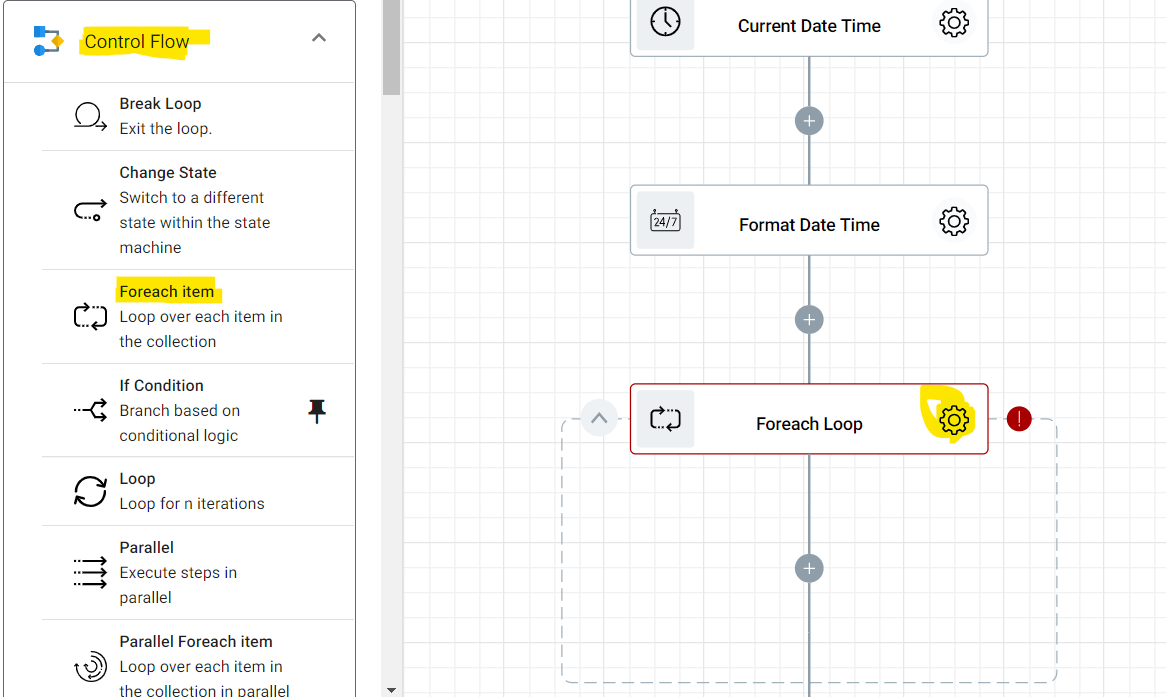
And then go back to the Designer panel, and under Control Flow, let’s select the Foreach item. This particular zenphi action will go through our list row by row to log or retrieve data.
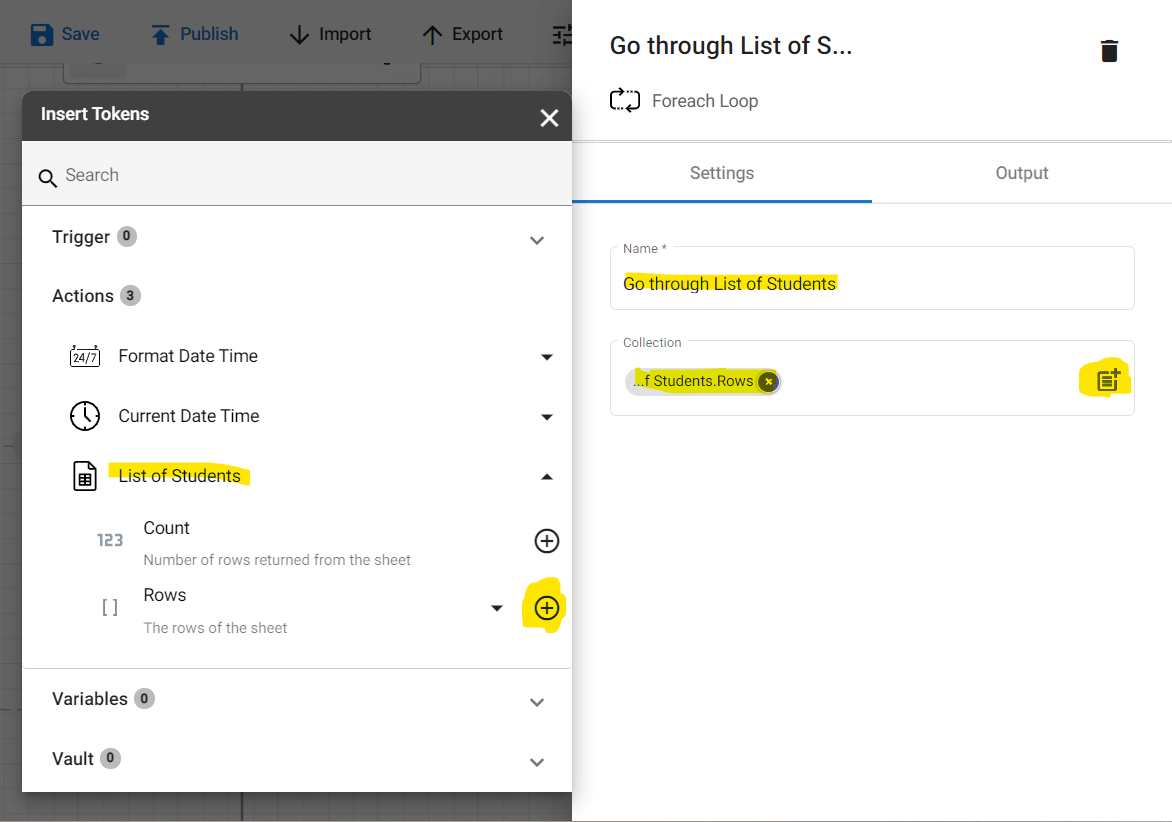
To configure this action, you can opt to rename the pre-filled name in the Name field. And in the Collection section, click the parameter icon, then select Rows under “List of Students”.
Step #11:
Finally, onto our last action, the Generate Slides under Google Slides in the Designer panel. This action is where the magic happens. Our Certificates will be generated using the Slide template we created earlier.
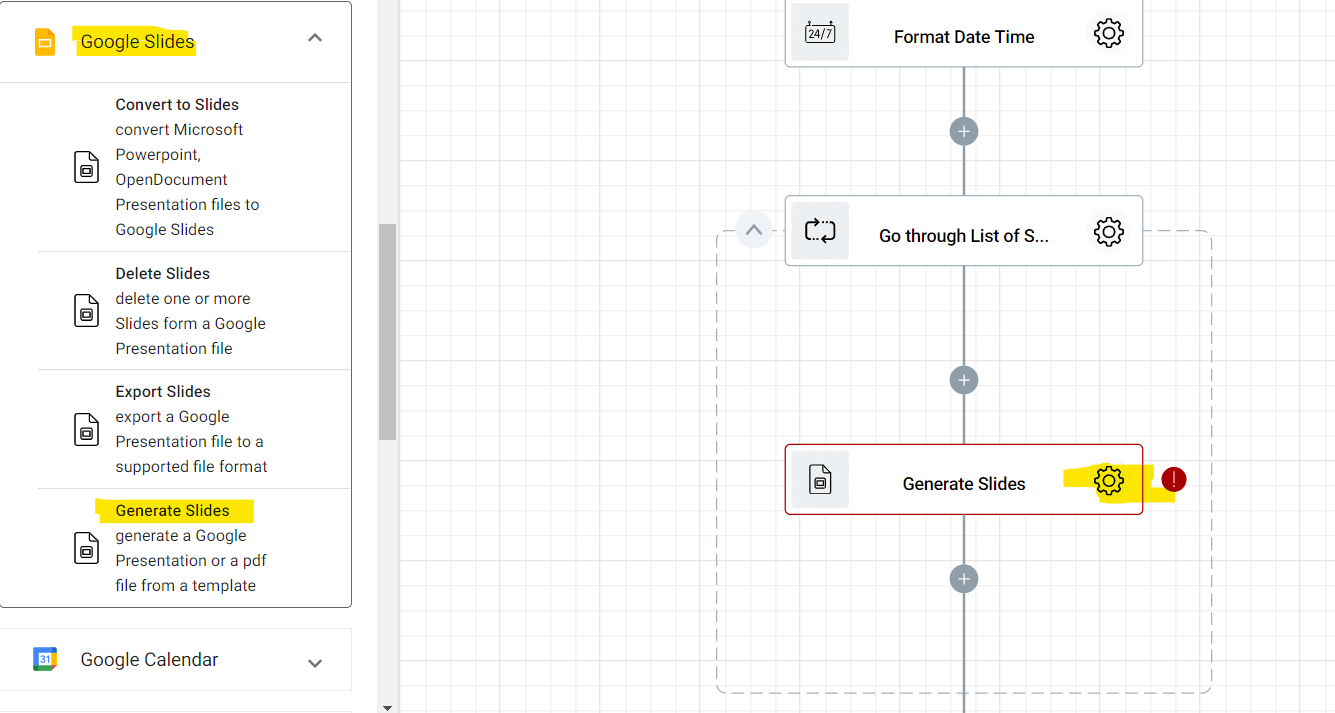
Now, to configure this action, we are naming this action “Generate Certificates” to make it easier for us to identify what this step is for.
In the Connection field, Let’s click the + button to add a new Drive connection and point to the right Google Workspace account. What this action does is to connect the flow to the Google Drive housing the template.
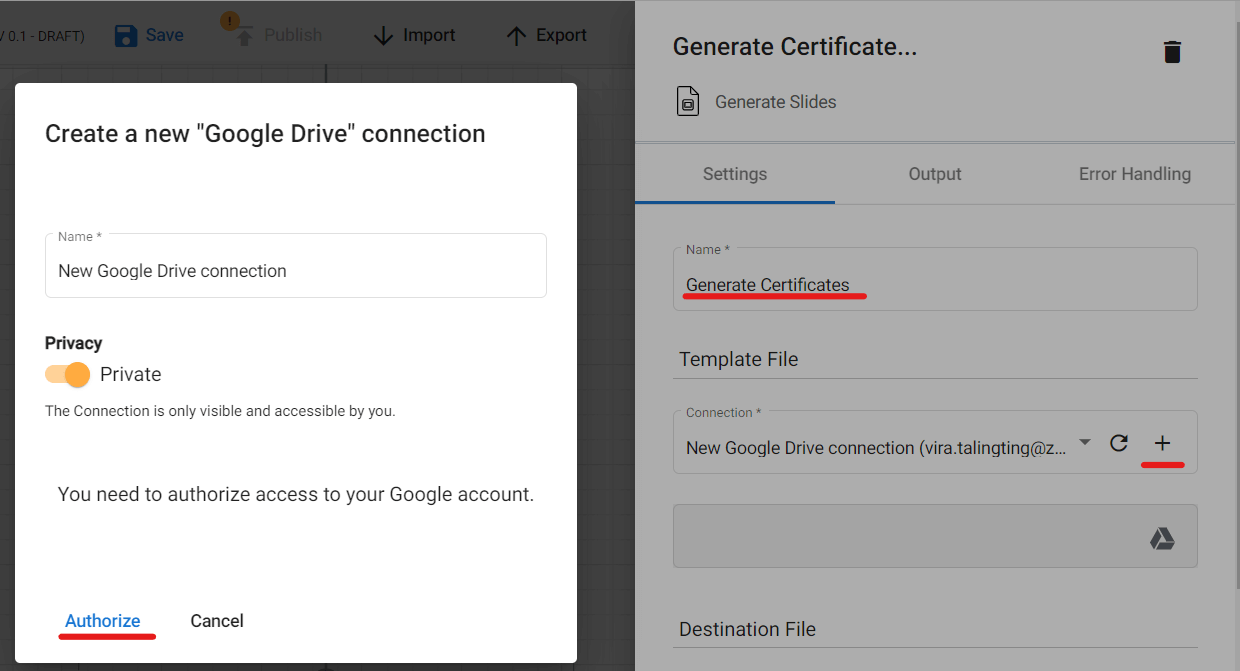
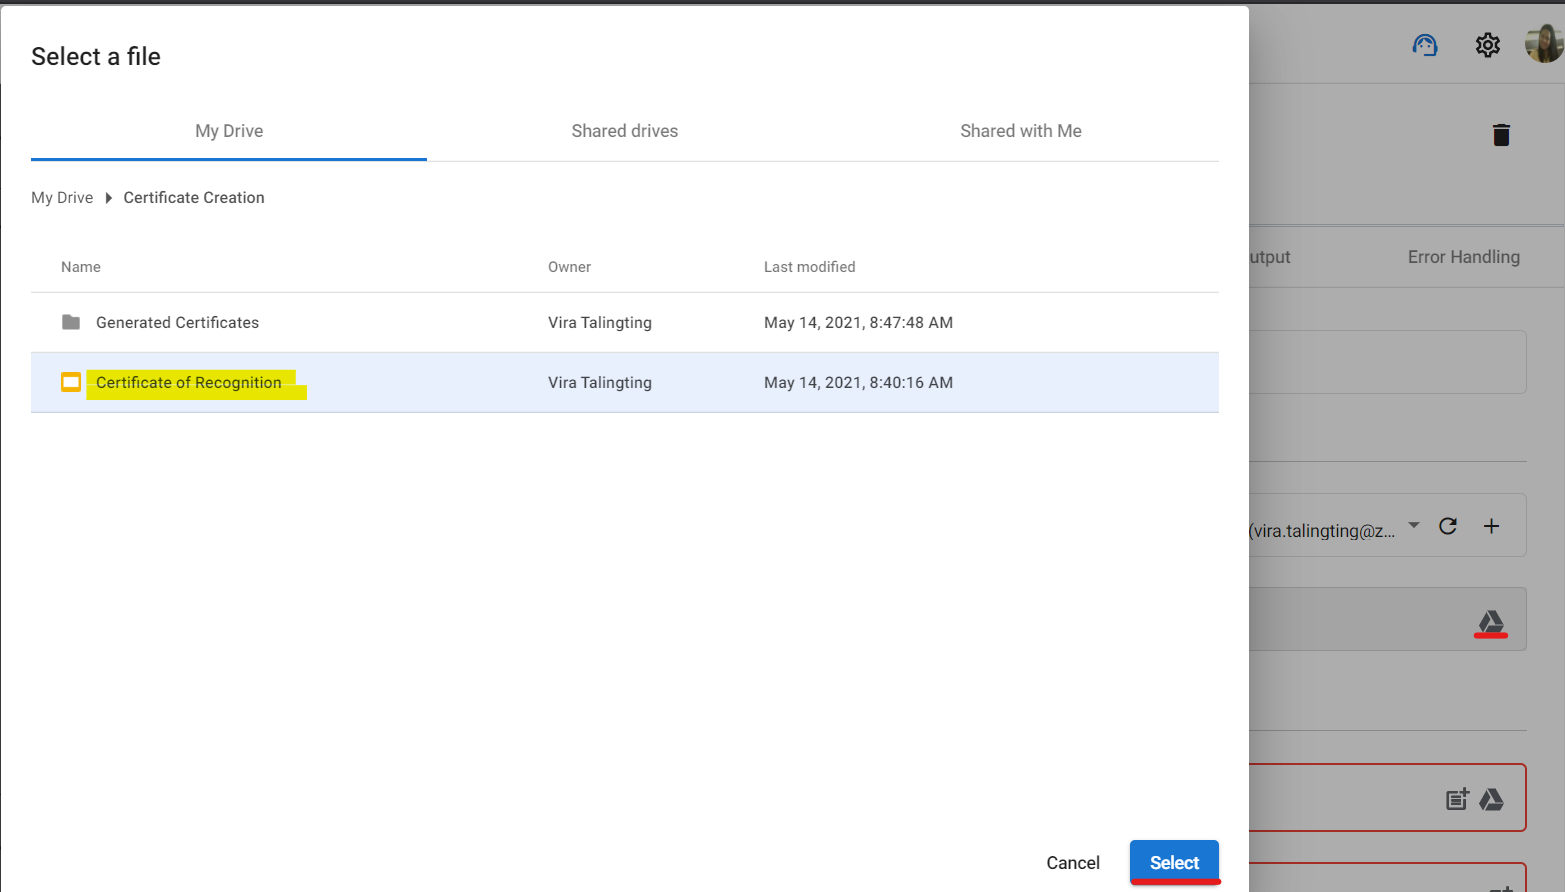
And then find the Slide template by clicking the Drive icon.
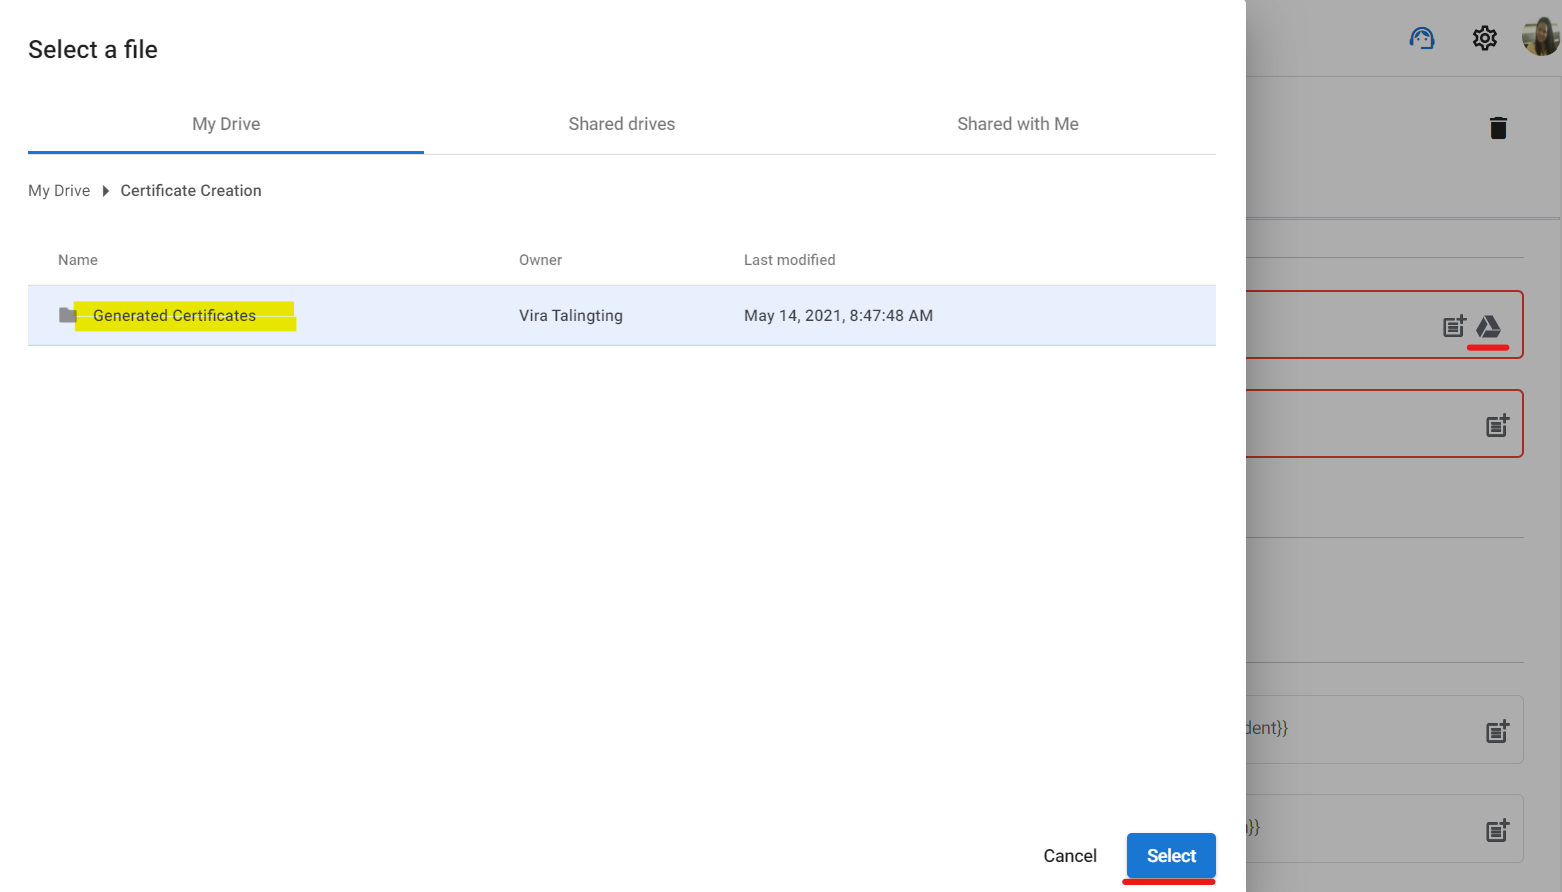
Let’s scroll a bit further down and we’ll arrive at the Destination File section. We will click the Drive icon in the Destination Folder field and select the sub-folder we created.
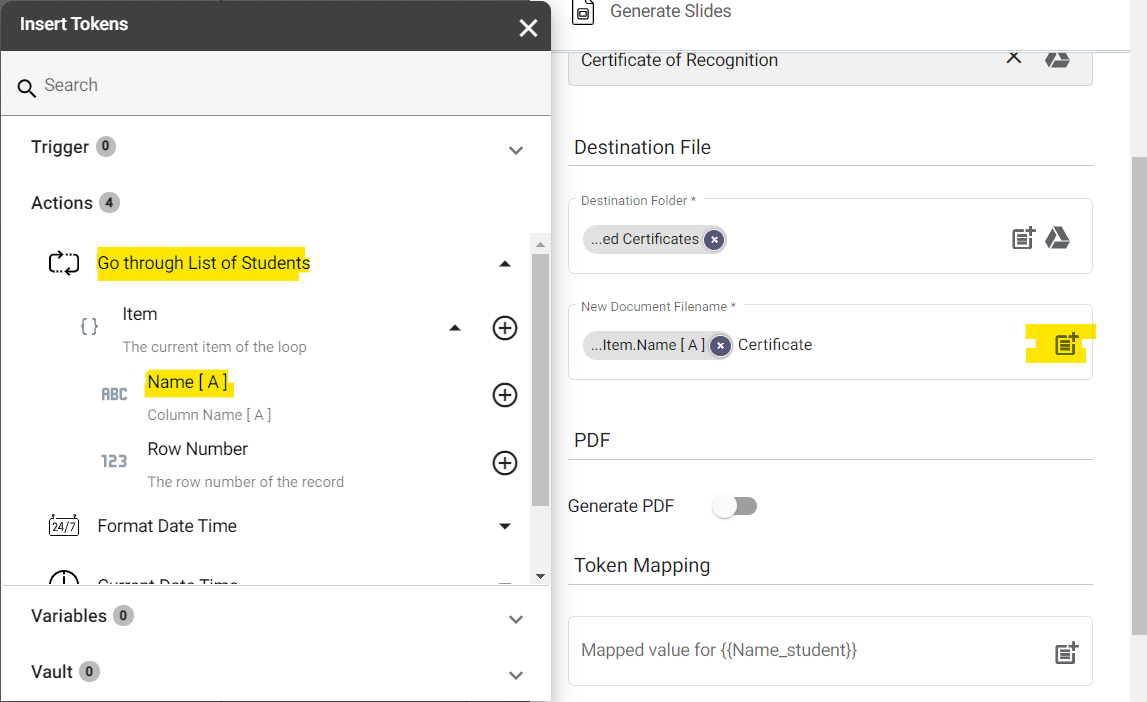
Assign a name to the generated documents.
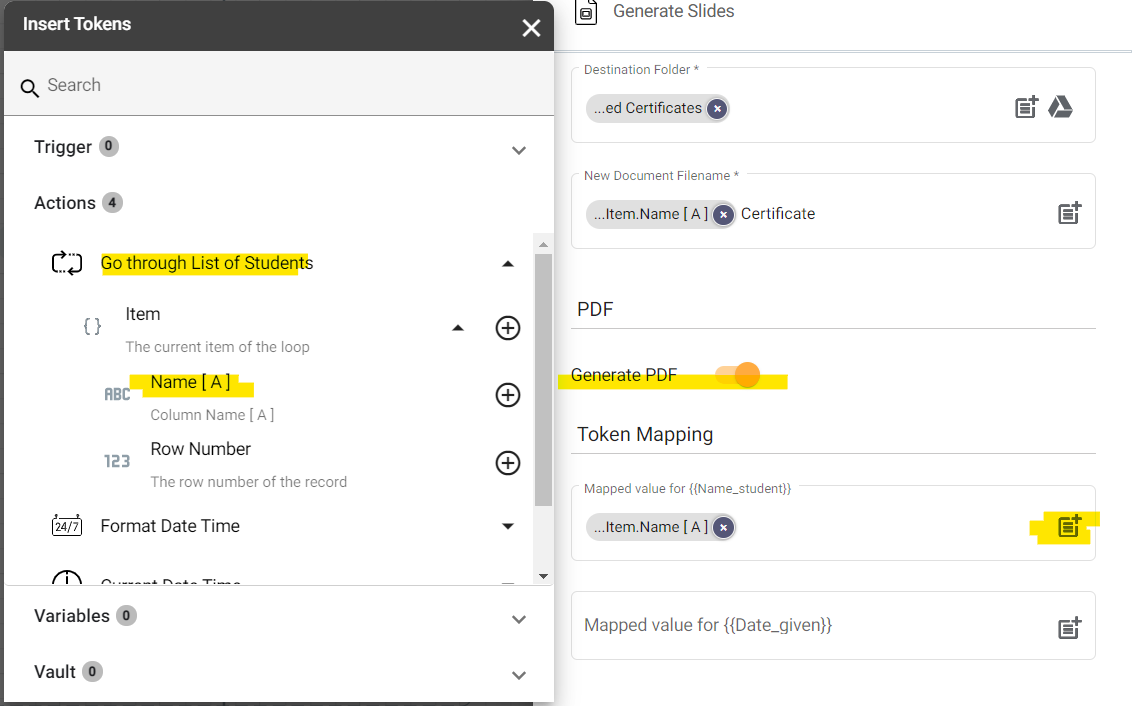
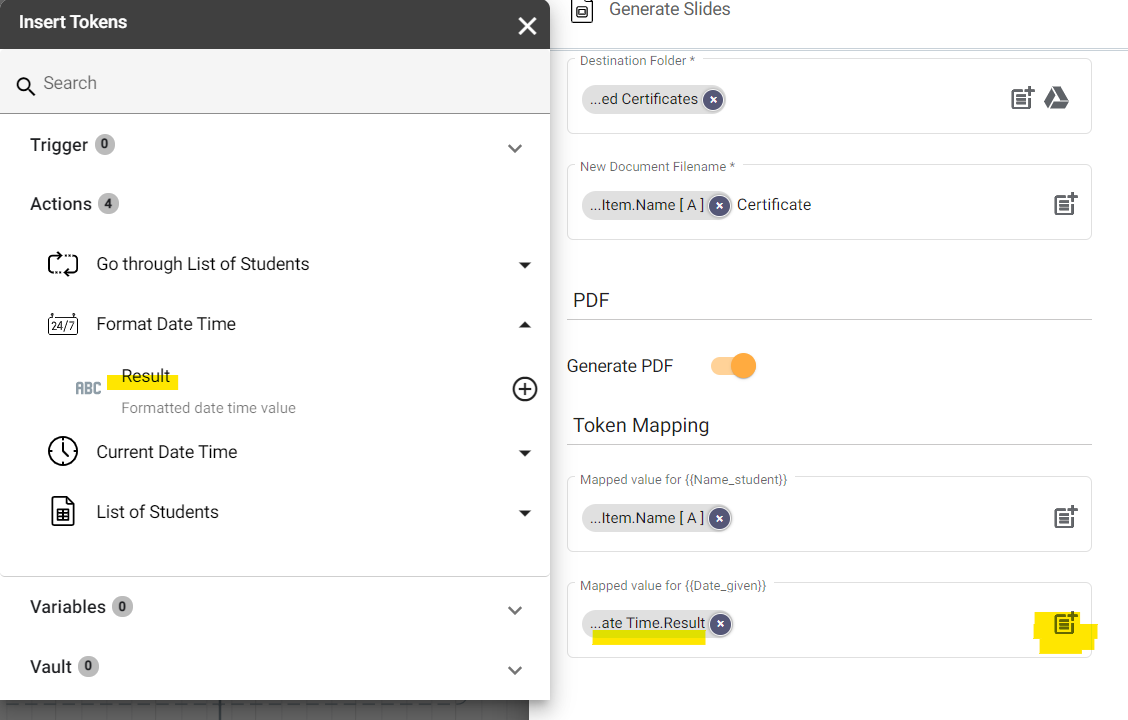
Let’s make sure to enable the Generate PDf button so the document generated has a PDF version. And as for the Token mapping, these are the fields with the {{}} in our Slide template.
To start mapping our token, let’s click the parameter icon first, and then select Name[A] under Item.
And as for {{Date_given}}, click the parameter once more and select Result under Format Date Time.
Conclusion
That’s it! Make sure to hit Save and Publish and don’t forget to test this flow to make sure that everything is in place.

