Often, after a Typeform submission, you find yourself needing to execute additional actions. These might encompass seeking approval, sending emails, integrating with your CRM system, or even generating PDFs. These PDFs could be a variety of documents, such as purchase orders, sales quotes, order confirmations, and more.
In this tutorial, we will guide you through the process of generating custom PDF documents from data submitted to a Typeform form using zenphi, a no-code workflow automation platform. By following these steps, you’ll be able to create automated workflows that generate PDFs, store them in Google Drive, and (optionally) email them back to the form submitter.
You can either watch the video version below or continue with the step-by-step instructions provided after. Let’s get started!
Step 1: Set Up the Typeform
To begin, make sure you have your Typeform published and ready for collecting responses. For this tutorial, we’ll use the “T-Shirt Order Form” template provided by Typeform. You can choose any template or create your own form.
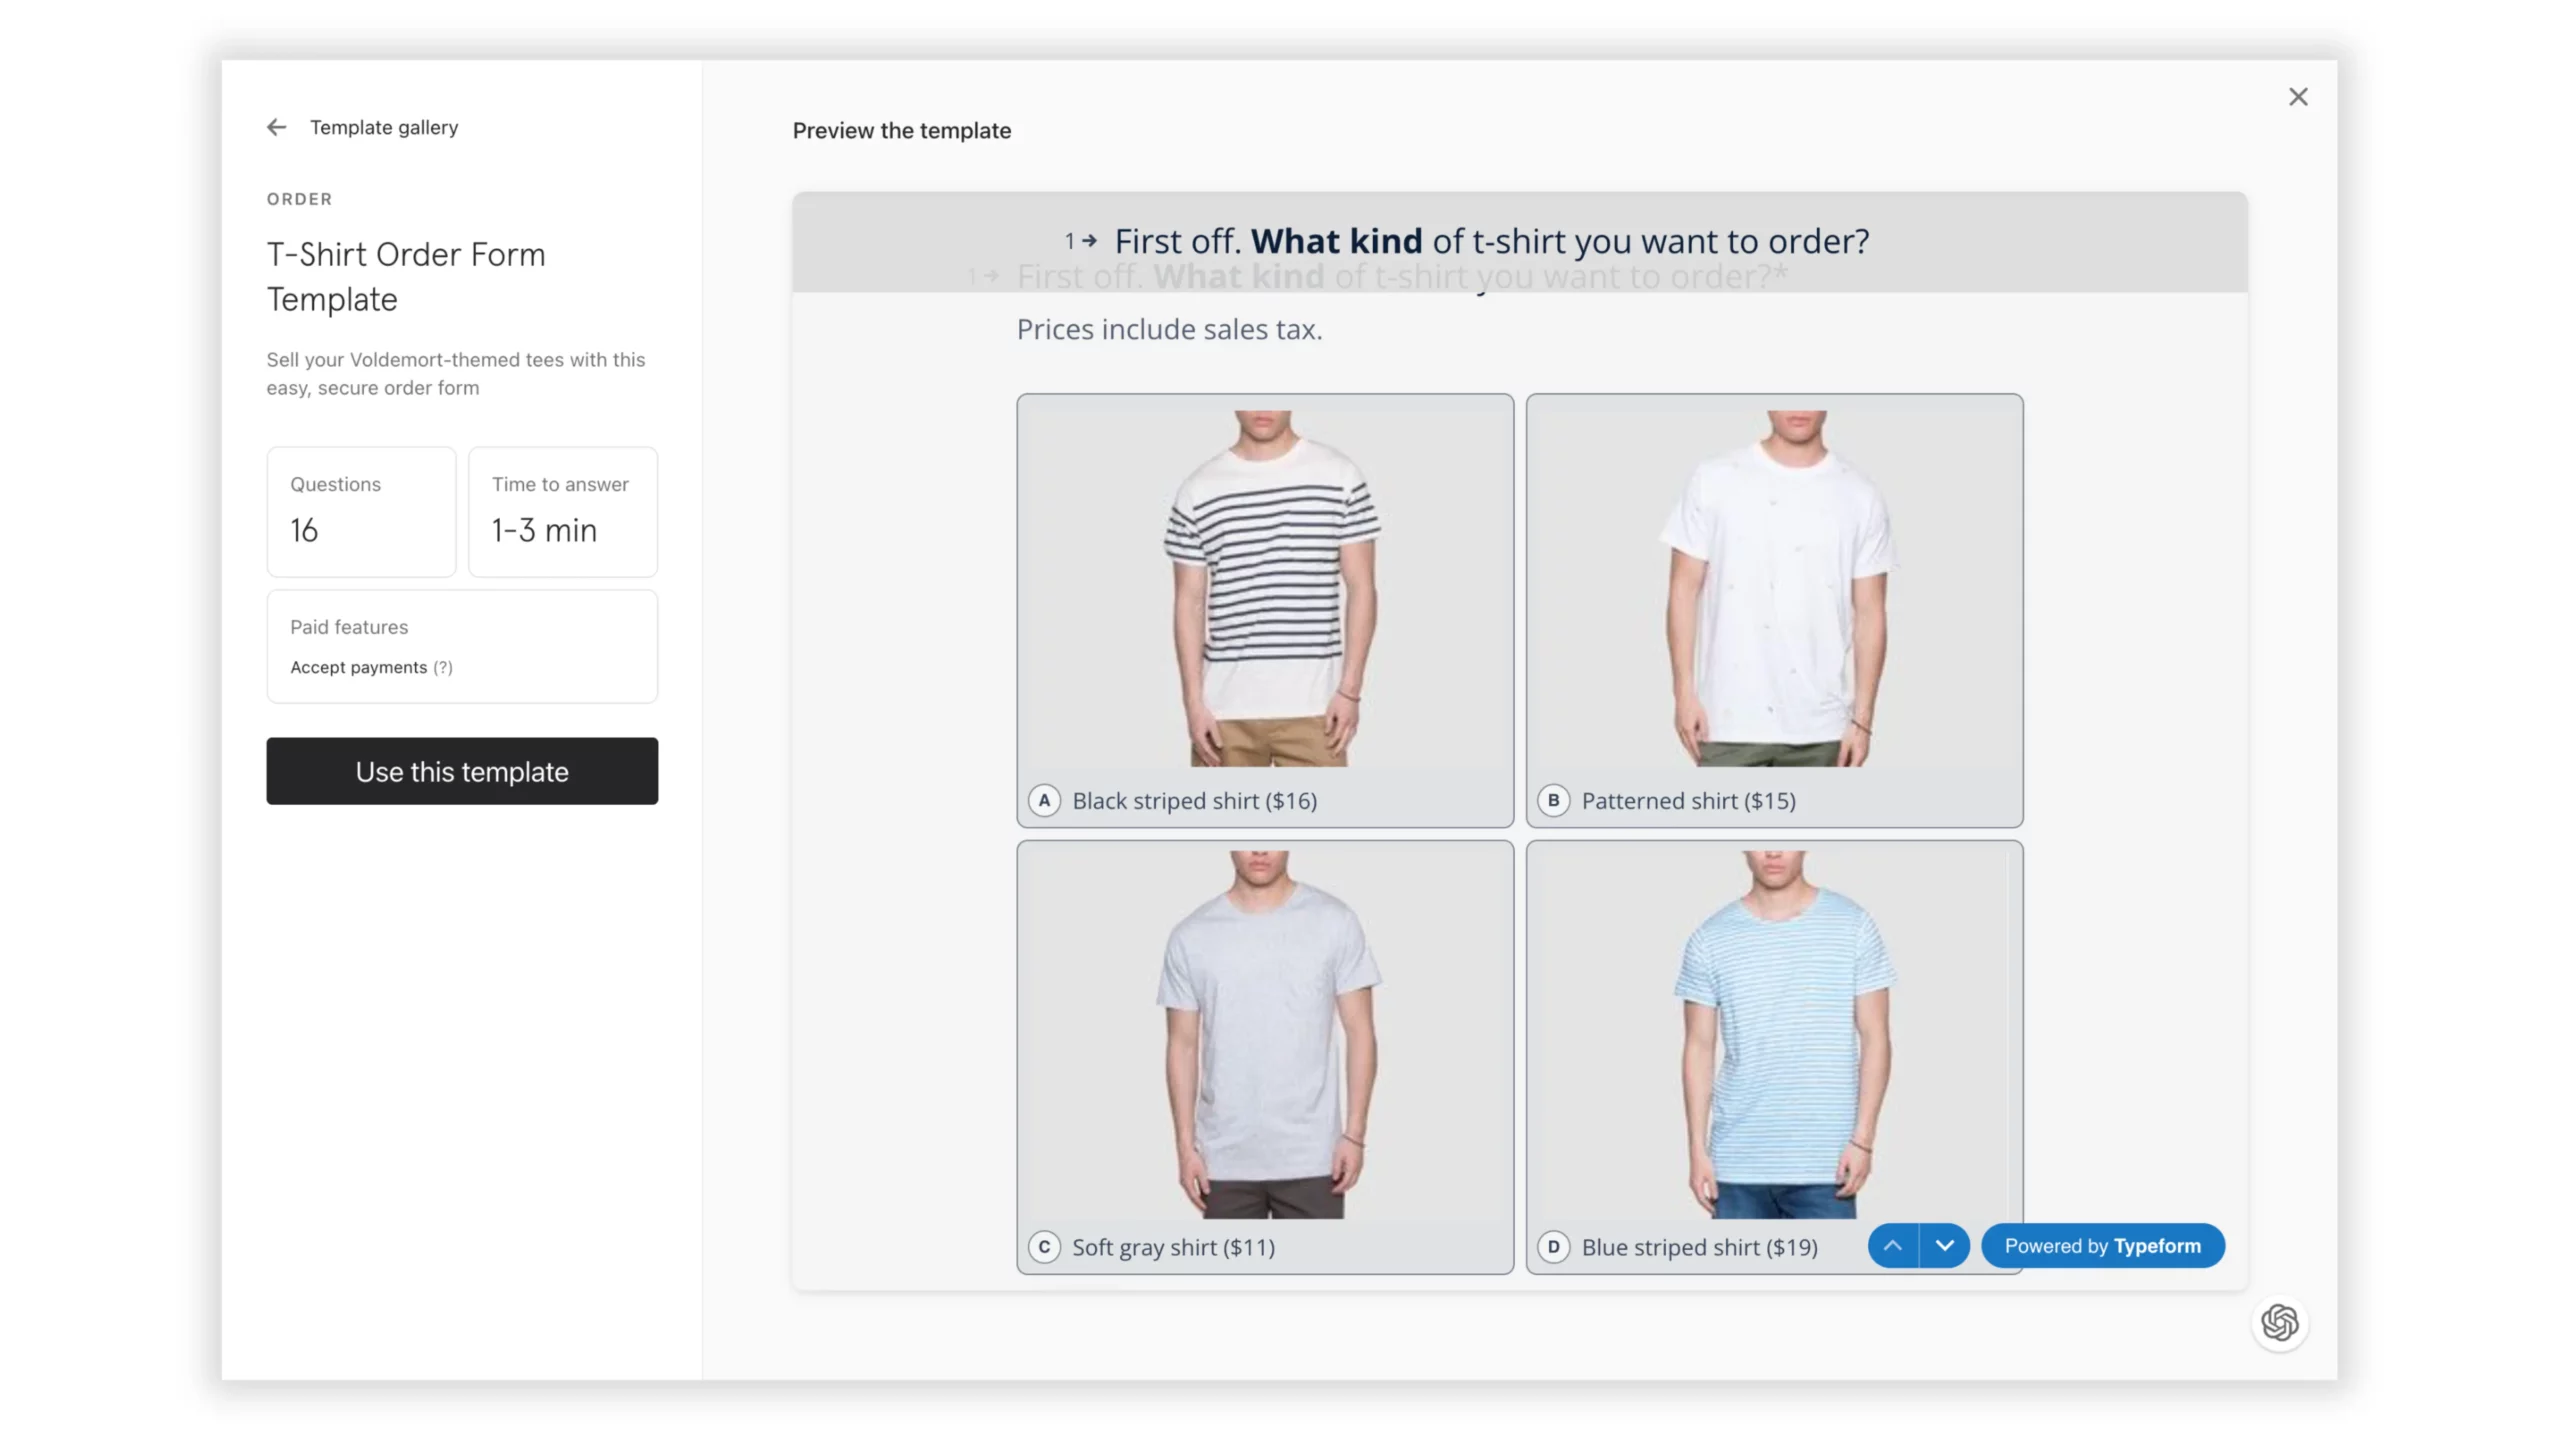
Step 2: Create an “Export Typeform to PDF” Flow in zenphi
1. Log in to your zenphi account or sign up for free.
2. Create a new Space or open the existing one and create a new Flow.
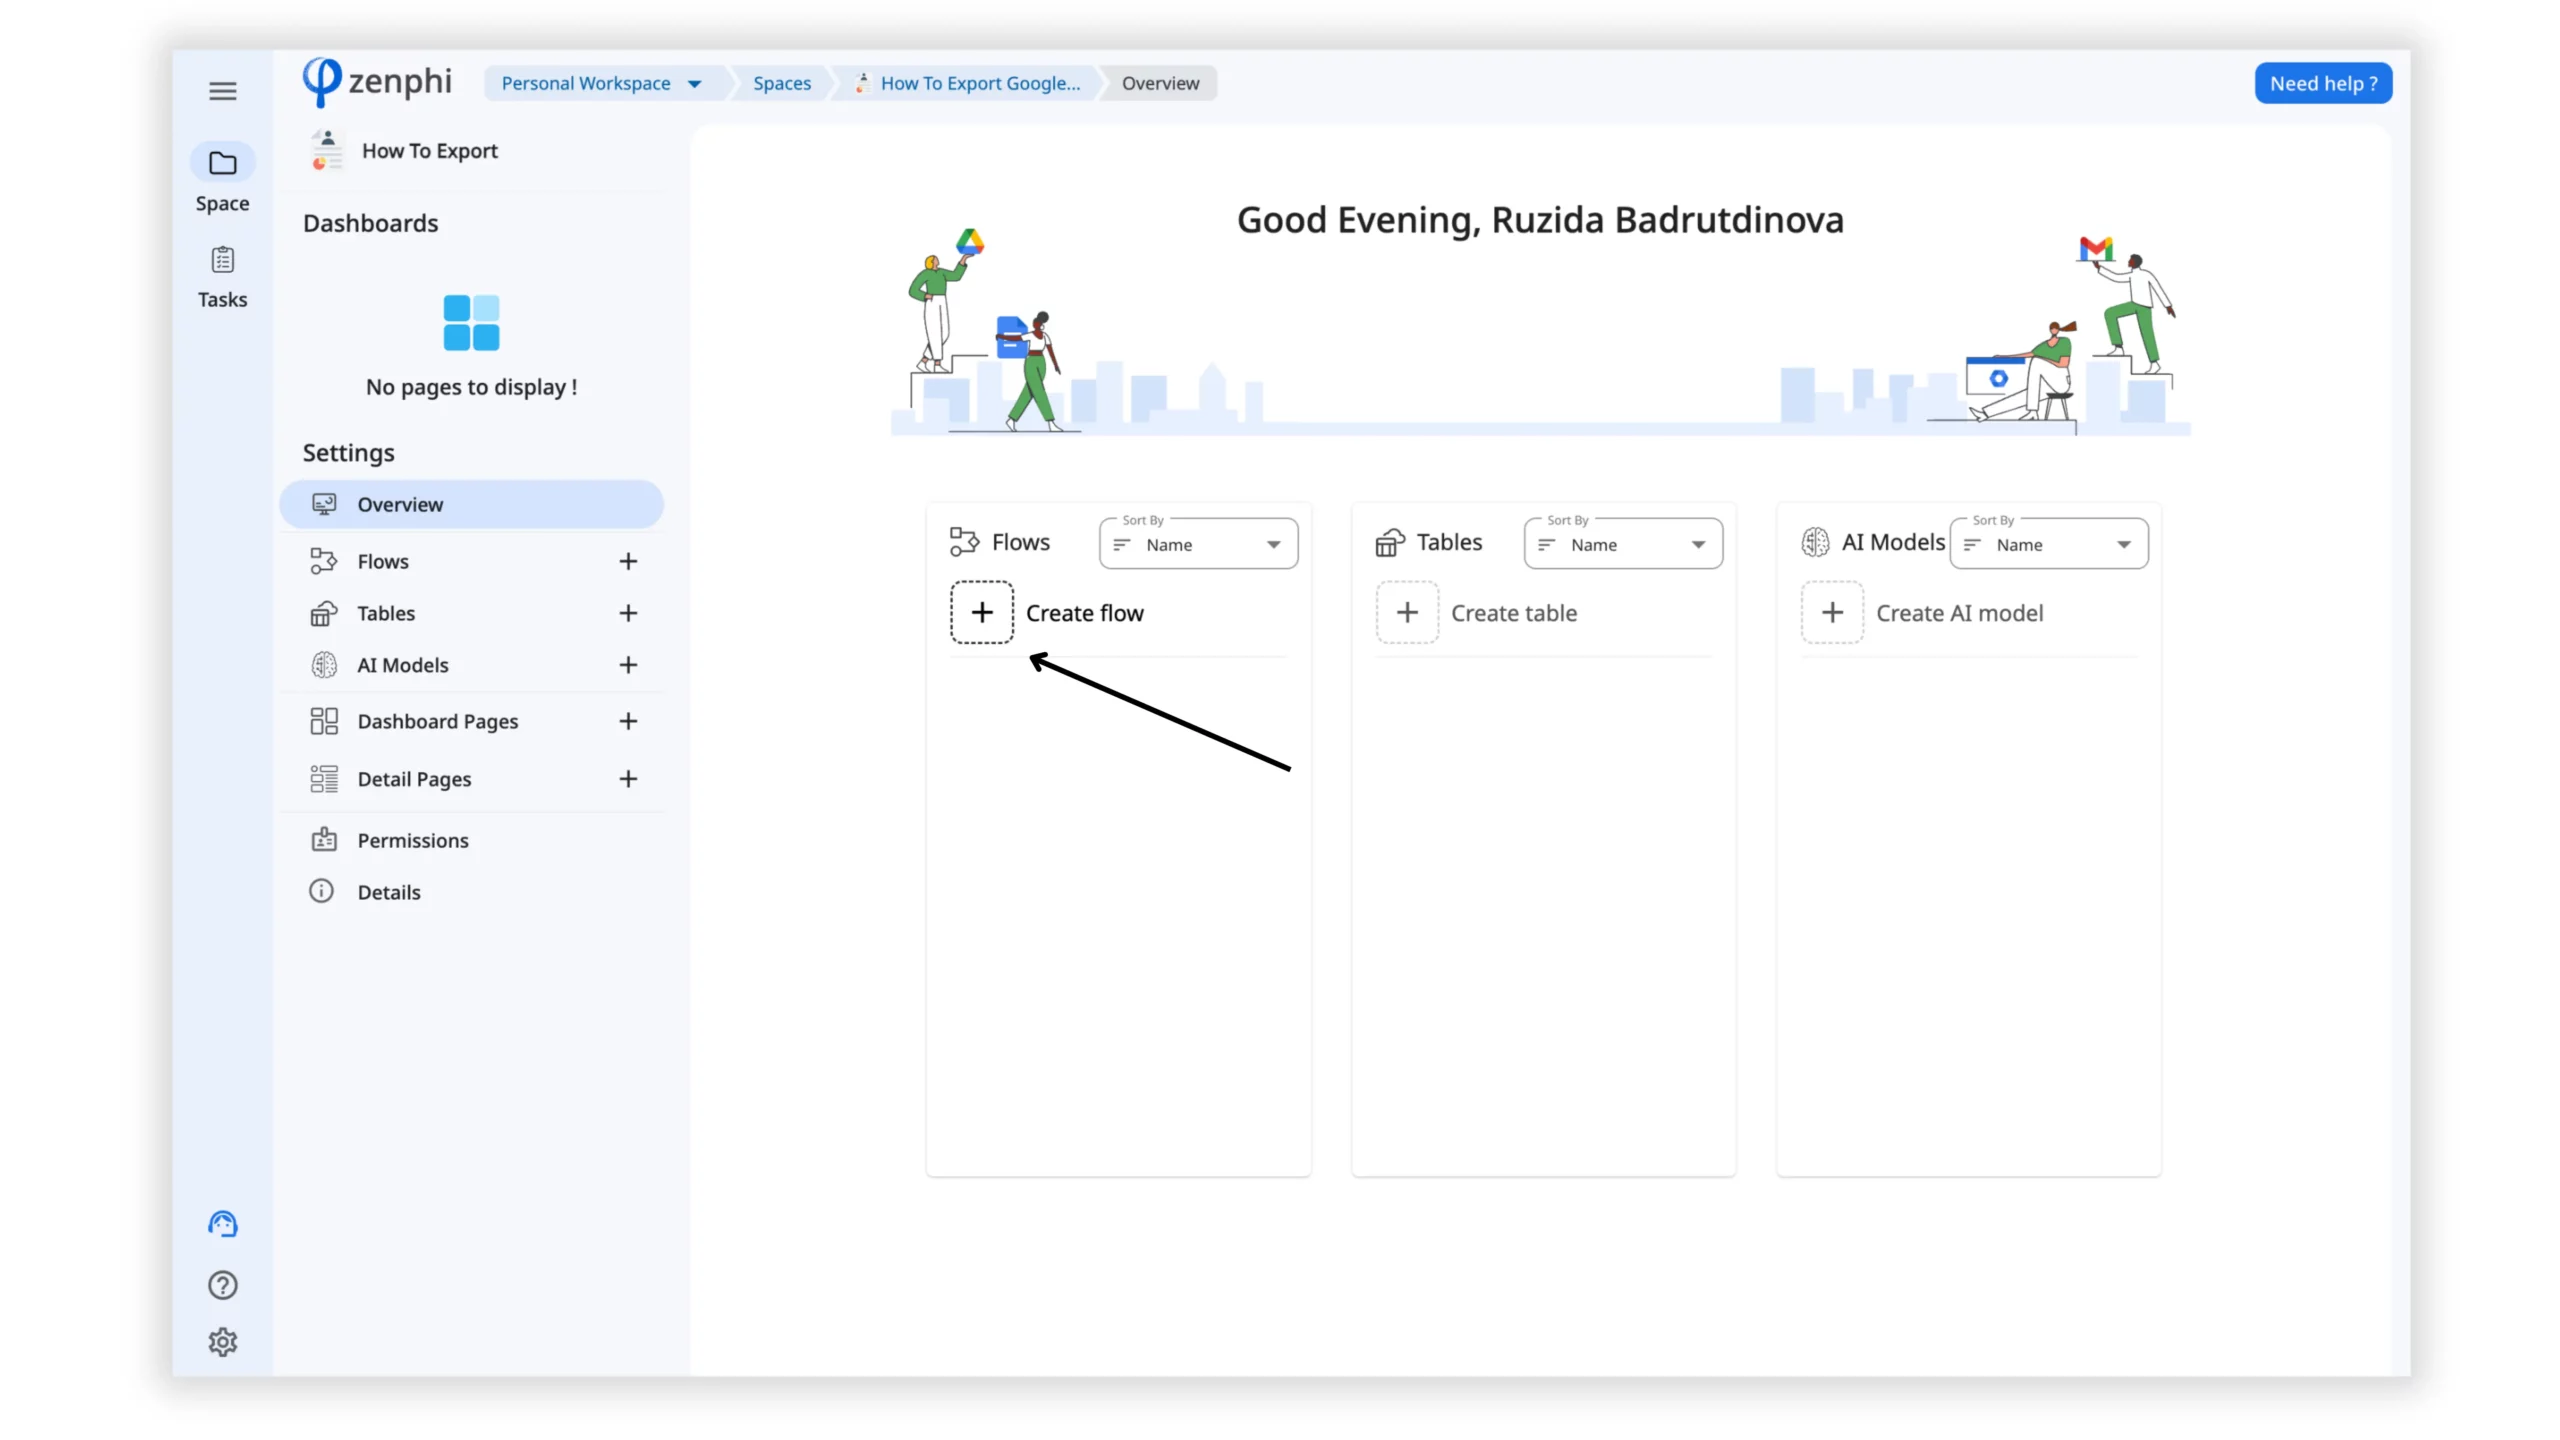
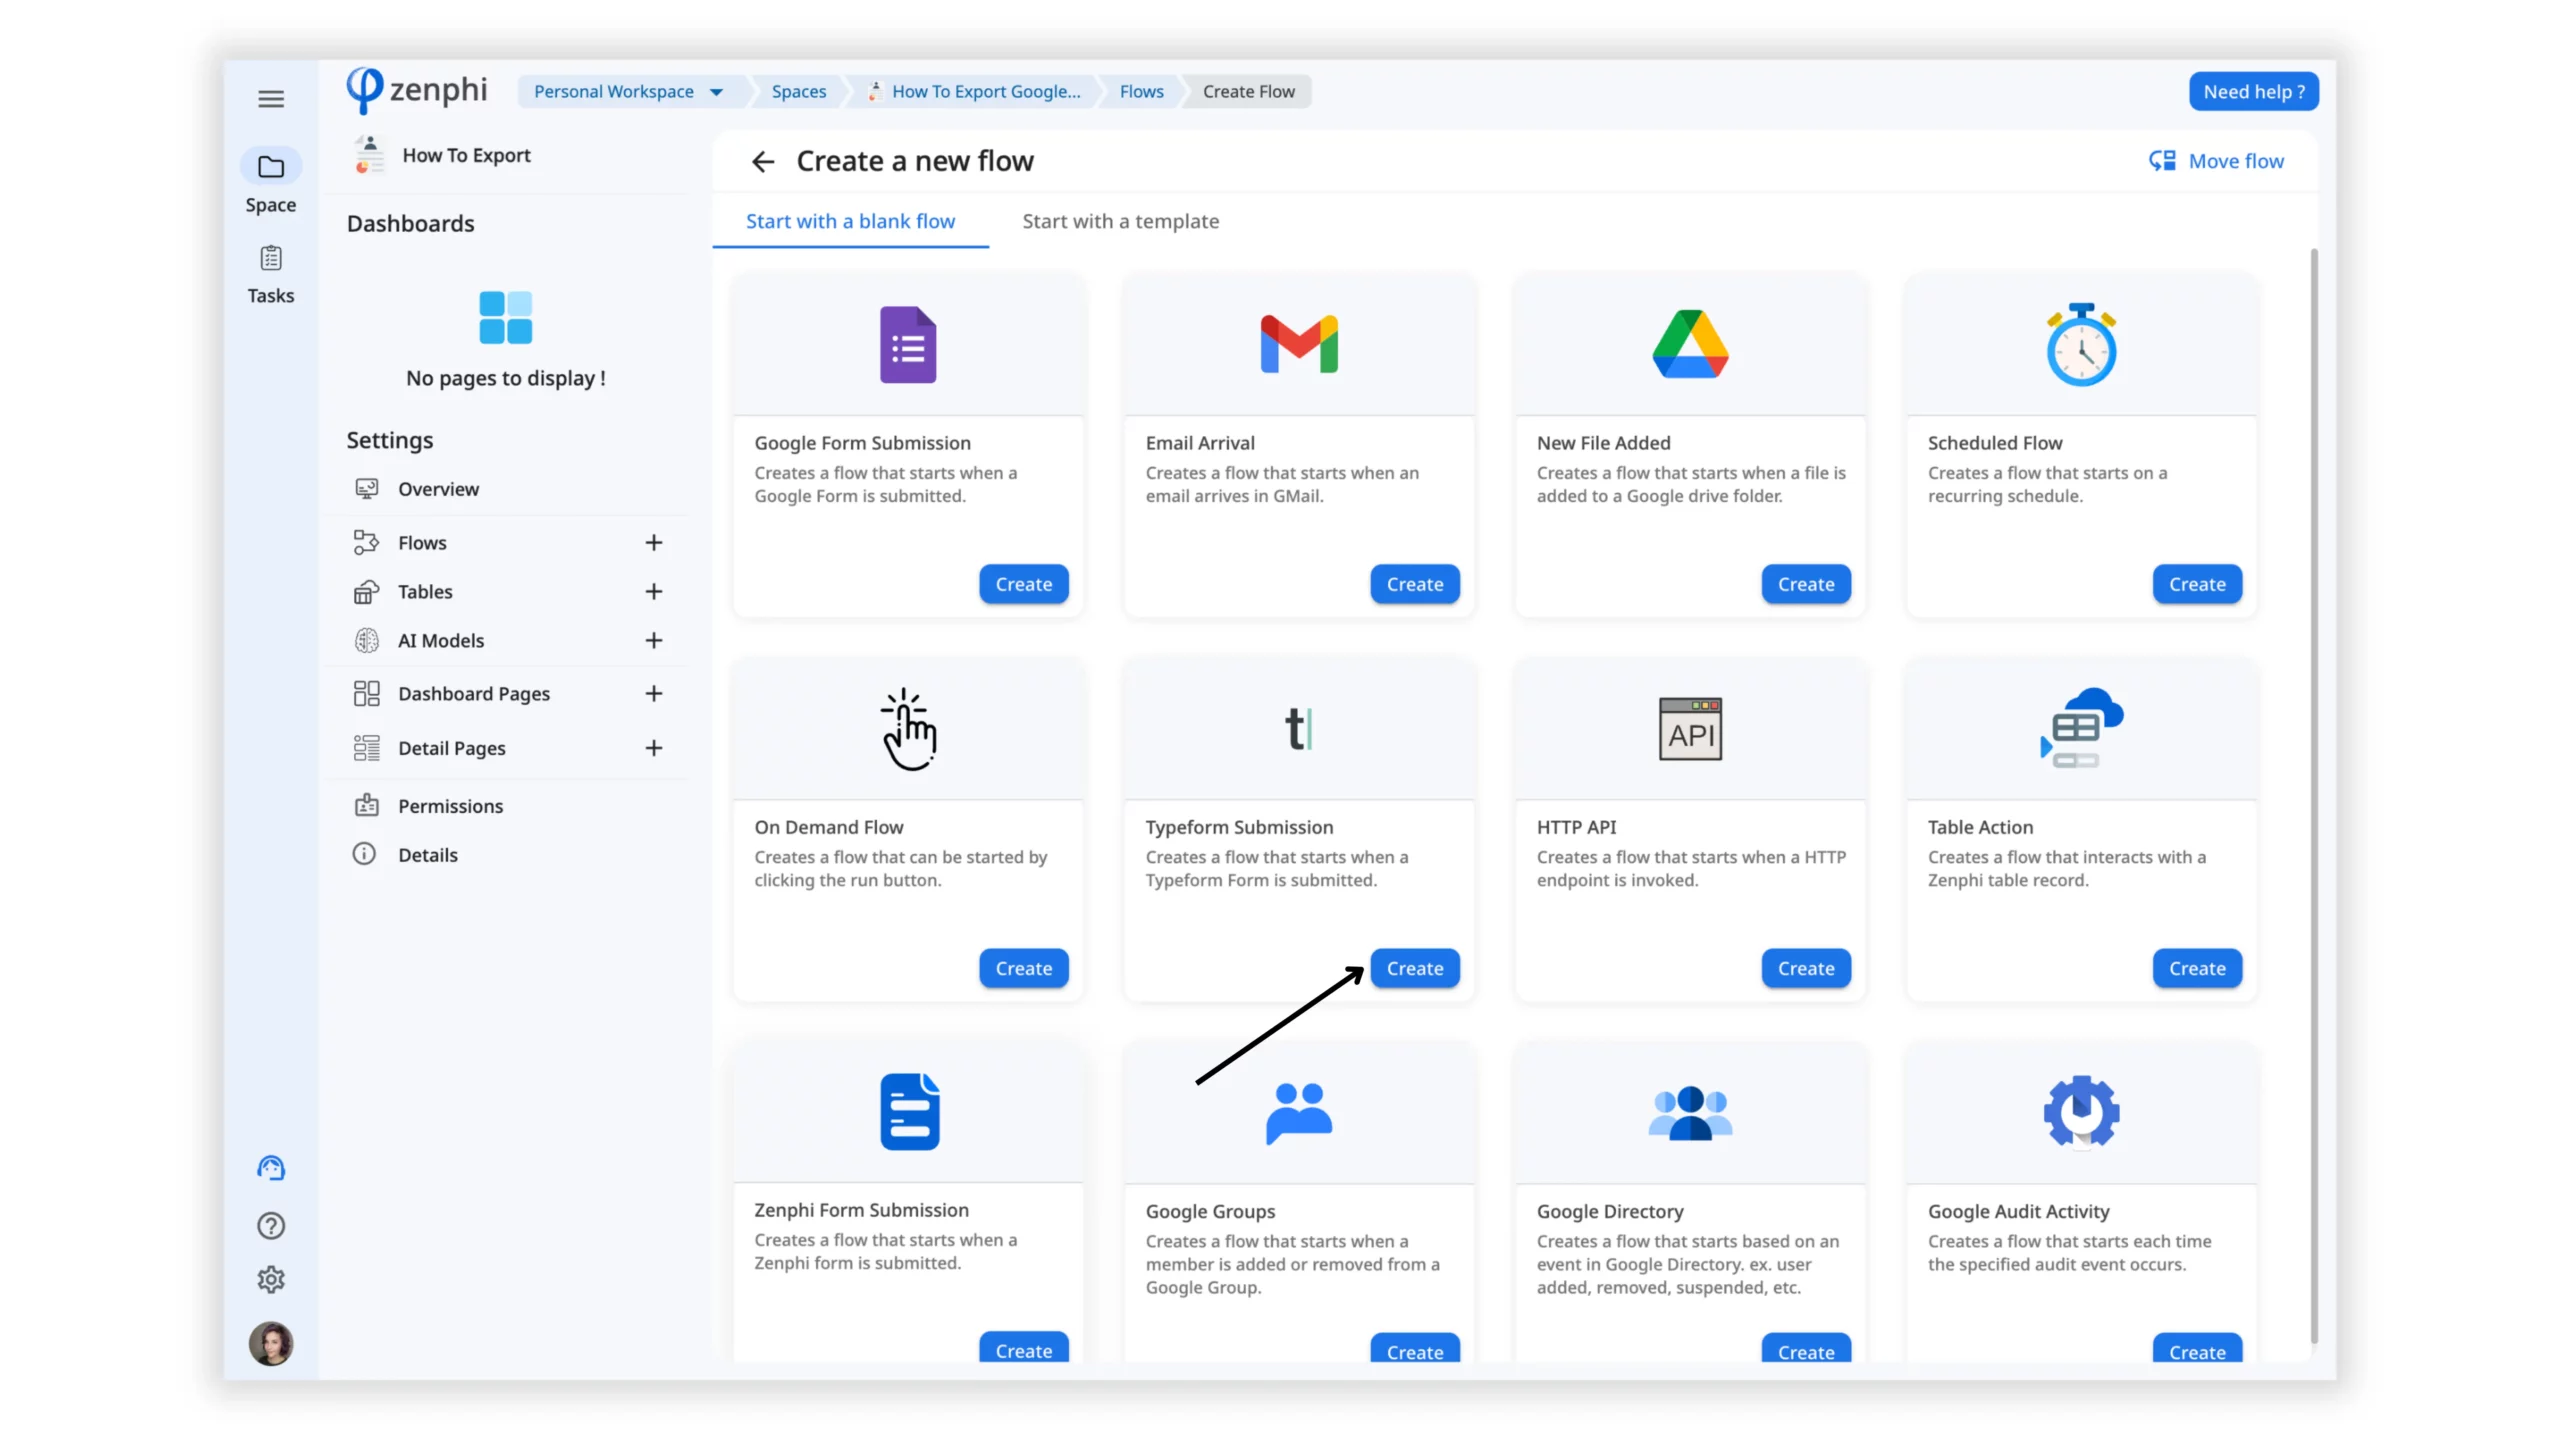
3. Select a Typeform trigger.
4. Name your Flow.
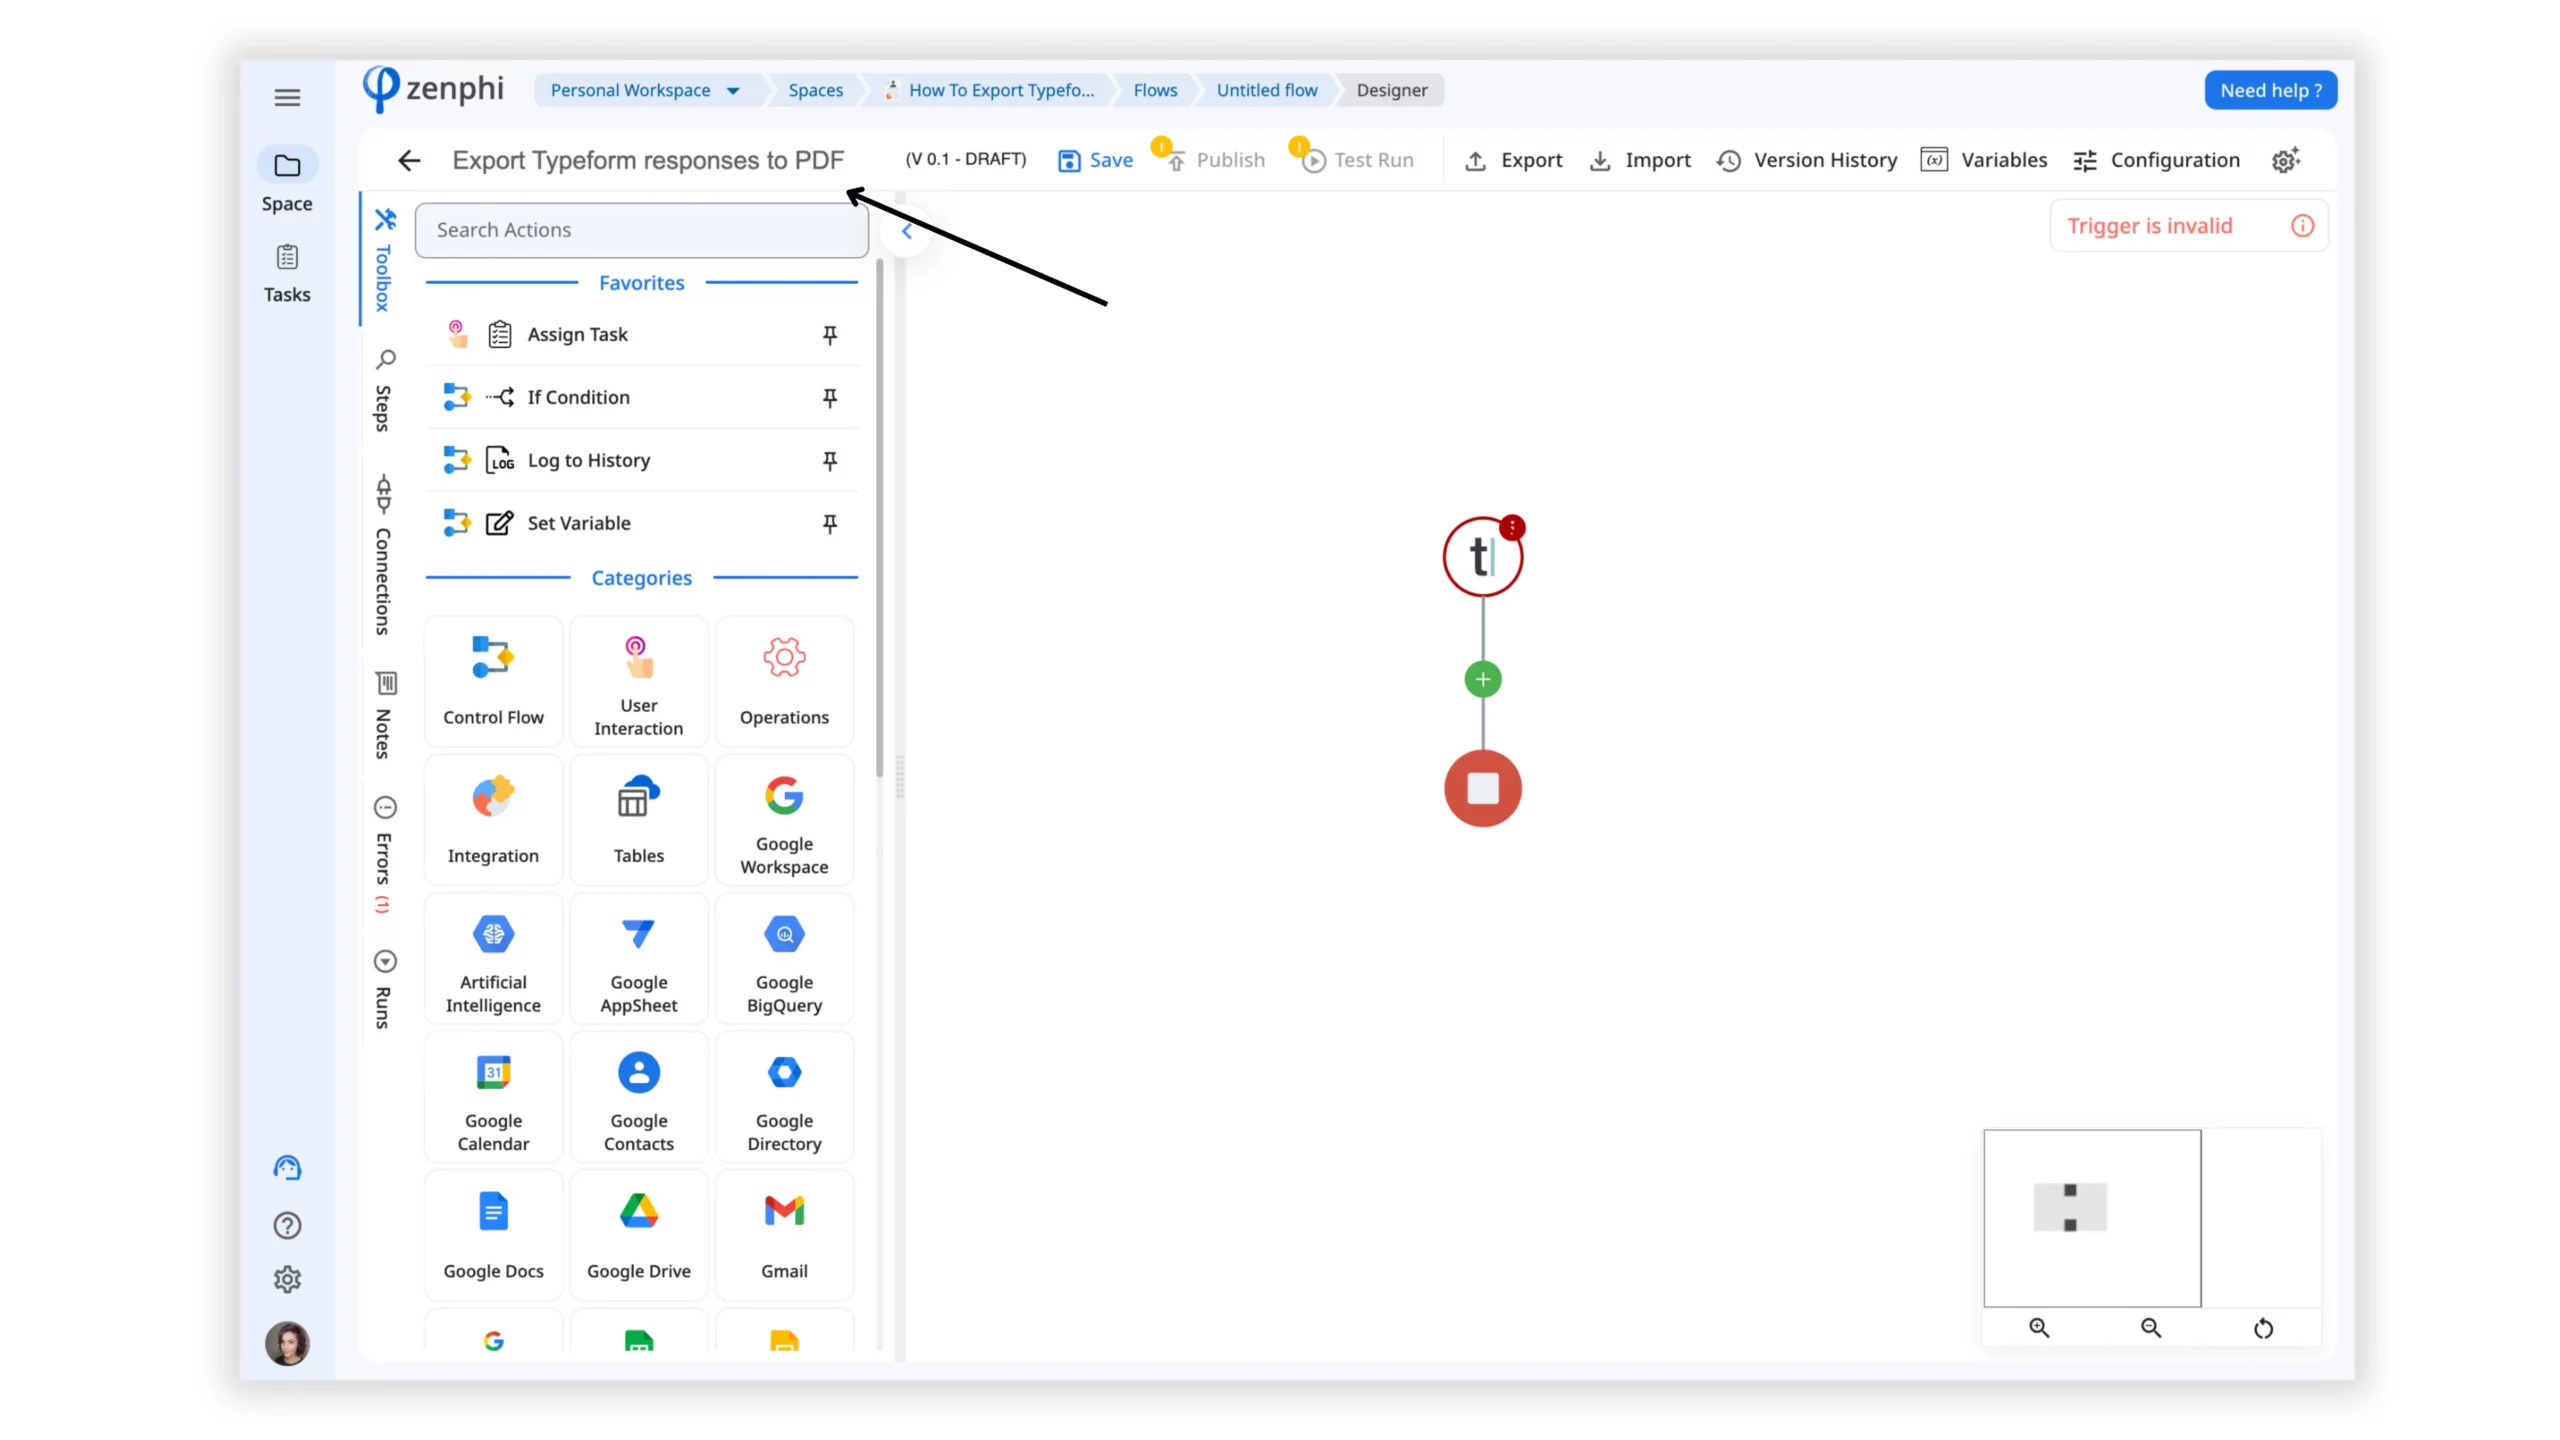
Step 3: Configure the Trigger
1. Click on the Typeform trigger inside the Flow Designer to open the settings.
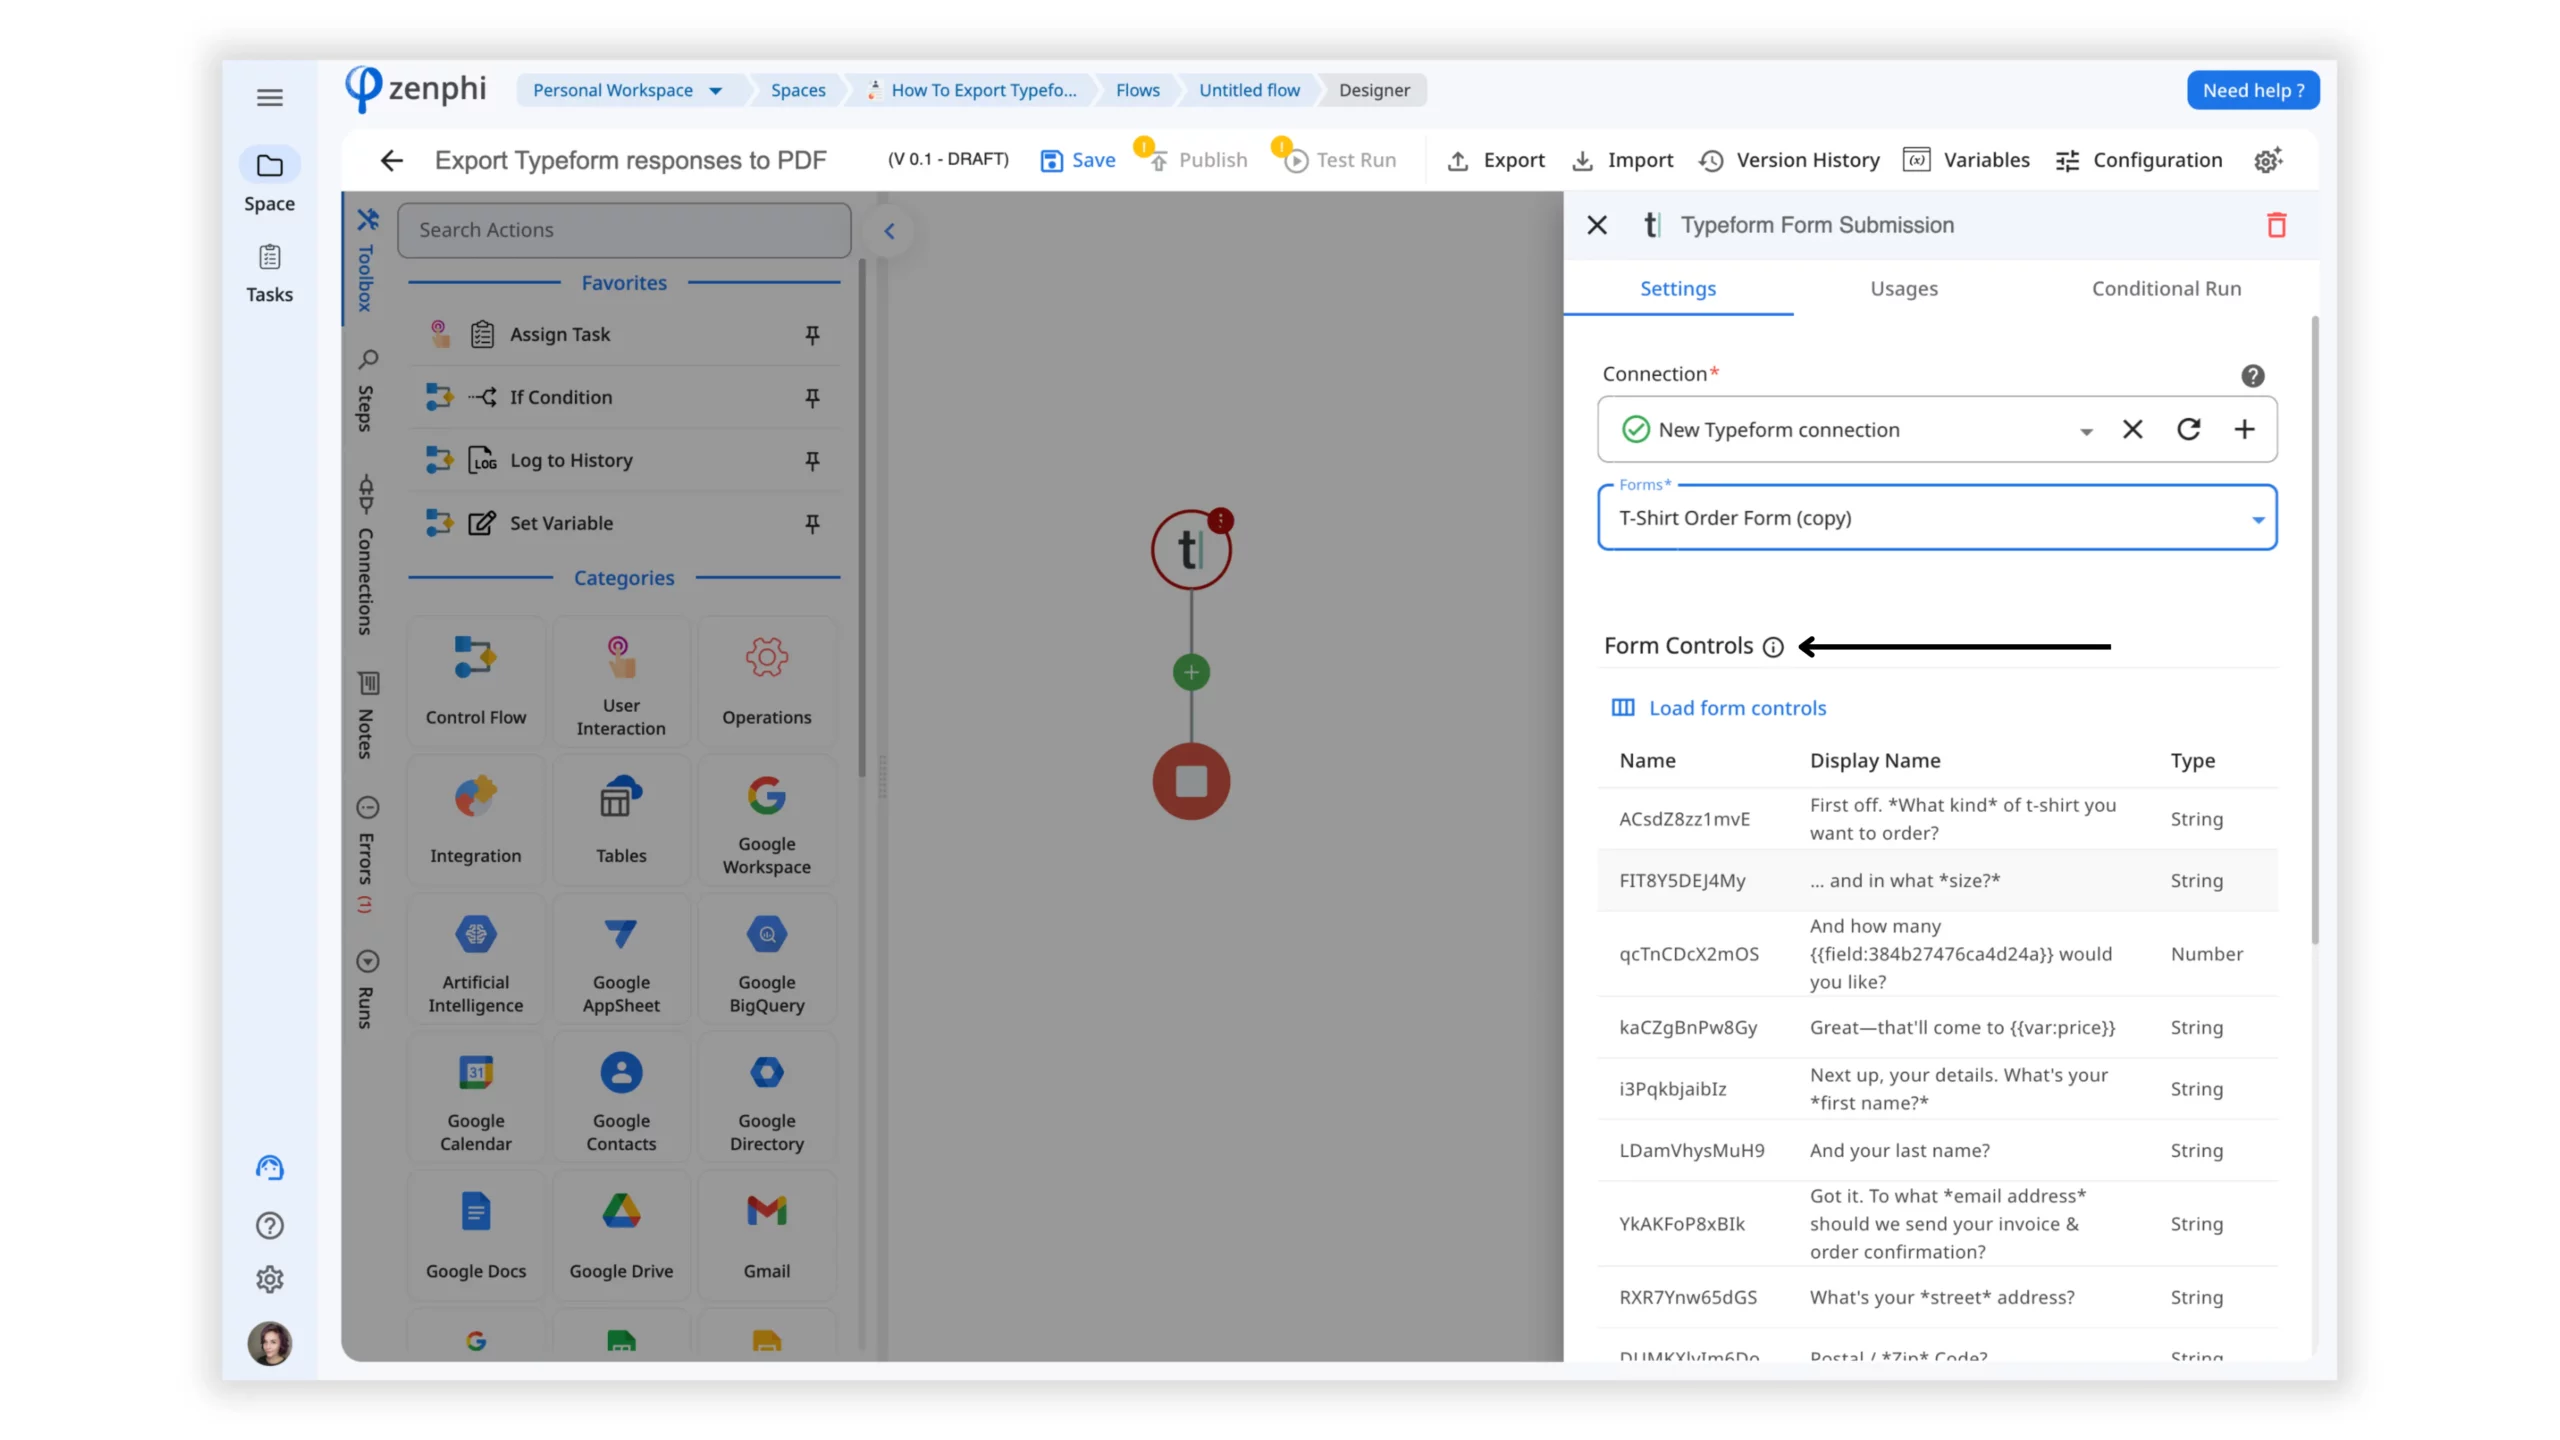
2. Establish a Connection with your Typeform account by clicking on the ‘plus’ in the Connection field.
3. Select the Typeform you want to use. Once selected, the Form Controls available on the form will be displayed.
4. Save the Flow.
Step 4: Export Typeform to PDF with Google Docs Template
1. Drag and drop the “Generate document using template” action from the Google Docs section.
2. Create a template in Google Docs that match the design you desire for the PDF document. You can copy the template we’ll be using for this tutorial here.
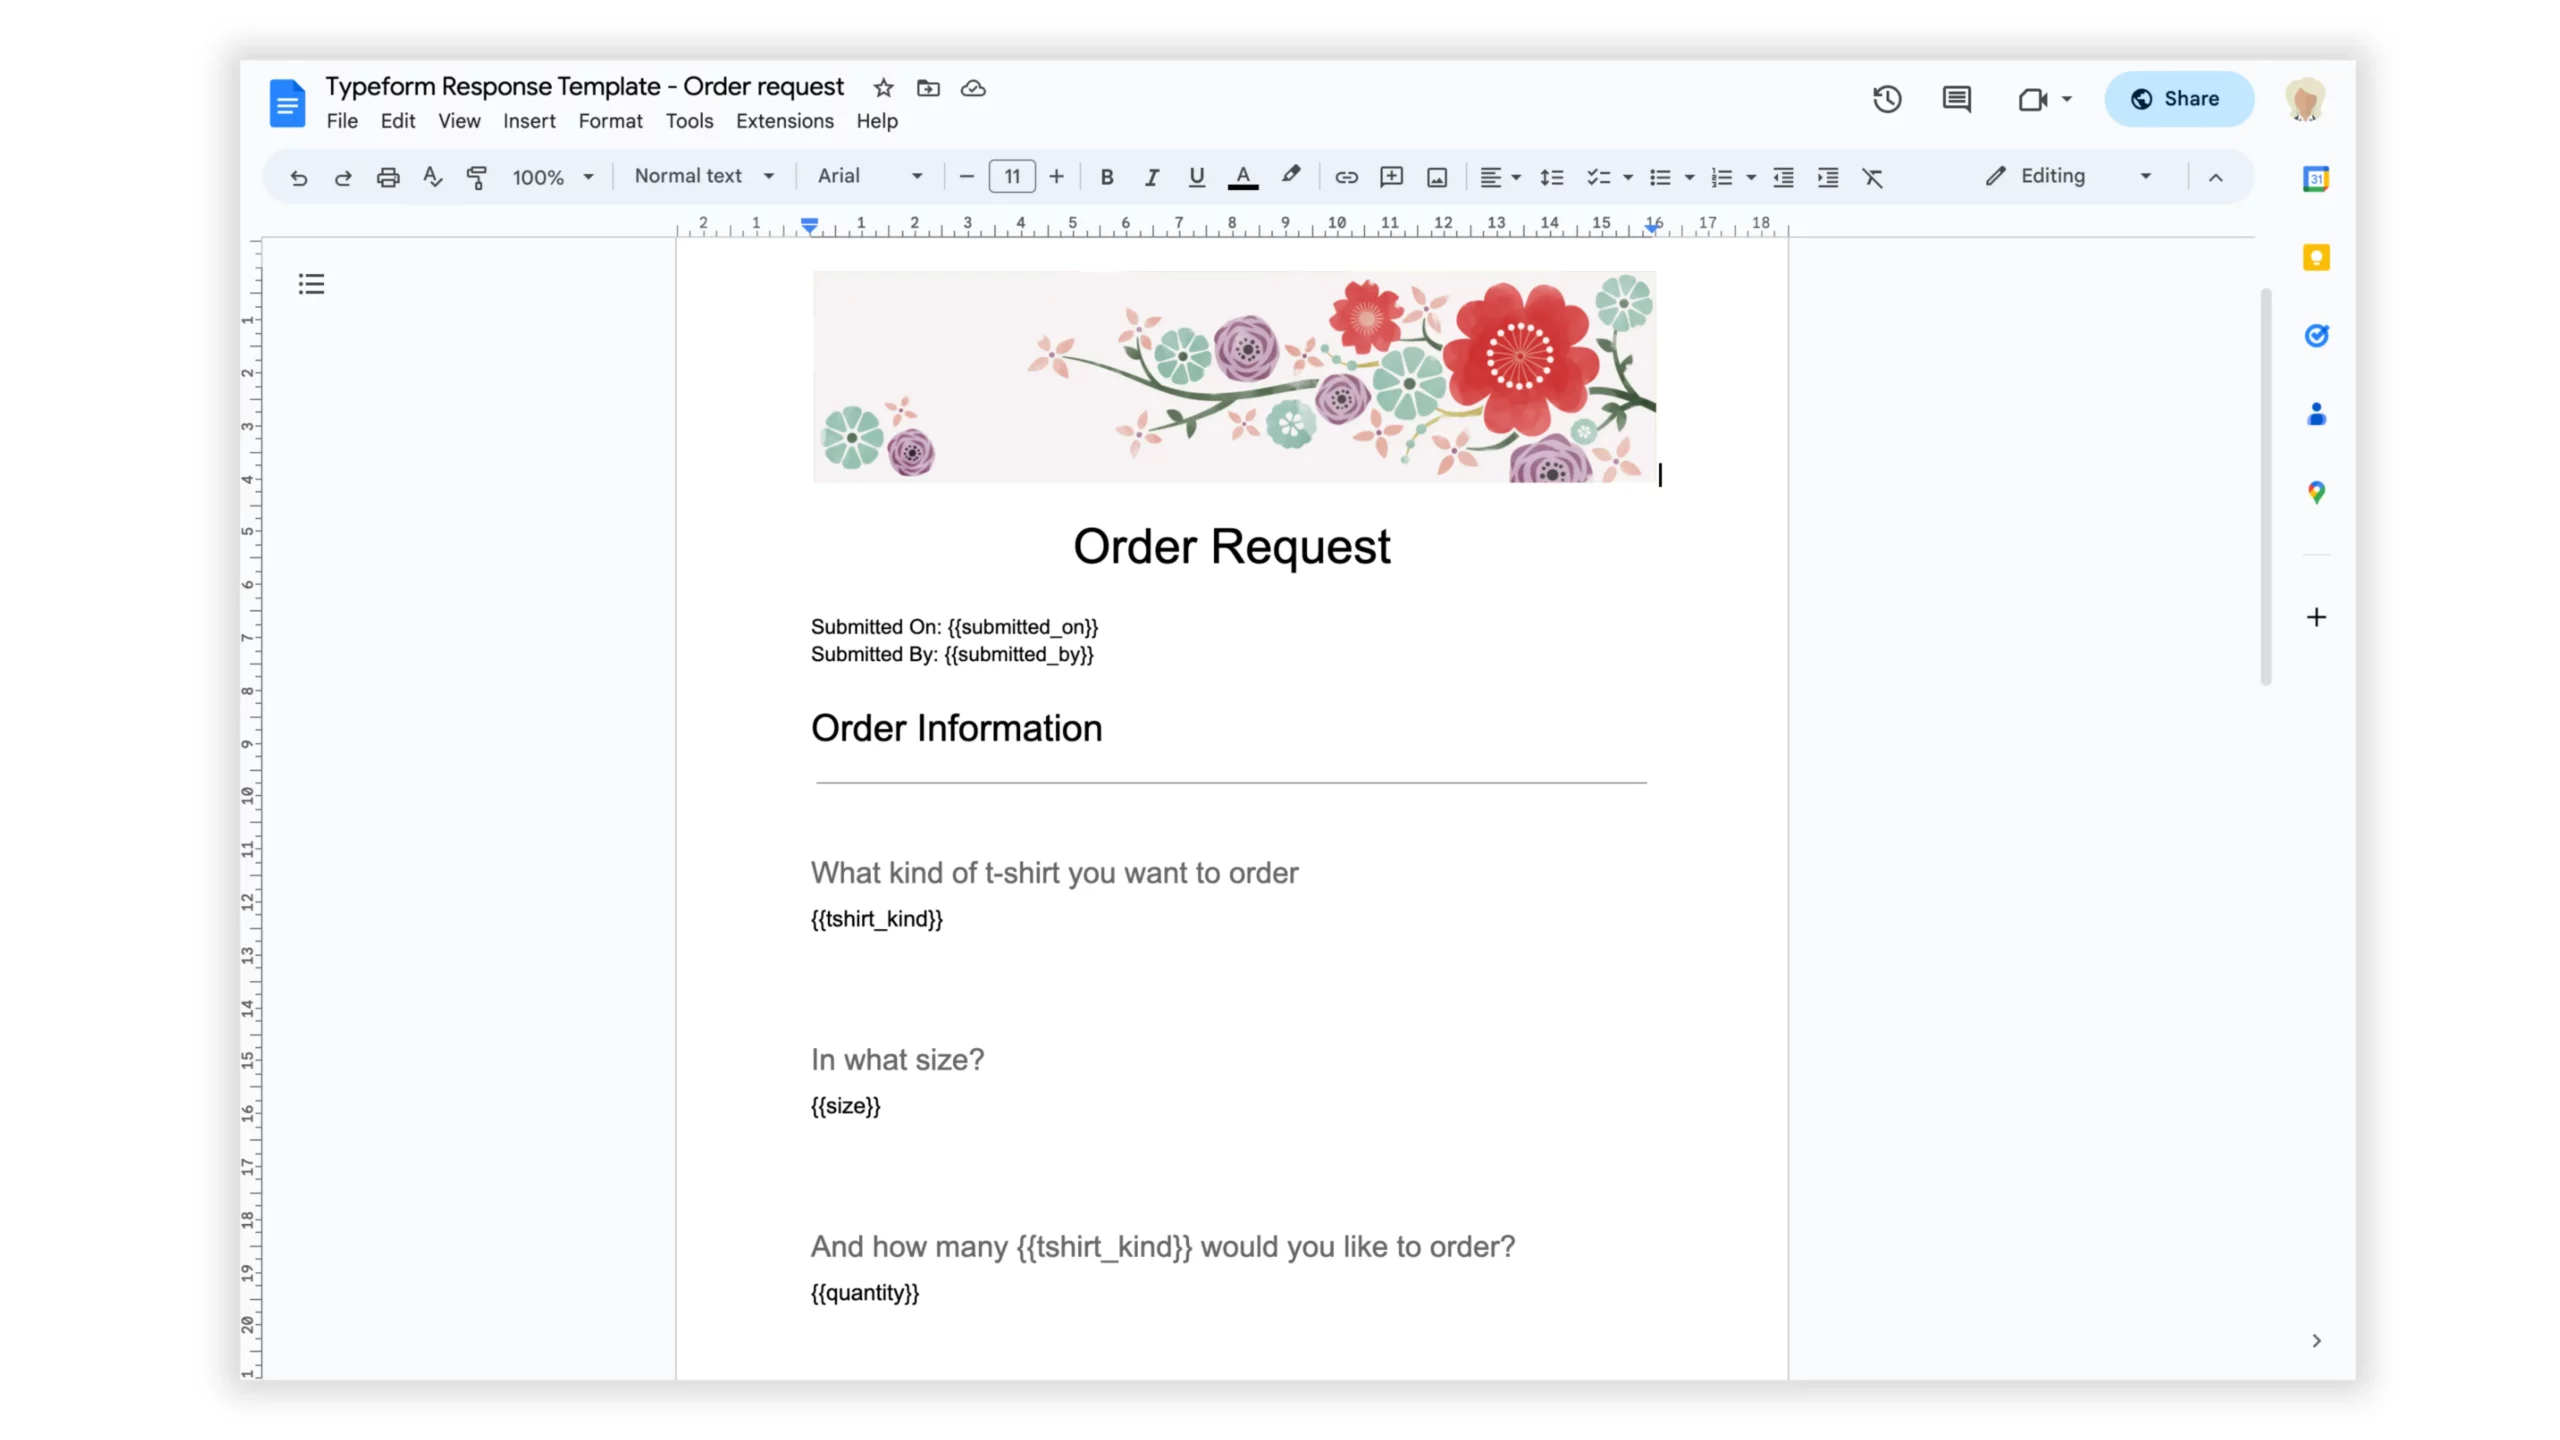
3. Go back to zenphi and configure the action by selecting the template and setting the destination Google Drive folder for the generated documents.
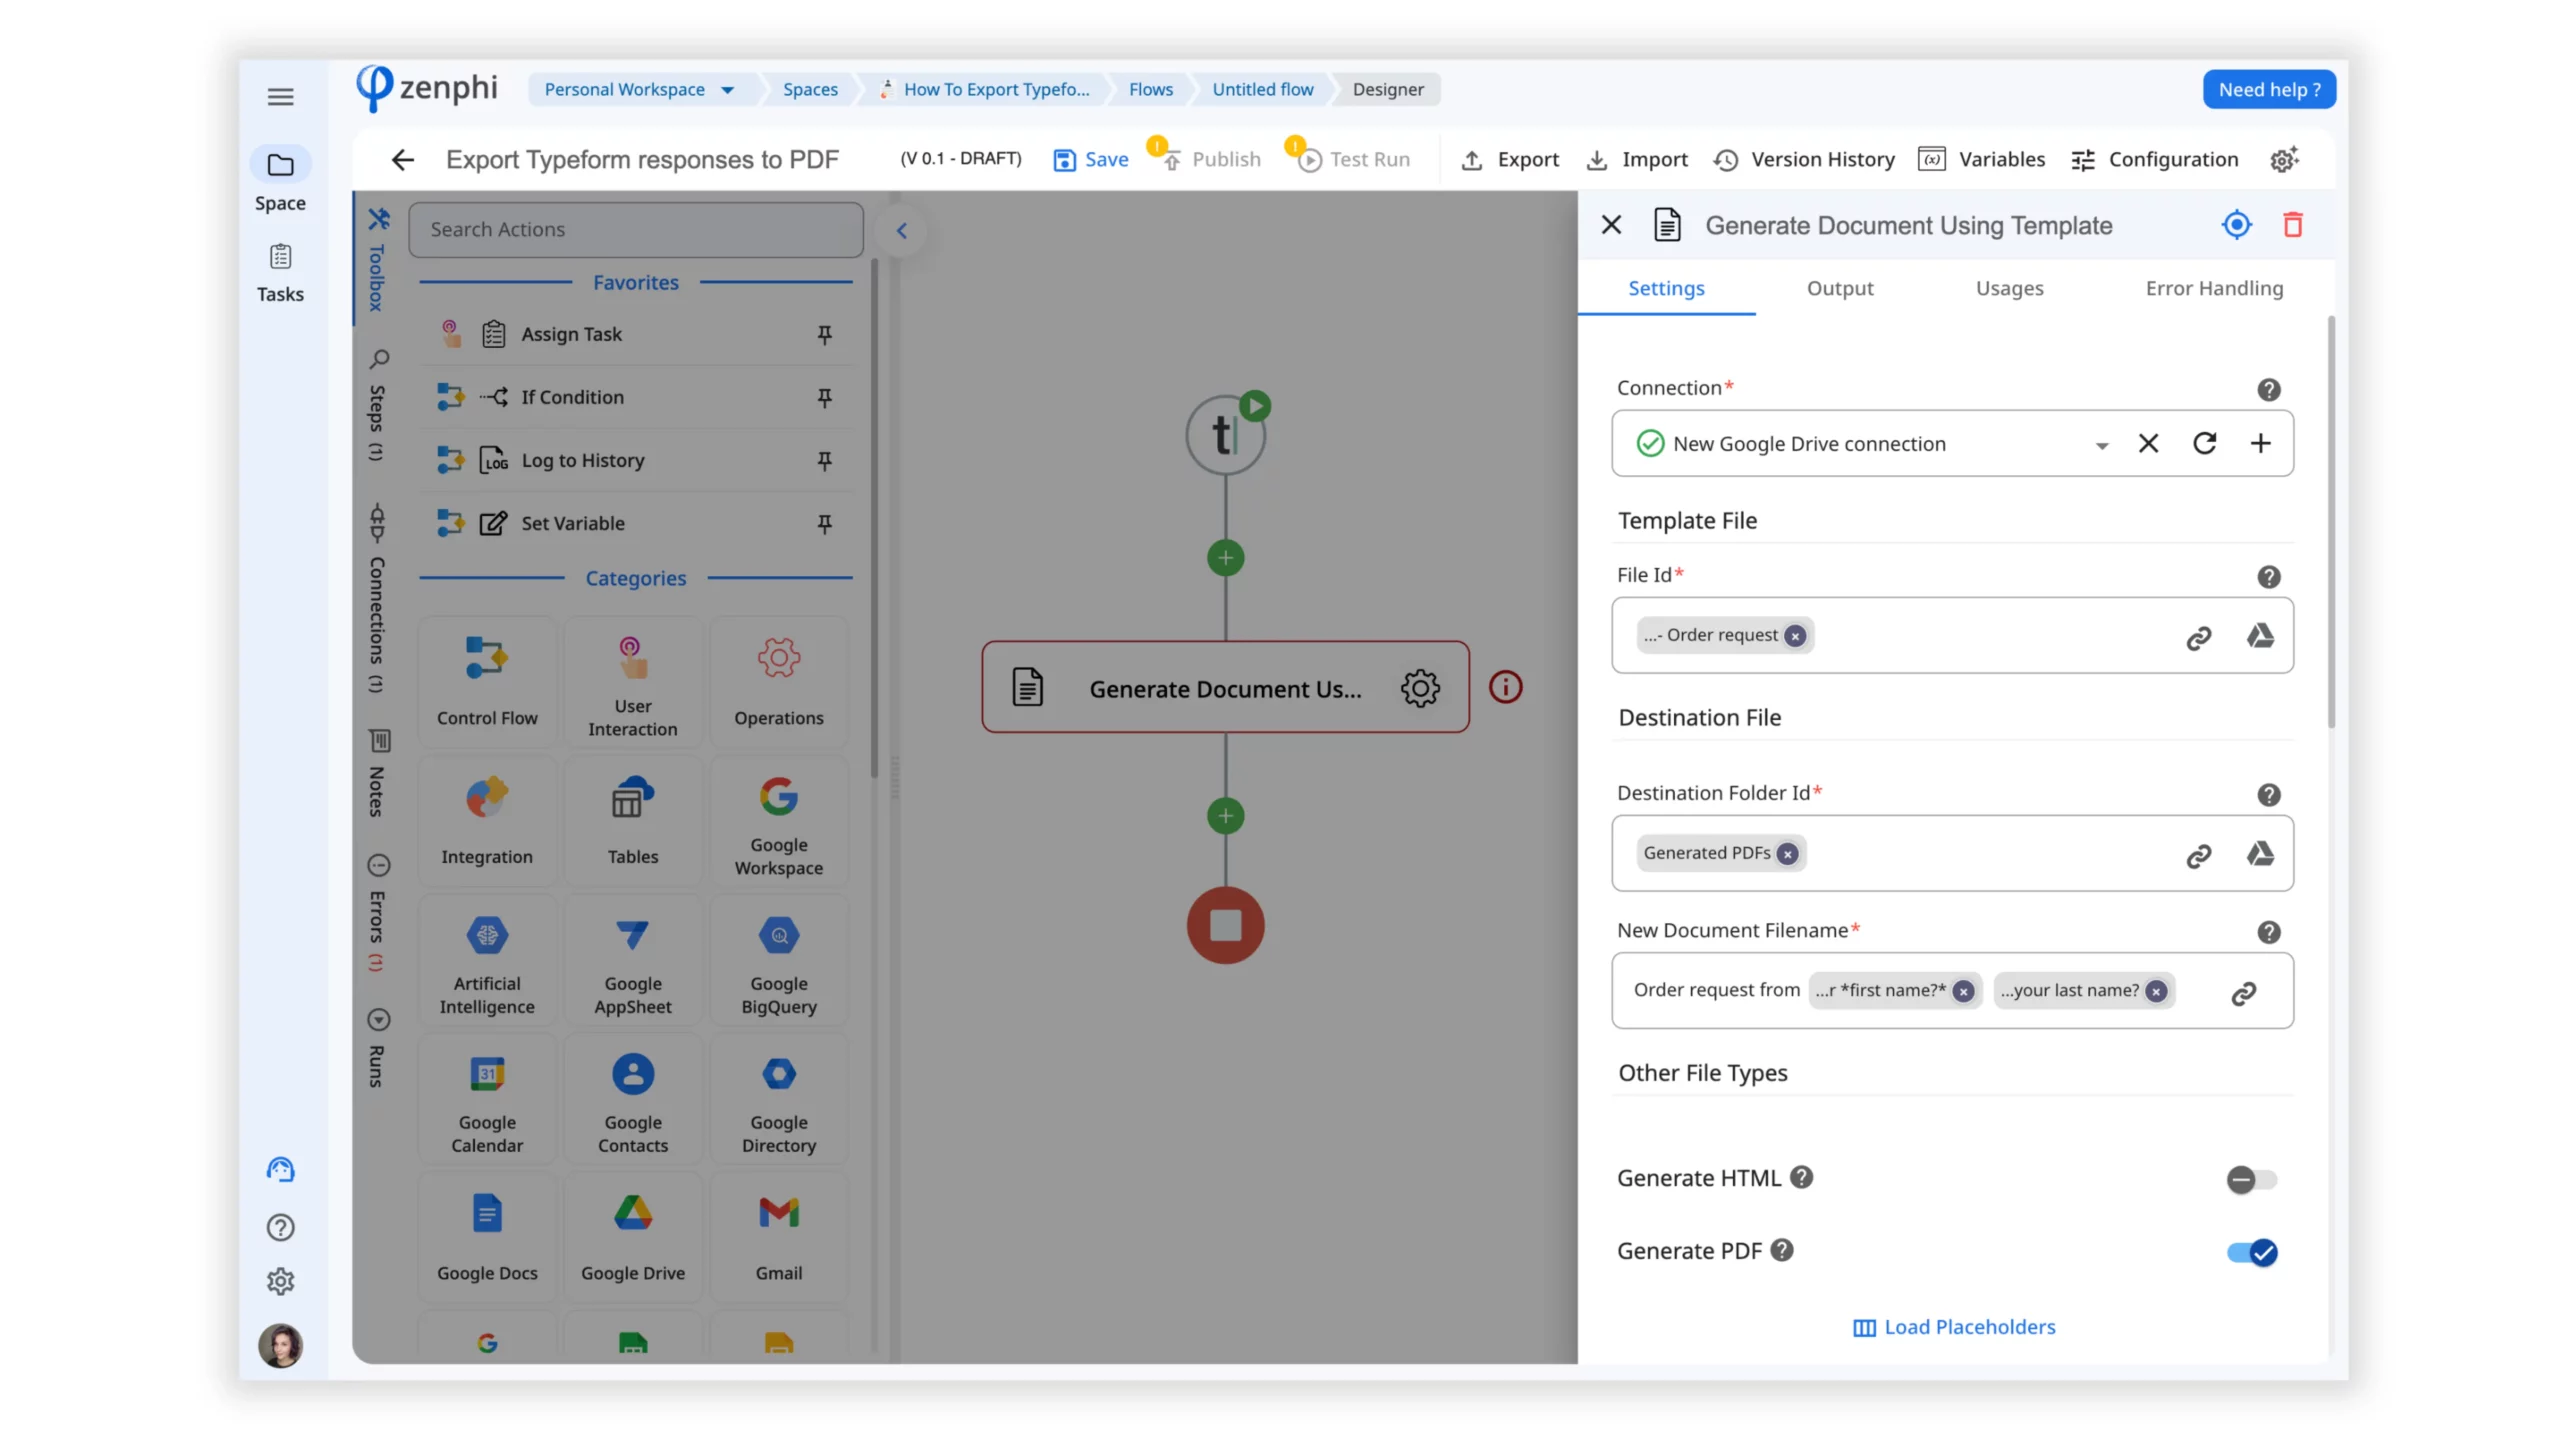
4. Customize the document name using the output data from the Trigger (for example, submitter’s name or creation date) or any desired value. For that, click on the Token picker icon inside the field and select the source of data.
5. Switch on the “Generate PDF” option.
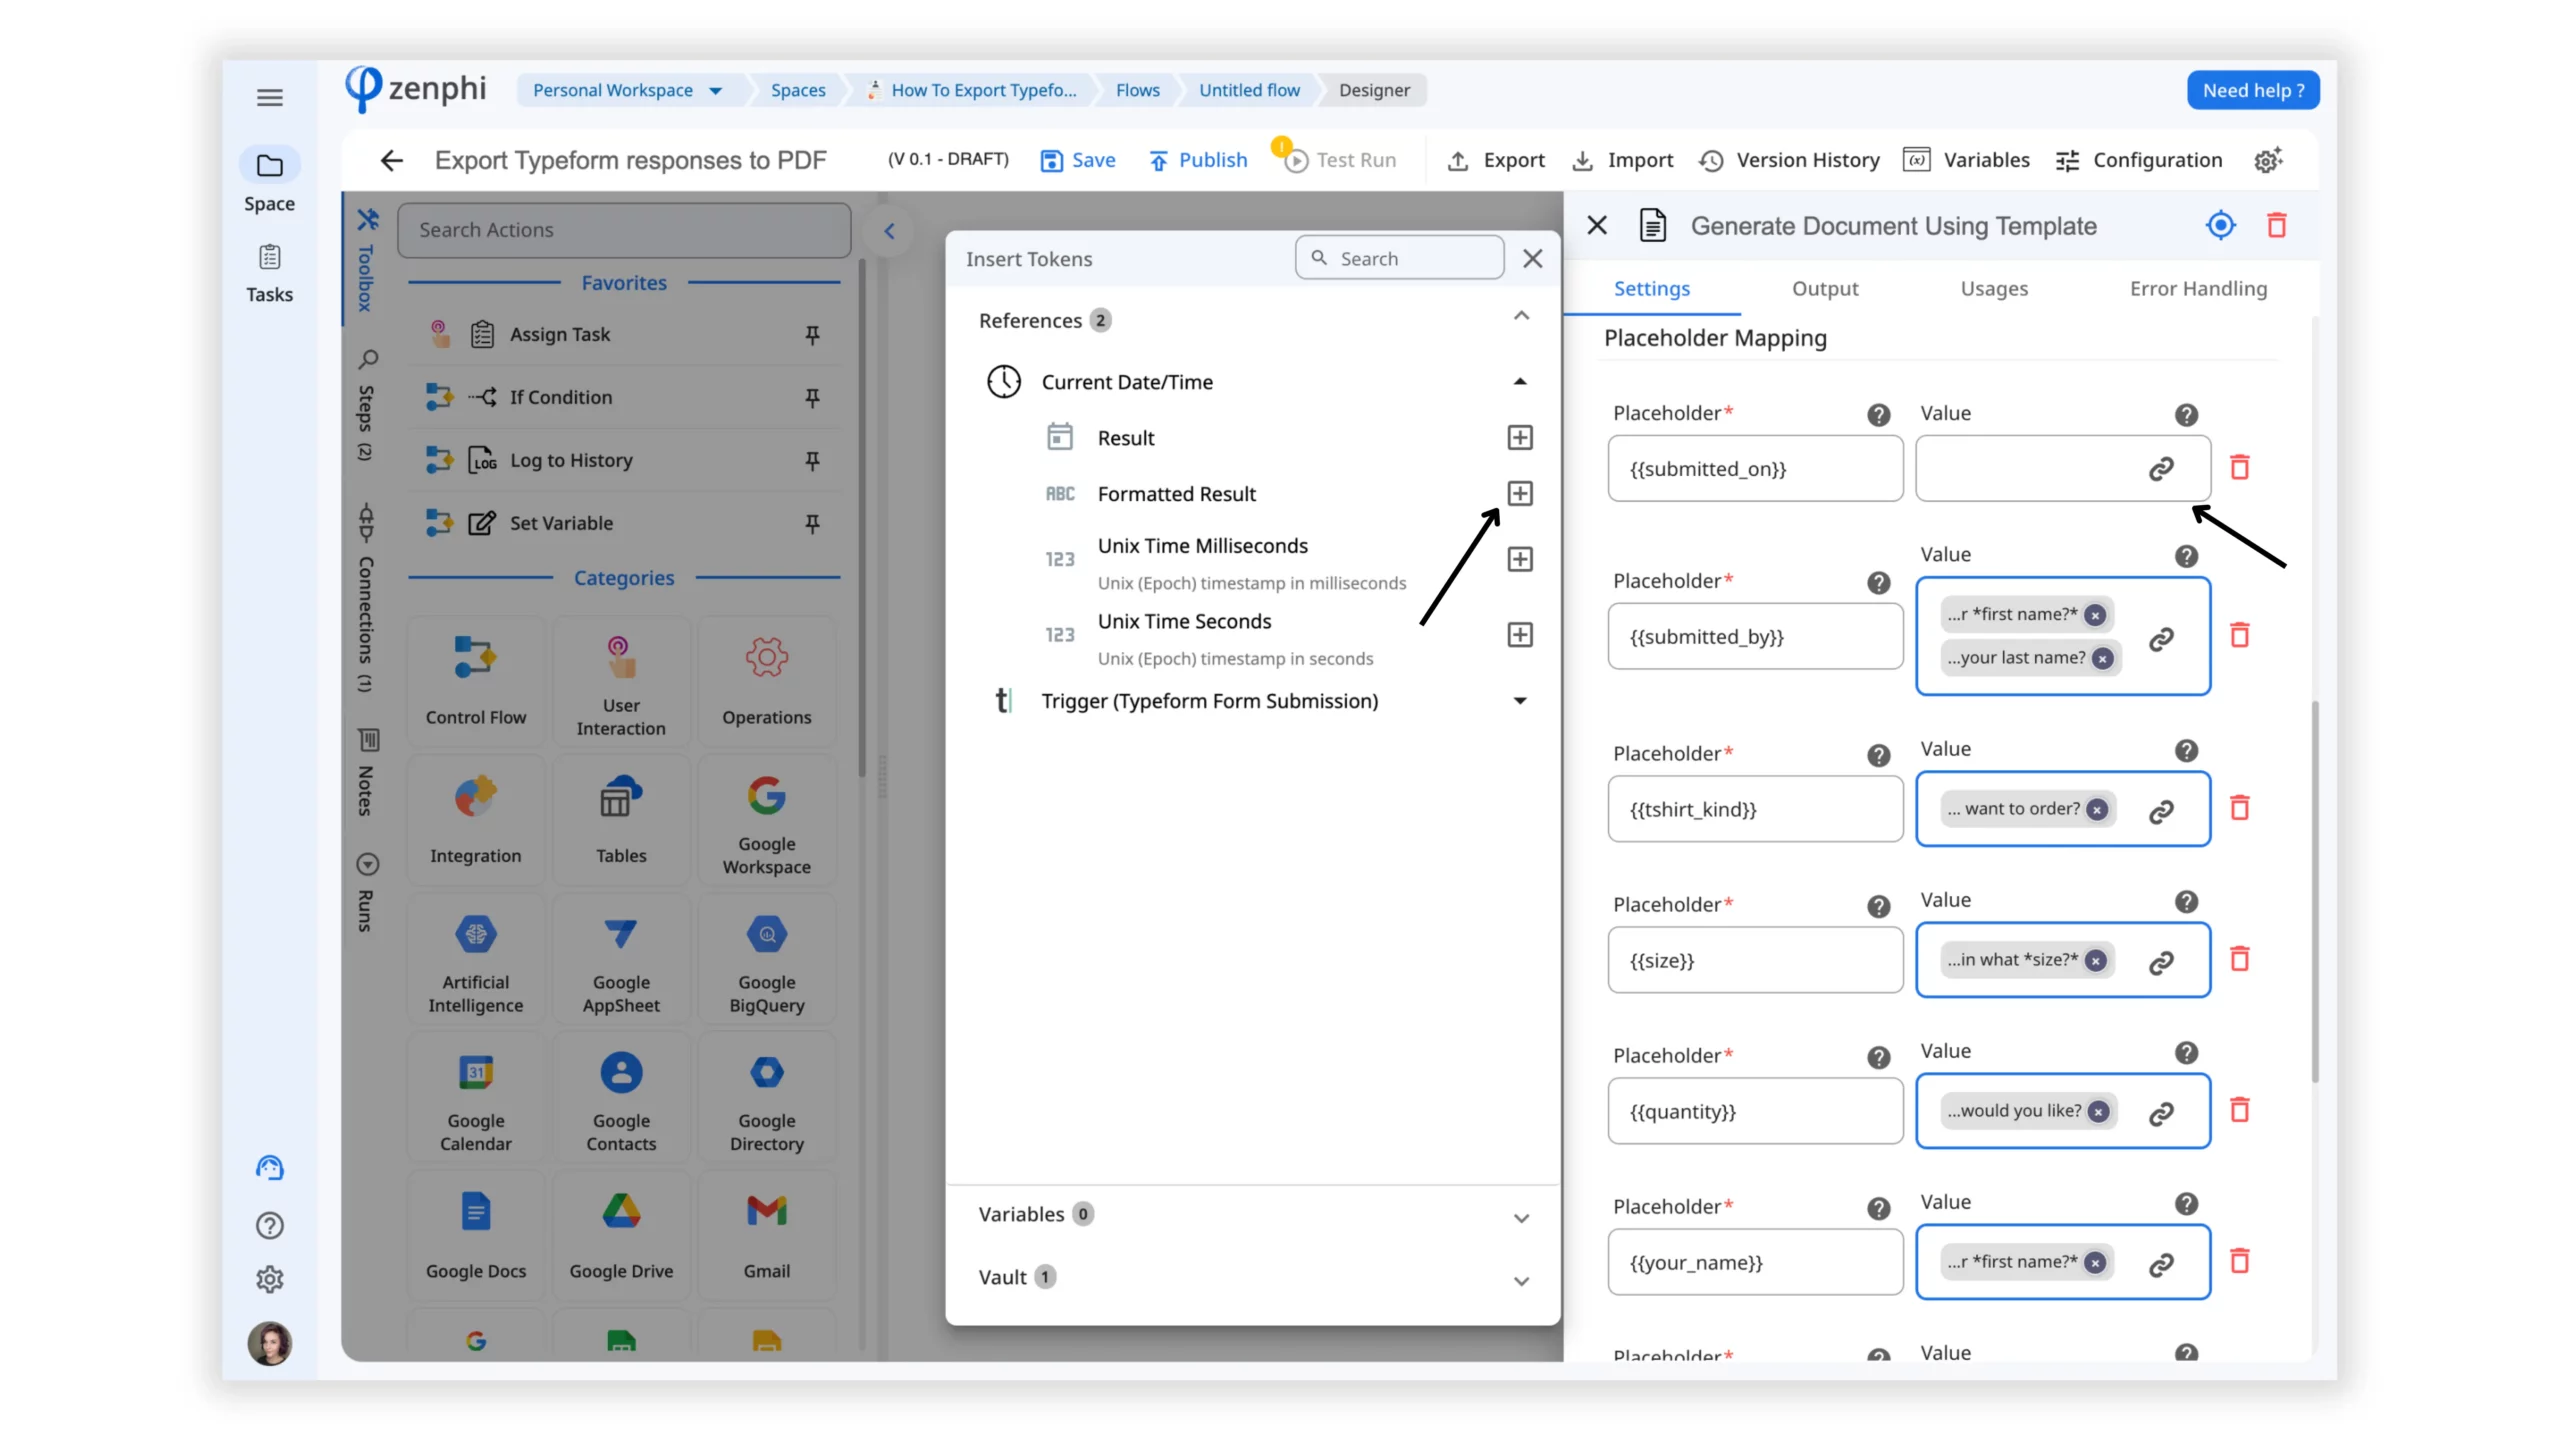
6. Map out the values using the Token picker.
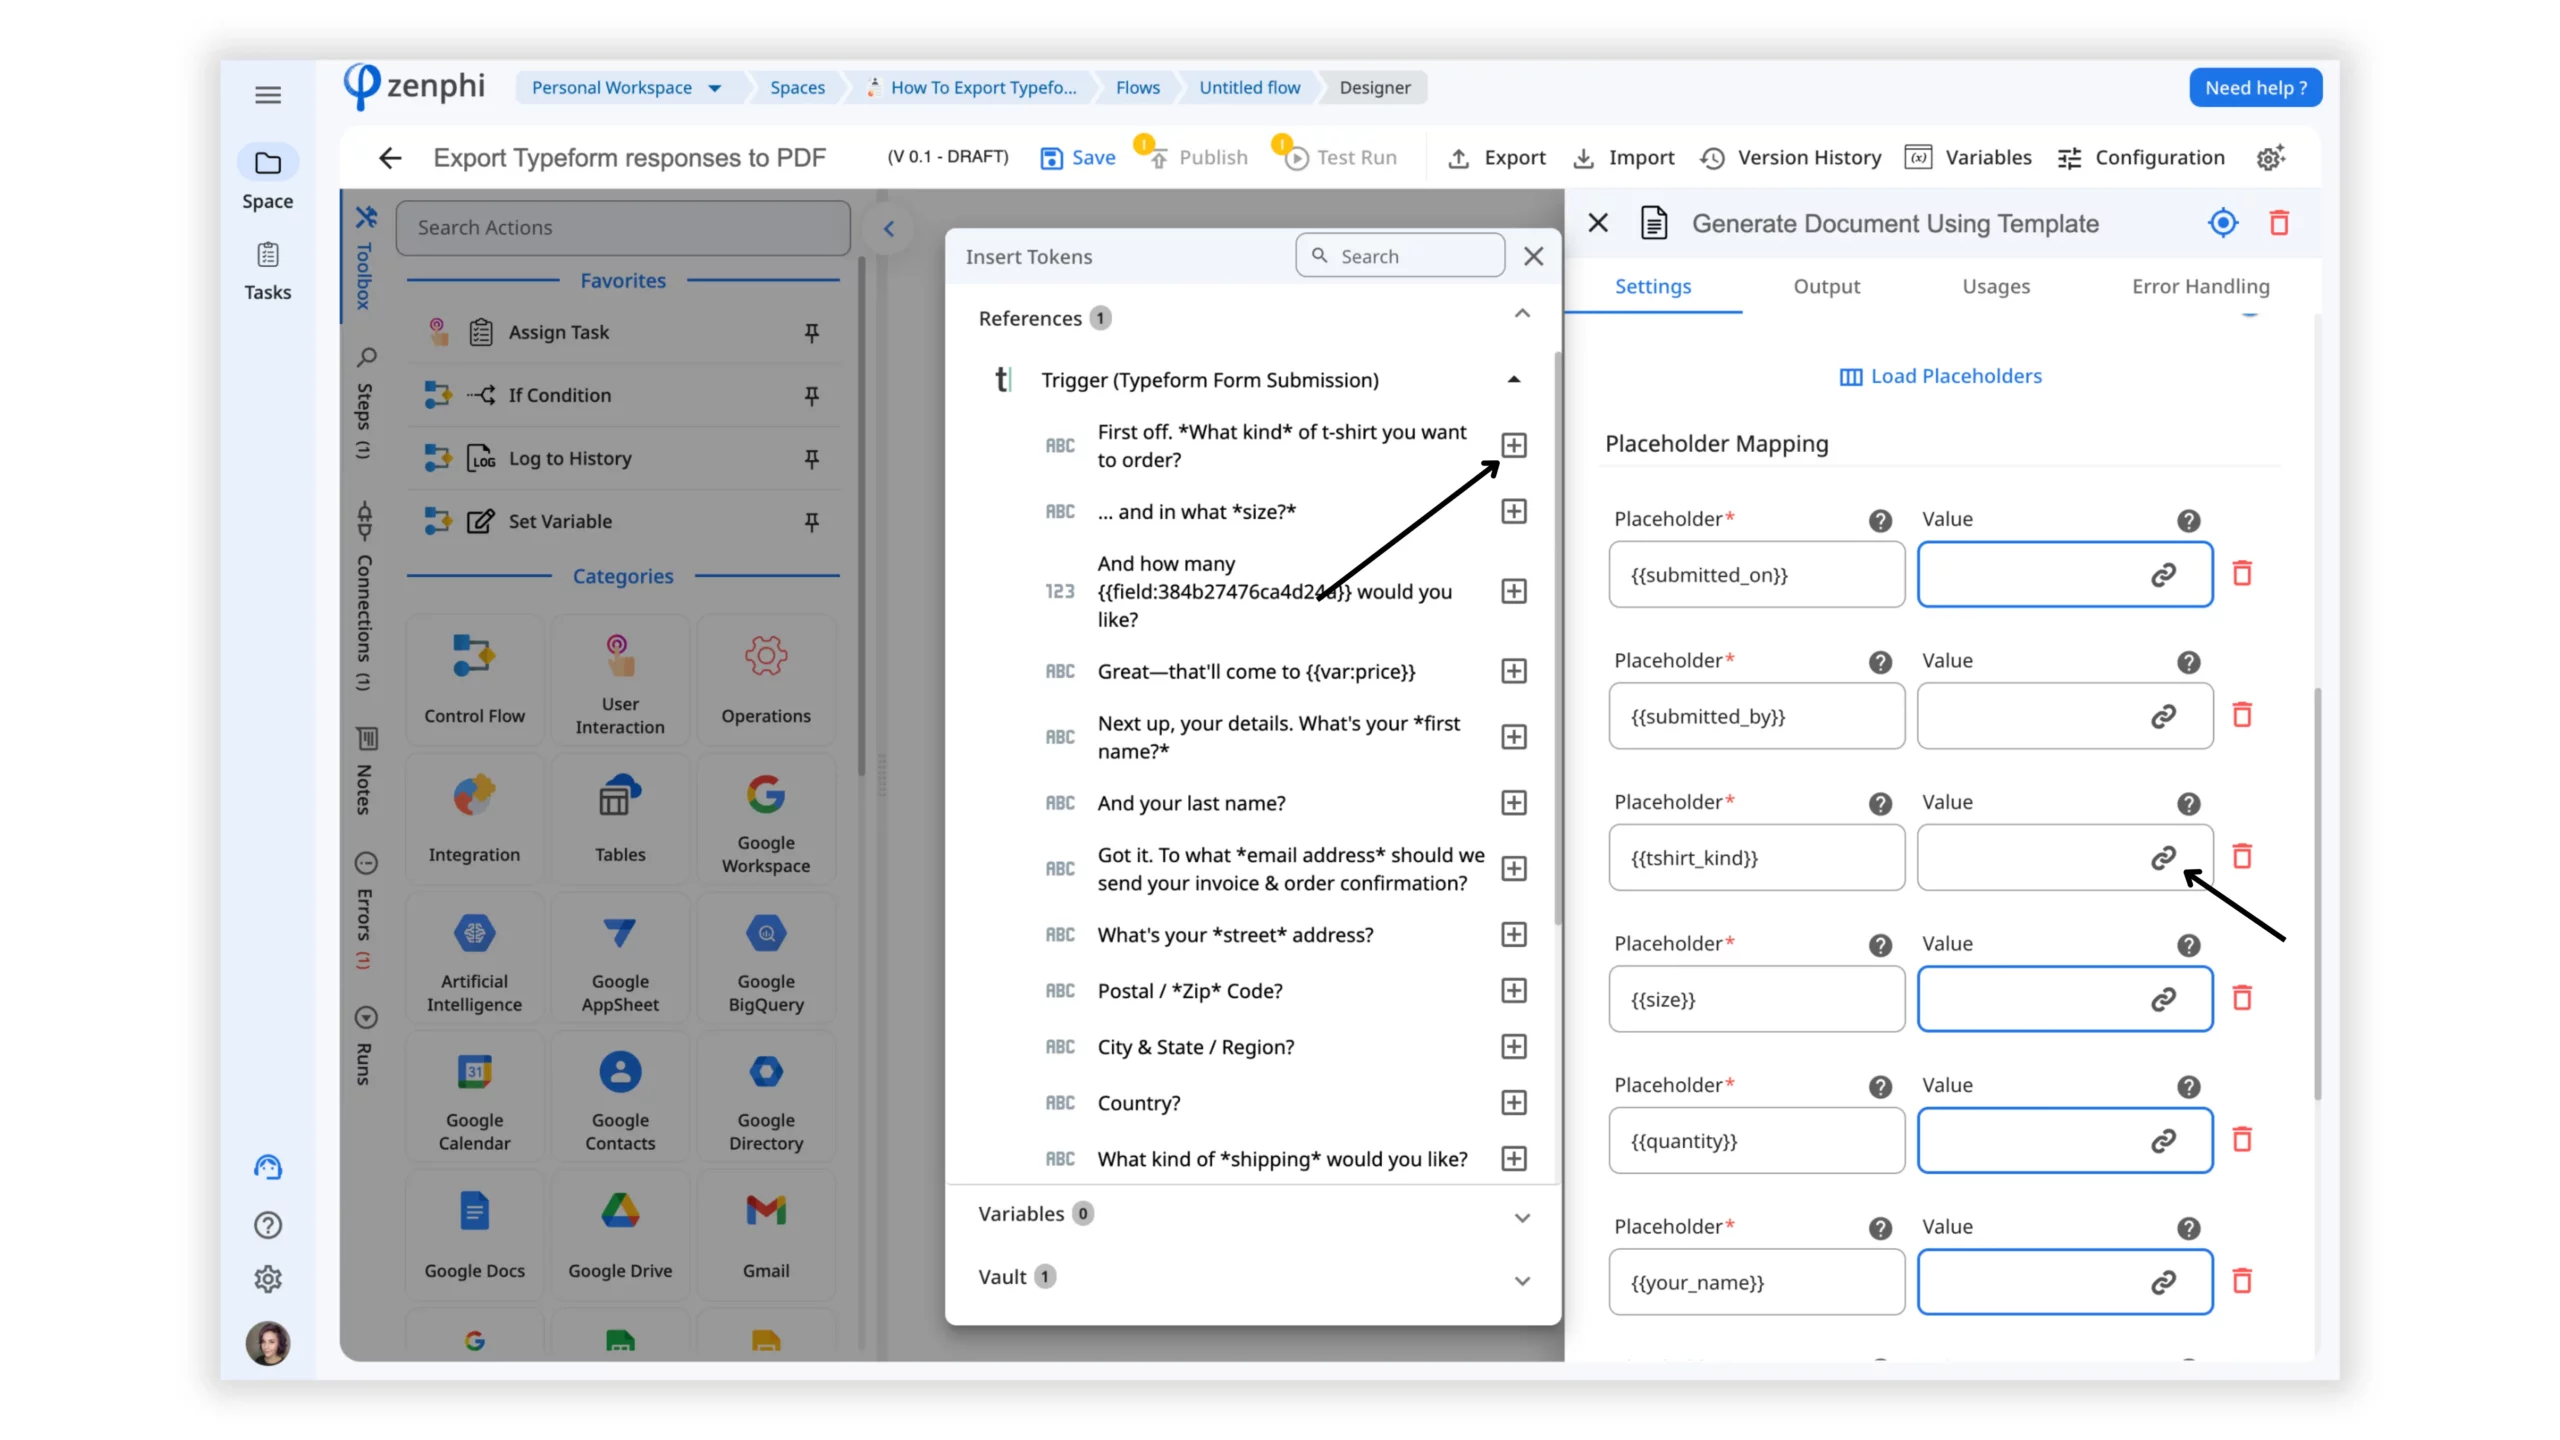
Once you indicate the Google Doc template, zenphi will automatically load all the placeholders where you can put tokens from the Typeform. Click on the Token picker in the Value fields and find the needed value from the Typeform response.
Step 5: Configure Current Date Time Action
With zenphi, customizing the date format is a breeze using the “Current Date Time” action. Simply select your time zone and preferred format.
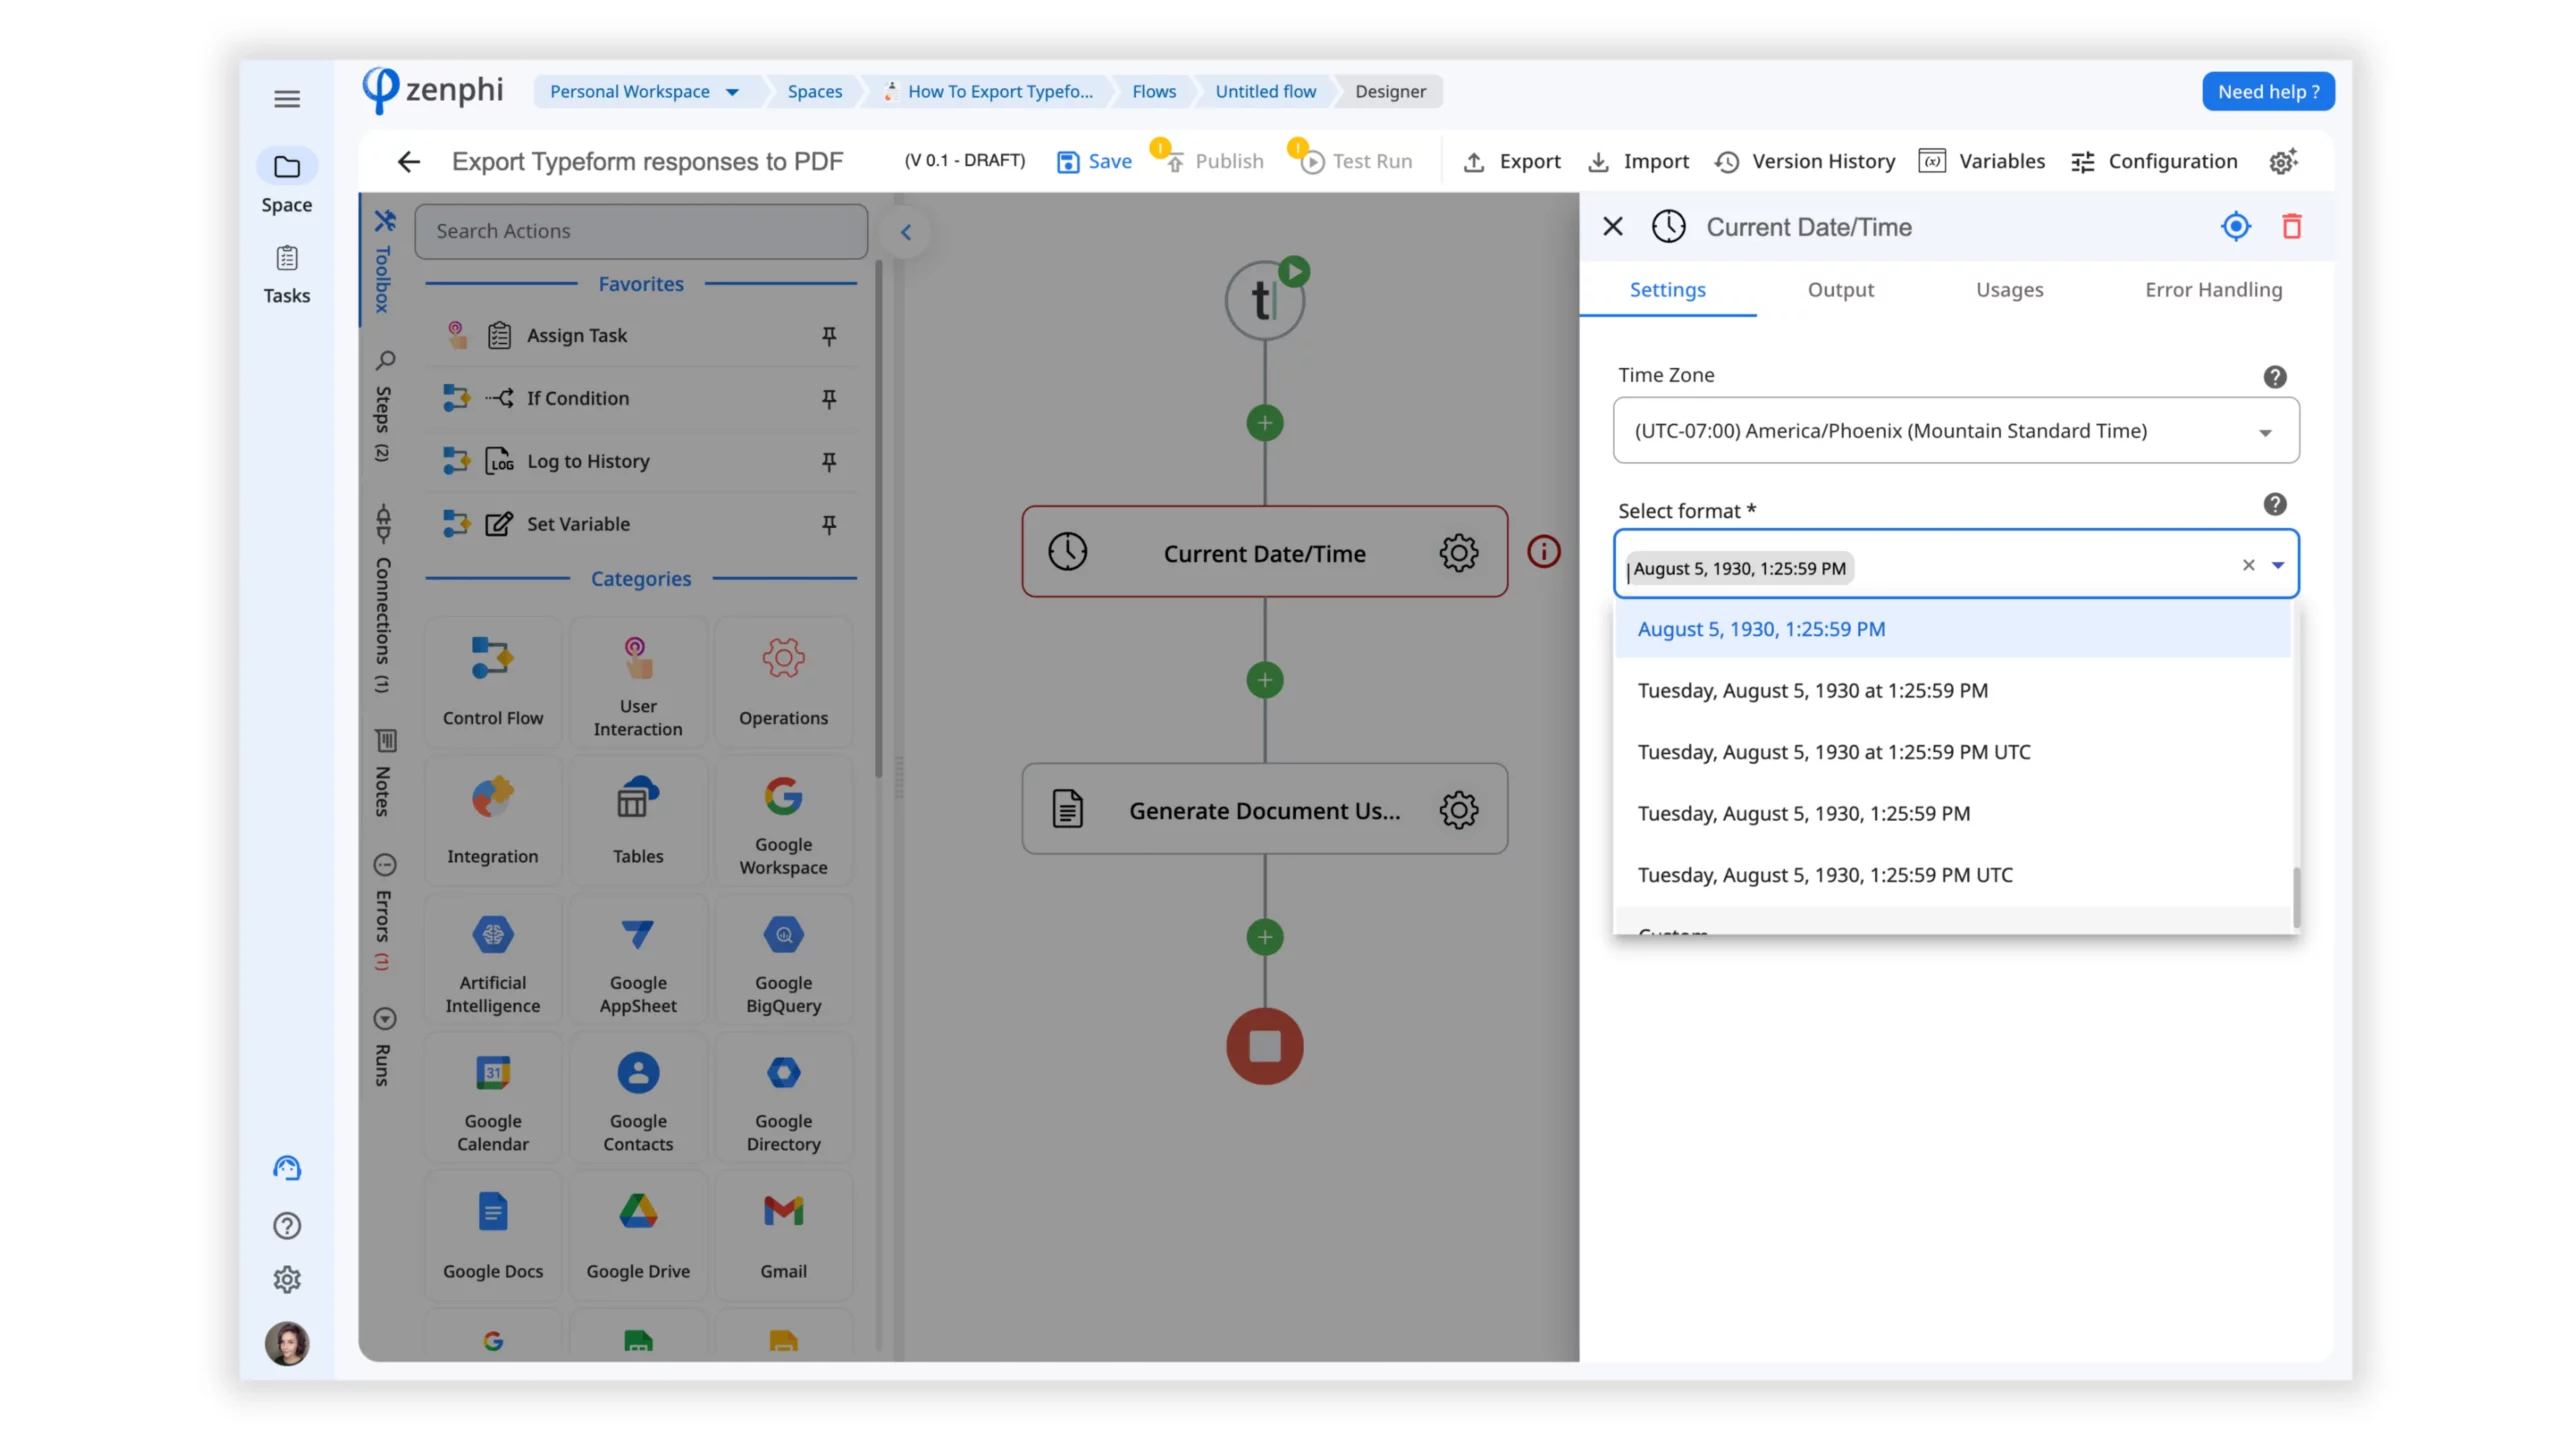
Next, in the “Generate Document using template” action, specify the output from the “Current Date Time” action.
Step 6: Test the “Export Typeform questions to PDF” Flow
To begin, save and publish the Flow by utilizing the controls located on the top panel. Following this, proceed to submit a fresh response through the Typeform. This submission will act as the trigger for the Flow, prompting the execution of all designated actions. For real-time monitoring of the progression, navigate to the Flow Runs tab, where you can observe the live status of each step.
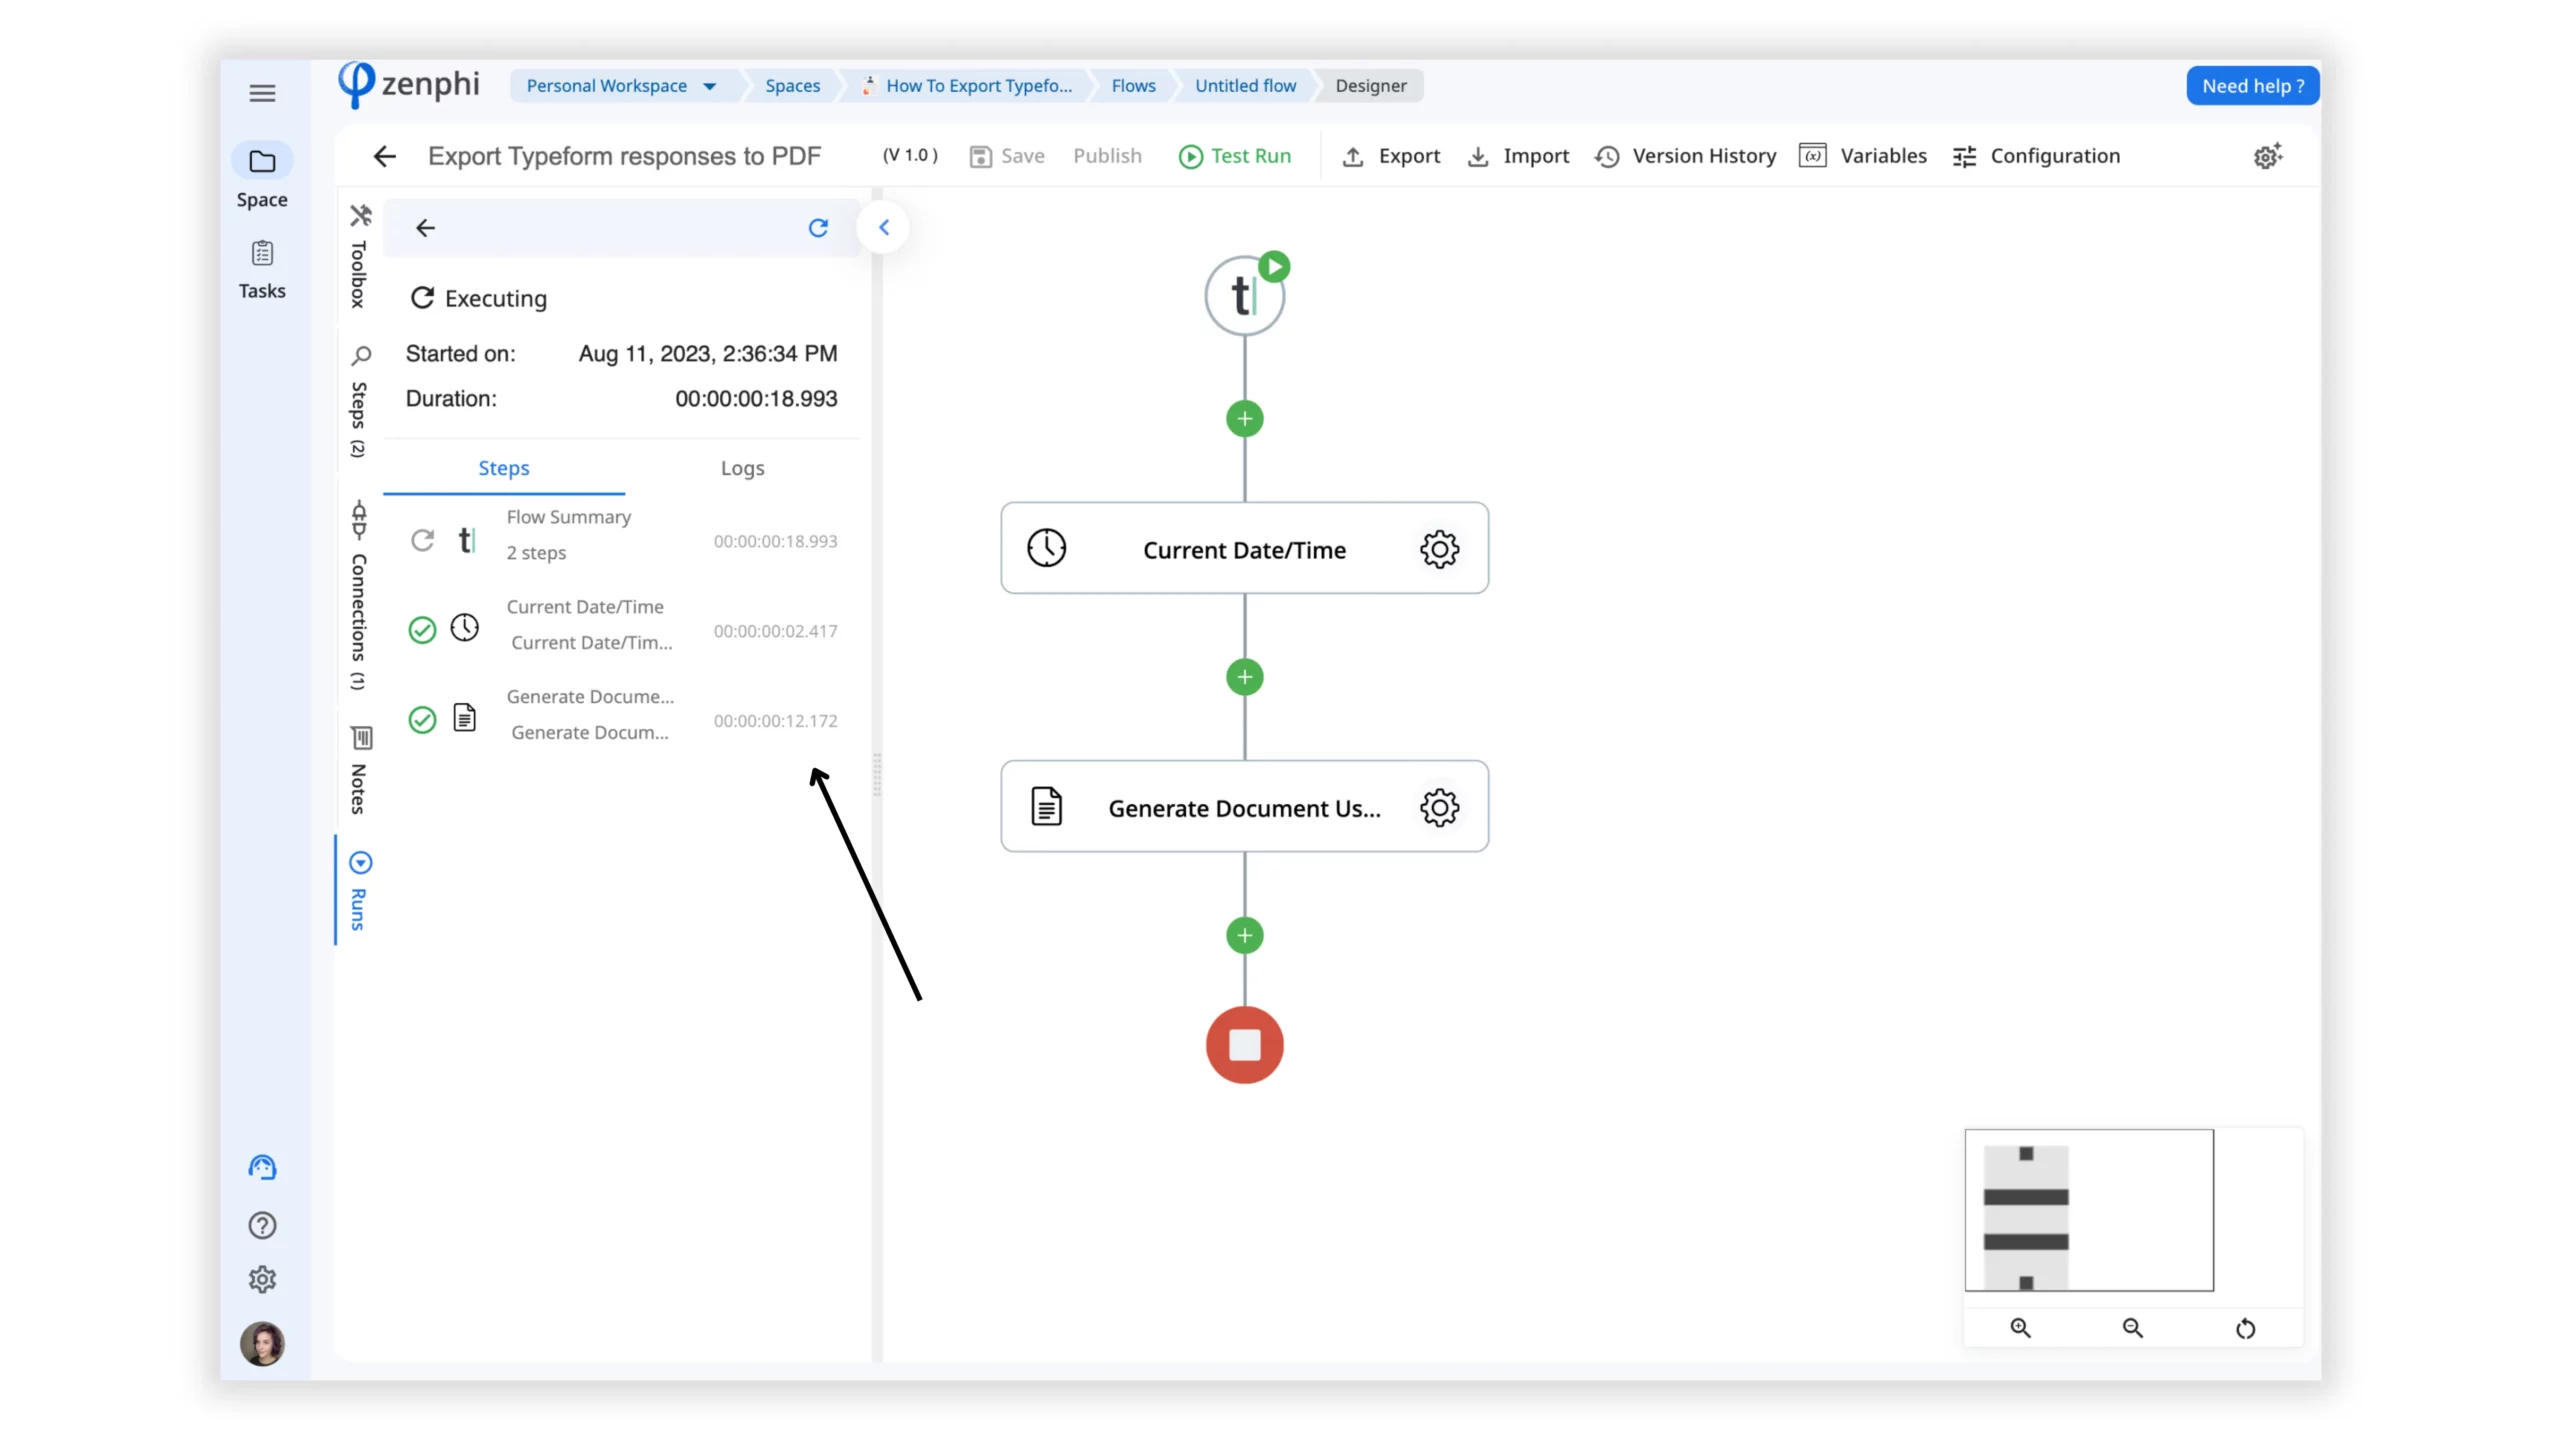
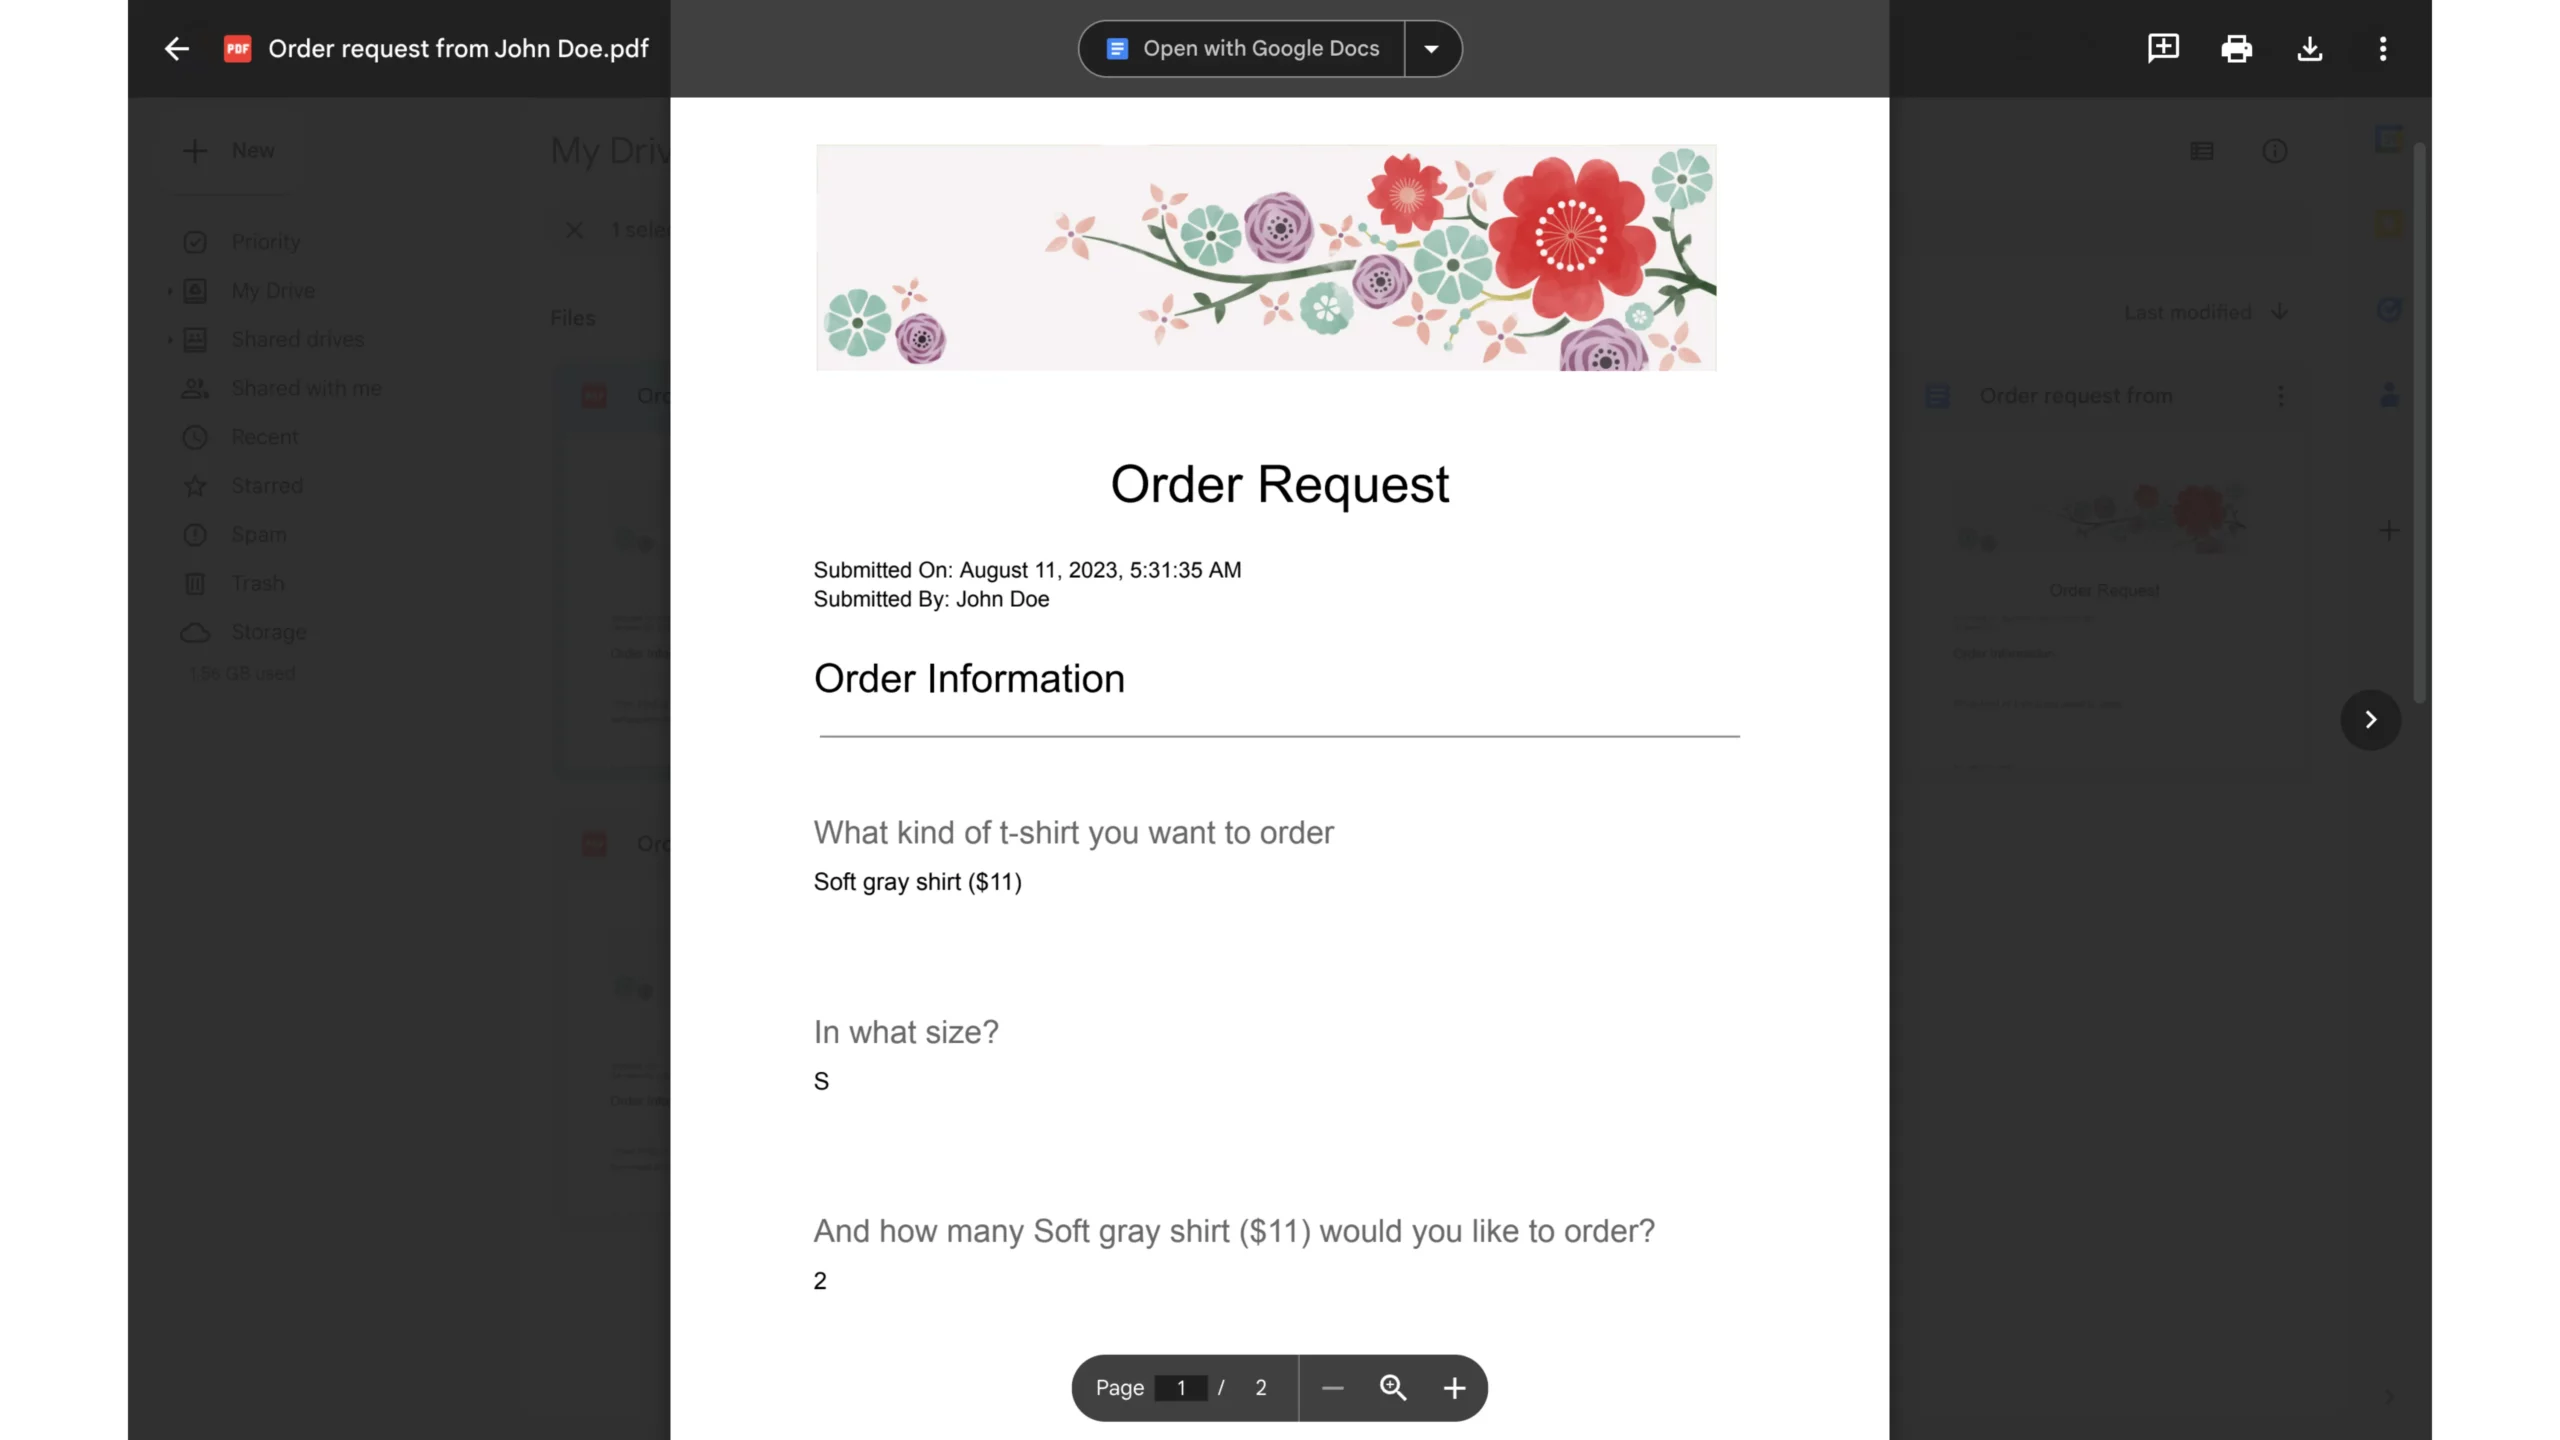
After executing the Flow, you will discover two new documents in the designated Google Drive folder. One document will be in Google Doc format, while the other will be in PDF format. Both files will contain the generated content based on the Typeform responses.
Configure Additional Actions (Optional)
Depending on your requirements, you can add more actions to enhance the automation process. Here are a few examples:
1. Send an email with the generated PDF document as an attachment to the respondent
With zenphi’s “Send Email (Gmail)” action, you can send customized emails to multiple recipients. You have the option to select output data from the previous step or manually type in respondents’ email addresses, separated by commas. Additionally, you can customize the subject and choose your preferred format for the email, such as HTML, plain text, or rich text, among others.
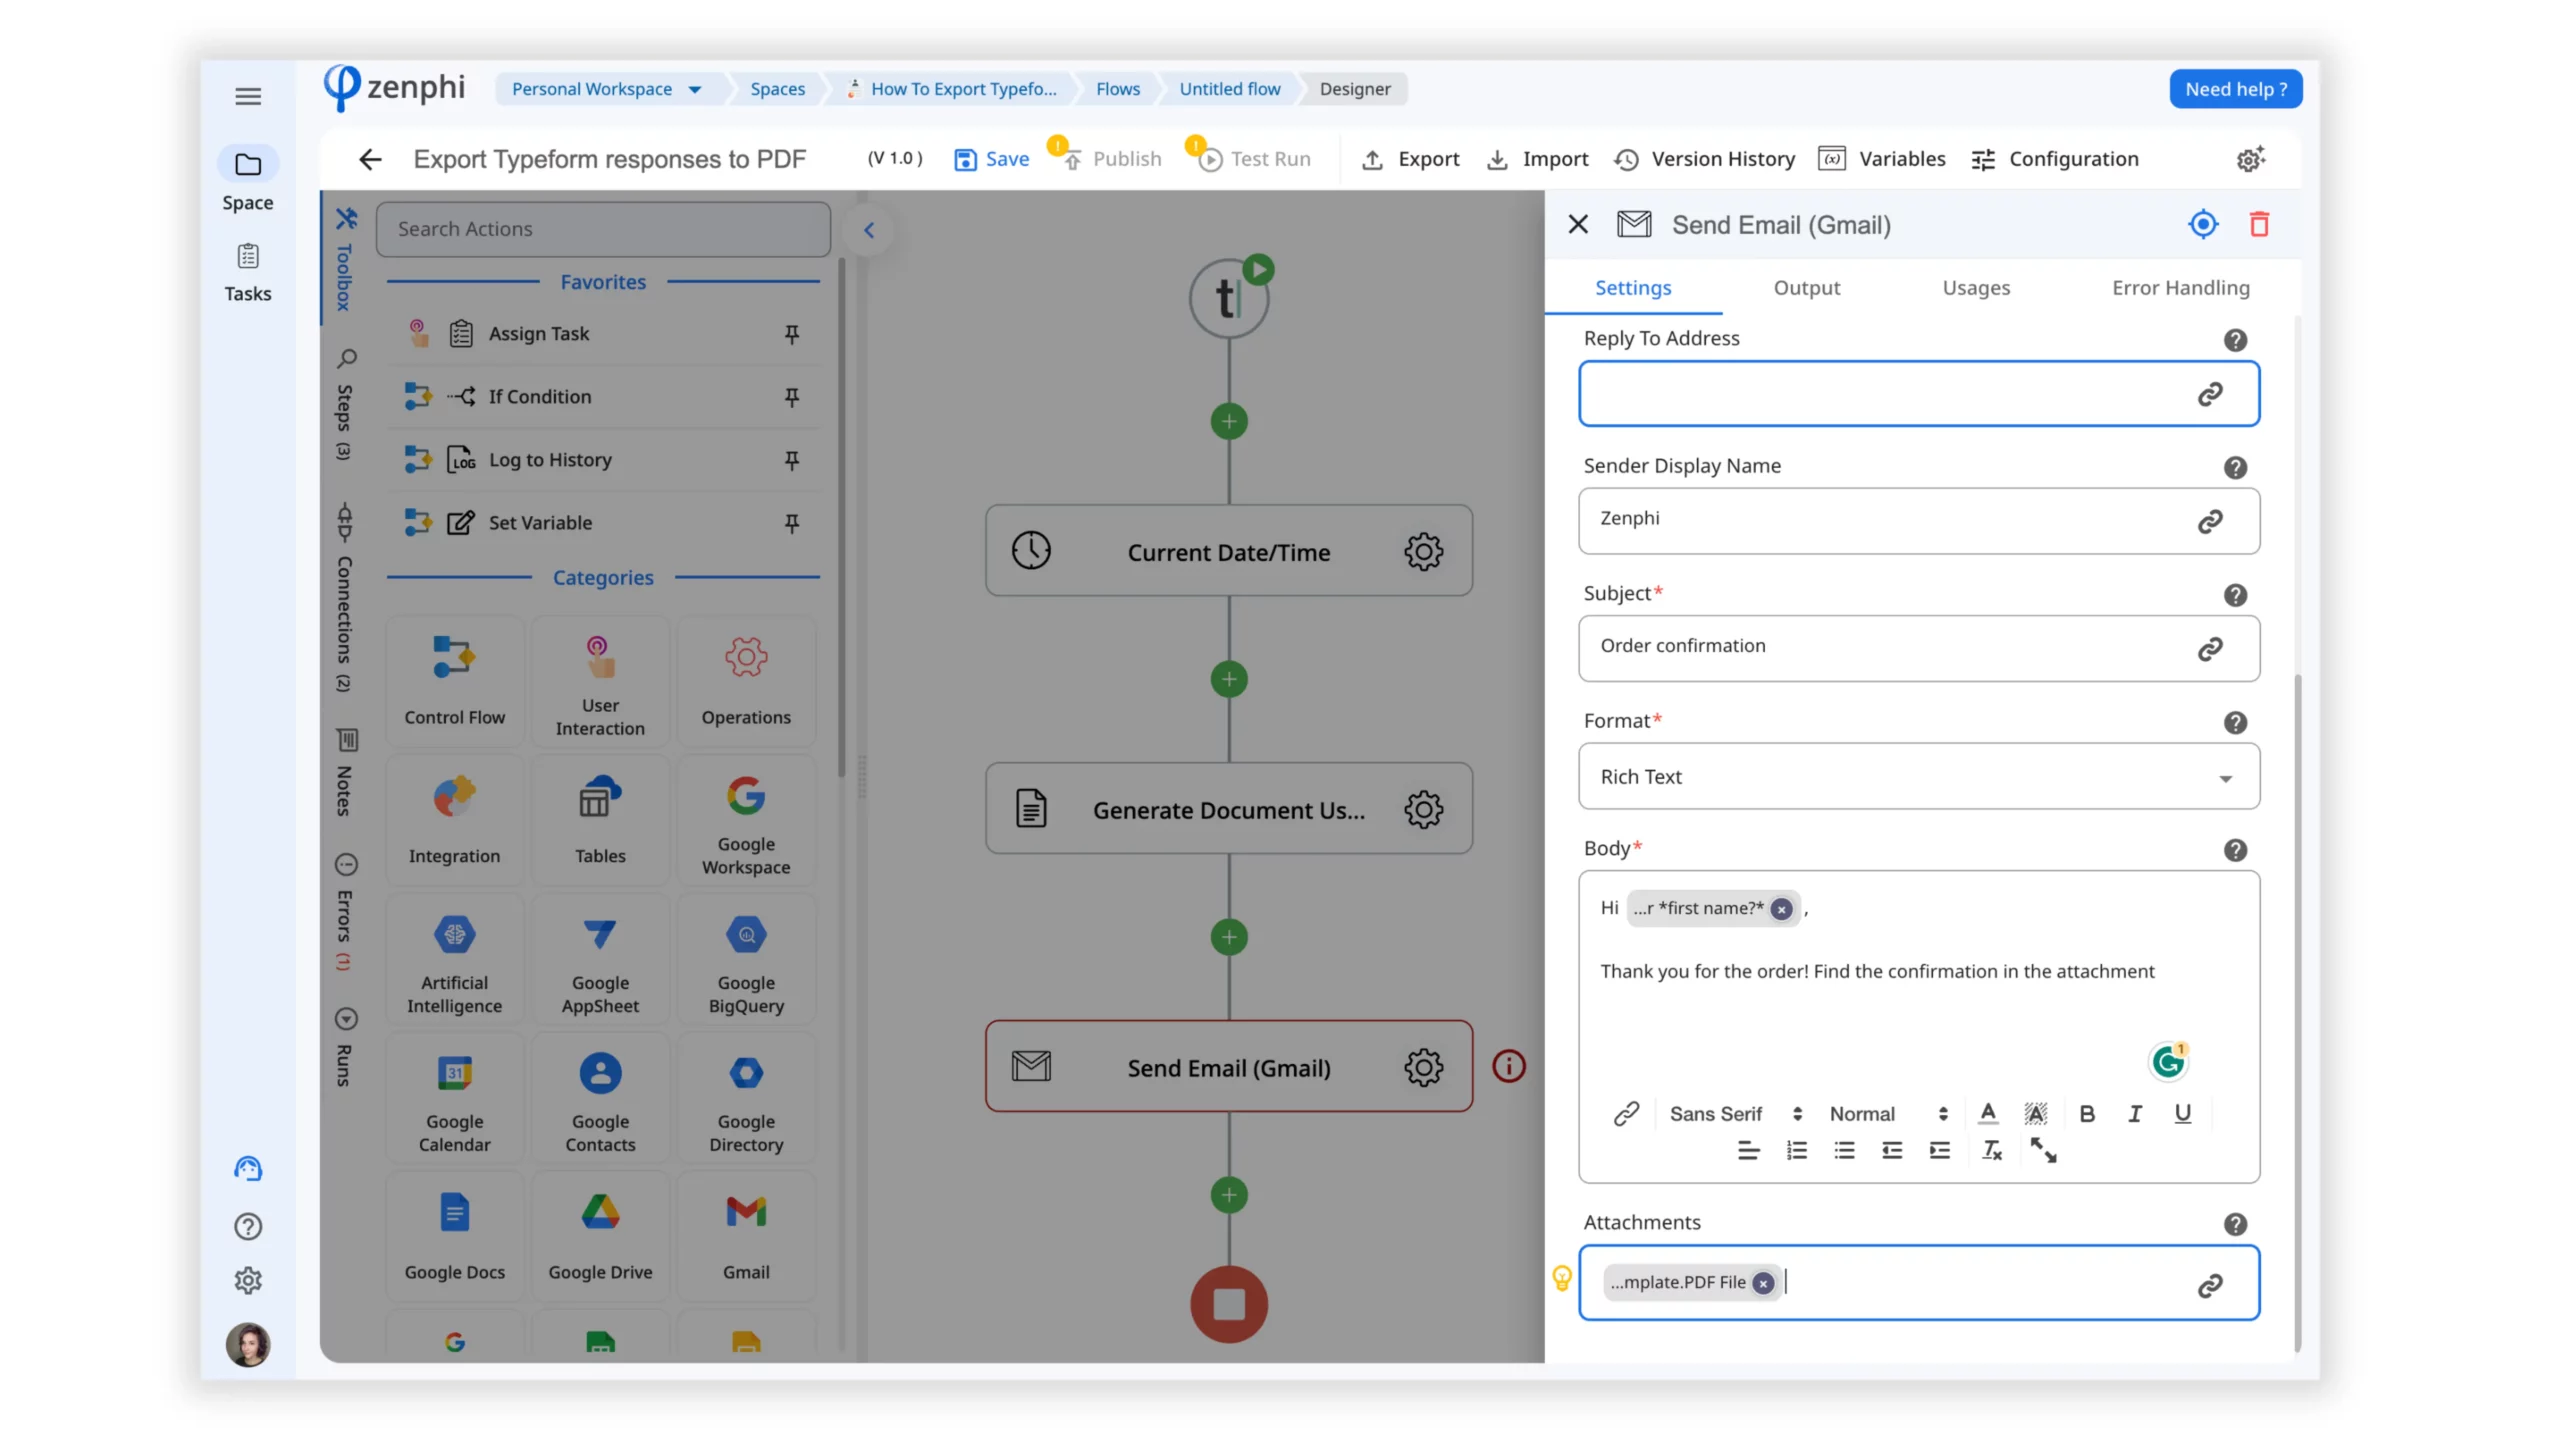 Use the Send email action from the Gmail section. In the Attachments field, indicate the output from the Generate Document action.
2. Delete the generated Google Docs file after conversion to PDF to avoid cluttering your Google Drive;
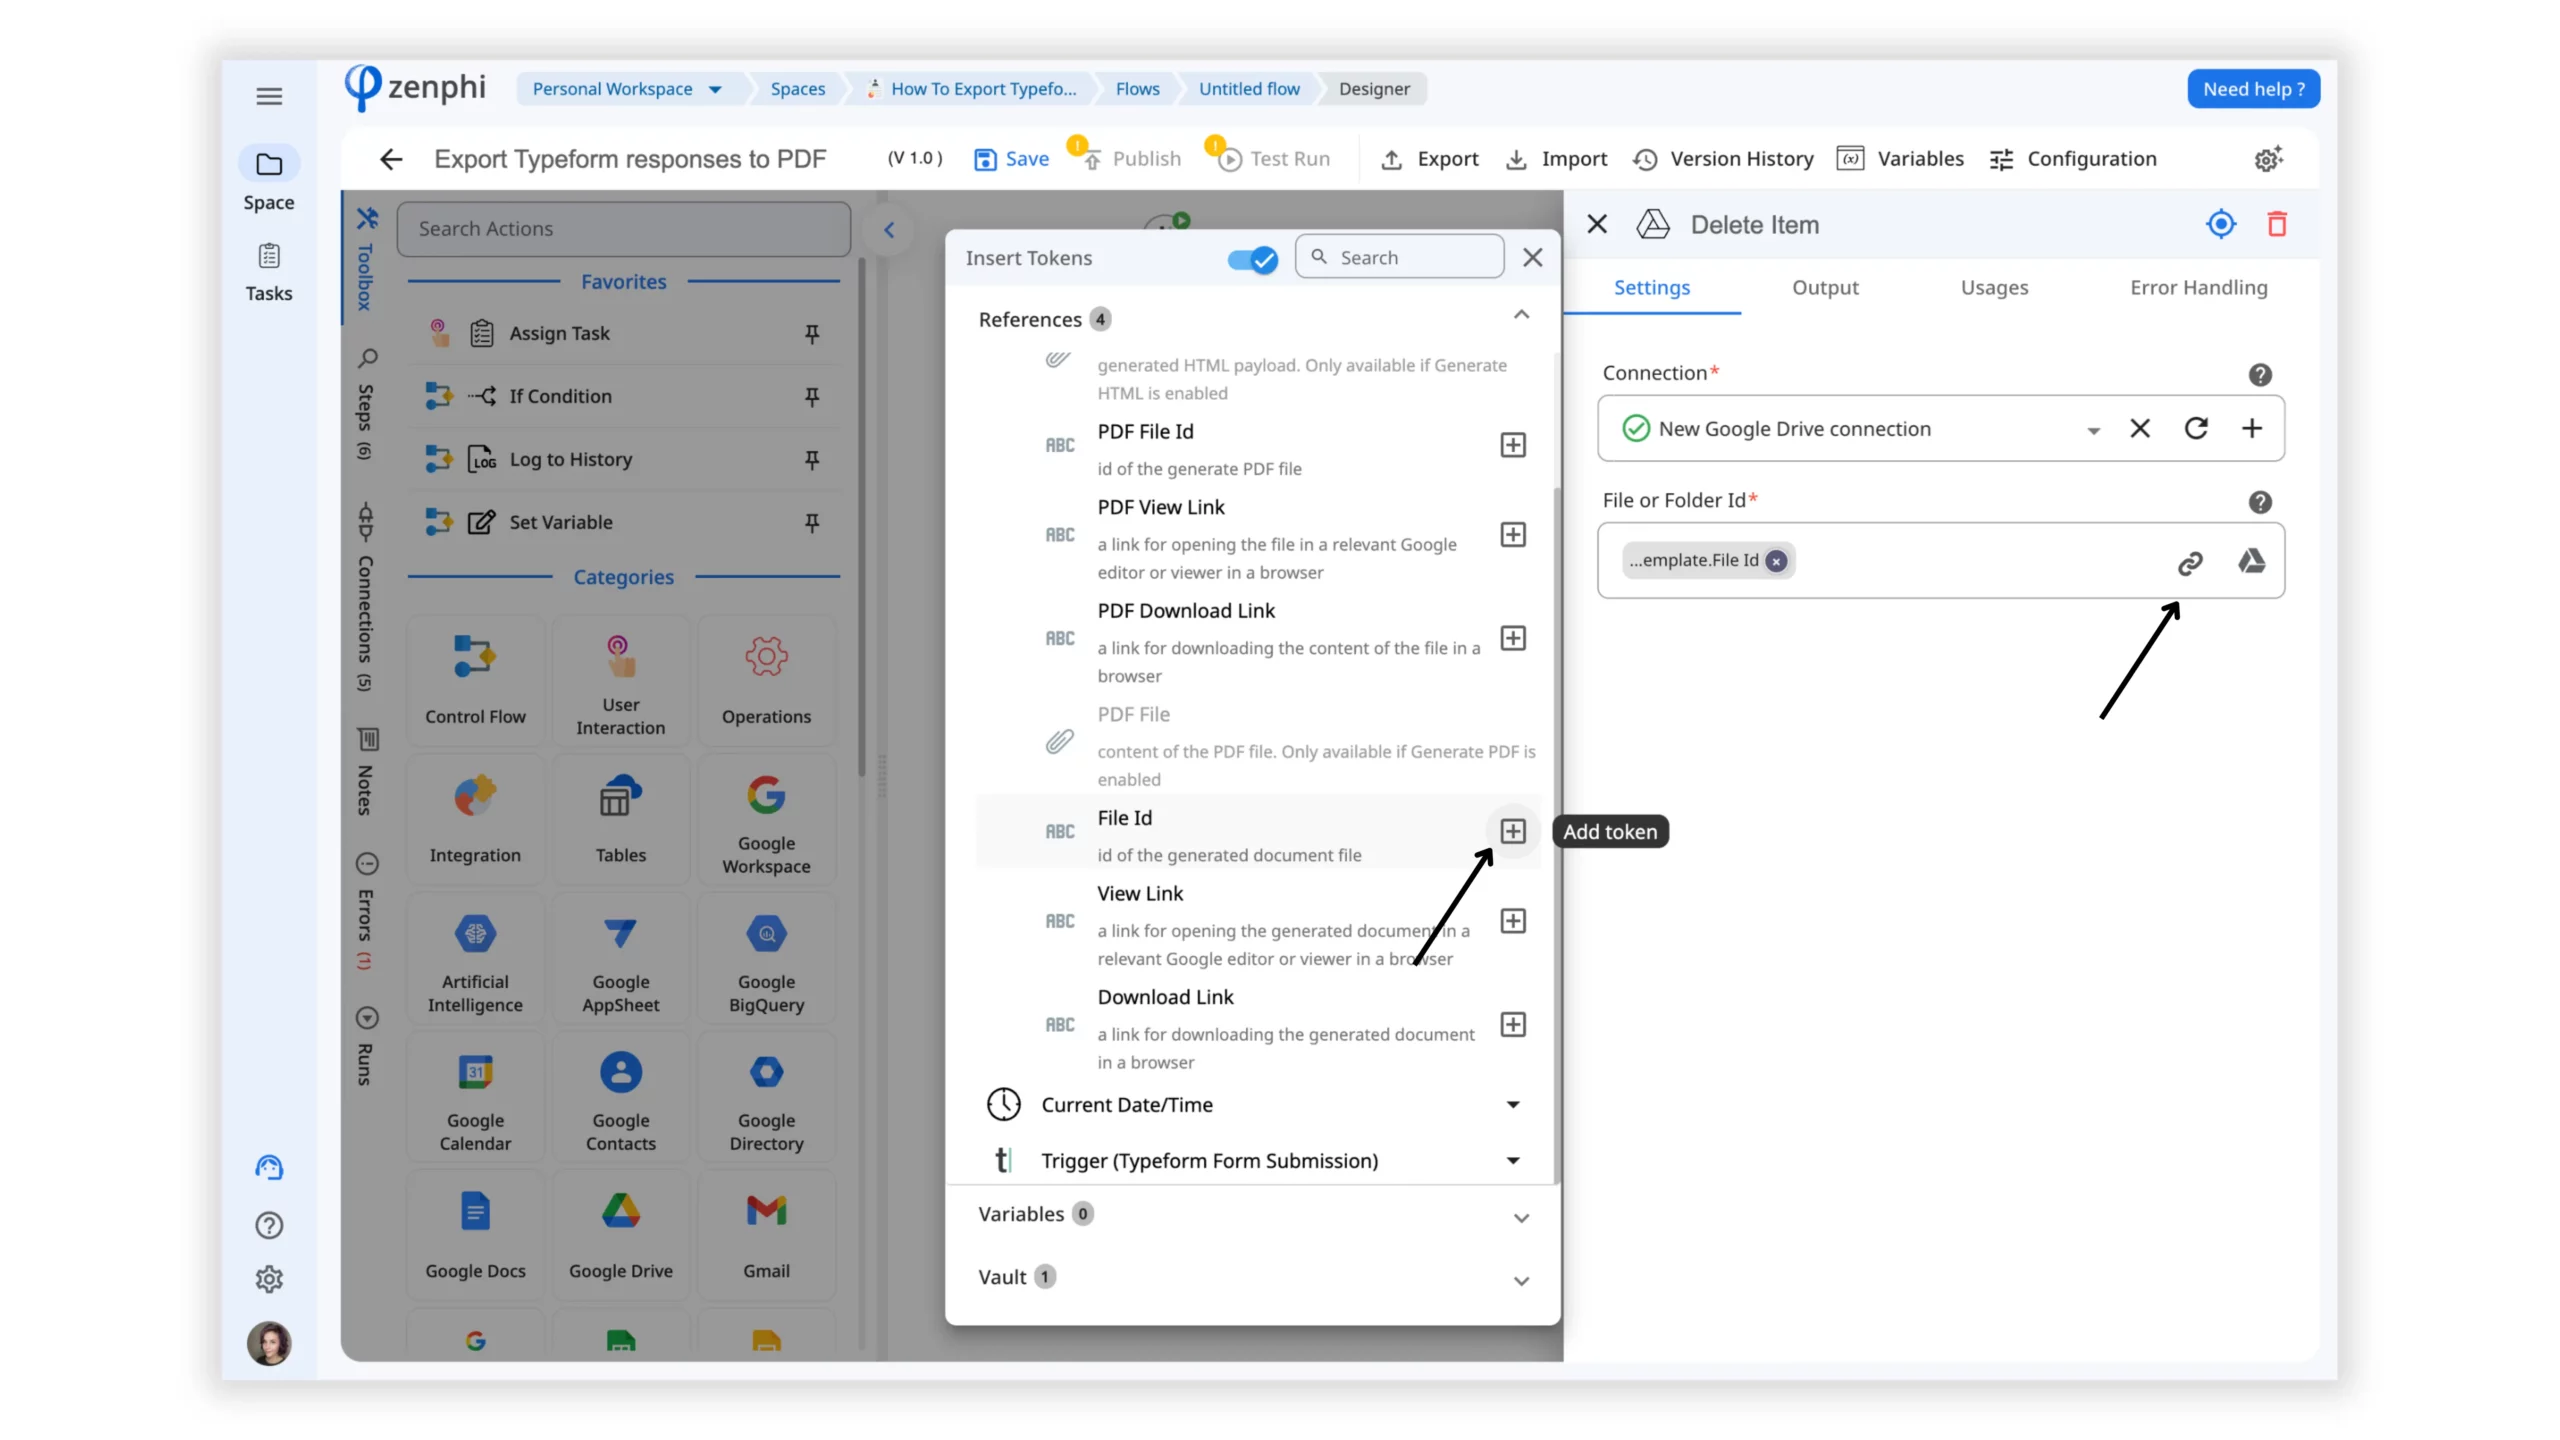
Use the Delete Item action from the Google Drive section. In the File Id field, indicate the output from the Generate Document action.

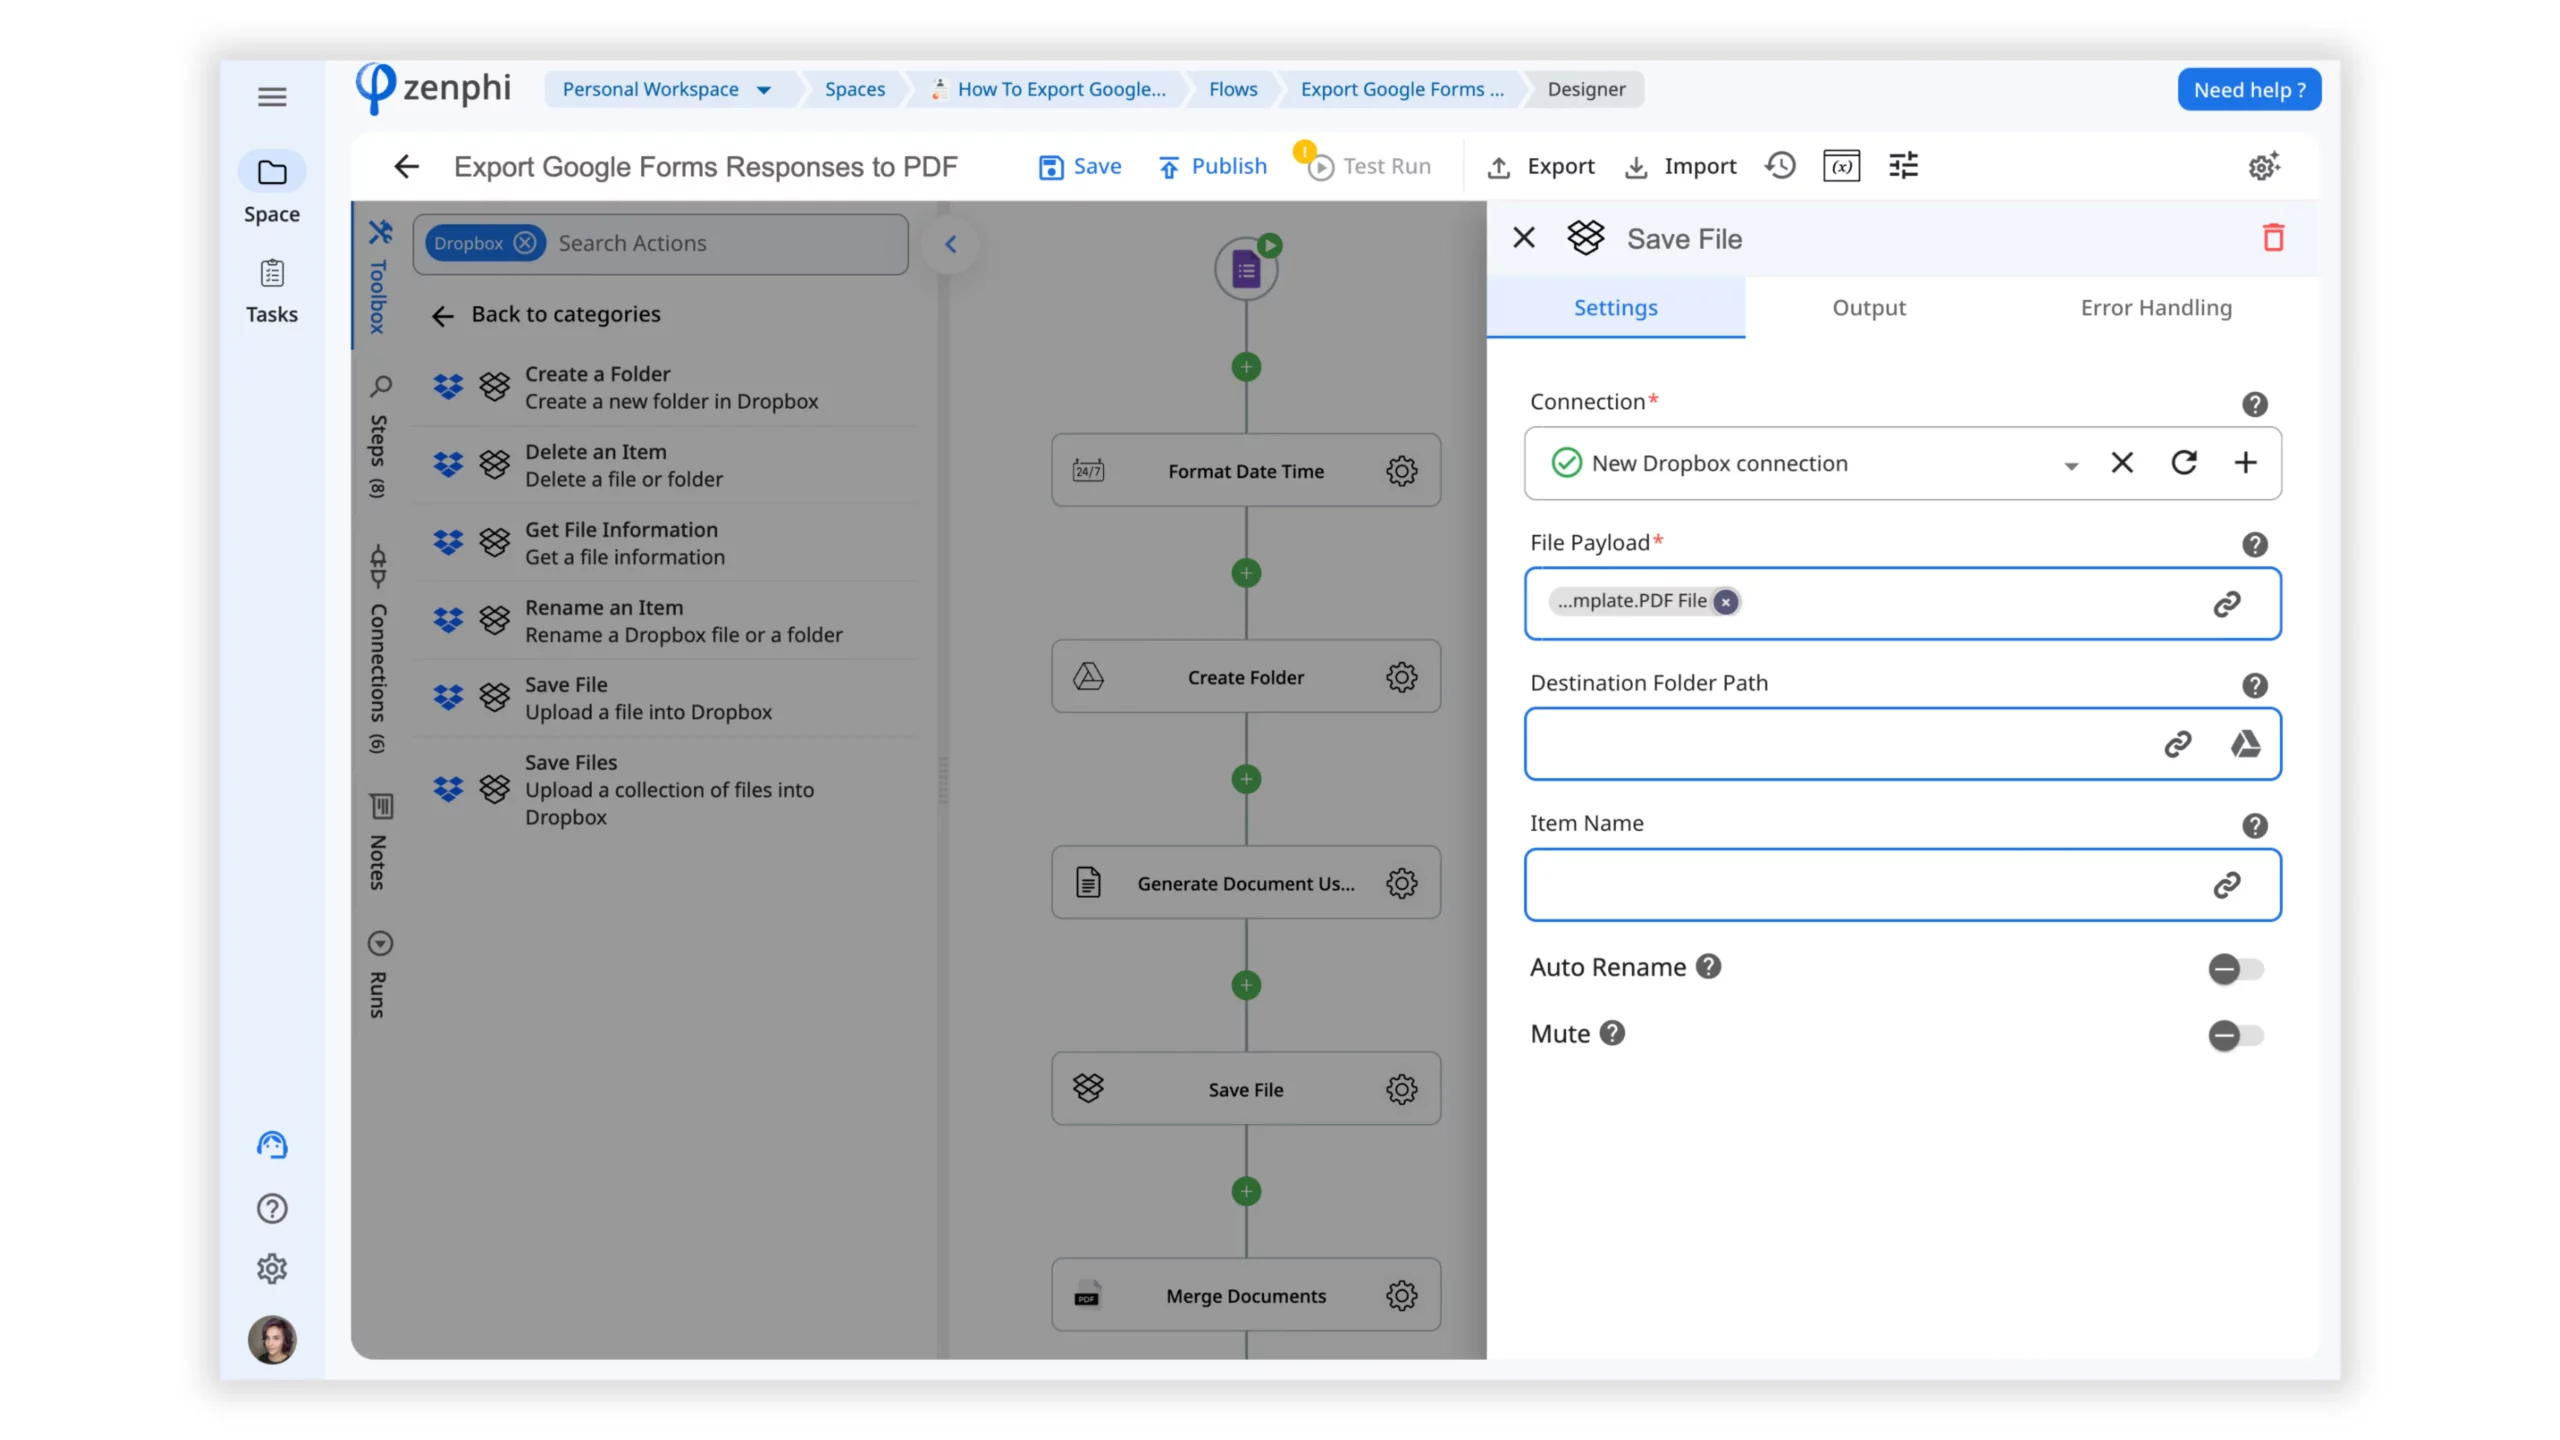
3. Save the generated document using Dropbox – Save File action.
4. Organize the PDF files in folders based on the submission date by using a “Create Folder” action.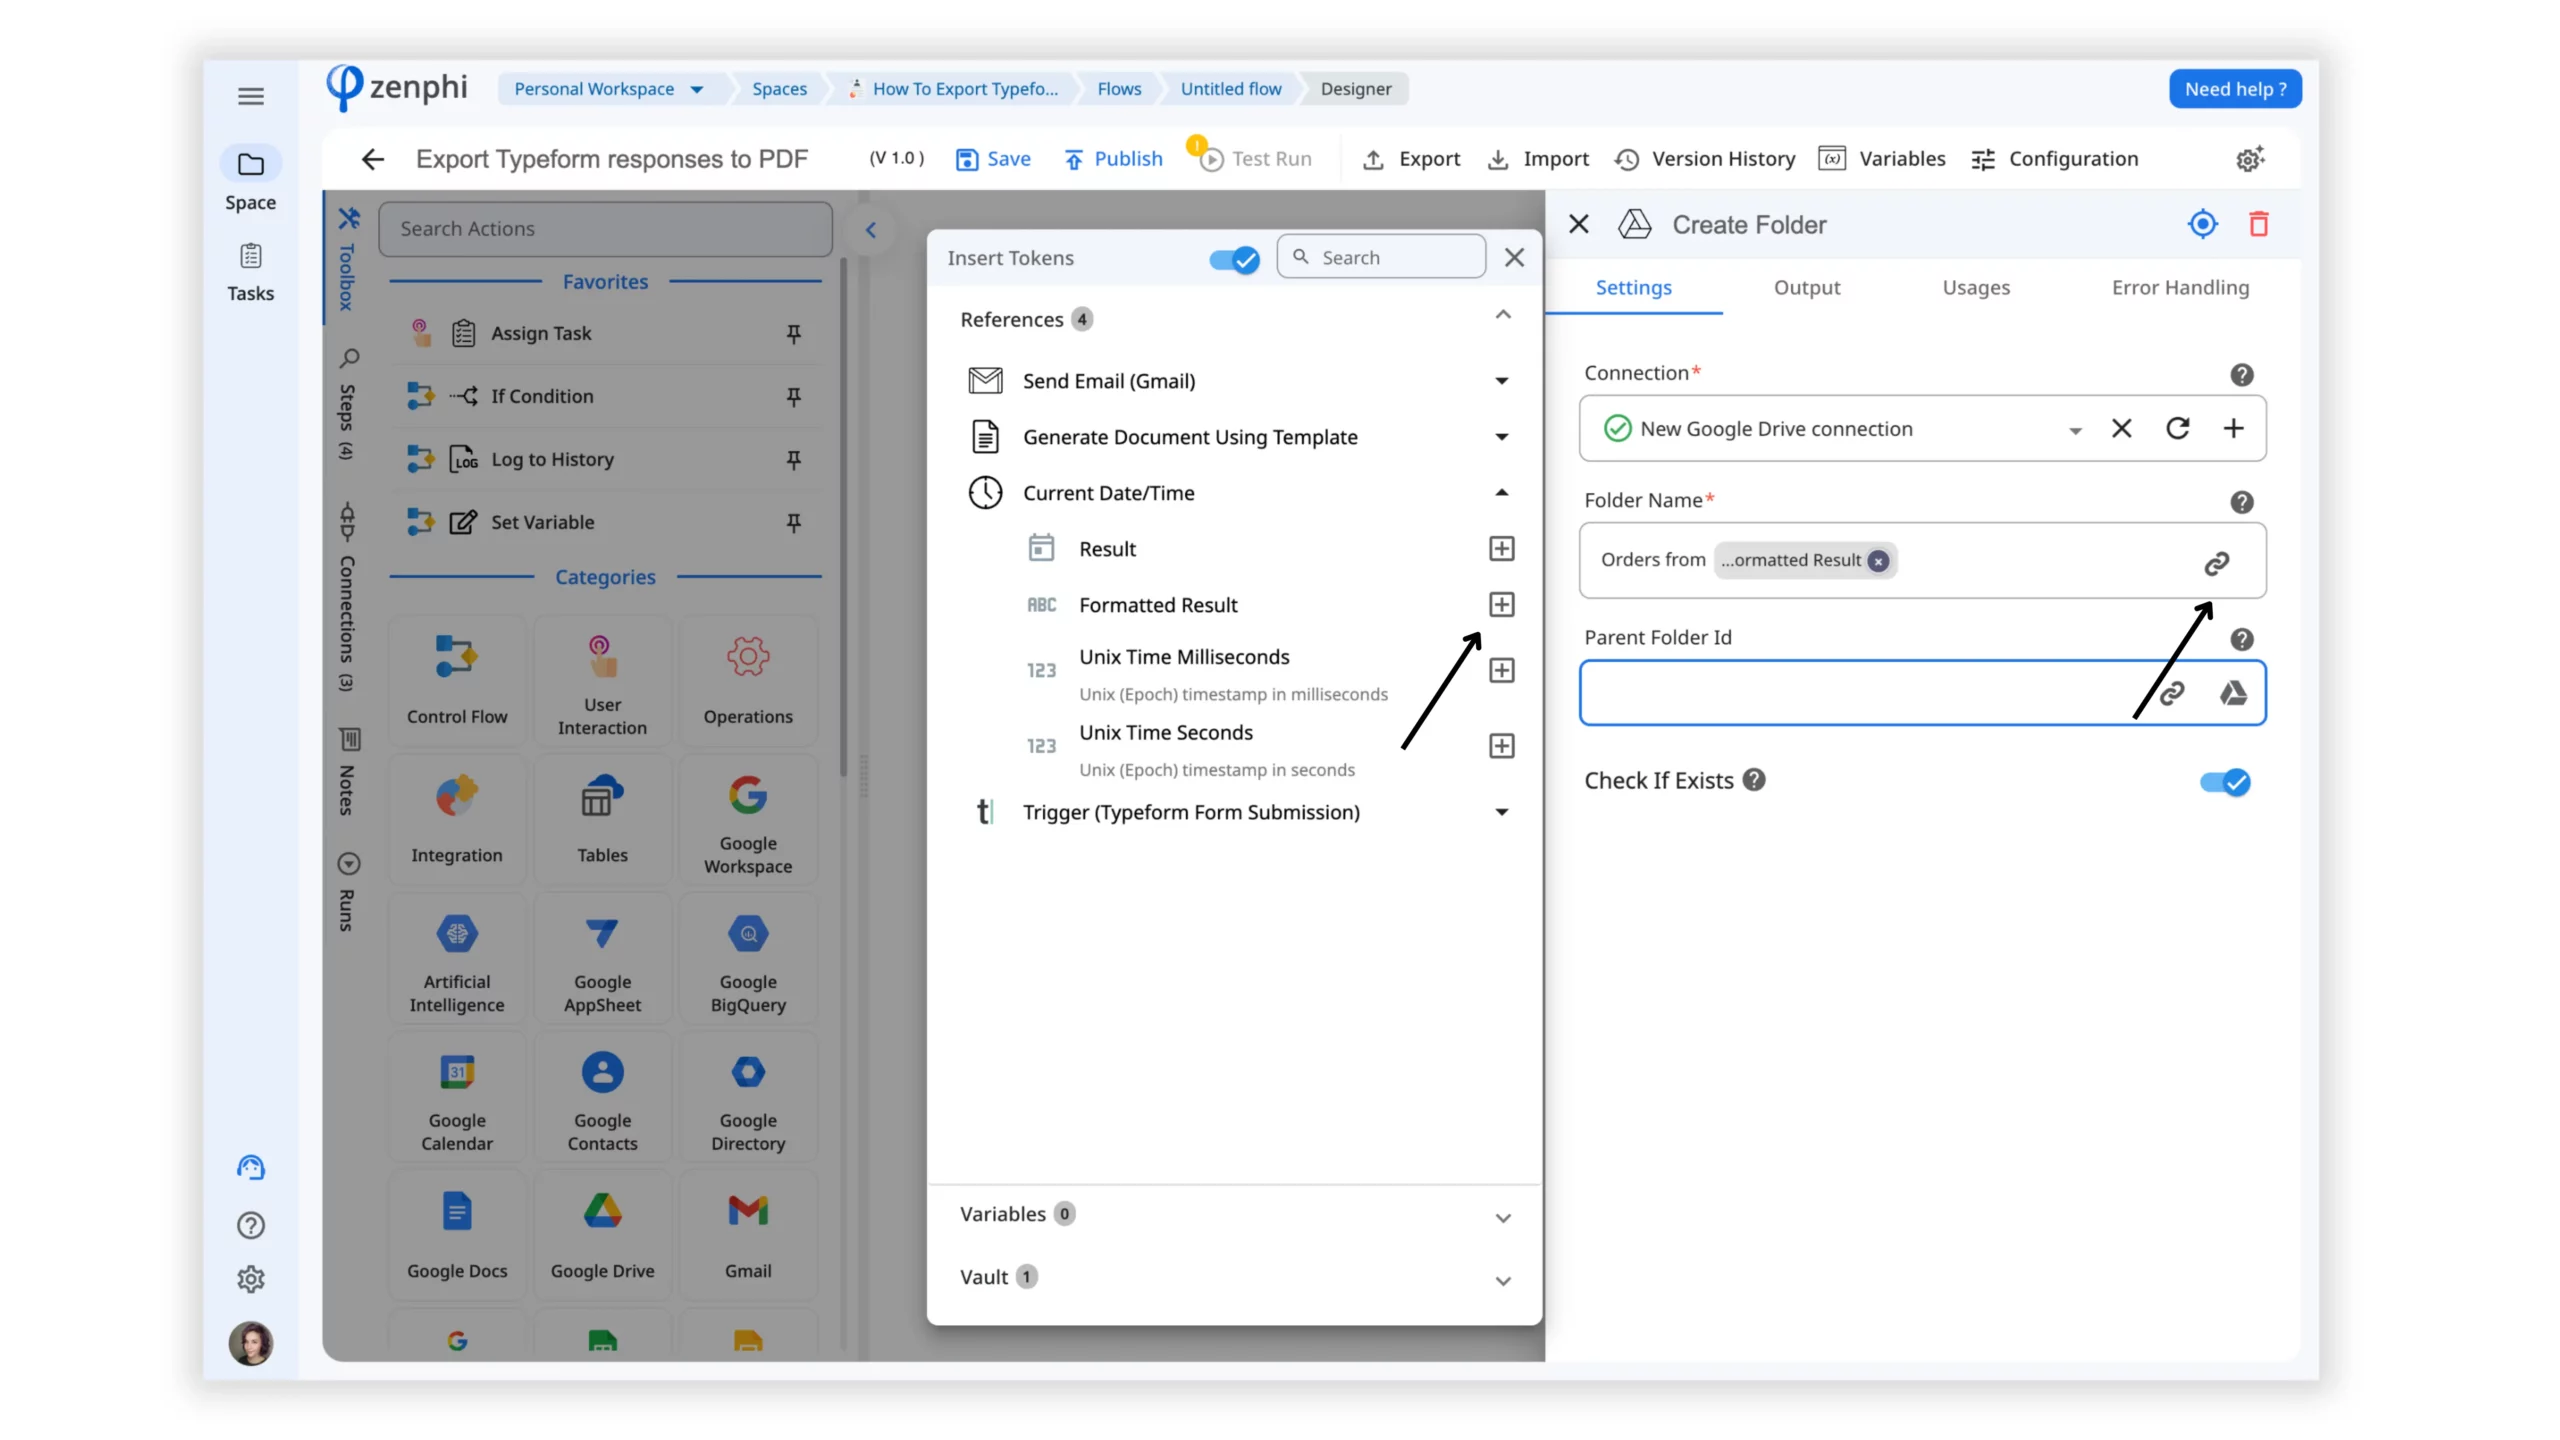
Use the values from the Google Form response to customize the Folder name. Indicate the Parent Folder if needed. Switch on the “Check If Exists” option.
Conclusion
By following these simple steps, you can export Typeform questions to PDF files and save them to your preferred cloud storage or send them to the respondents via email. The automation provided by zenphi streamlines the process, saving you time and effort on repetitive tasks. Enjoy the benefits of generating PDF documents with ease and efficiency!

