Greetings! We hope you had a productive month. July was another busy month for our team, focusing on another bunch of feature updates designed to make your automated processes even more powerful. Our aim is to free up your time and resources, allowing you and your team to focus on the human side of work – creativity, collaboration, and innovation. Let’s dive right in and take a look at the enhancements we’ve released during July:
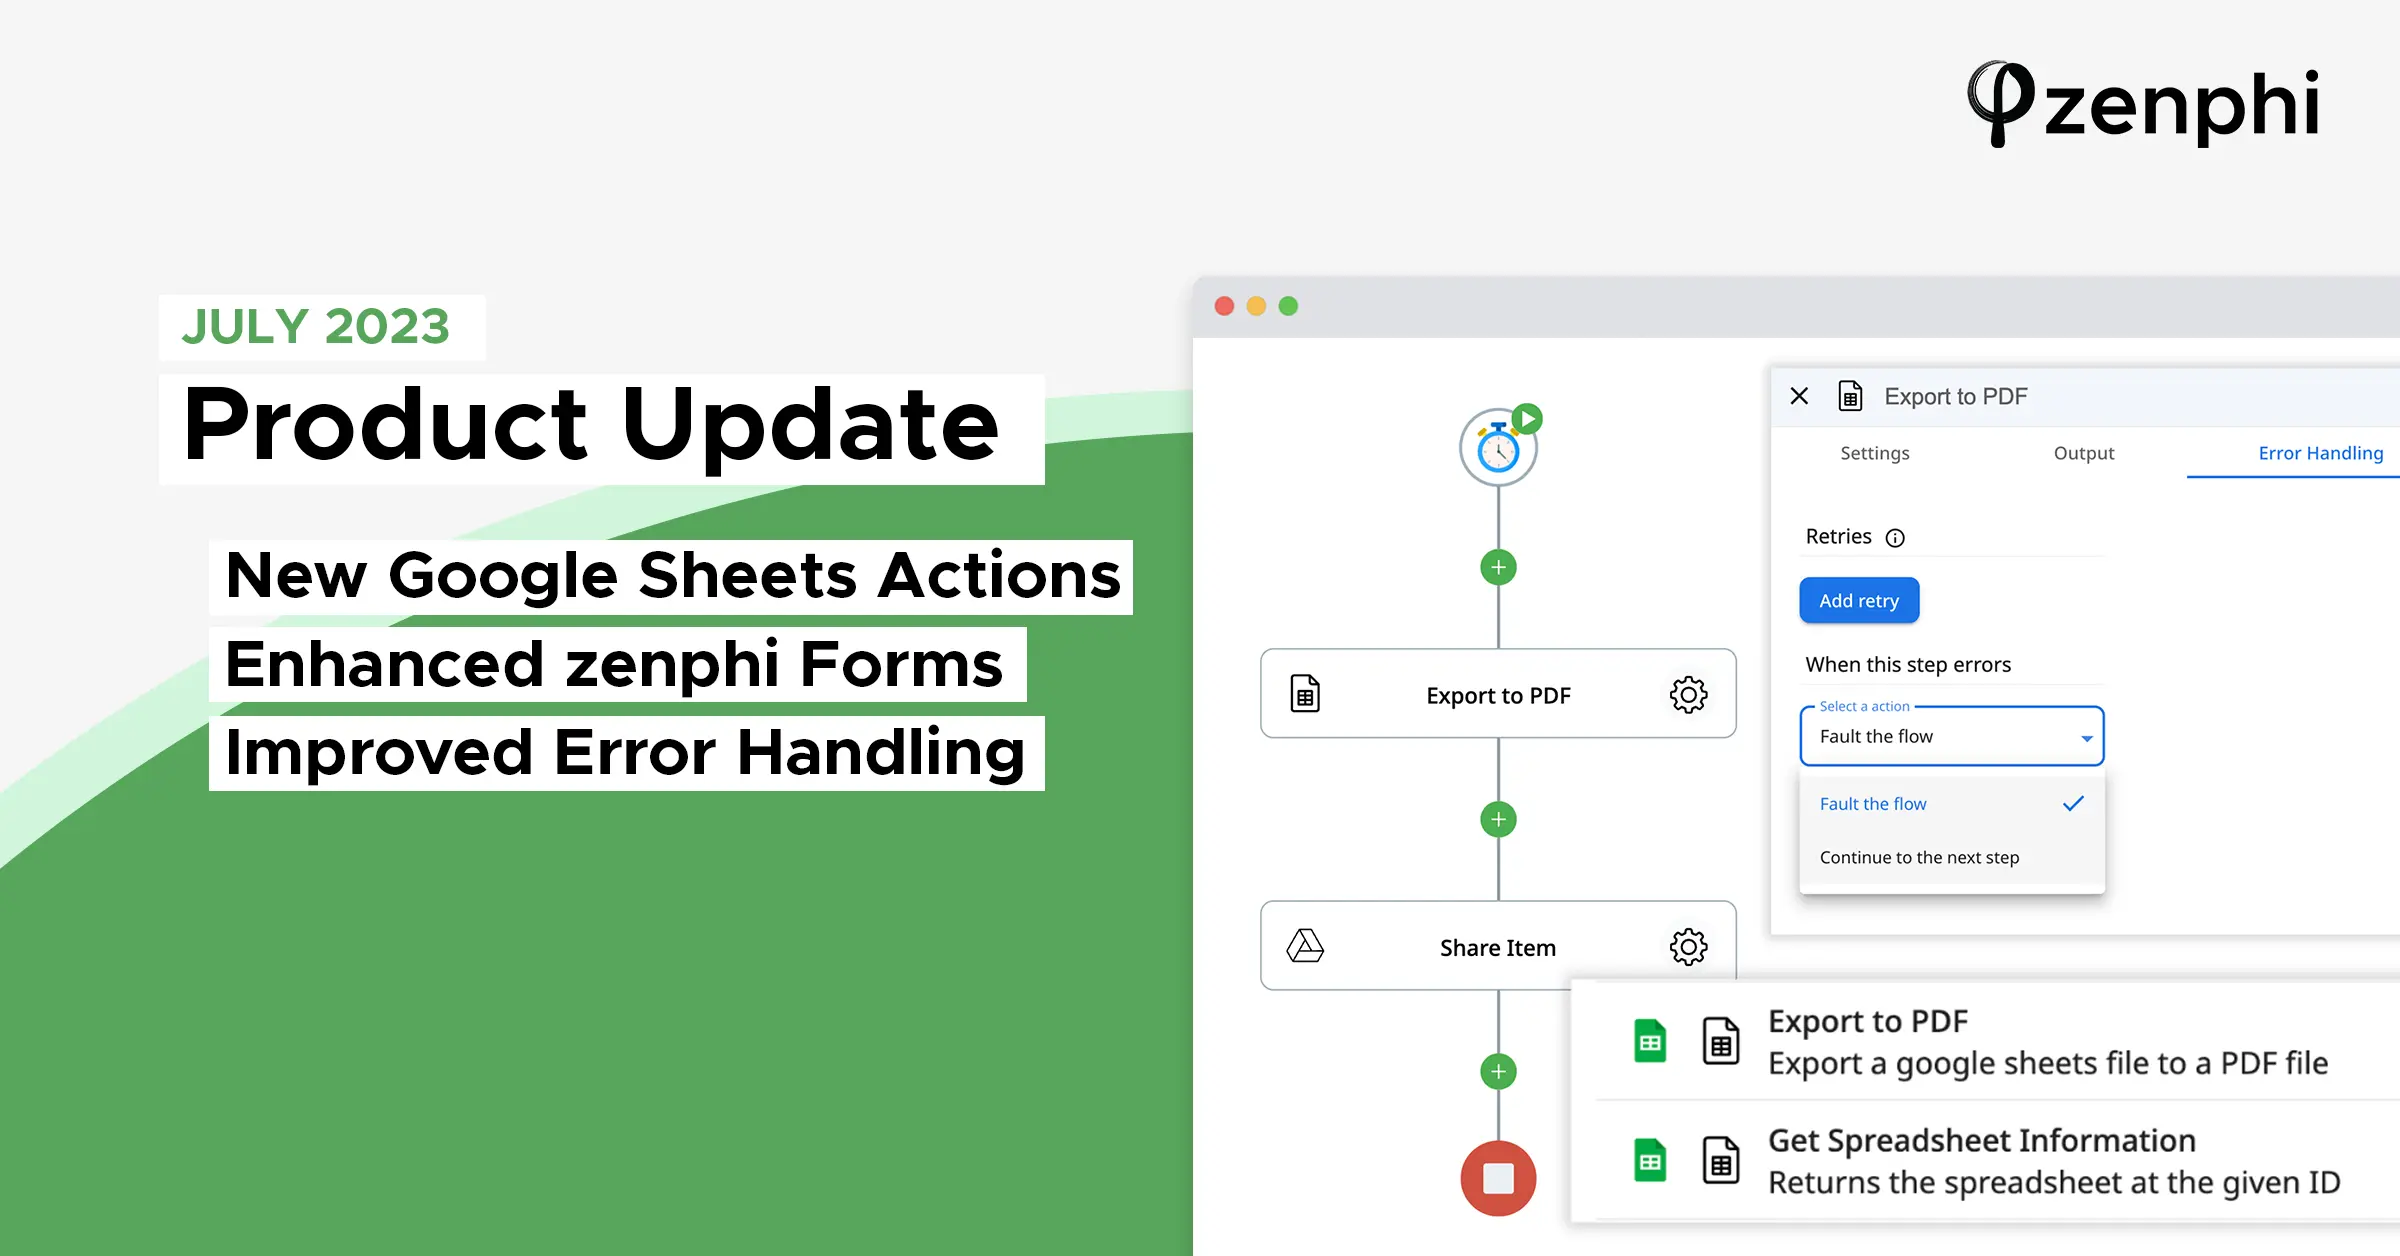
1. Streamline Google Sheets Workflow With New Google Sheet Actions
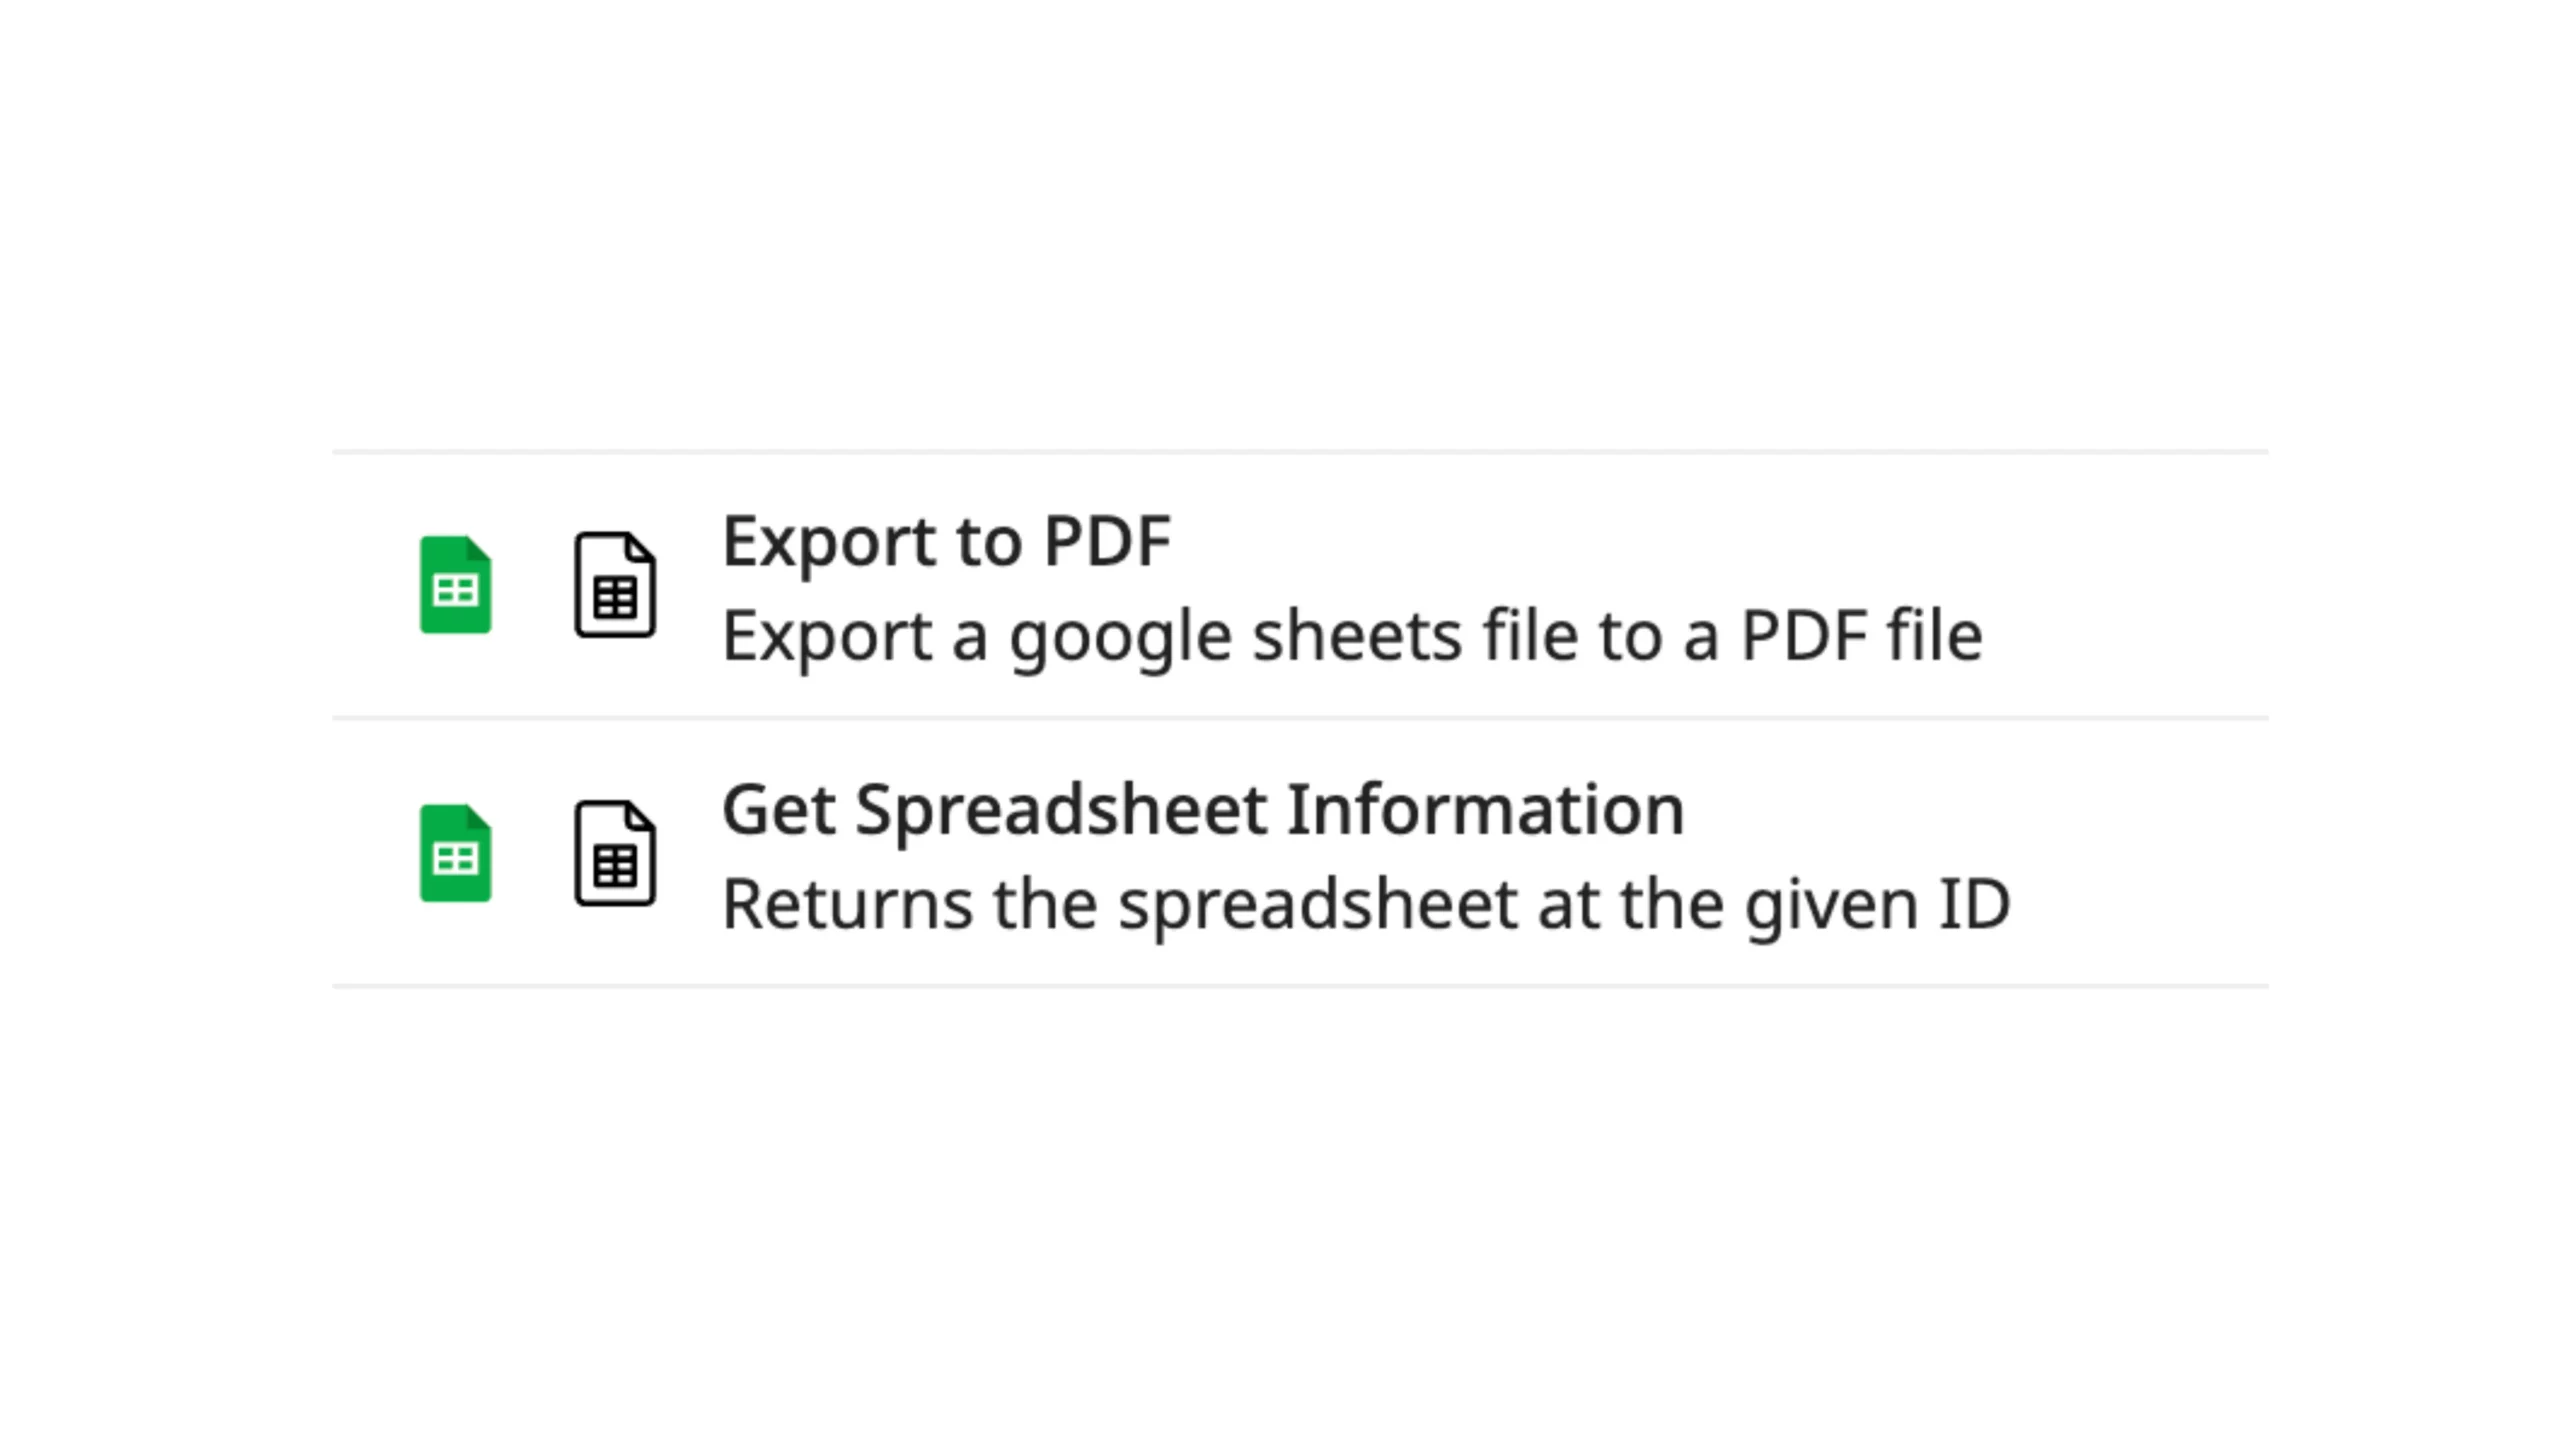
Our Google Sheet integration has received a significant boost with two powerful new actions:
Get Spreadsheets Info
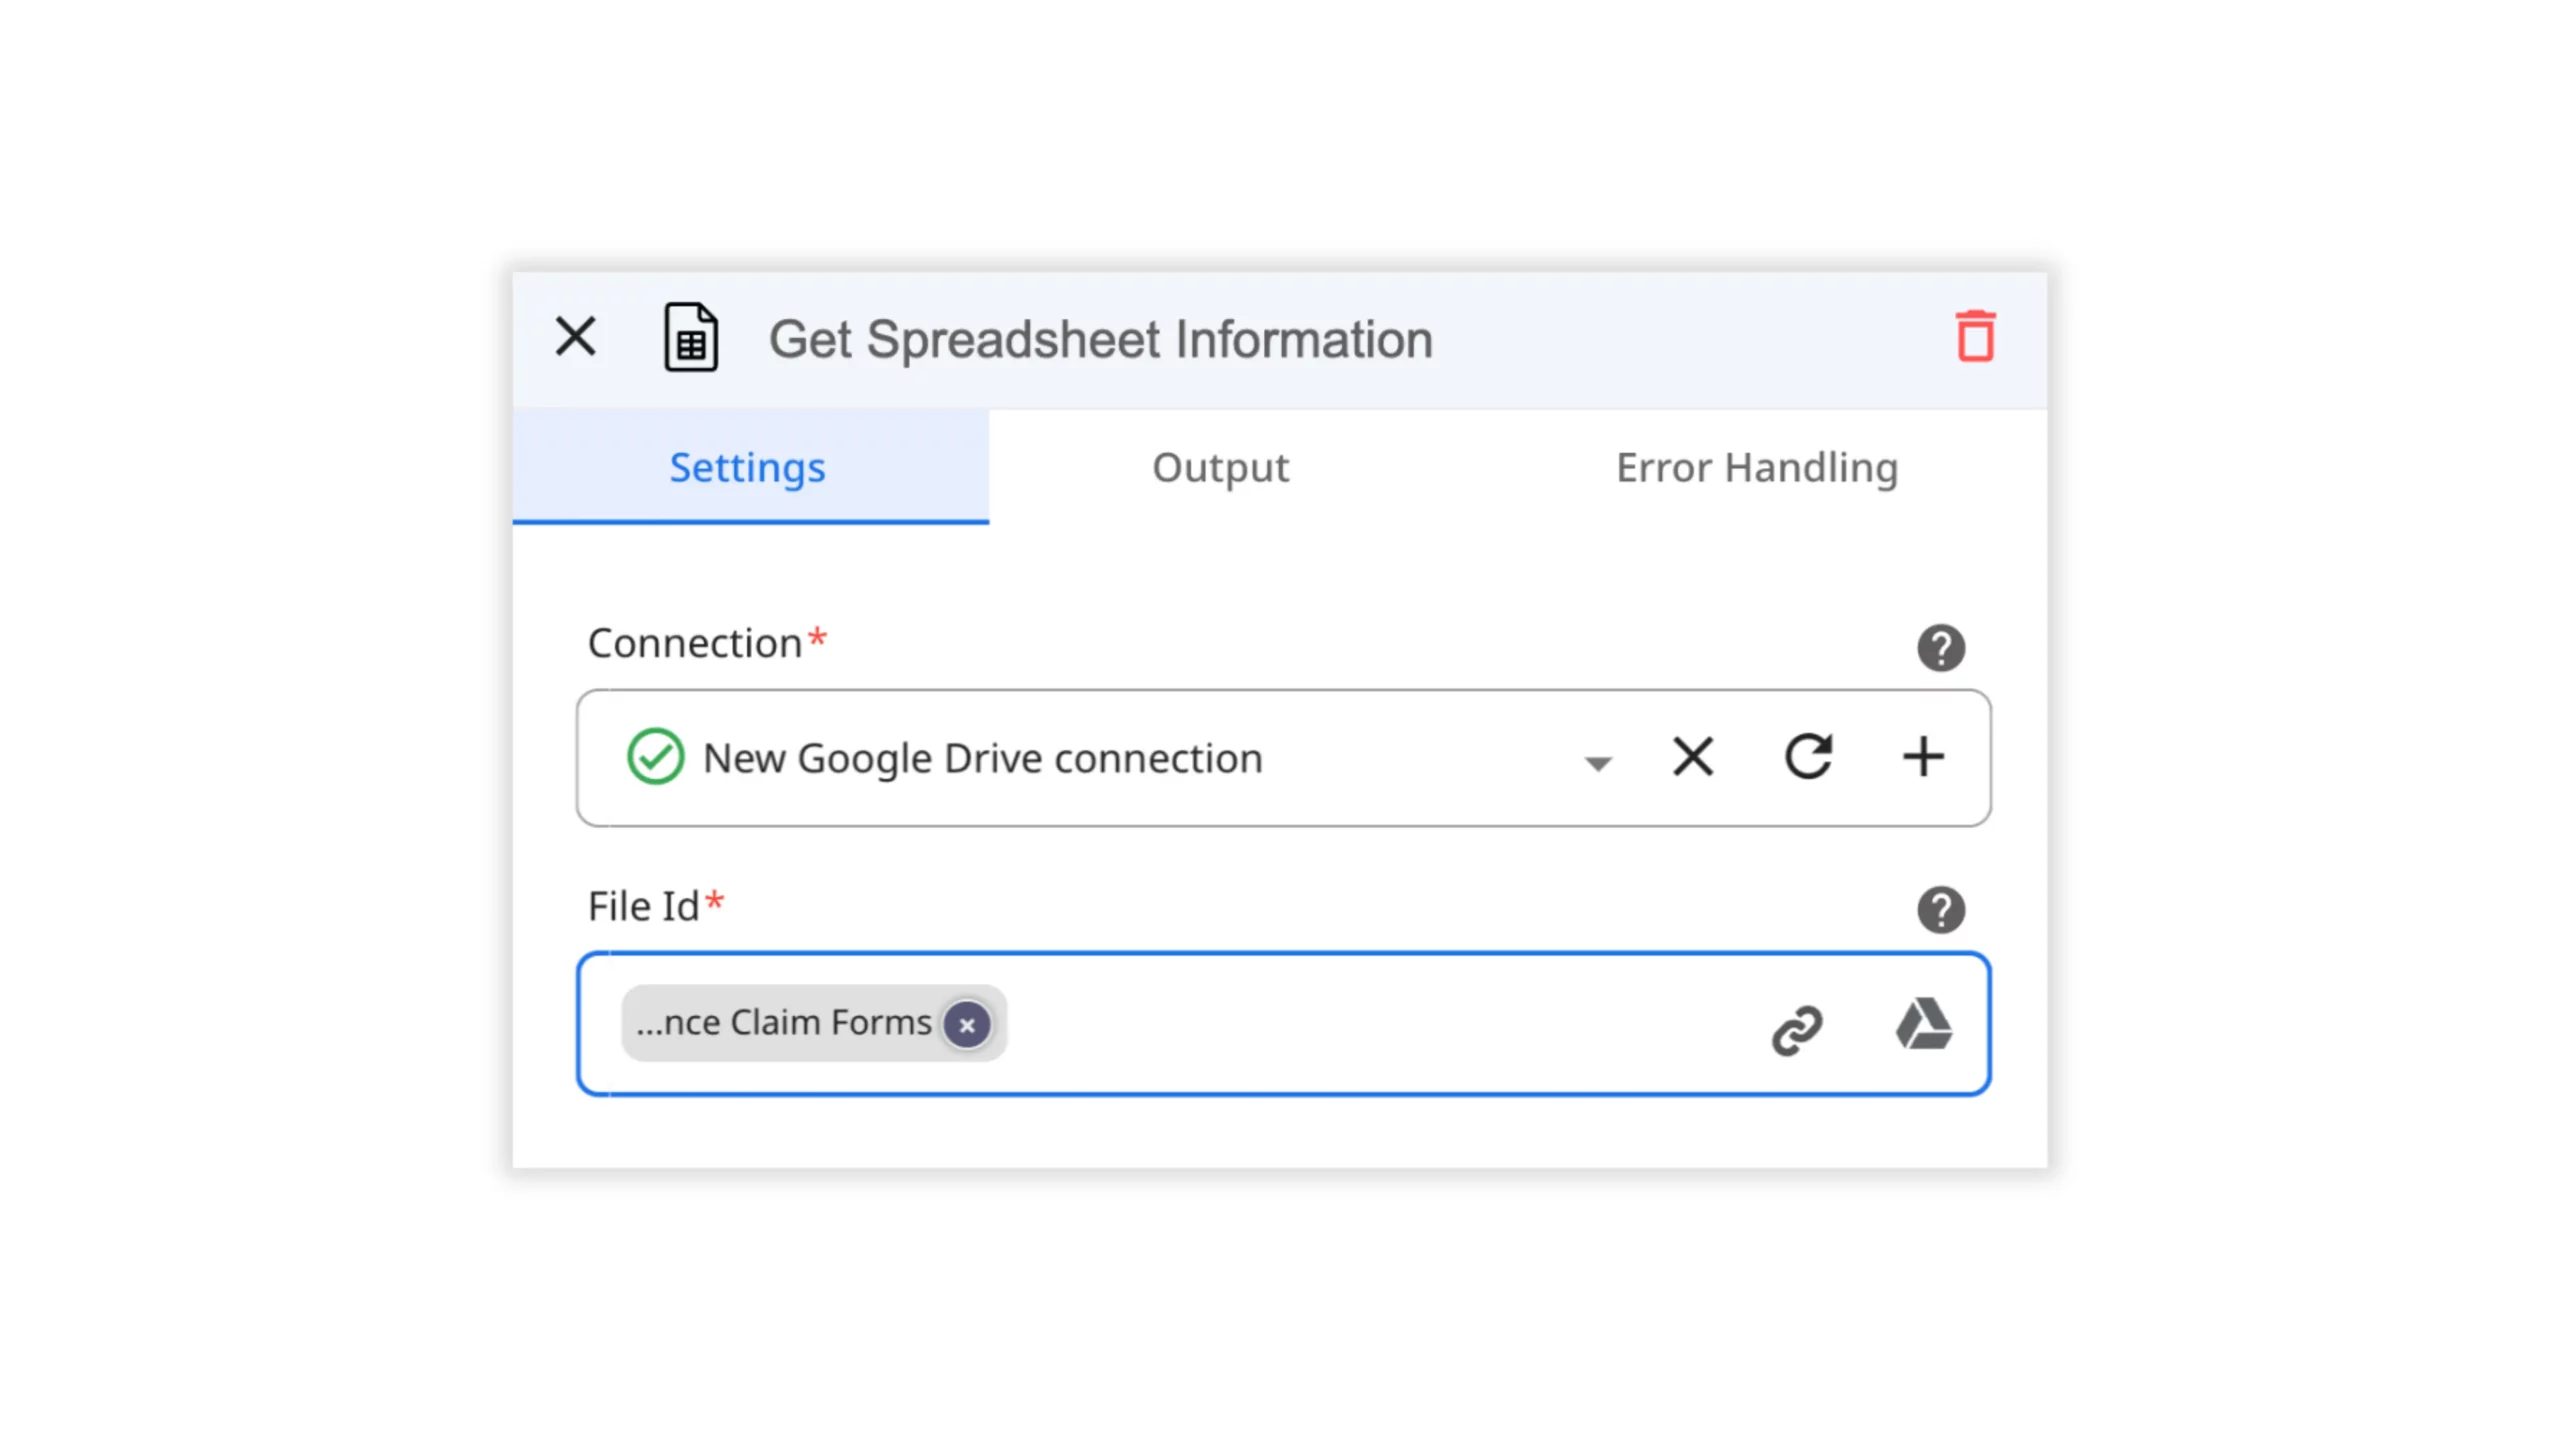
This action allows you to gather essential information from any Google Spreadsheet within your process. You can effortlessly retrieve details such as File ID, Title, View link, and even dive deeper to get information about each Sheet included in the Spreadsheet, such as Sheet ID, Title, Index, Row Count, Column Count, and more.
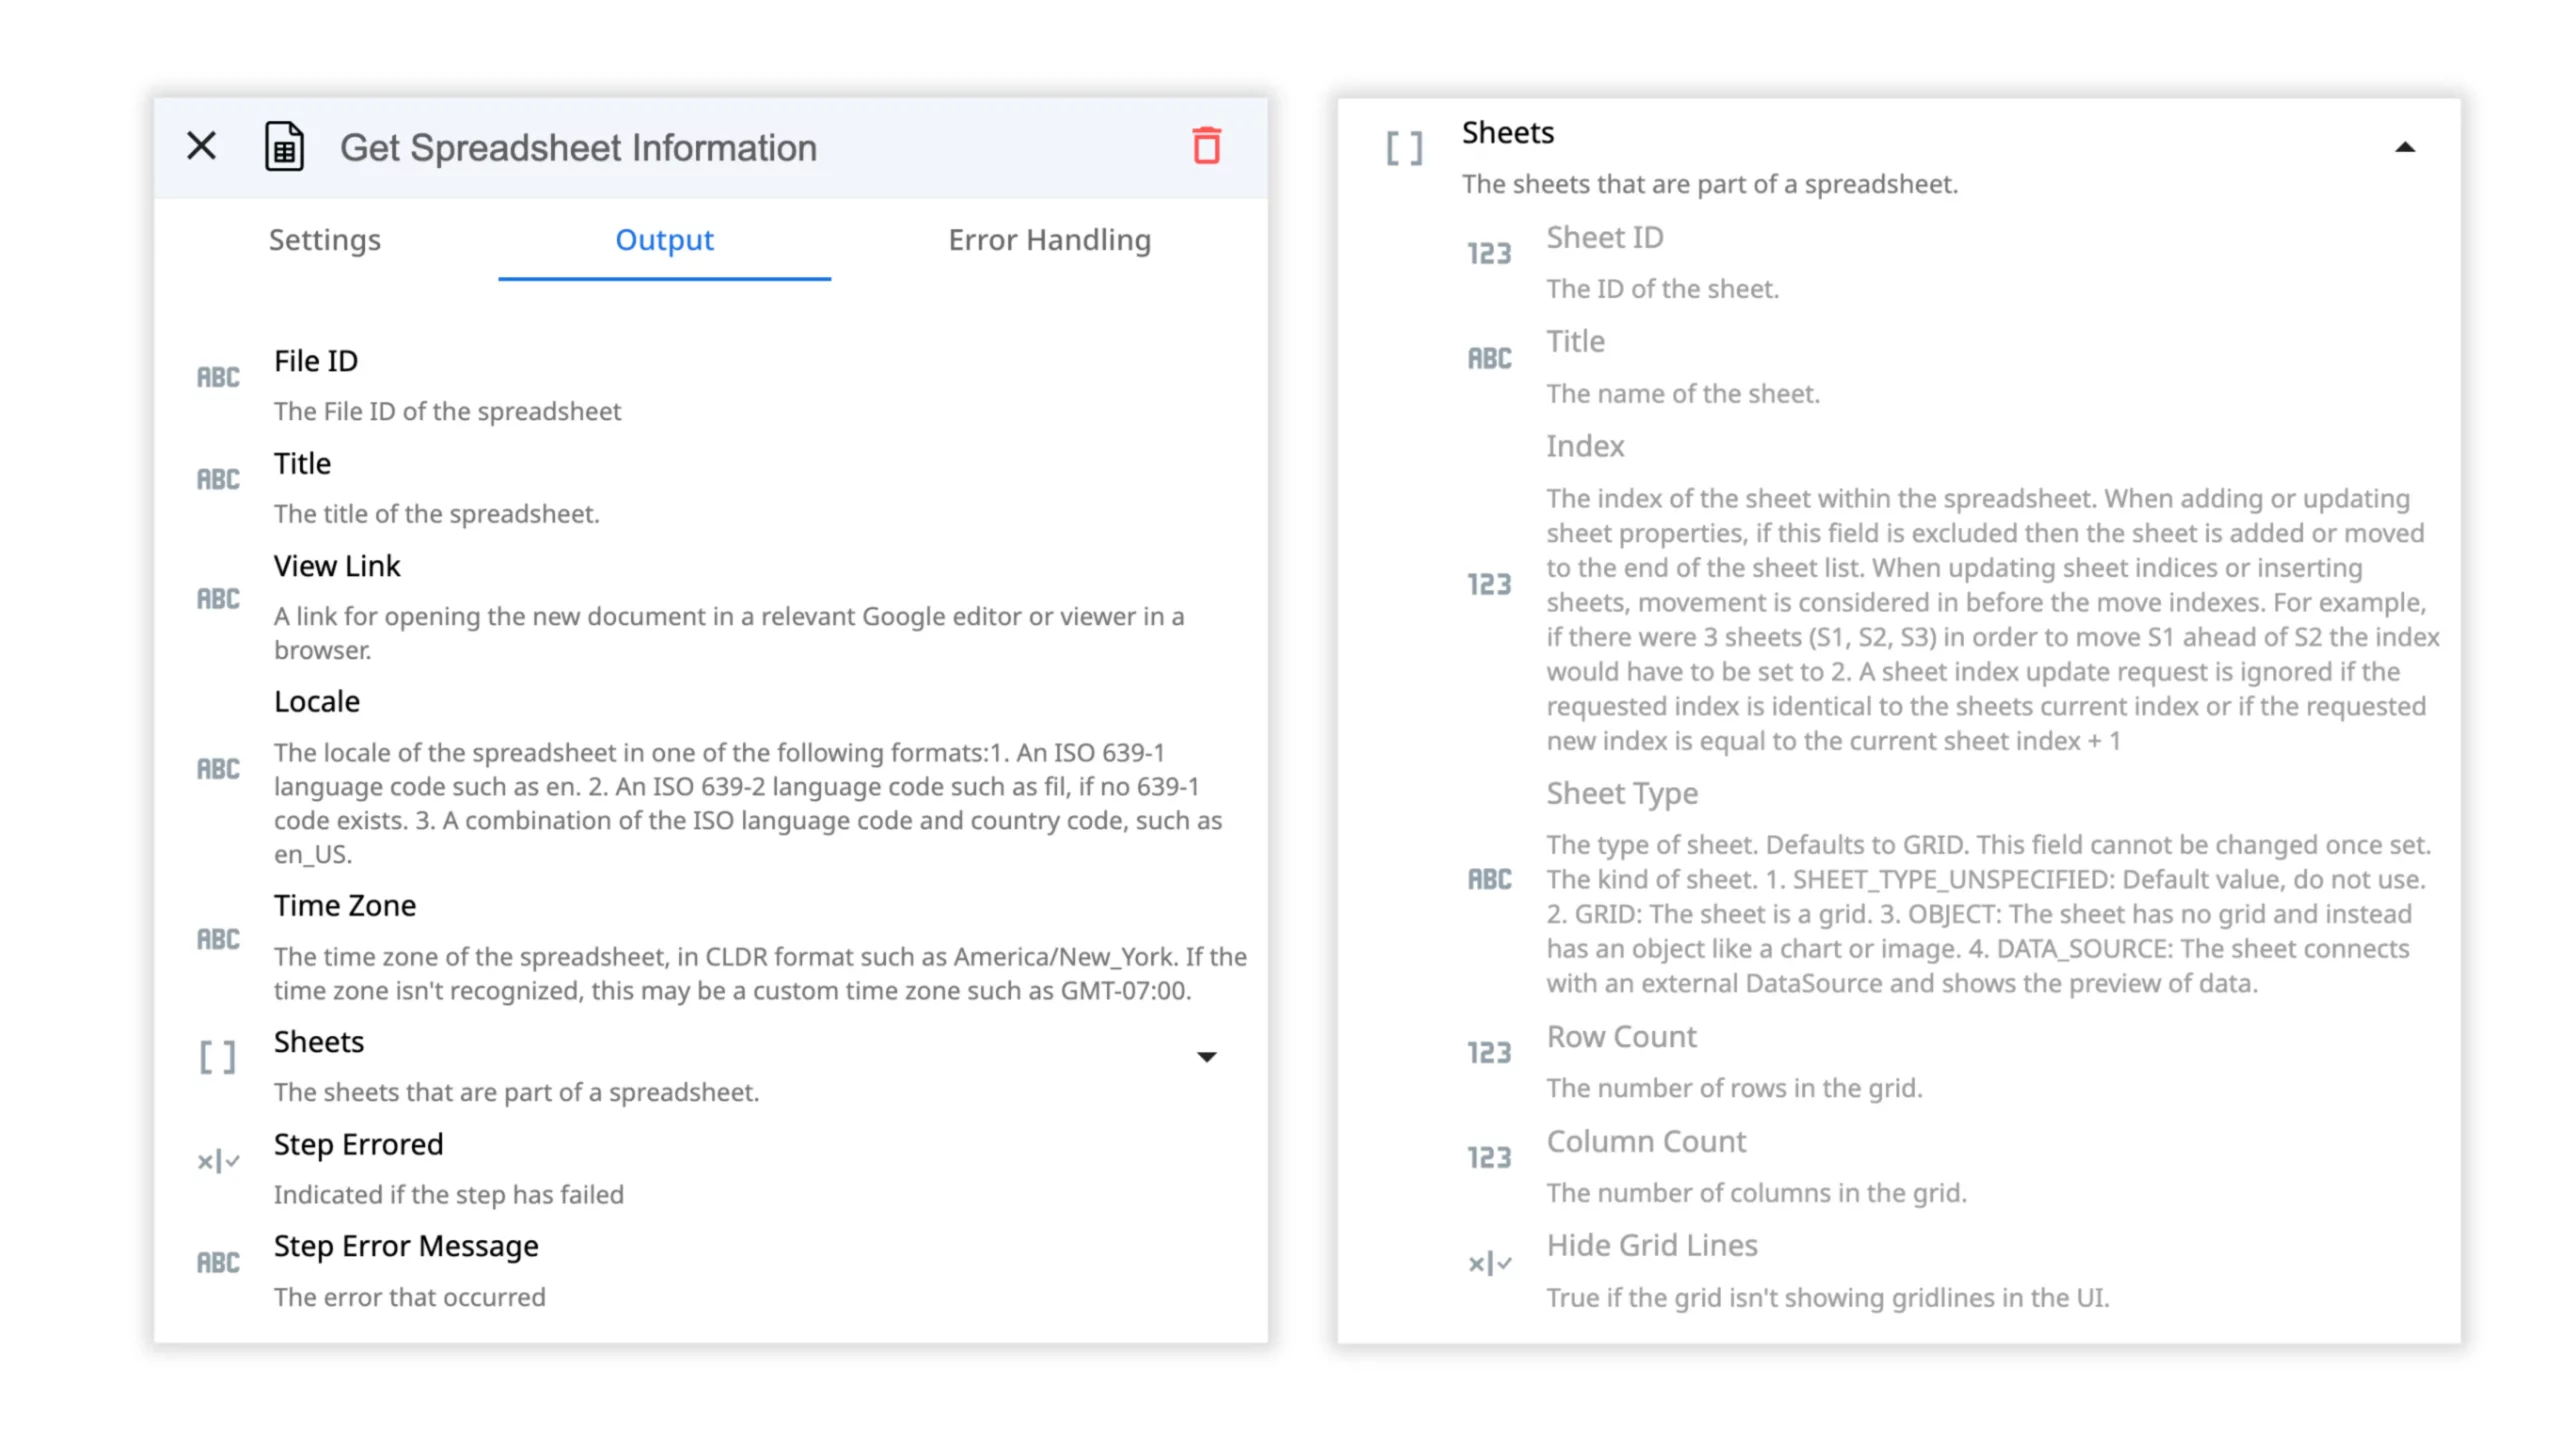
For example, imagine automated report generation using the output data from this action or the ability to easily share data from specified Spreadsheets with your teammates, enhancing collaboration and ensuring that everyone has access to the latest information.
Export Google Spreadsheet as a PDF
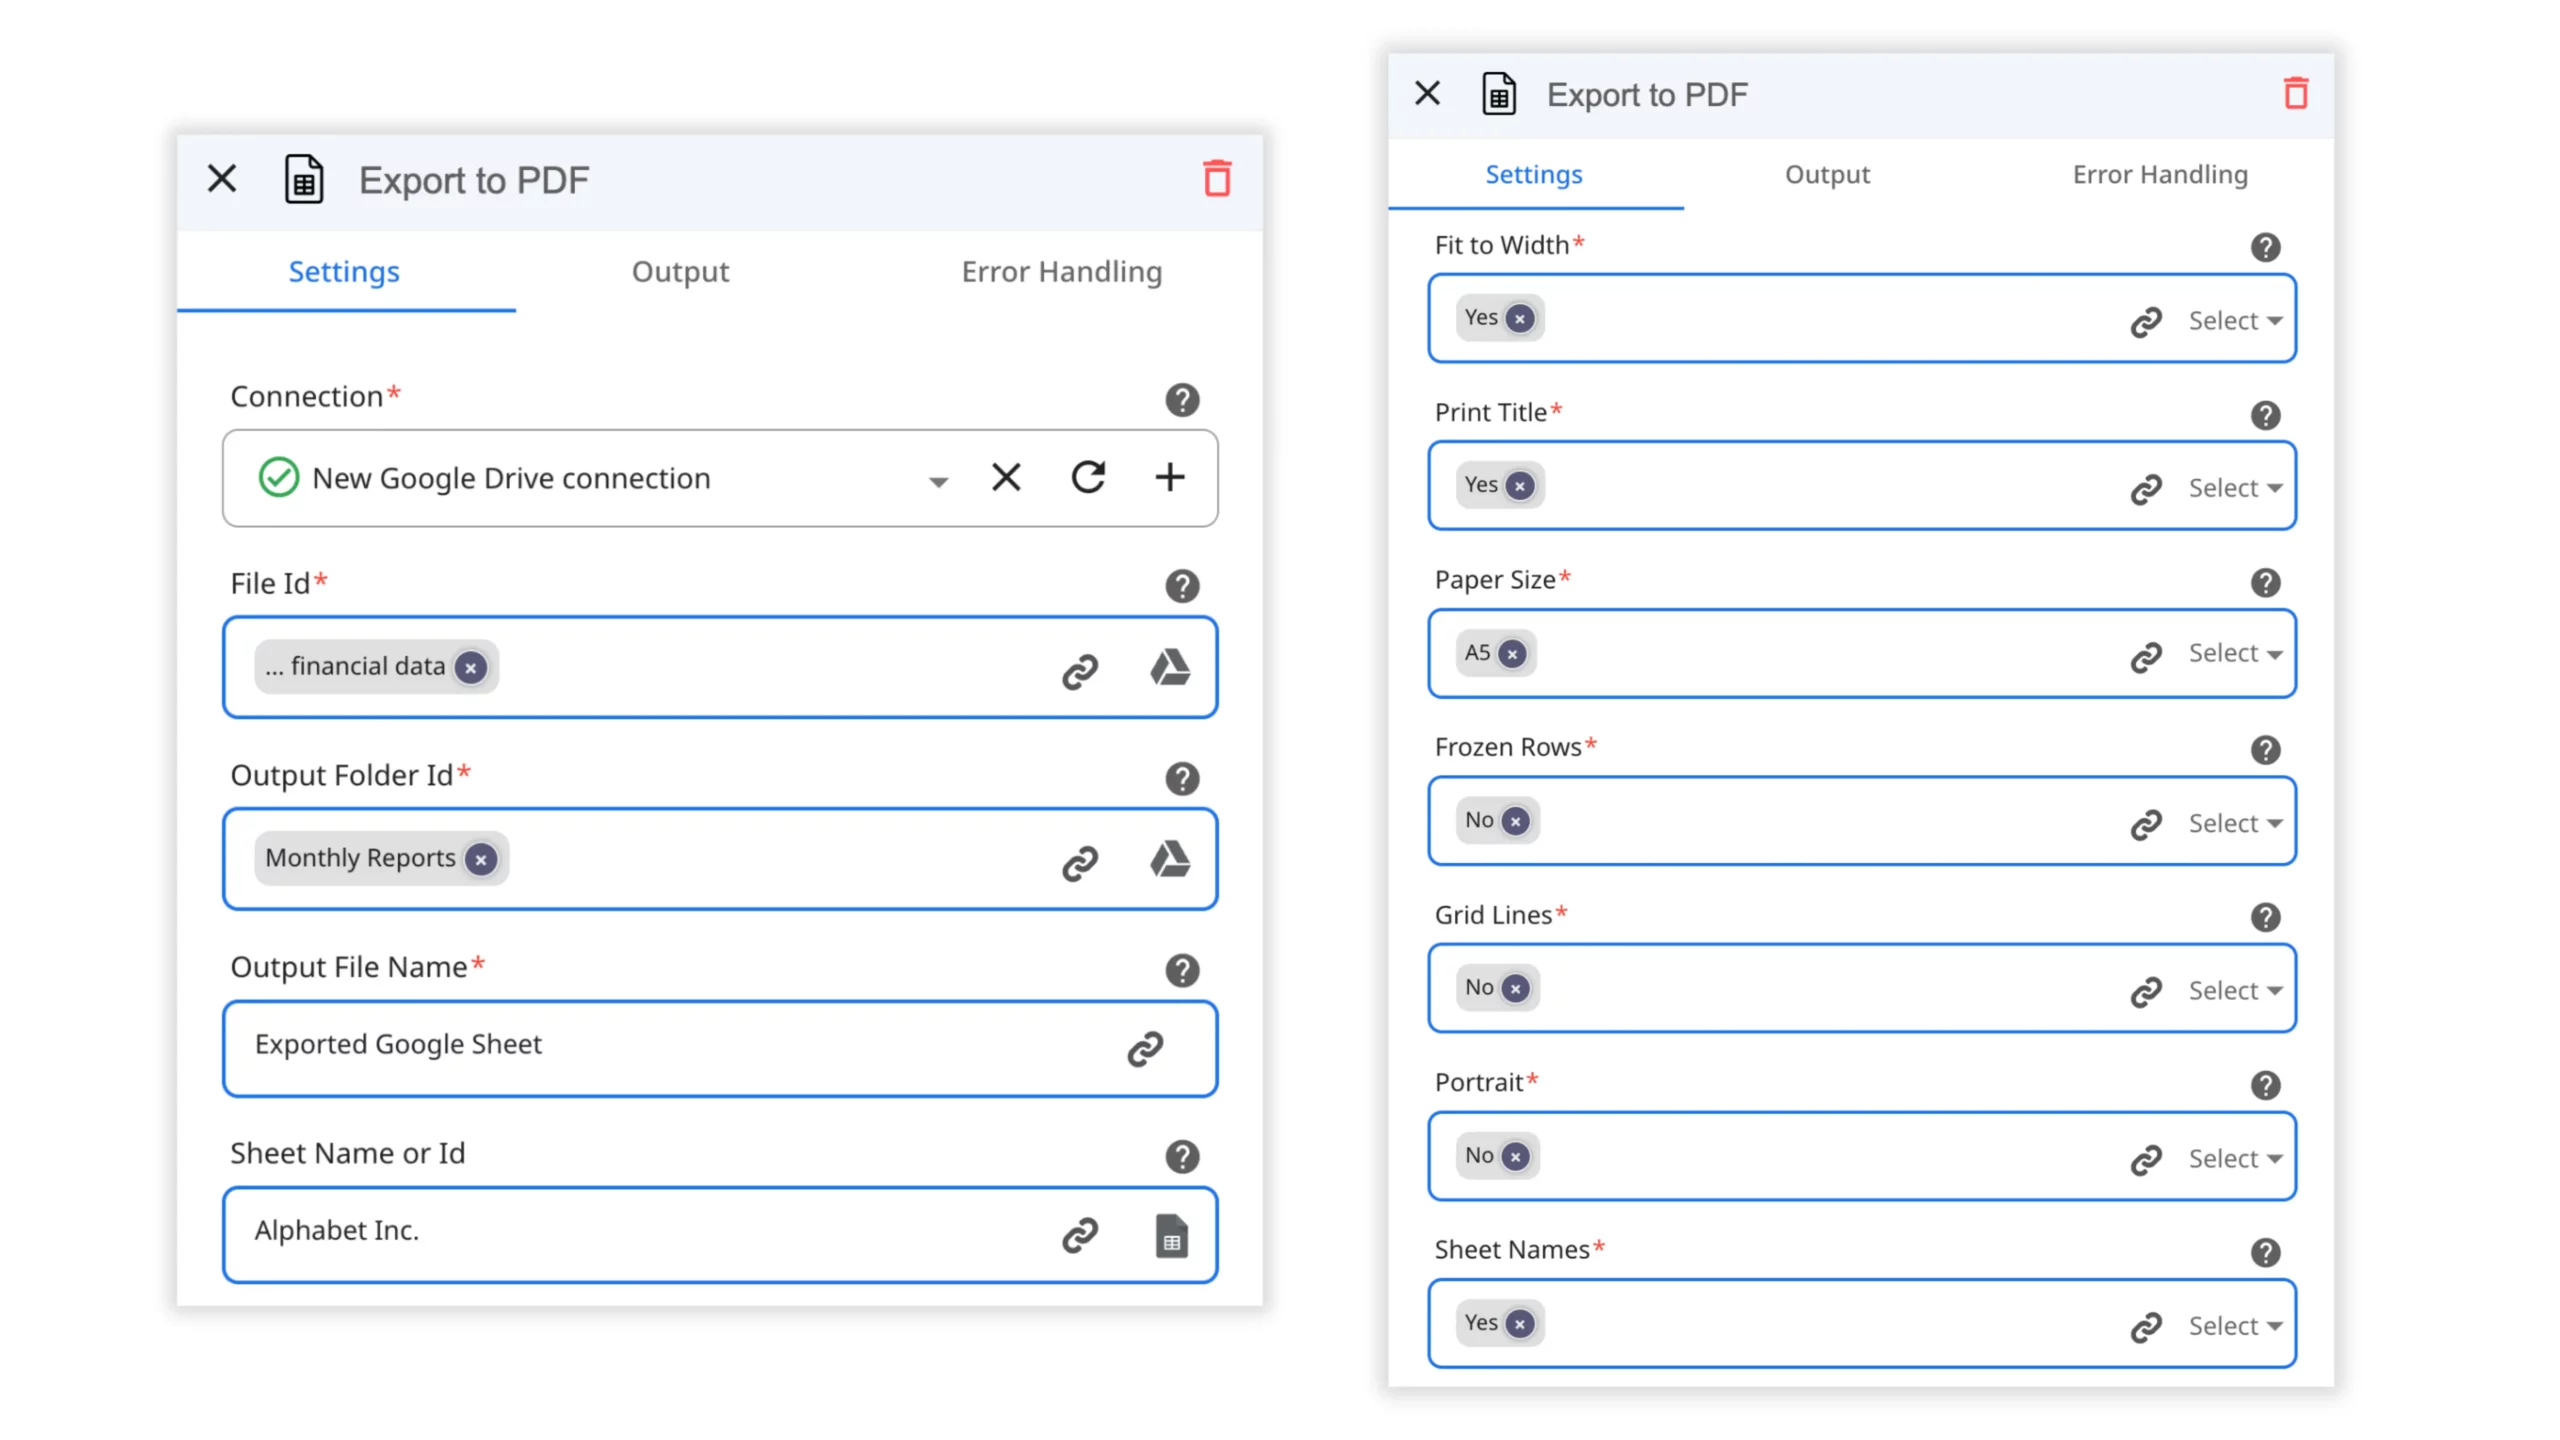
Simplify your document management by automatically exporting Google Spreadsheets to a specified Google Drive folder. Customize the file name, specify the Sheets to display, and set additional parameters such as fit to width, printing titles, paper size, cell range for export, freezing rows, displaying grid lines, and choosing the portrait layout for the PDF.
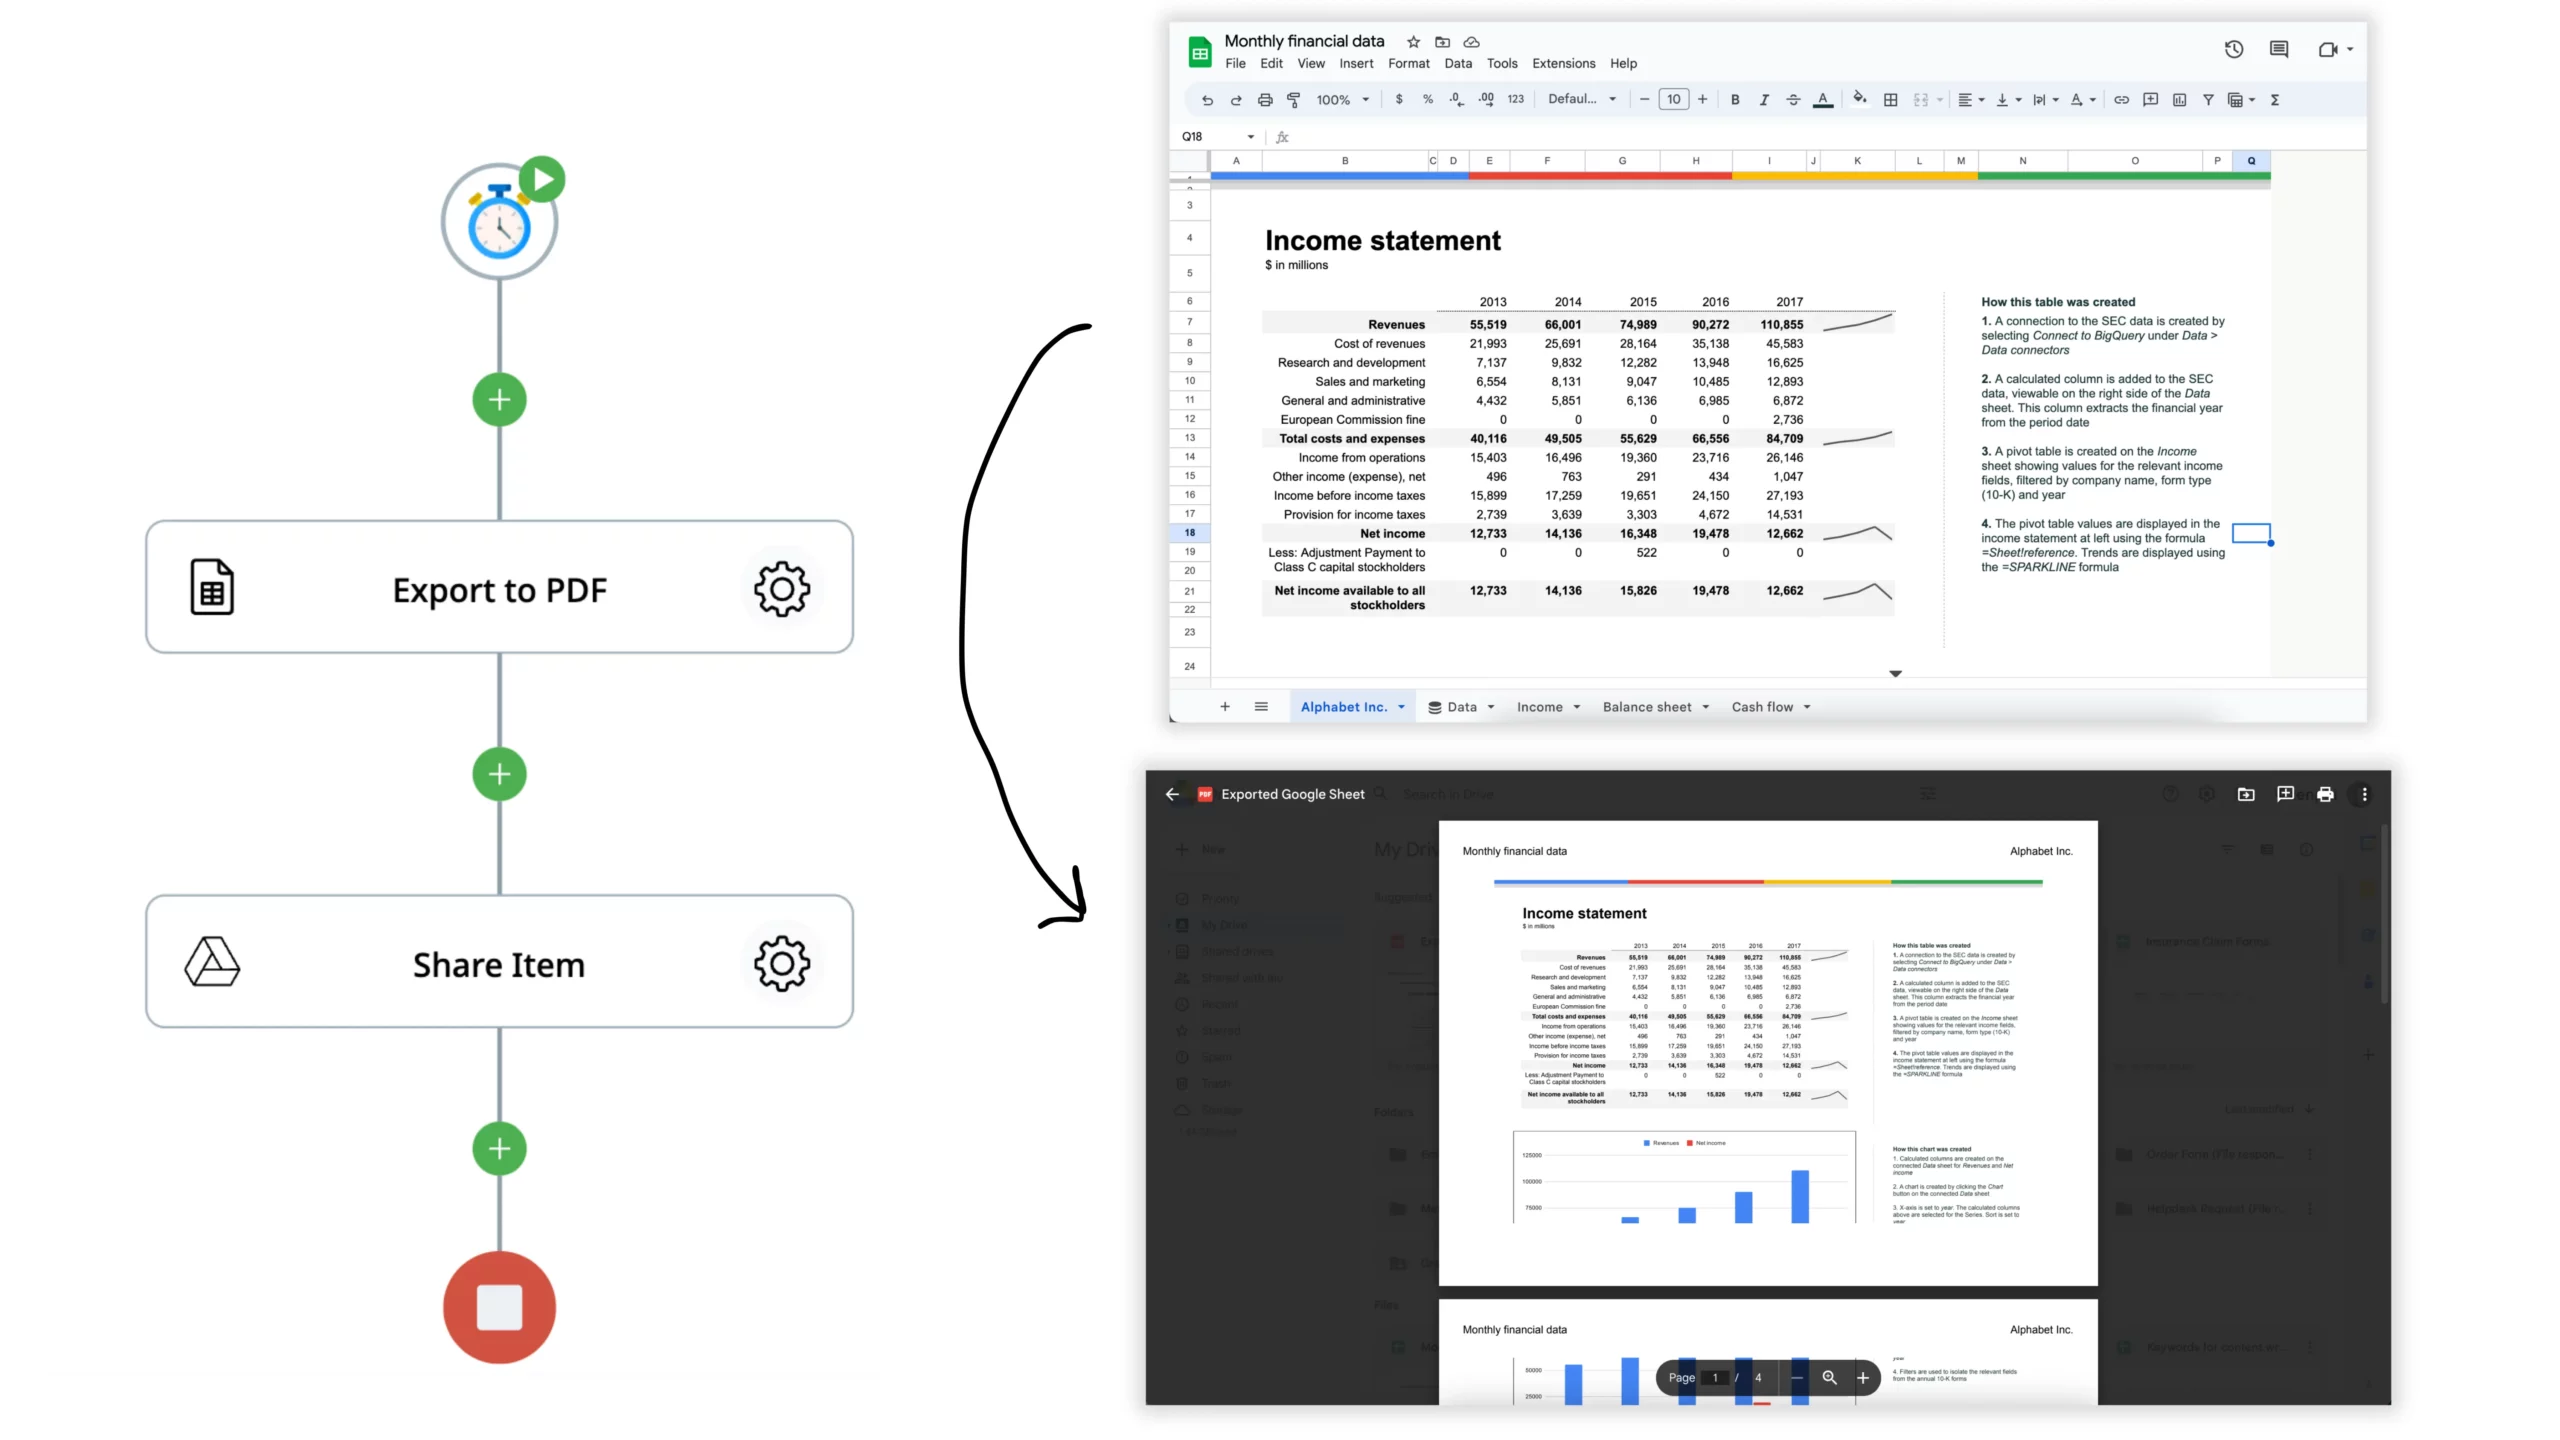
For instance, with this action, you can streamline your financial reporting process by automating the export of monthly financial data to a PDF file. Not only that, but you can also designate a specific Google Drive folder to store the files and even automatically share them with stakeholders and relevant team members. This ensures that your team always has the latest financial reports readily available in a convenient format at their fingertips. By incorporating this action into your workflow, you can save valuable time, reduce manual effort, and improve the accessibility and efficiency of your financial reporting processes.
2. Section Rules in zenphi Forms
We are excited to announce that zenphi Forms now come equipped with even greater power, thanks to the introduction of Section Rules. This new feature allows you to personalize form content based on real-time data from your processes, making your form interactions more dynamic and user-specific. Not only can you display form sections based on previous answers from multiple-choice sections, but you can also take it a step further and base it on all the data collected within the form, irrespective of the question type.
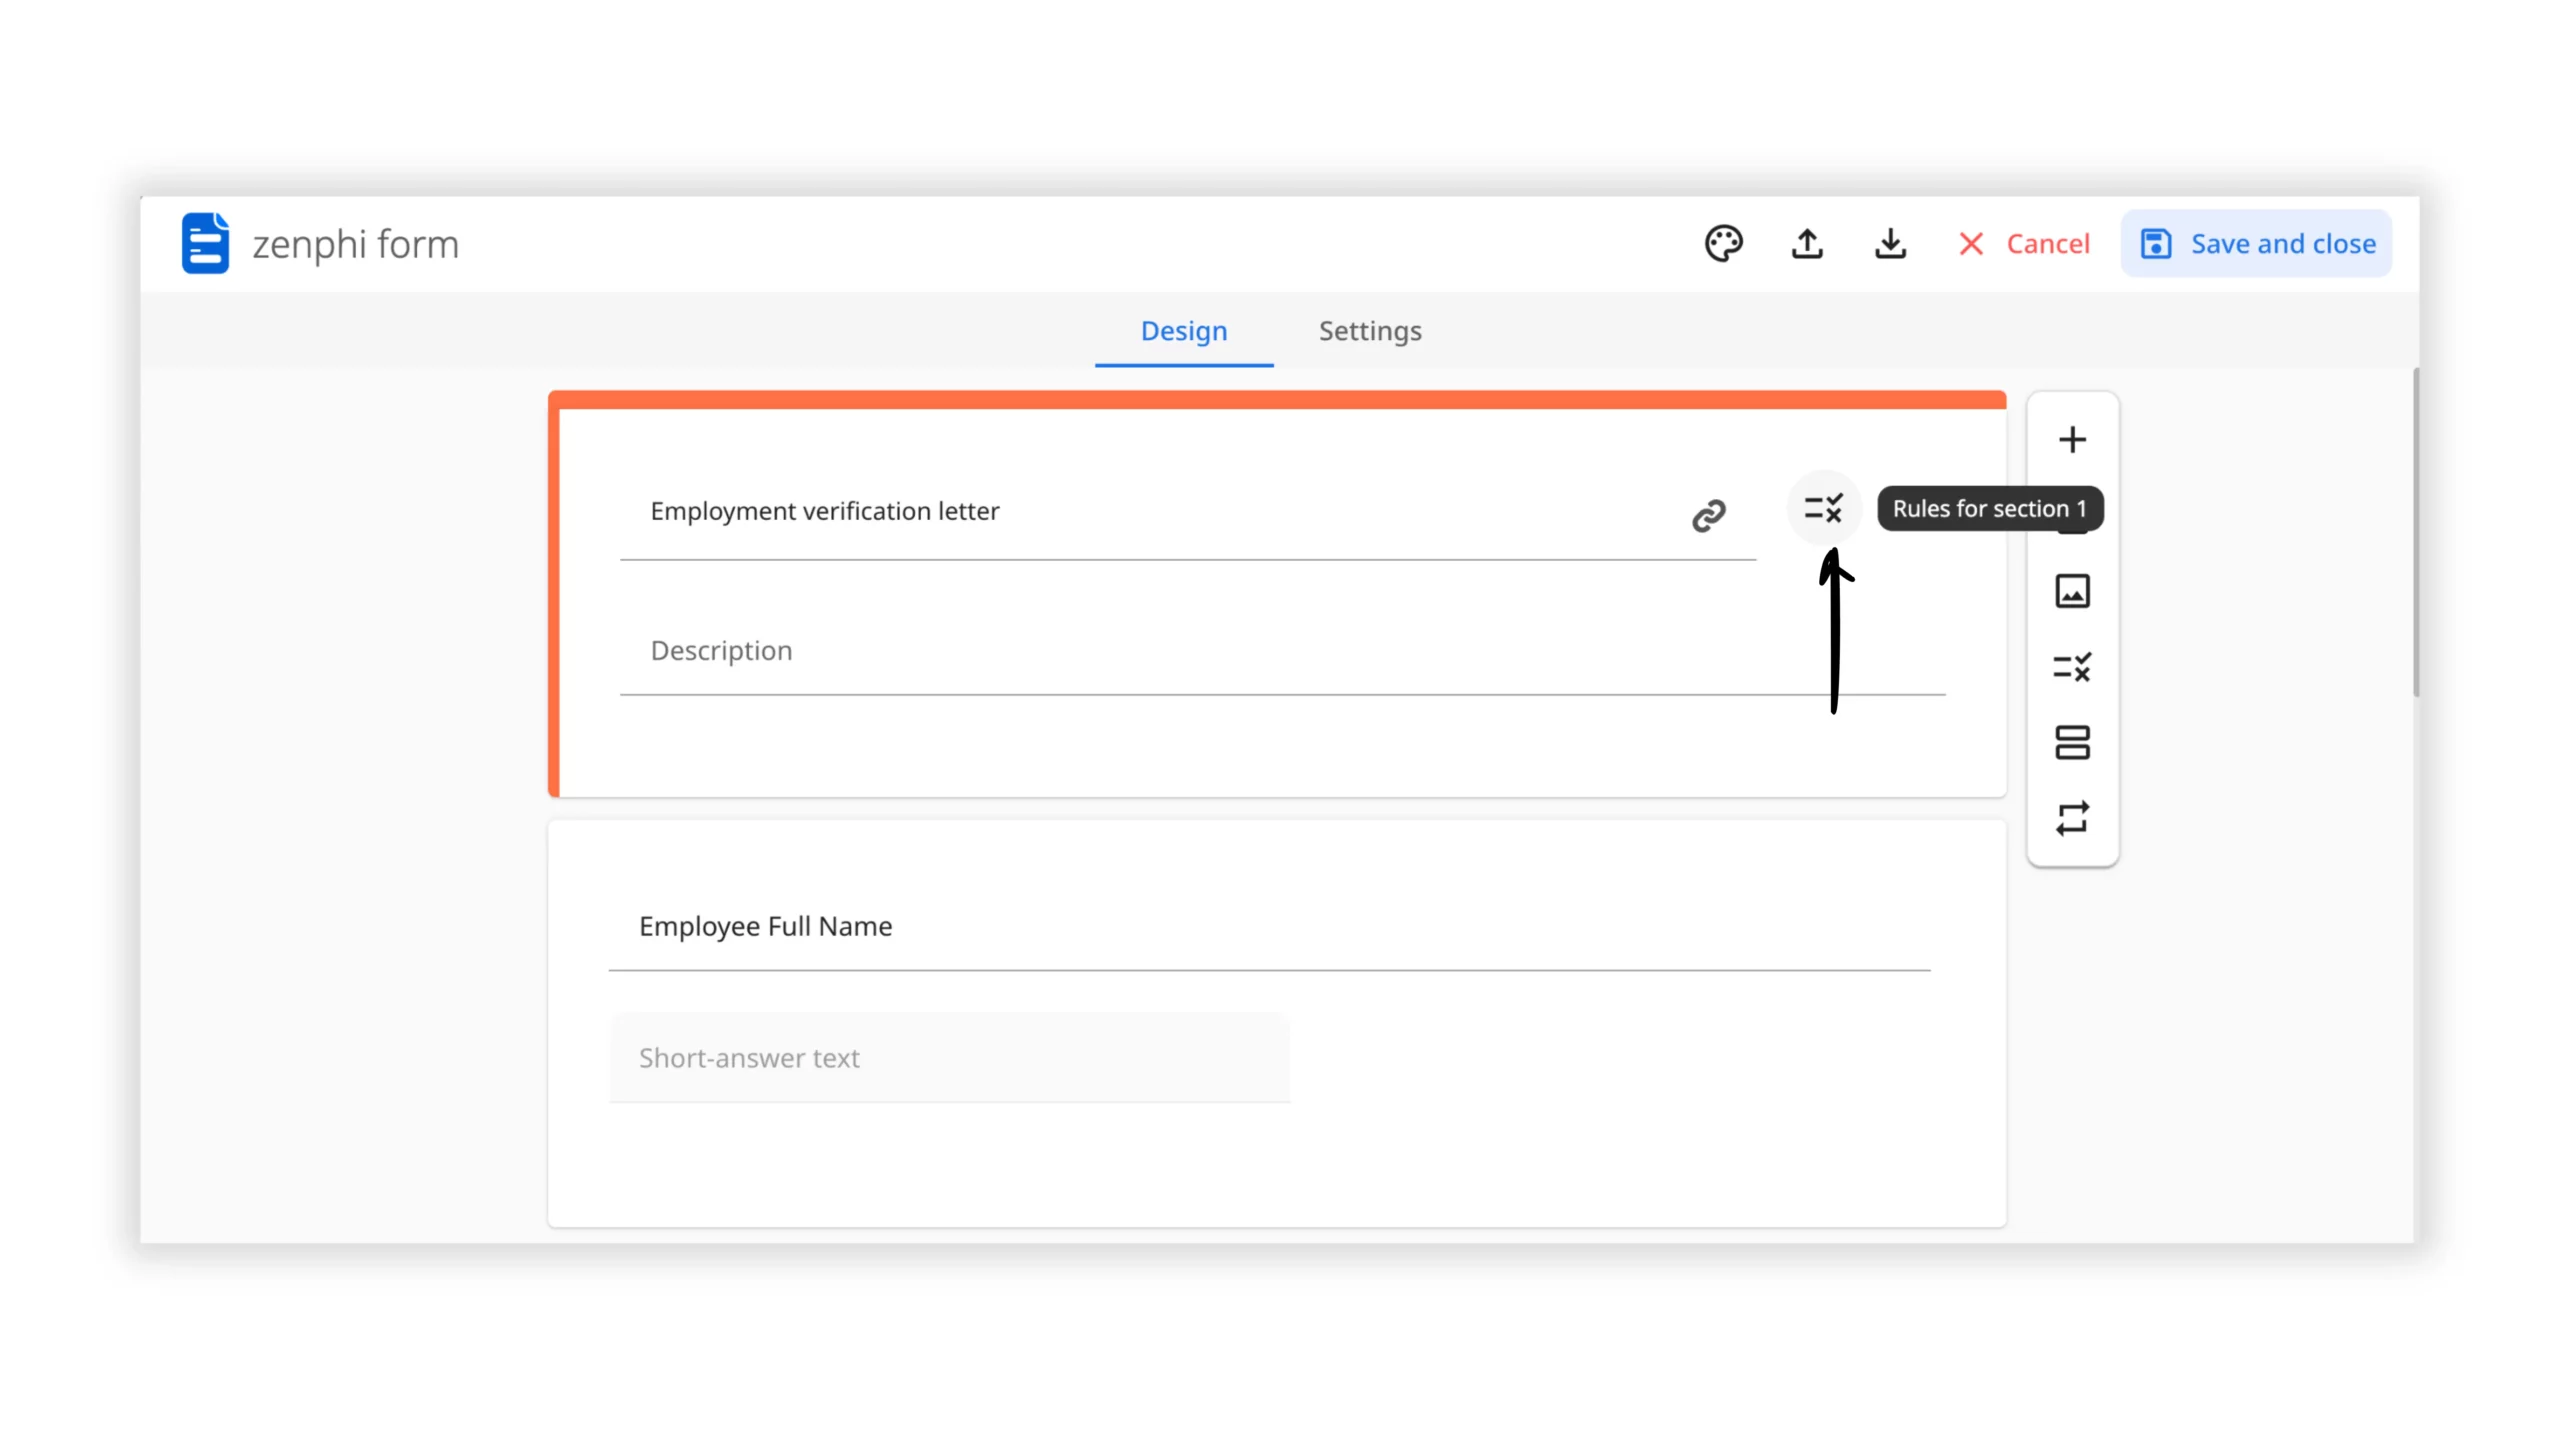
Let’s explore a practical example of how you can leverage this feature to enhance your business processes:
Example: Automating Personalized Employee Documents
Imagine using a zenphi Form to automate the process of generating personalized employee documents. During the form submission, employees specify their job titles. With the introduction of section rules, the form can now display unique questions tailored to each employee’s role. For instance, a manager might be presented with questions related to team management, while an individual contributor could encounter questions related to their specific tasks or responsibilities.
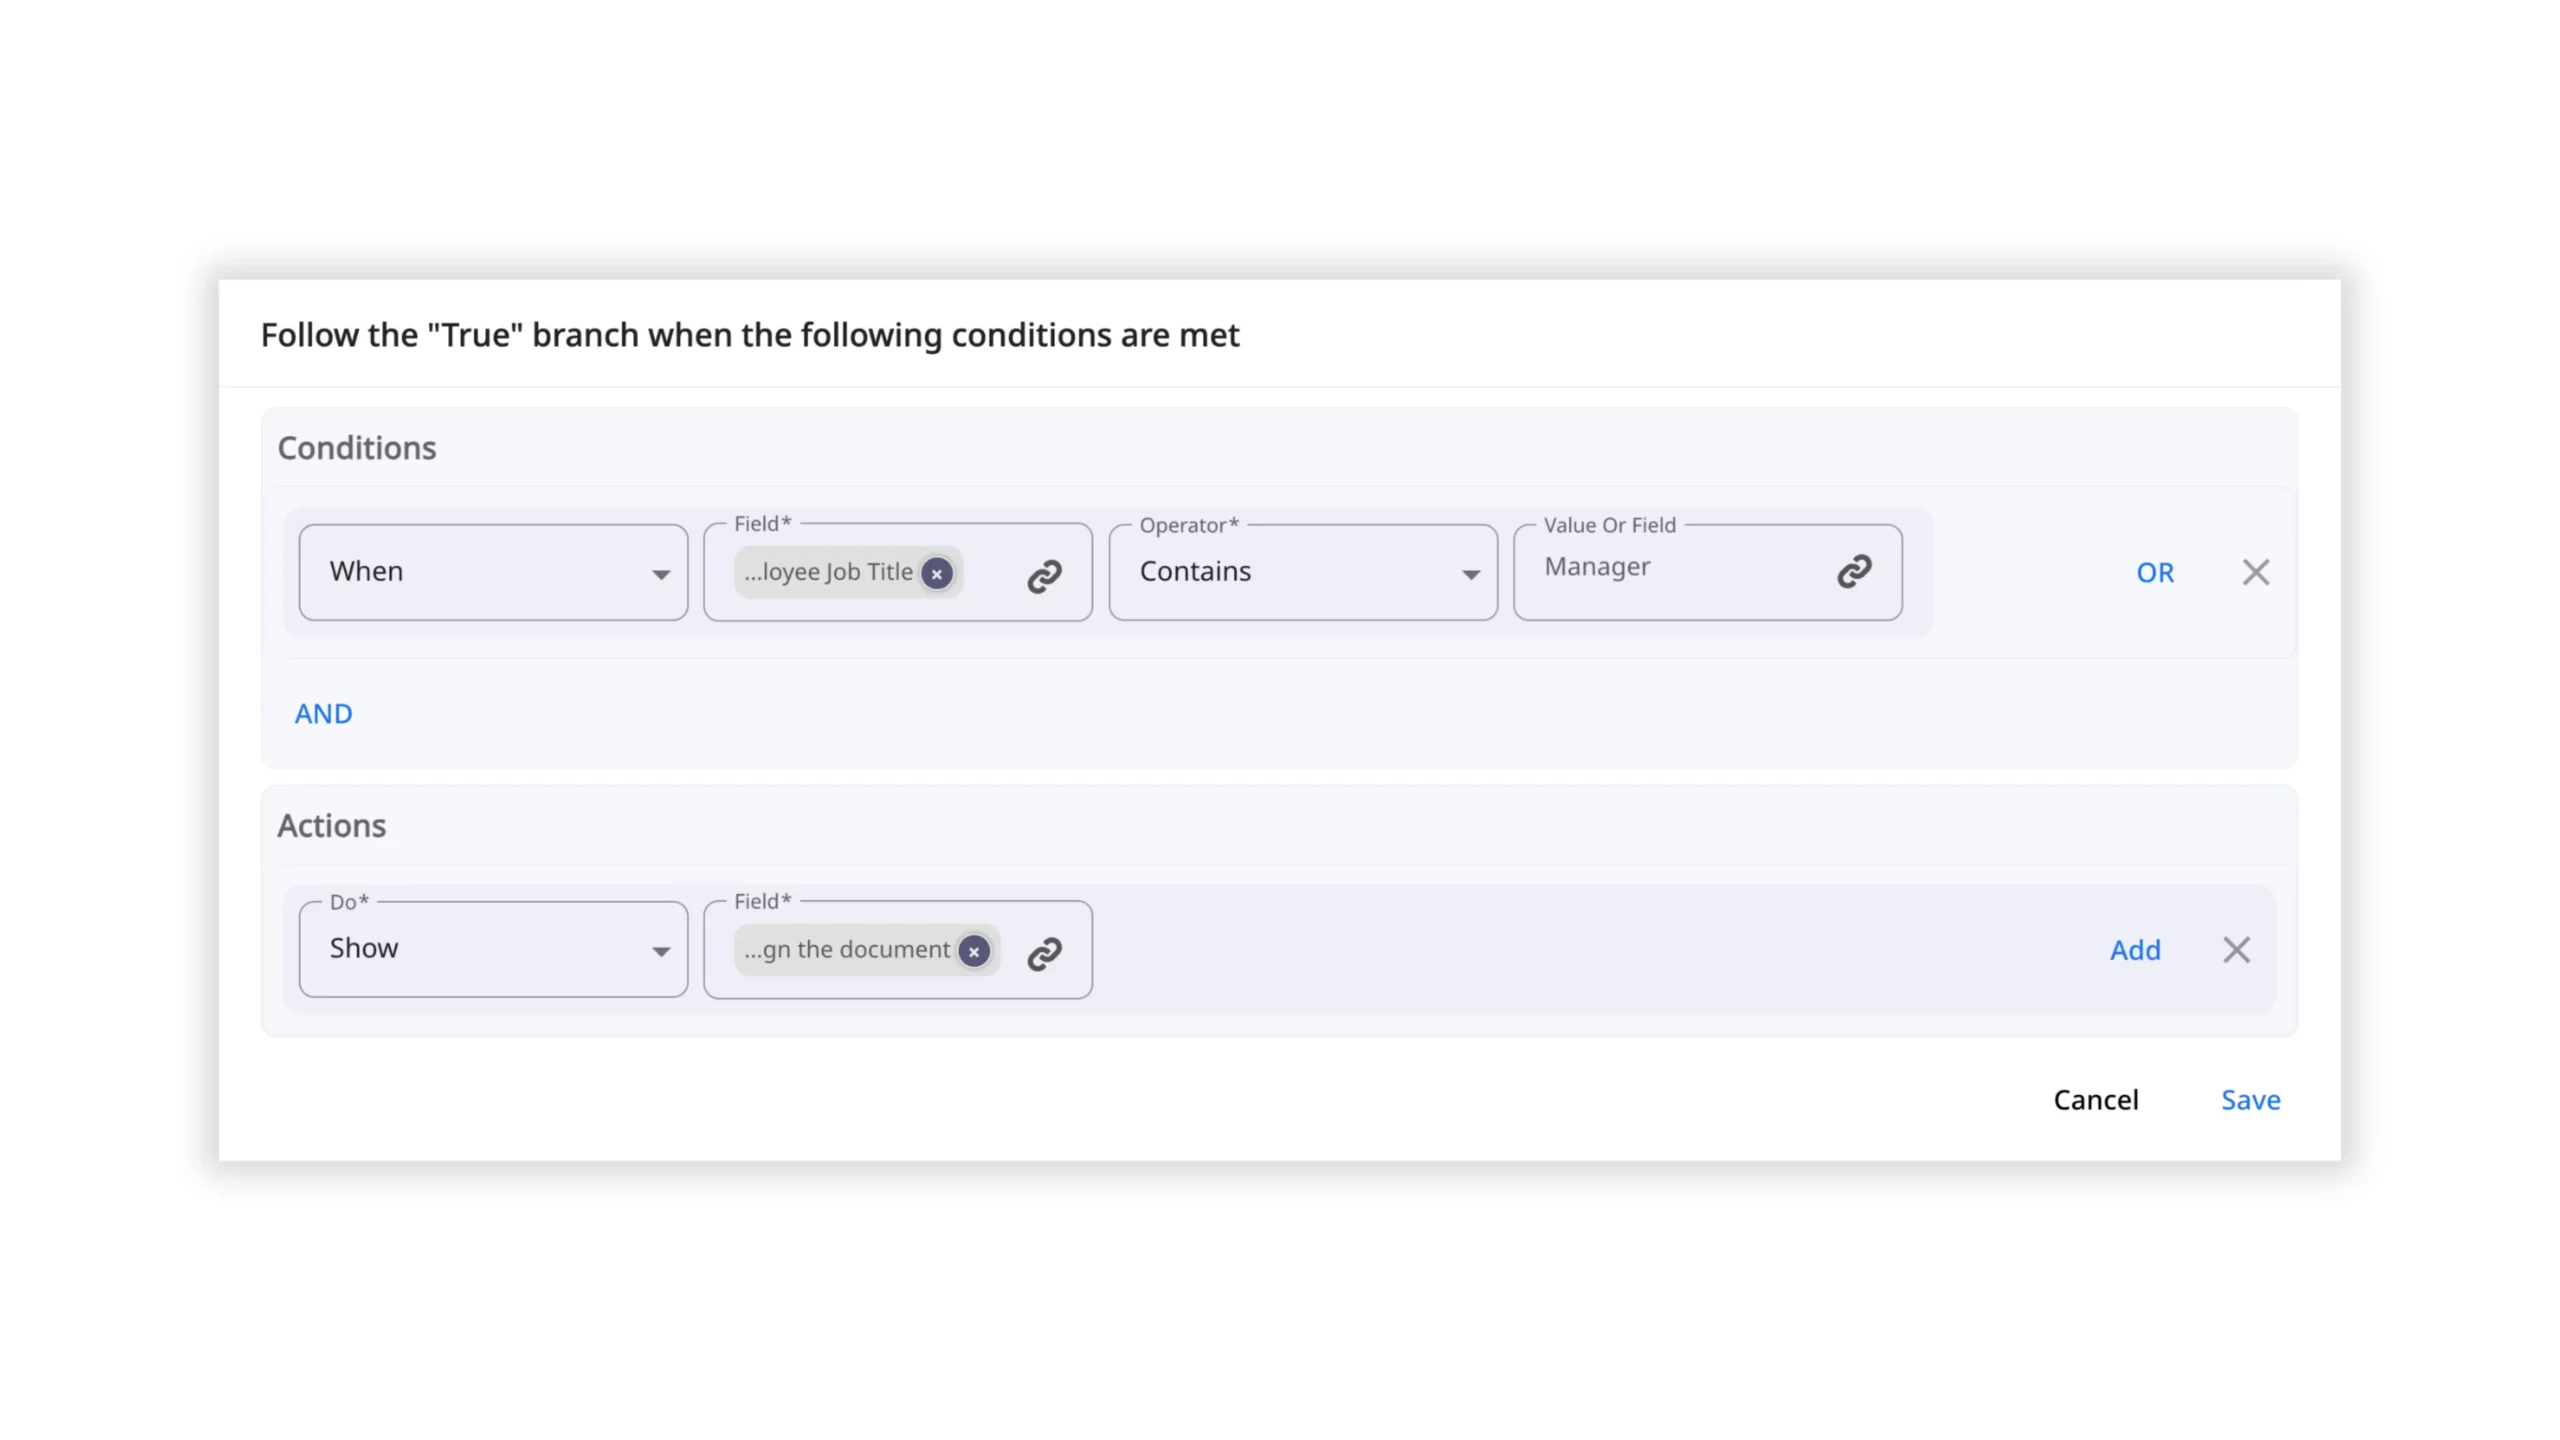
This feature streamlines the data collection process, ensuring that relevant and role-specific questions are displayed based on individual requirements. As a result, the form becomes a personalized experience for each employee, enhancing engagement and accuracy in the information gathered.
Advanced Rules for Greater Customization
But it doesn’t stop there! With zenphi Forms, you have the flexibility to create advanced rules using and/or operators. This allows you to show or hide specific questions based on complex conditions, providing an even deeper level of customization and personalization. Moreover, you are able to add multiple rules per section.
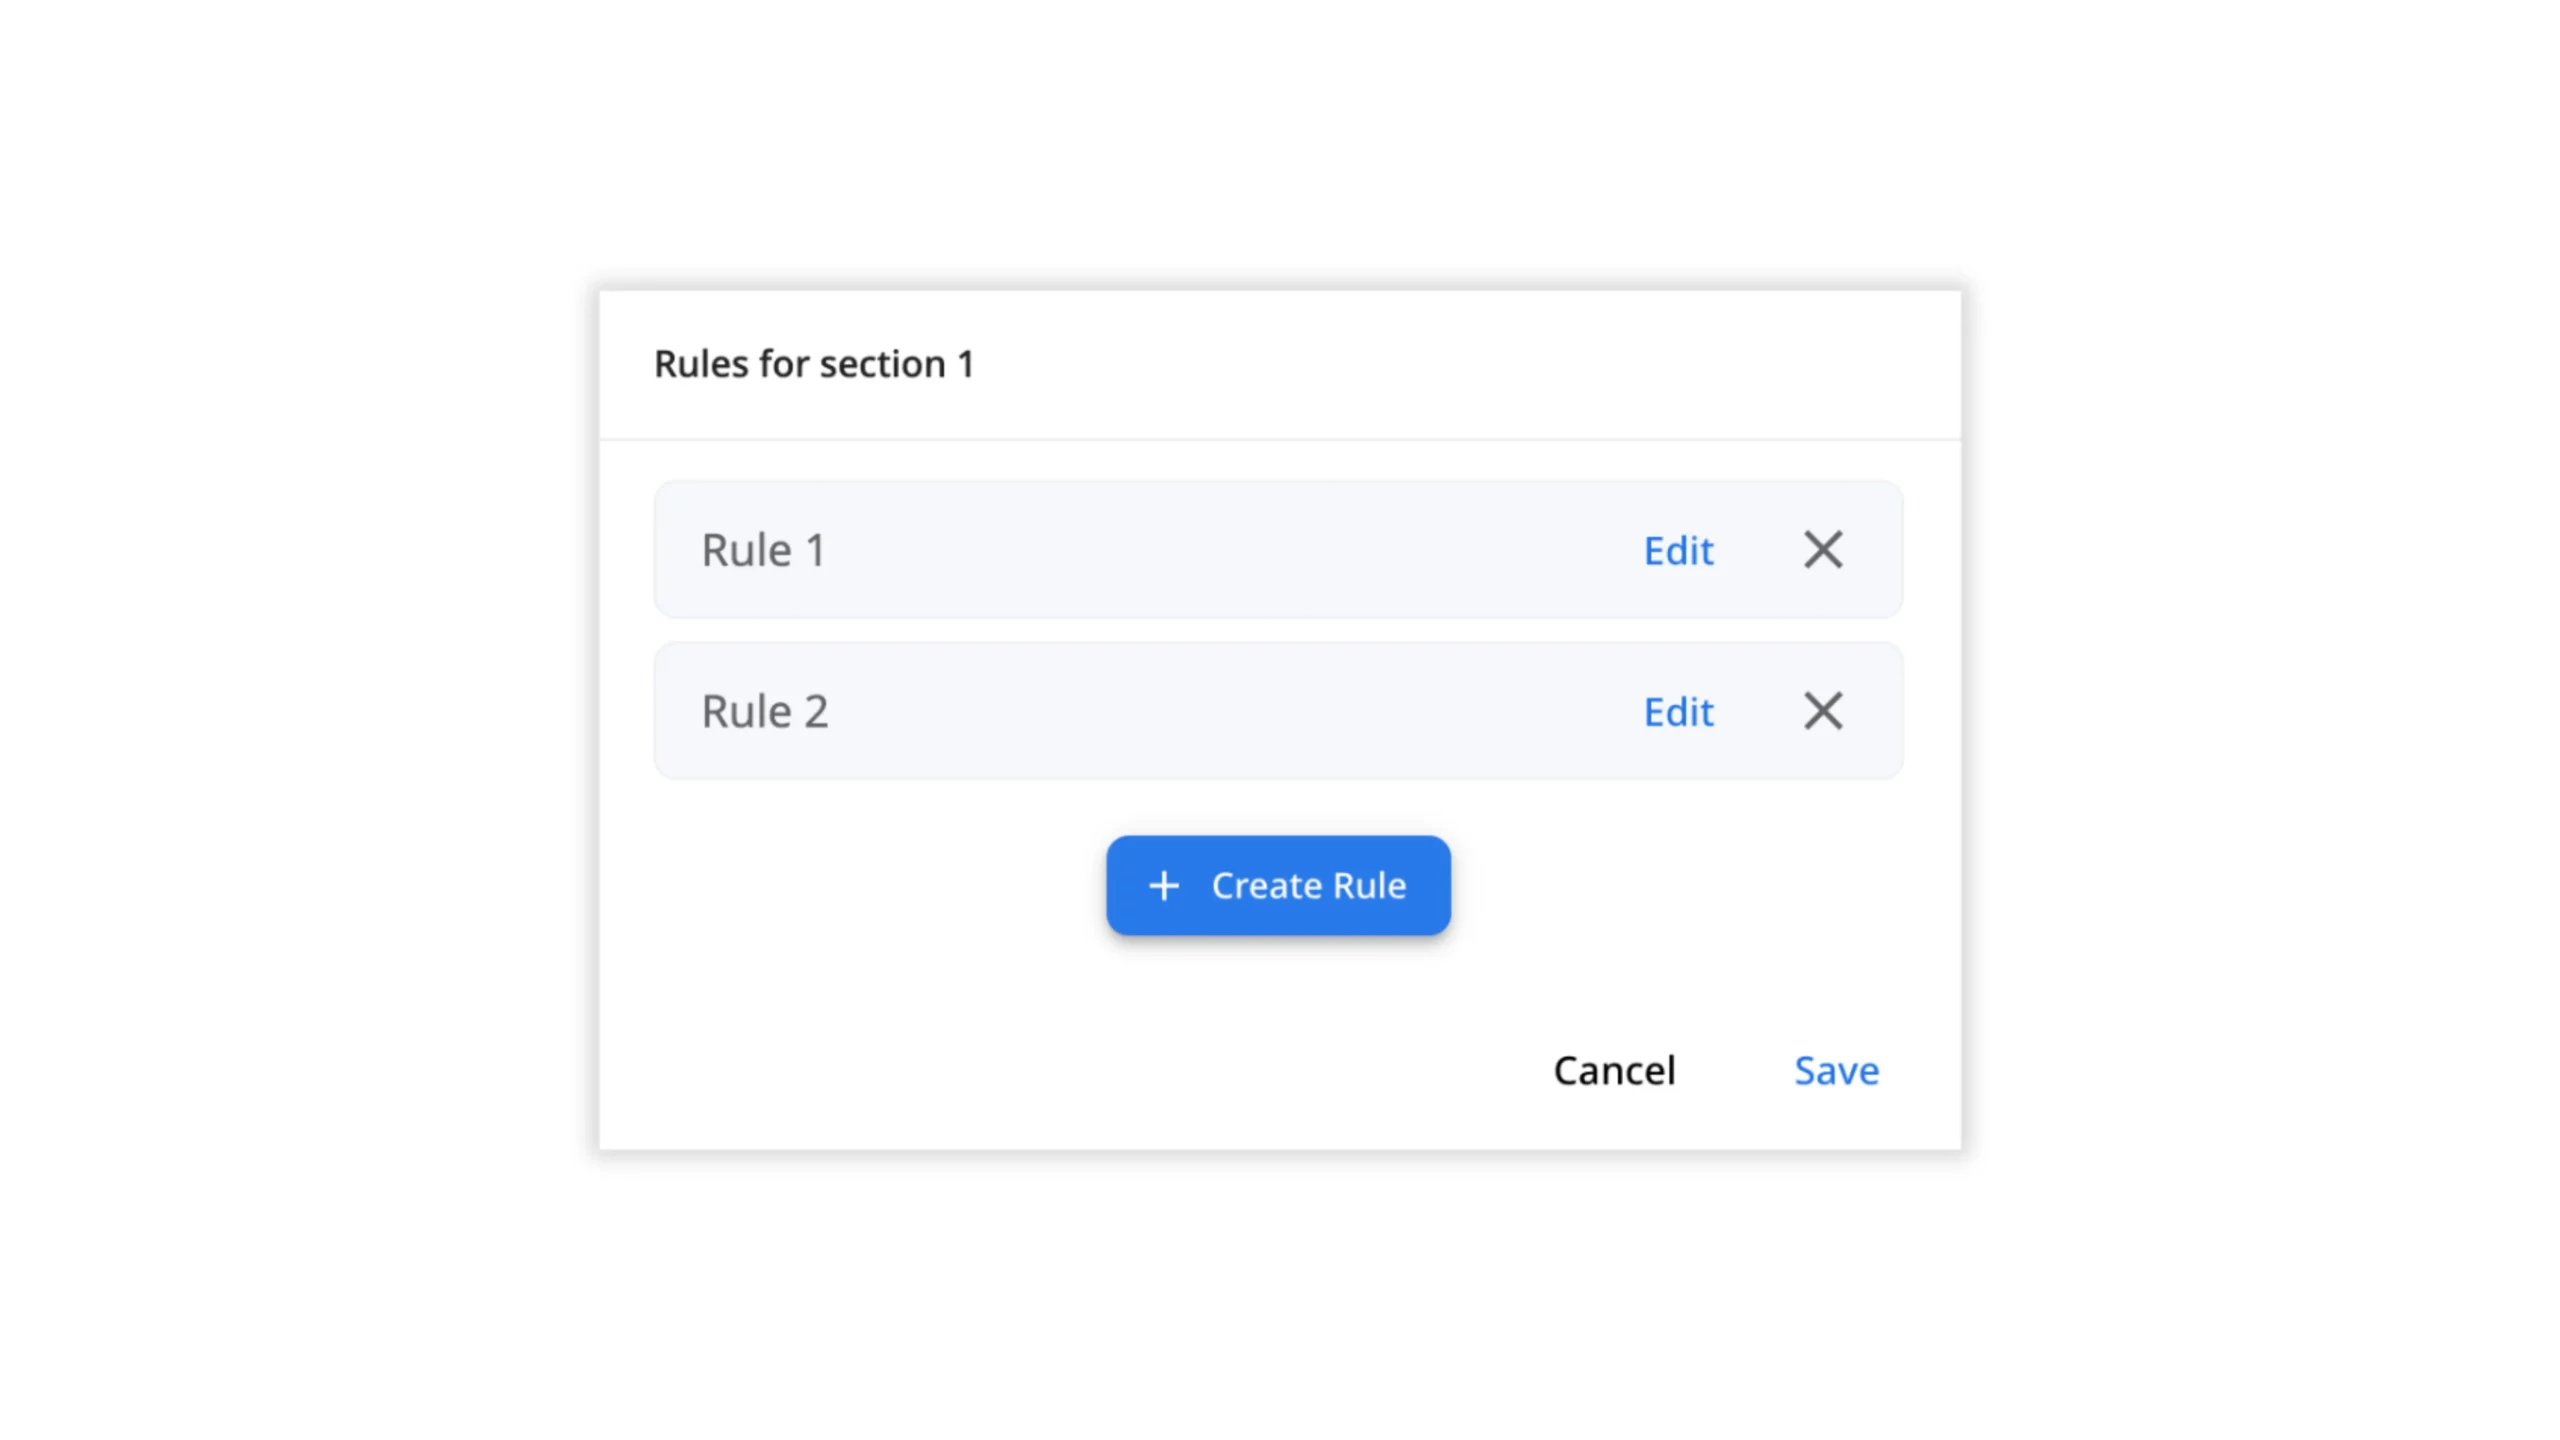
Seamless Integration into Your Workflow
The versatility of zenphi Forms allows you to use them as process triggers or within any step of your automation workflow with the Request Data action. This means you can gather information from stakeholders, obtain approvals, enable digital signing of documents directly from the forms, and much more—all while maintaining a seamless and efficient workflow.
3. Improved Error Handling for Flow Runs
Ensuring smooth automation requires effective handling of errored Flow Runs. That’s why we’ve introduced two new features to make error management easier than ever before:
1. More Control at Each Flow Step
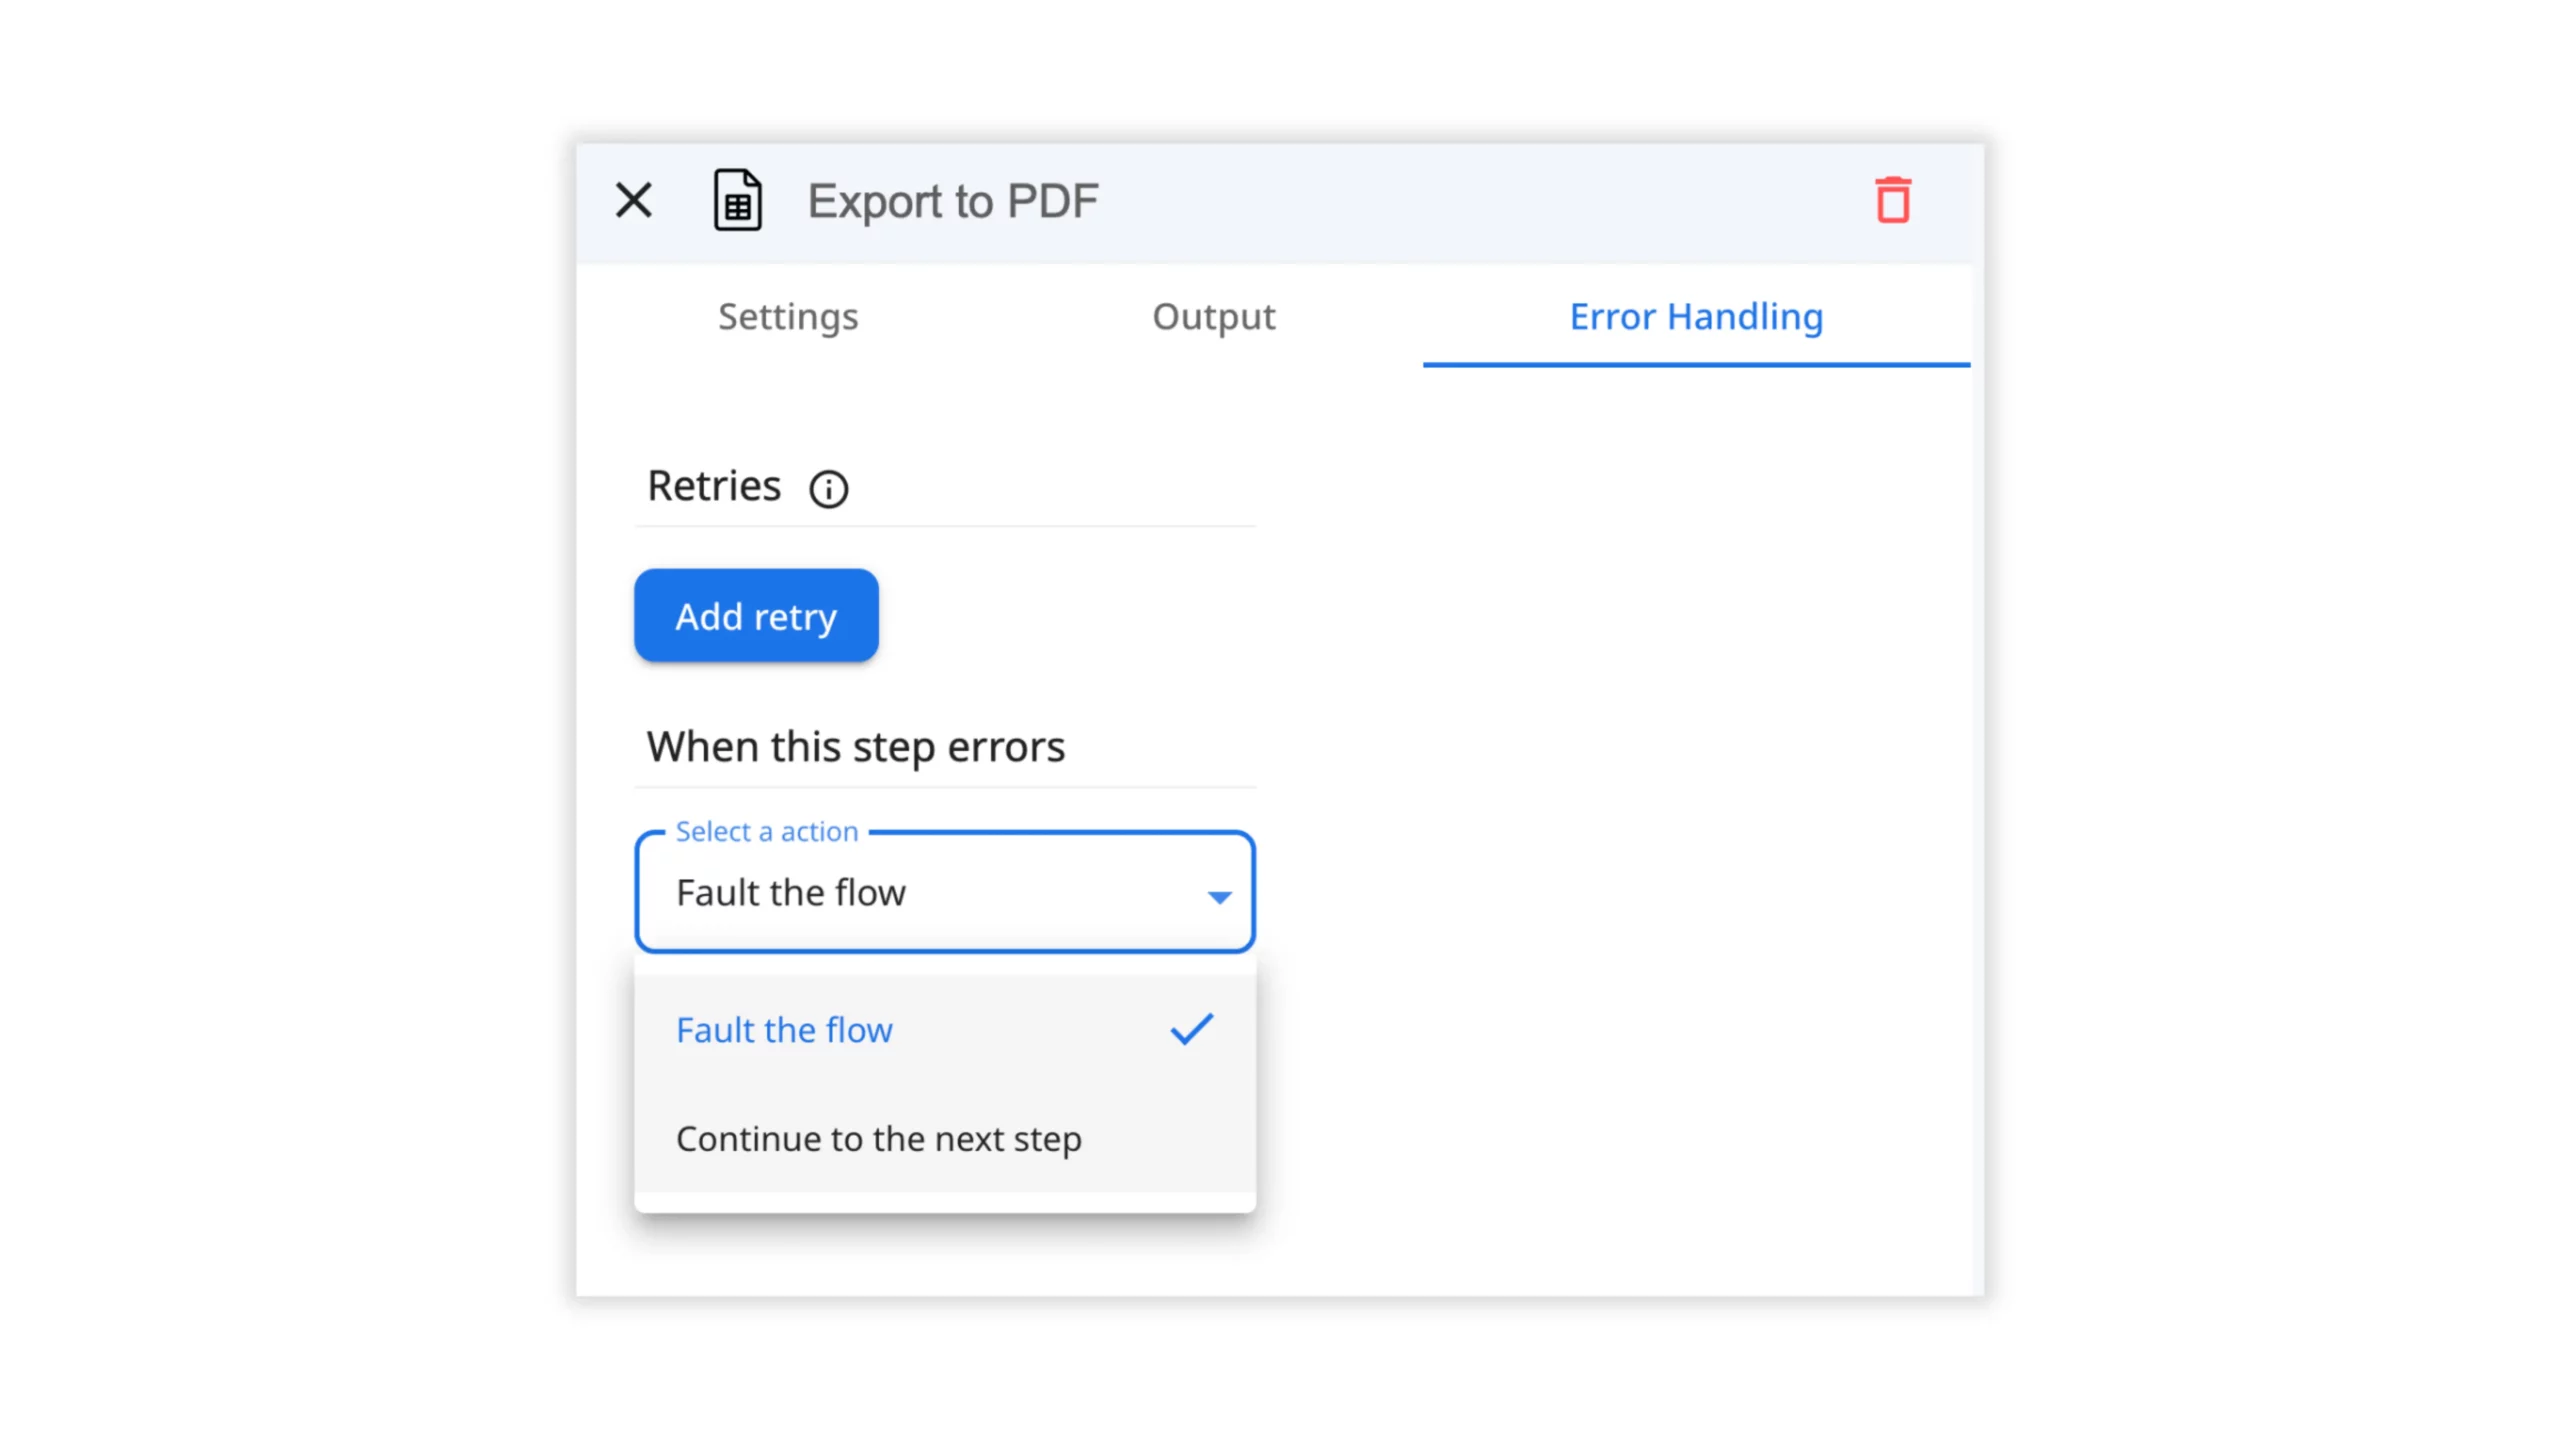
Now, at each Flow Step, you have the freedom to choose how you want to handle errors:
Continue to the next step: Select this option to skip the errored step and allow your workflow to continue seamlessly. This ensures that your automation doesn’t come to a halt due to minor issues, keeping your processes running smoothly.
Fault the flow: Alternatively, you can choose to pause the Flow and mark it as Faulted. This gives you the opportunity to investigate and rectify the error before proceeding, ensuring accuracy and reliability in your automation.
To set up error handling, simply open the actions settings and switch to the Error handling tab. These options provide you with greater control over how you want to manage Flow Run errors, empowering you to tailor your automation to your specific needs.
2. Bulk Re-Run of Faulted Flow Runs
We understand that managing errors can be time-consuming, so we’ve introduced a time-saving feature. Now, you can re-run Faulted Flow Runs in bulk! This means you can address multiple errors at once, saving you precious time and effort in error management.
Access this feature from your Flow Dashboards in the Faulted Flow Runs tab. With just a few clicks, you can initiate bulk re-runs and ensure that your processes run smoothly without any disruptions.
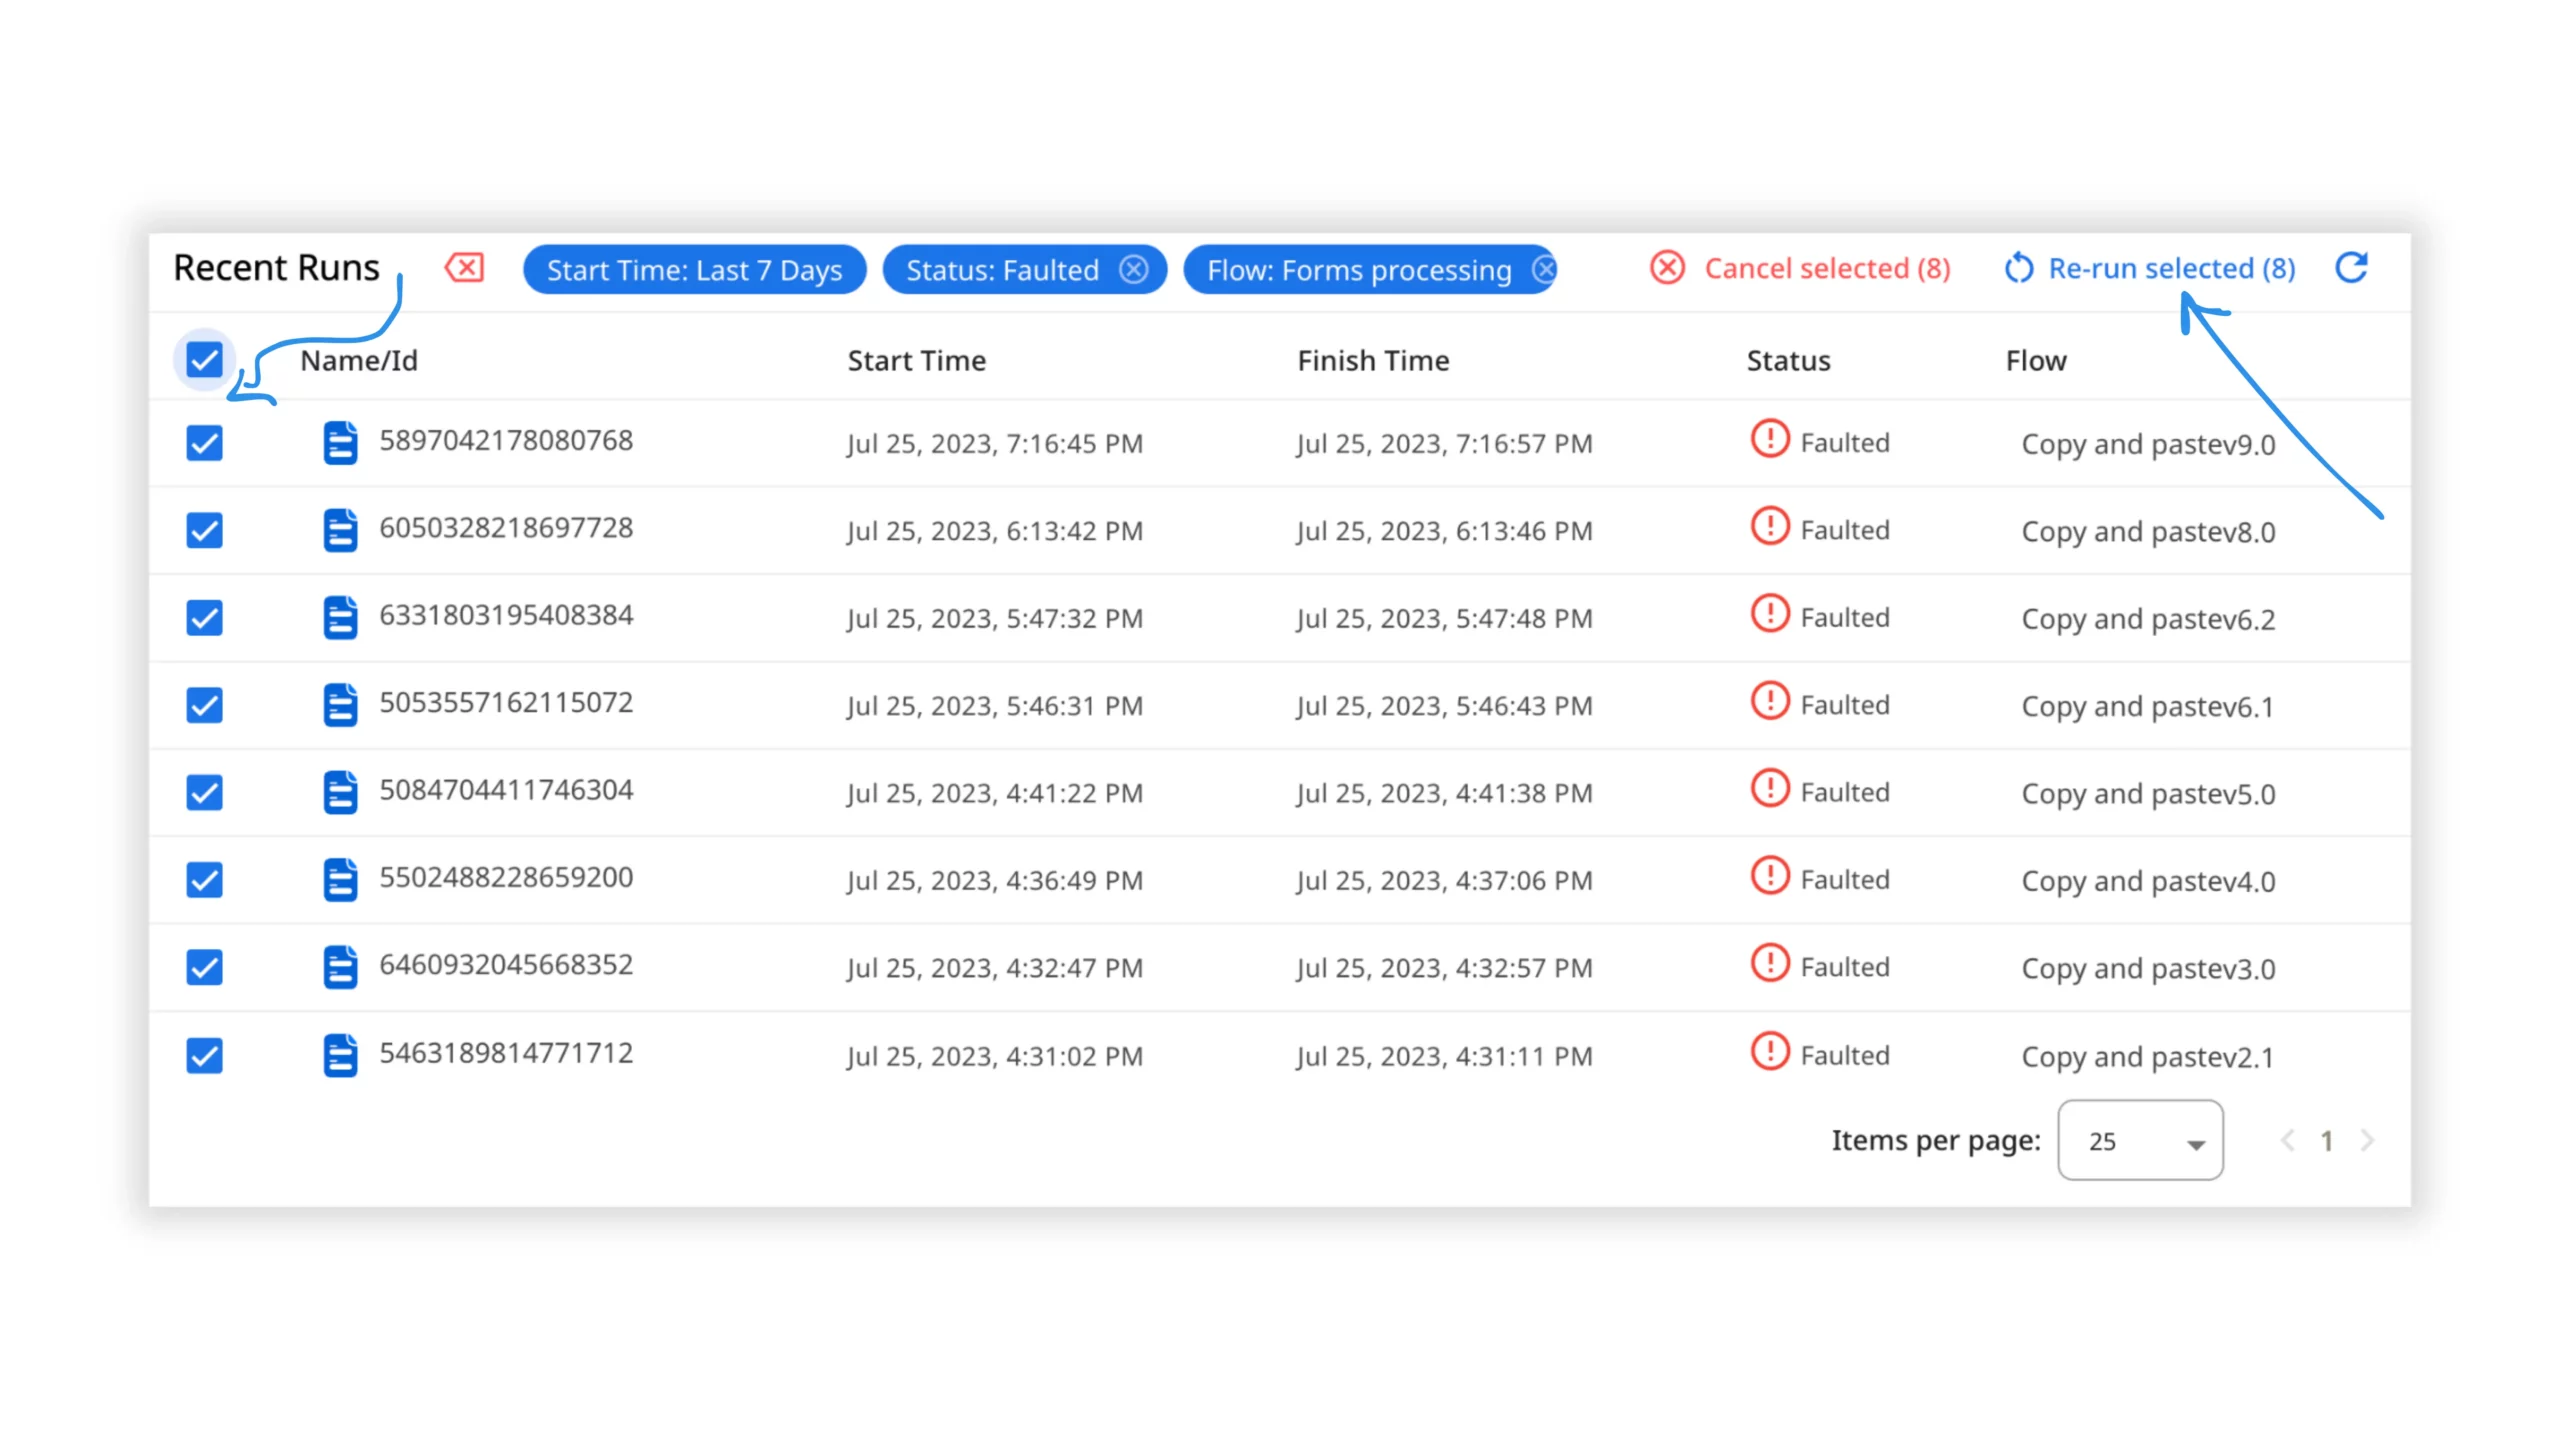
Please note that this function will re-run the entire instance from the beginning, not just the failed step. If you specifically wish to re-run the failed step only, you can do so by opening the Flow Run and selecting the option from there.
What’s Next
For a comprehensive overview of the latest zenphi improvements and how they can elevate your process automation, don’t miss the opportunity to watch the recording of “New at zenphi: 2023 Mid-year Feature Recap“.
Moreover, we are continually enhancing our help documentation for actions and incorporating more inline help within the Flow Designer. These improvements are aimed at making it even easier for you to configure actions and get your automation up and running quickly and smoothly.
Stay tuned for more enhancements in the coming months as we continue to strive for excellence and deliver features that empower your automation journey!


