Google Slides is an excellent tool for creating visually appealing presentations. However, if your job requires creating a multitude of presentations and multiple parties are involved in the process, it can become time-consuming and inefficient. Fortunately, there are tools available that can help automate some of the more tedious tasks, allowing you to focus on the creative aspects of your presentation. One such tool is zenphi, a no-code process automation platform built specifically for Google Workspace apps, such as Google Slides, Sheets, Docs, Forms, and more. In this article, we’ll explore 5 ways to automate Google Slides with zenphi.
1. Automatically create slides from a Google Form
If you’re creating a presentation that requires input from others, such as a survey or feedback form, you can use zenphi to automatically create slides from the responses. Simply connect your Google Form to zenphi, and set up a workflow that triggers when a new response is received. You can then use zenphi’s “Generate Slide” action to populate a pre-designed slide template with the data from the form, saving you time and ensuring consistency across your presentation.
Another example of how you can benefit from such automation is a self-serve certificate (or other documents) generation. Let’s say you need to issue employee certificates by request. With zenphi, you can automate the whole process in a matter of minutes with a simple drag & drop workflow builder.
1. Create a Google Form gathering the information needed for the certificate, such as name and job title. Zenphi will automatically log the date and time of a Google Form submission.
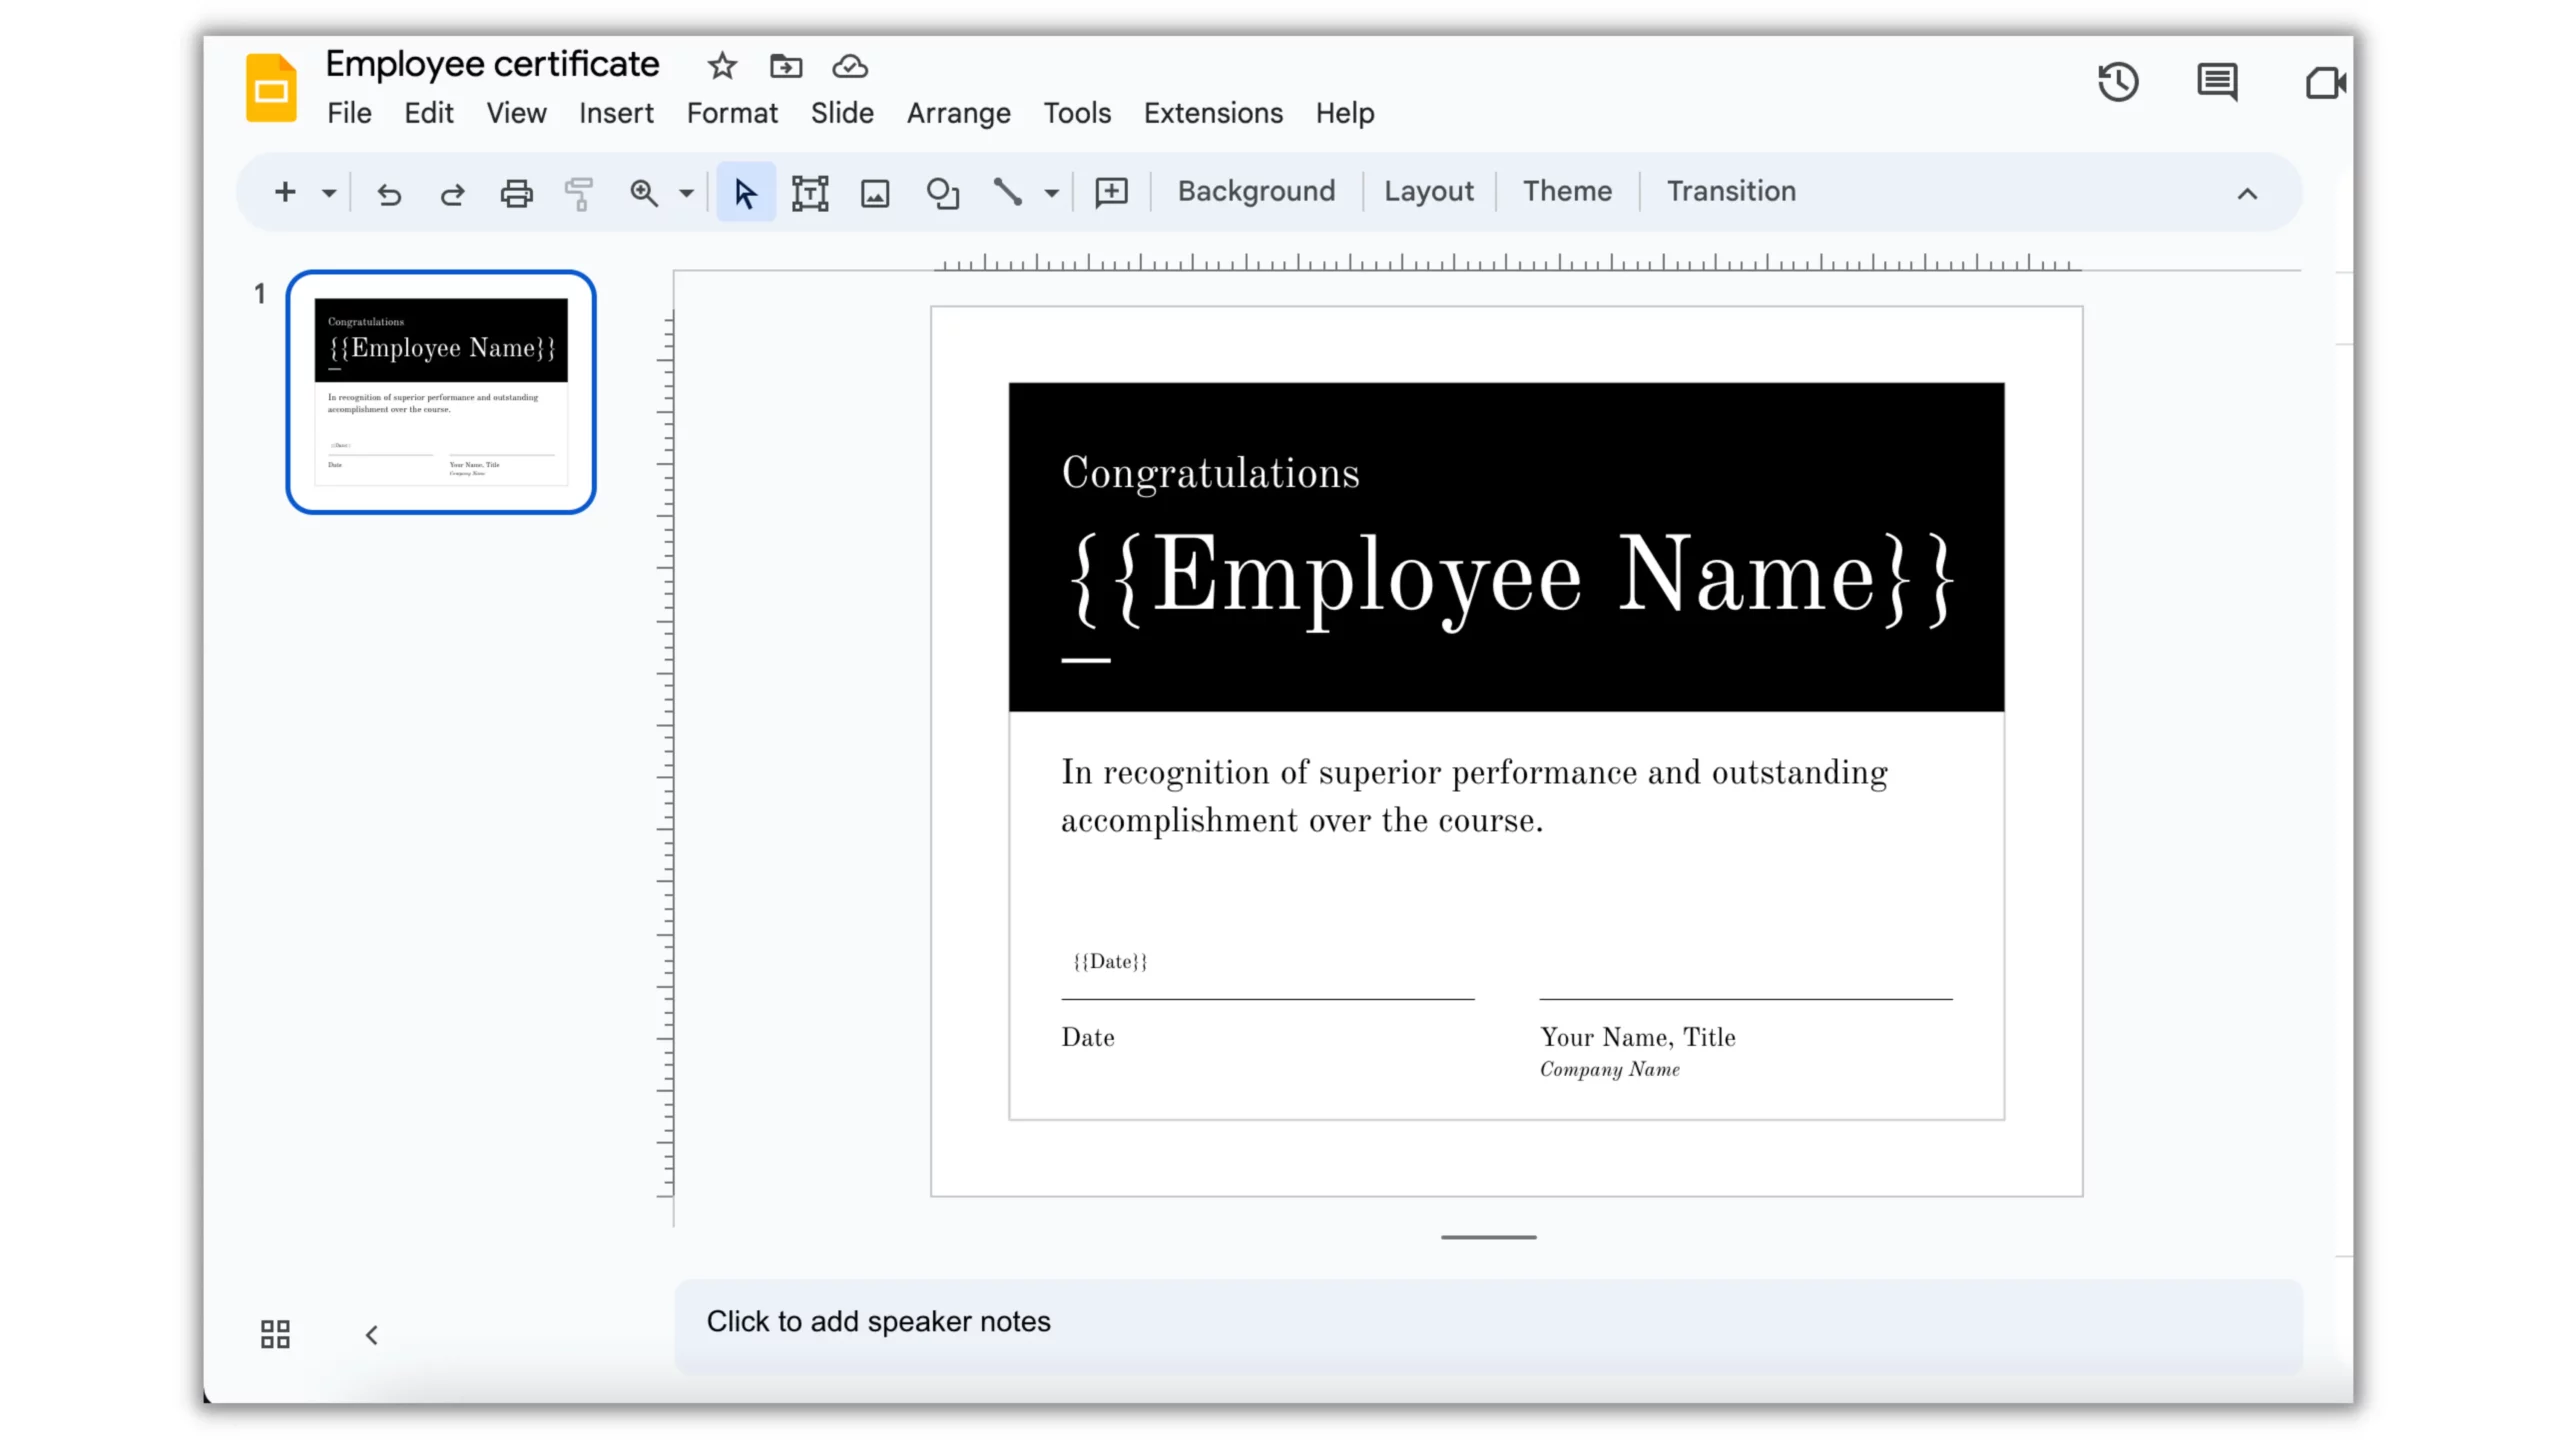
2. Generate a master slide and put the dynamic values into the curly brackets {{data}}.
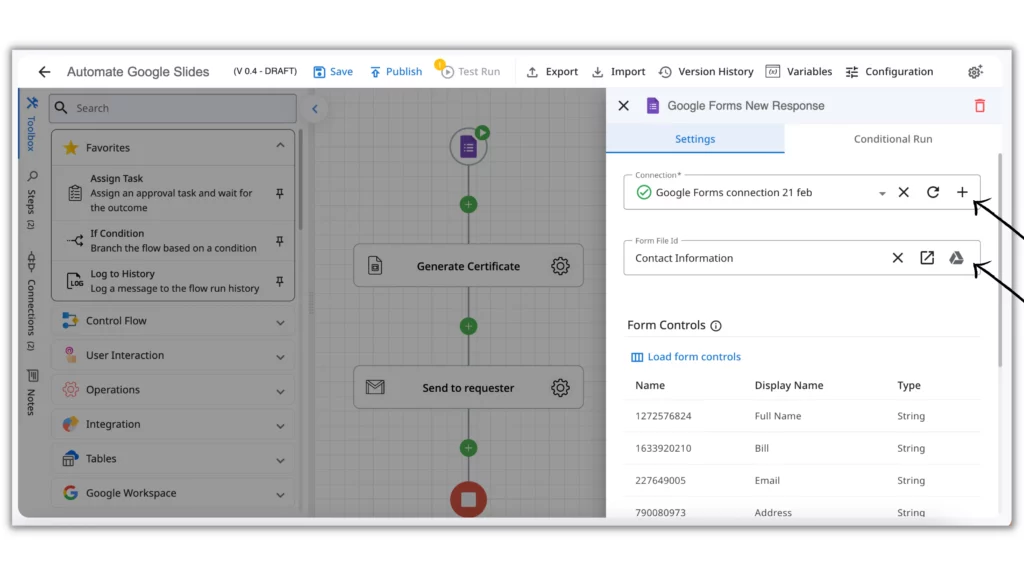
3. Create a new zenphi Flow and choose a Google Form as a Trigger.
4. Establish a connection with your Google Form account and select the Form you created earlier.
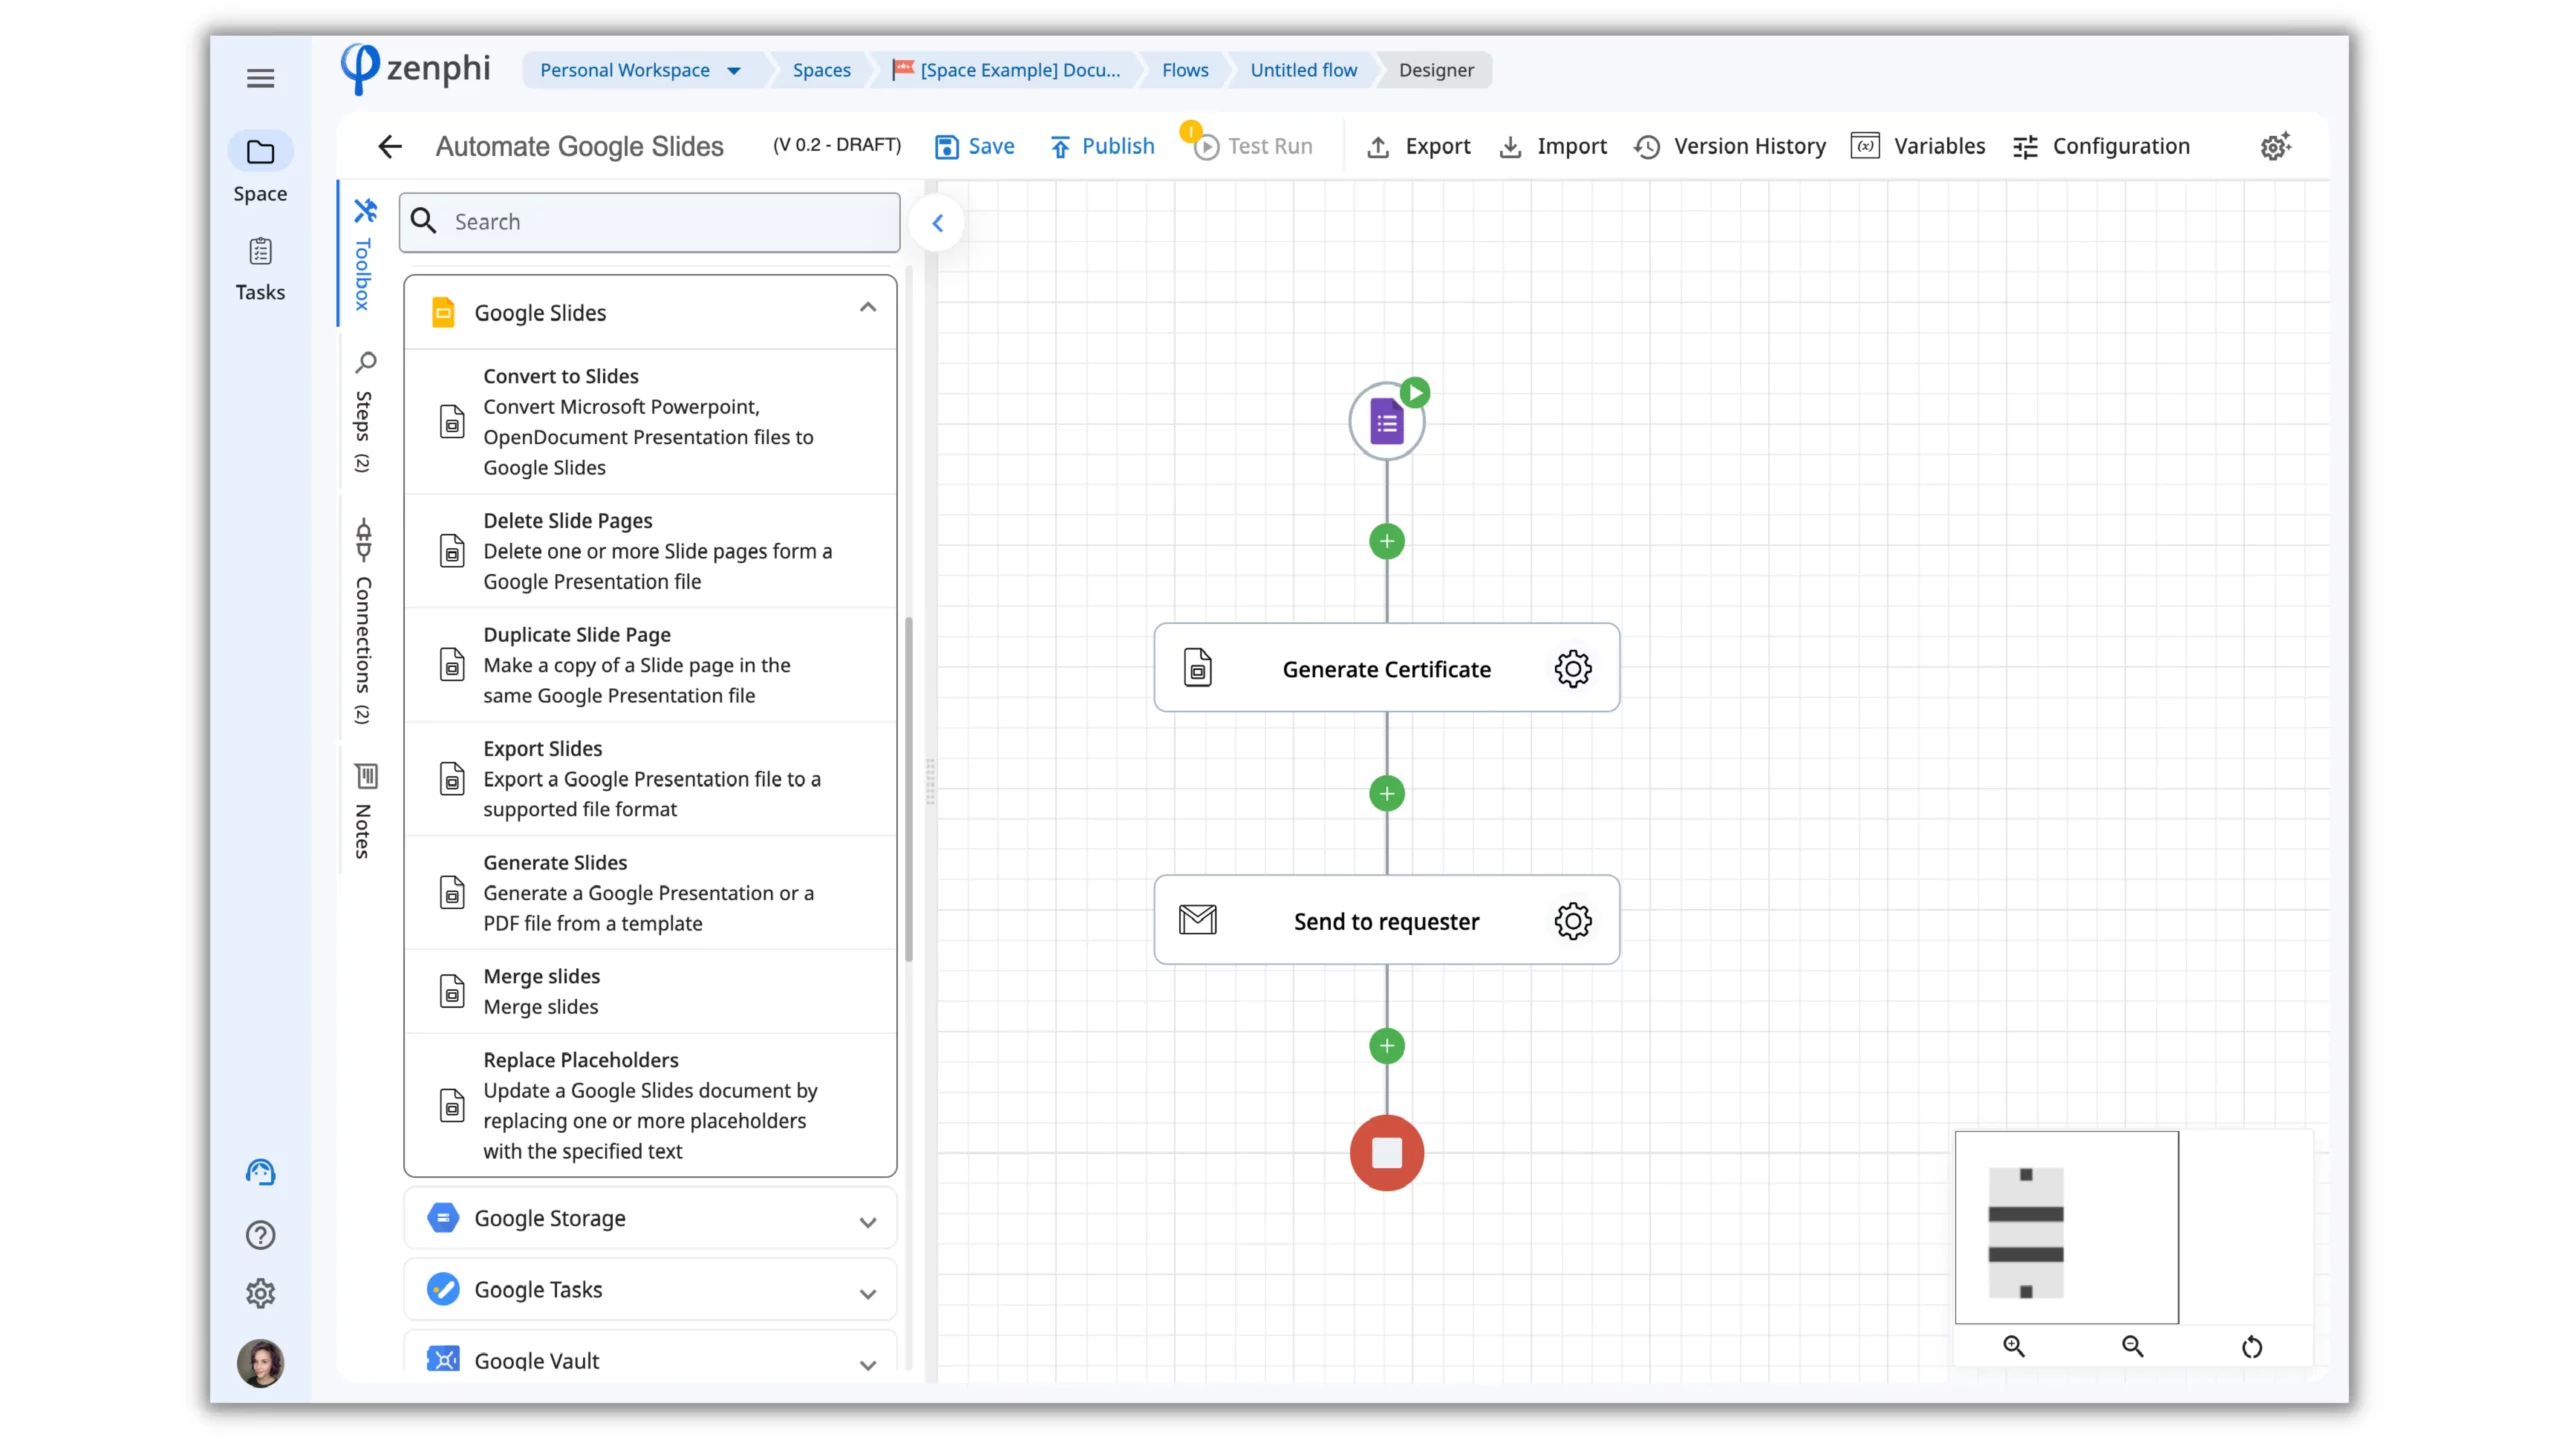
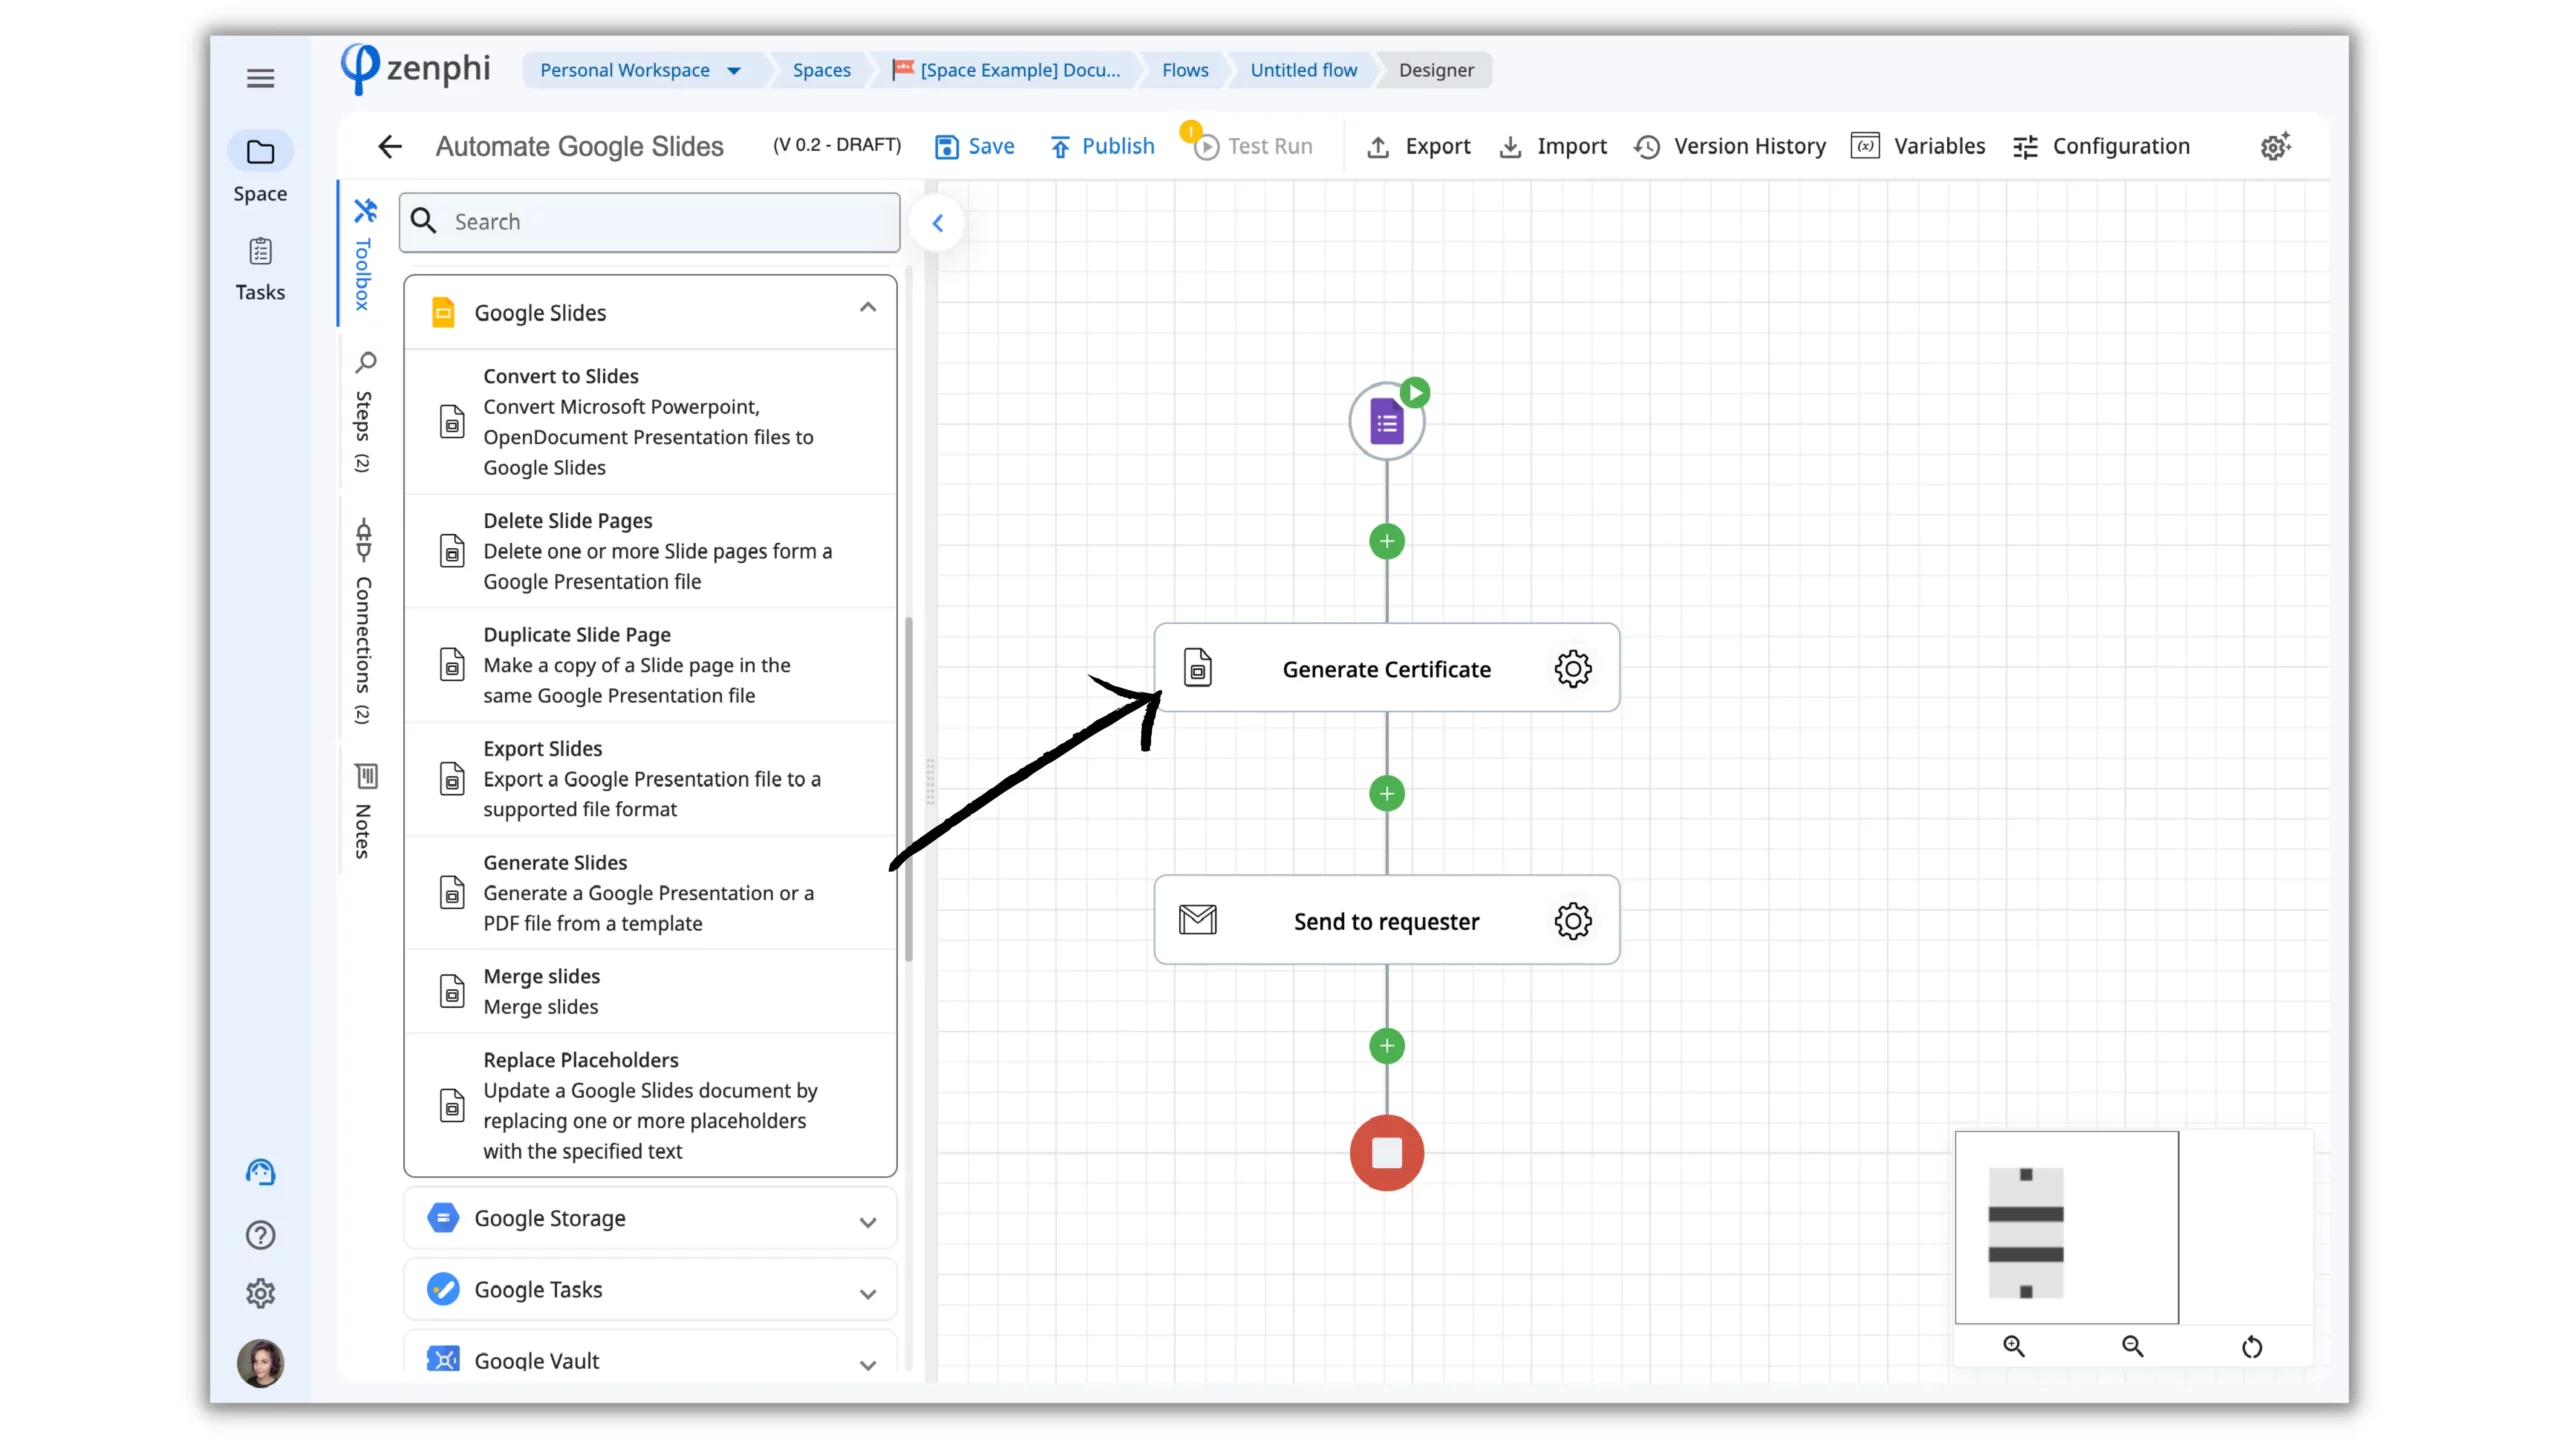
5. Drag & drop the “Generate Slide” action, set up the connection with your Google Slides account, and select the presentation you created in step 2.
6. Map out the dynamic values for your slide with the Token Picker. With the Token Picker, you can dynamically insert text, dates, numbers, and even images.
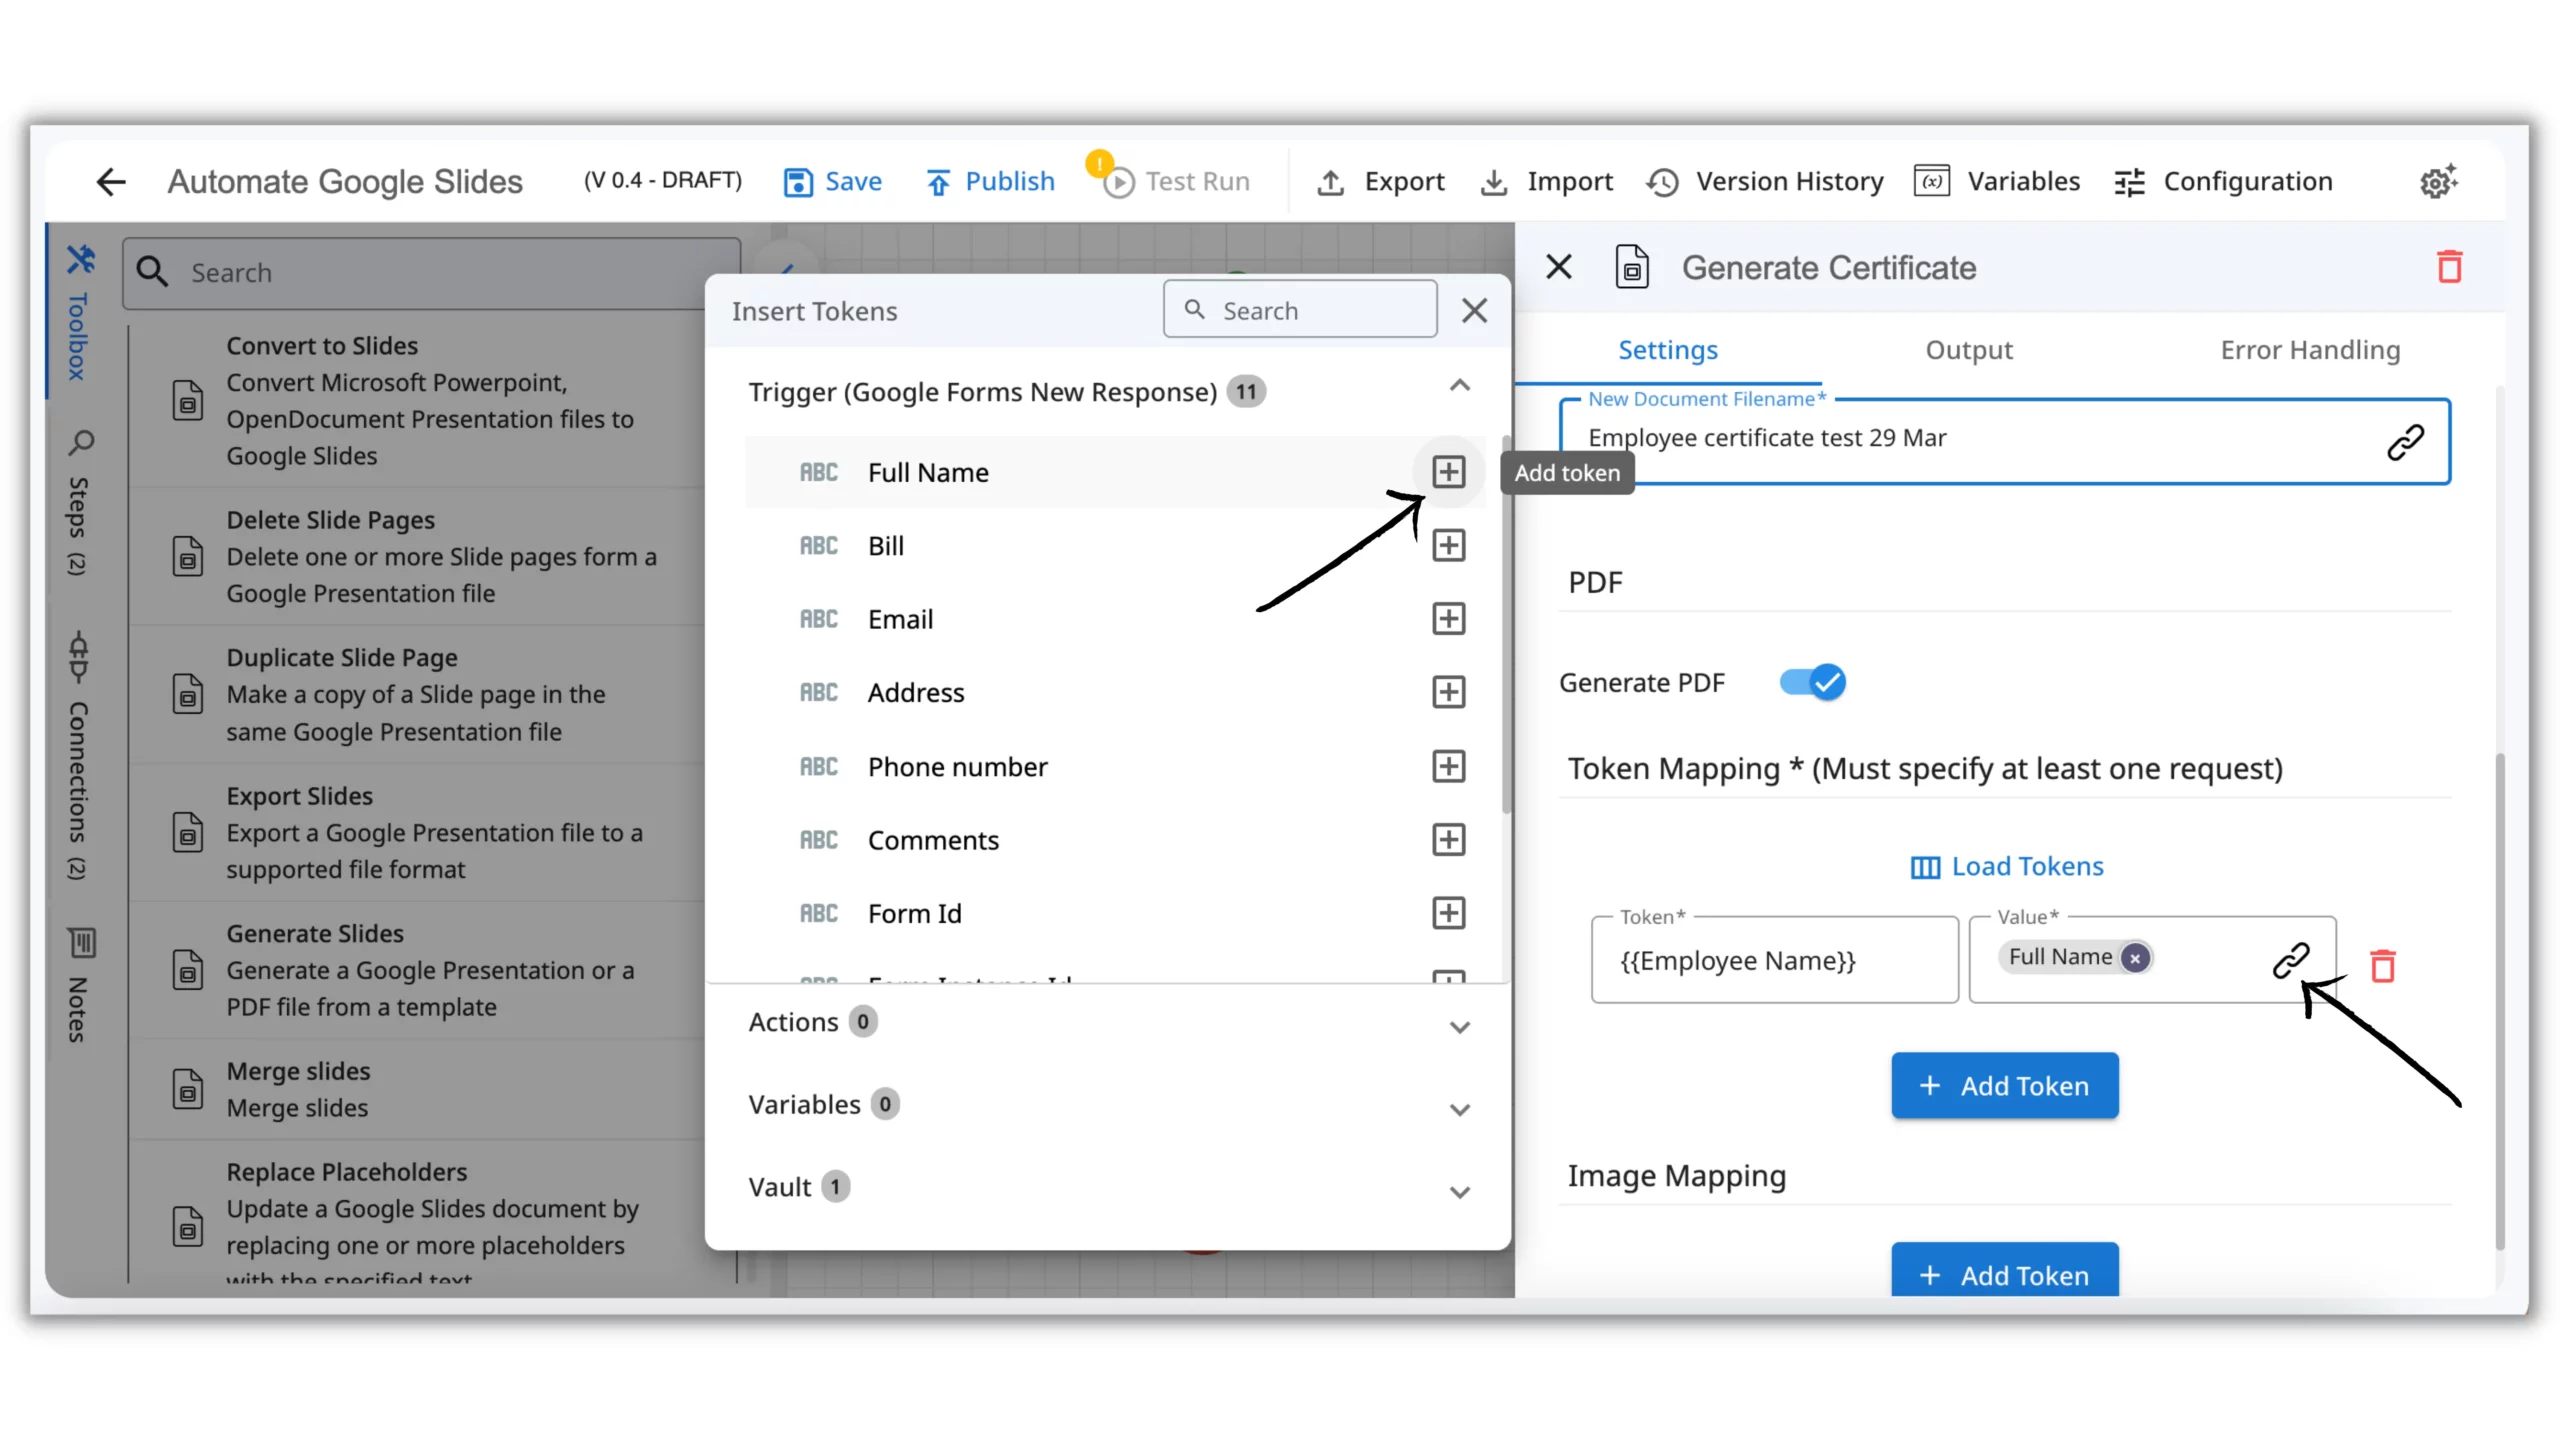
7. Enable the “Generate PDF” option.
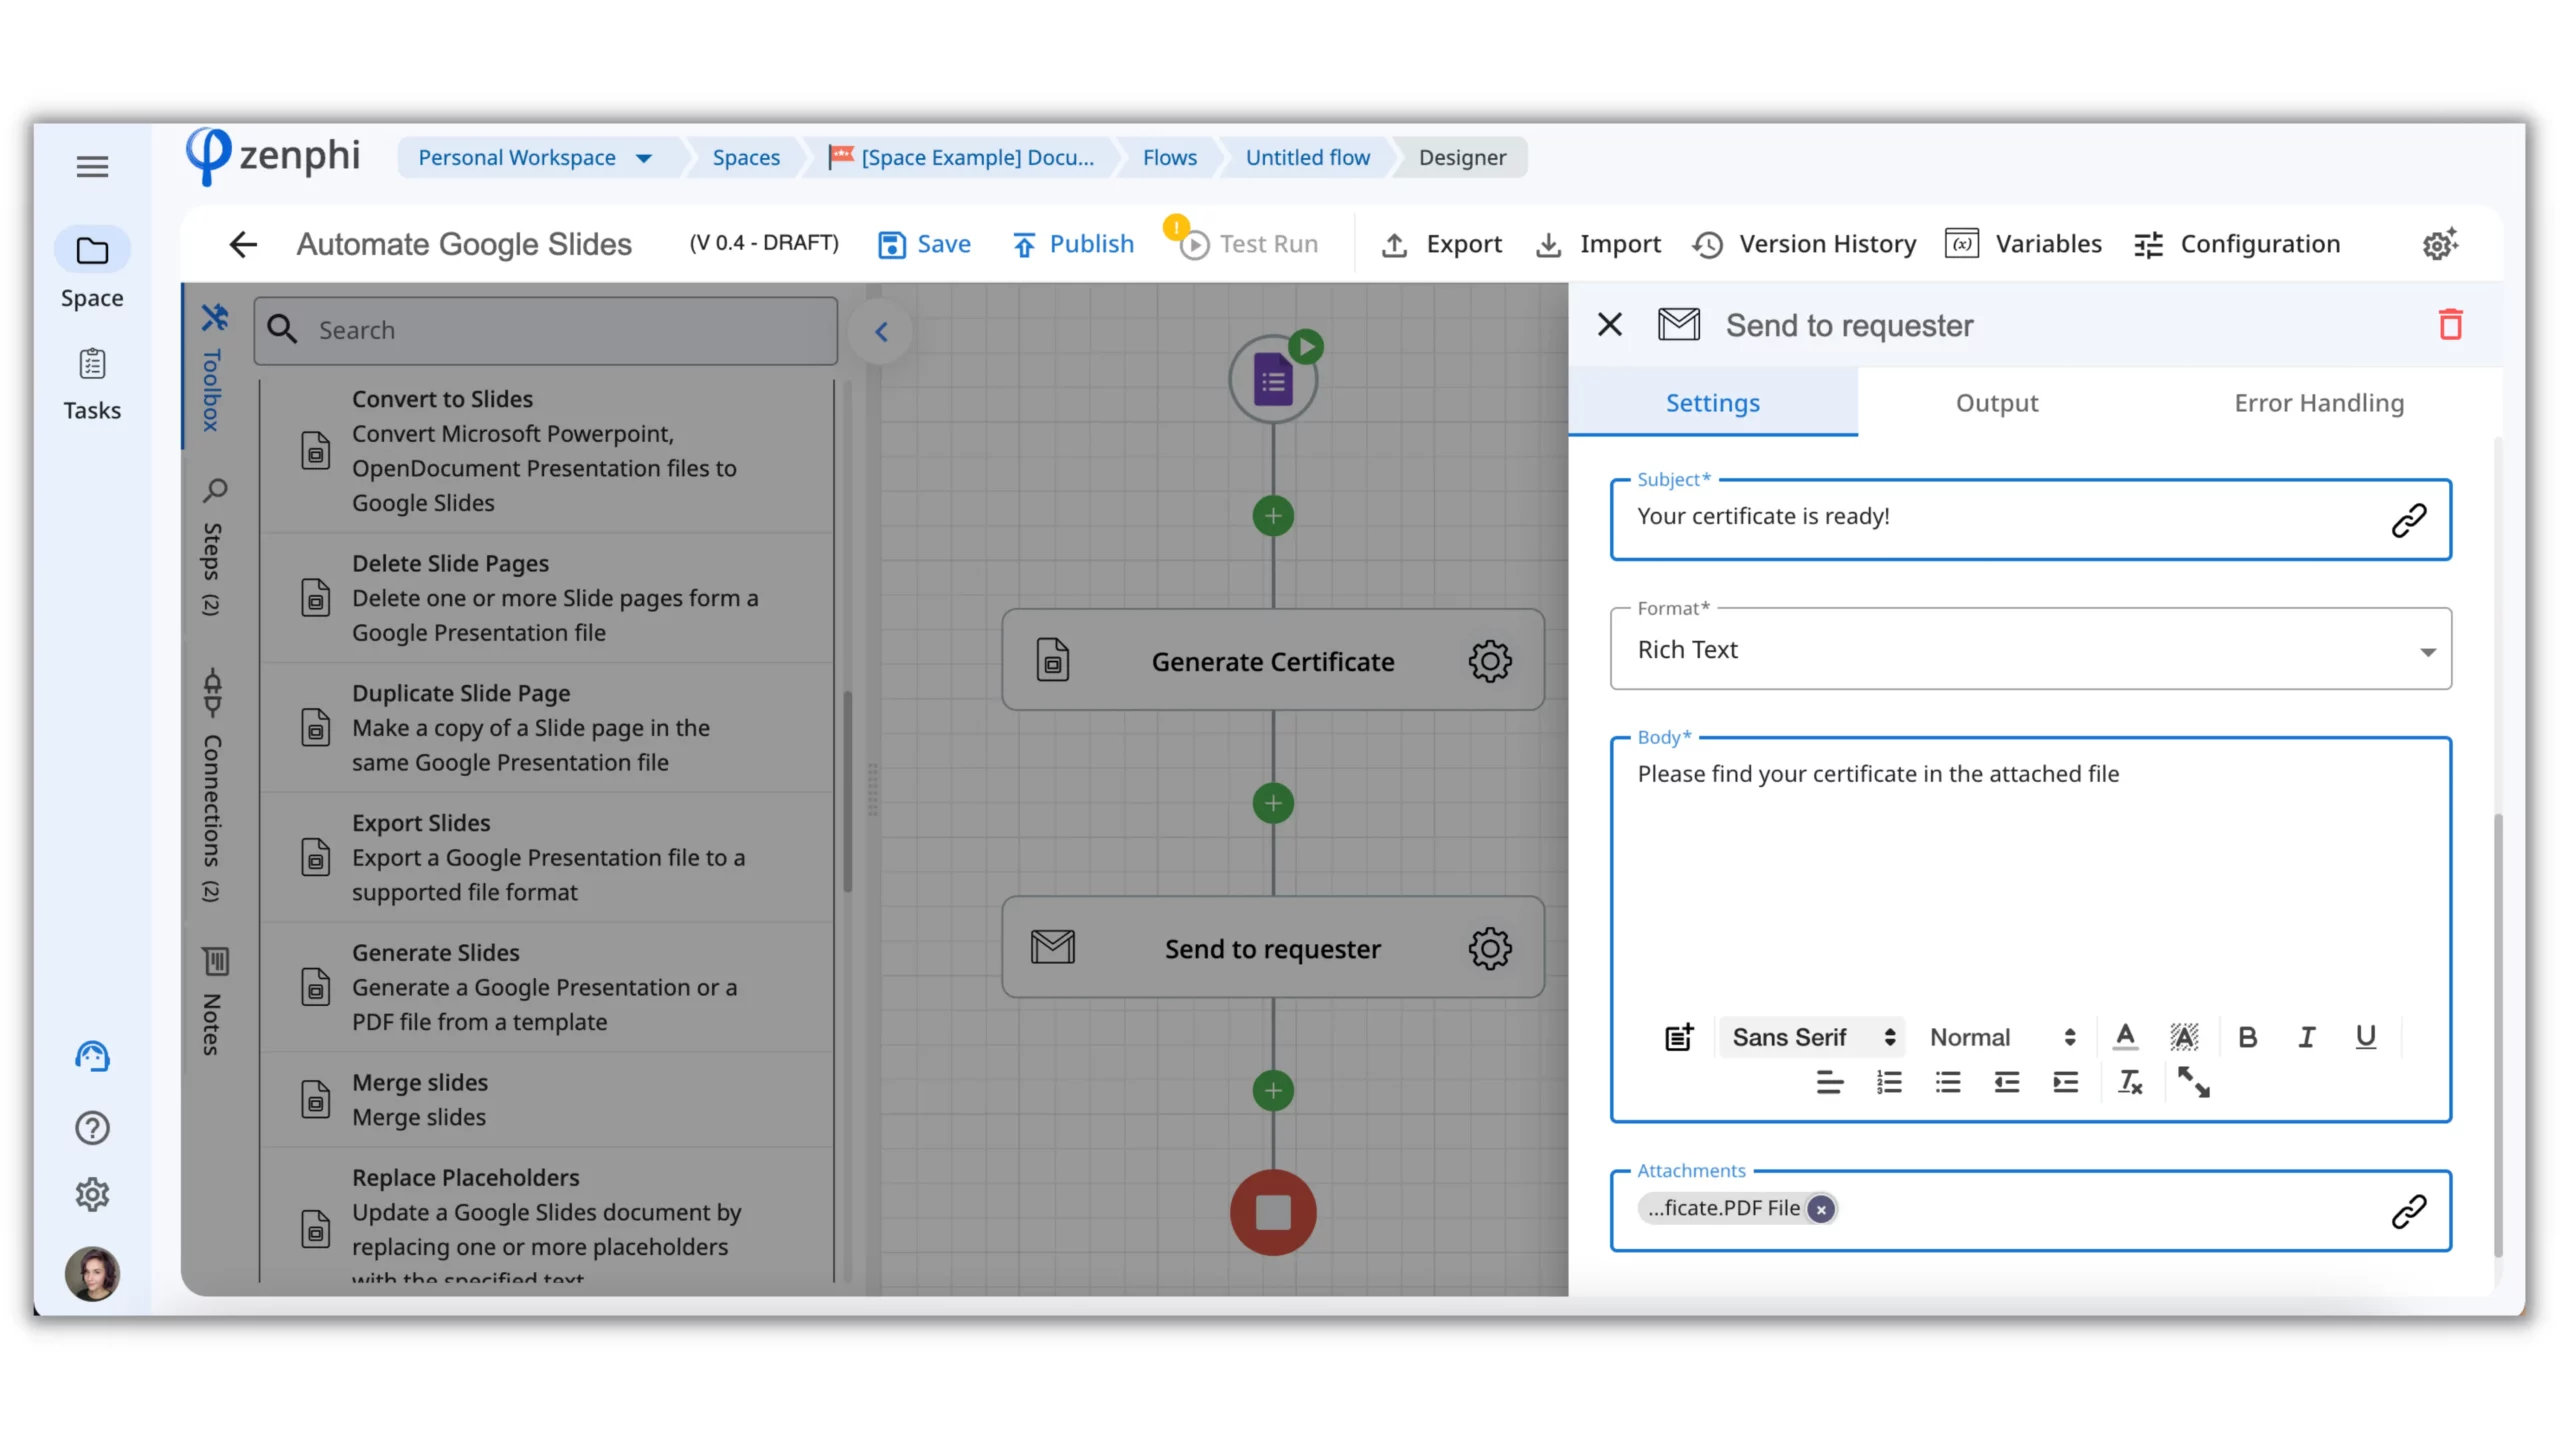
8. Drag & drop the “Send email” action to send the complete certificate back to the requester.
9. Test and publish your Flow.
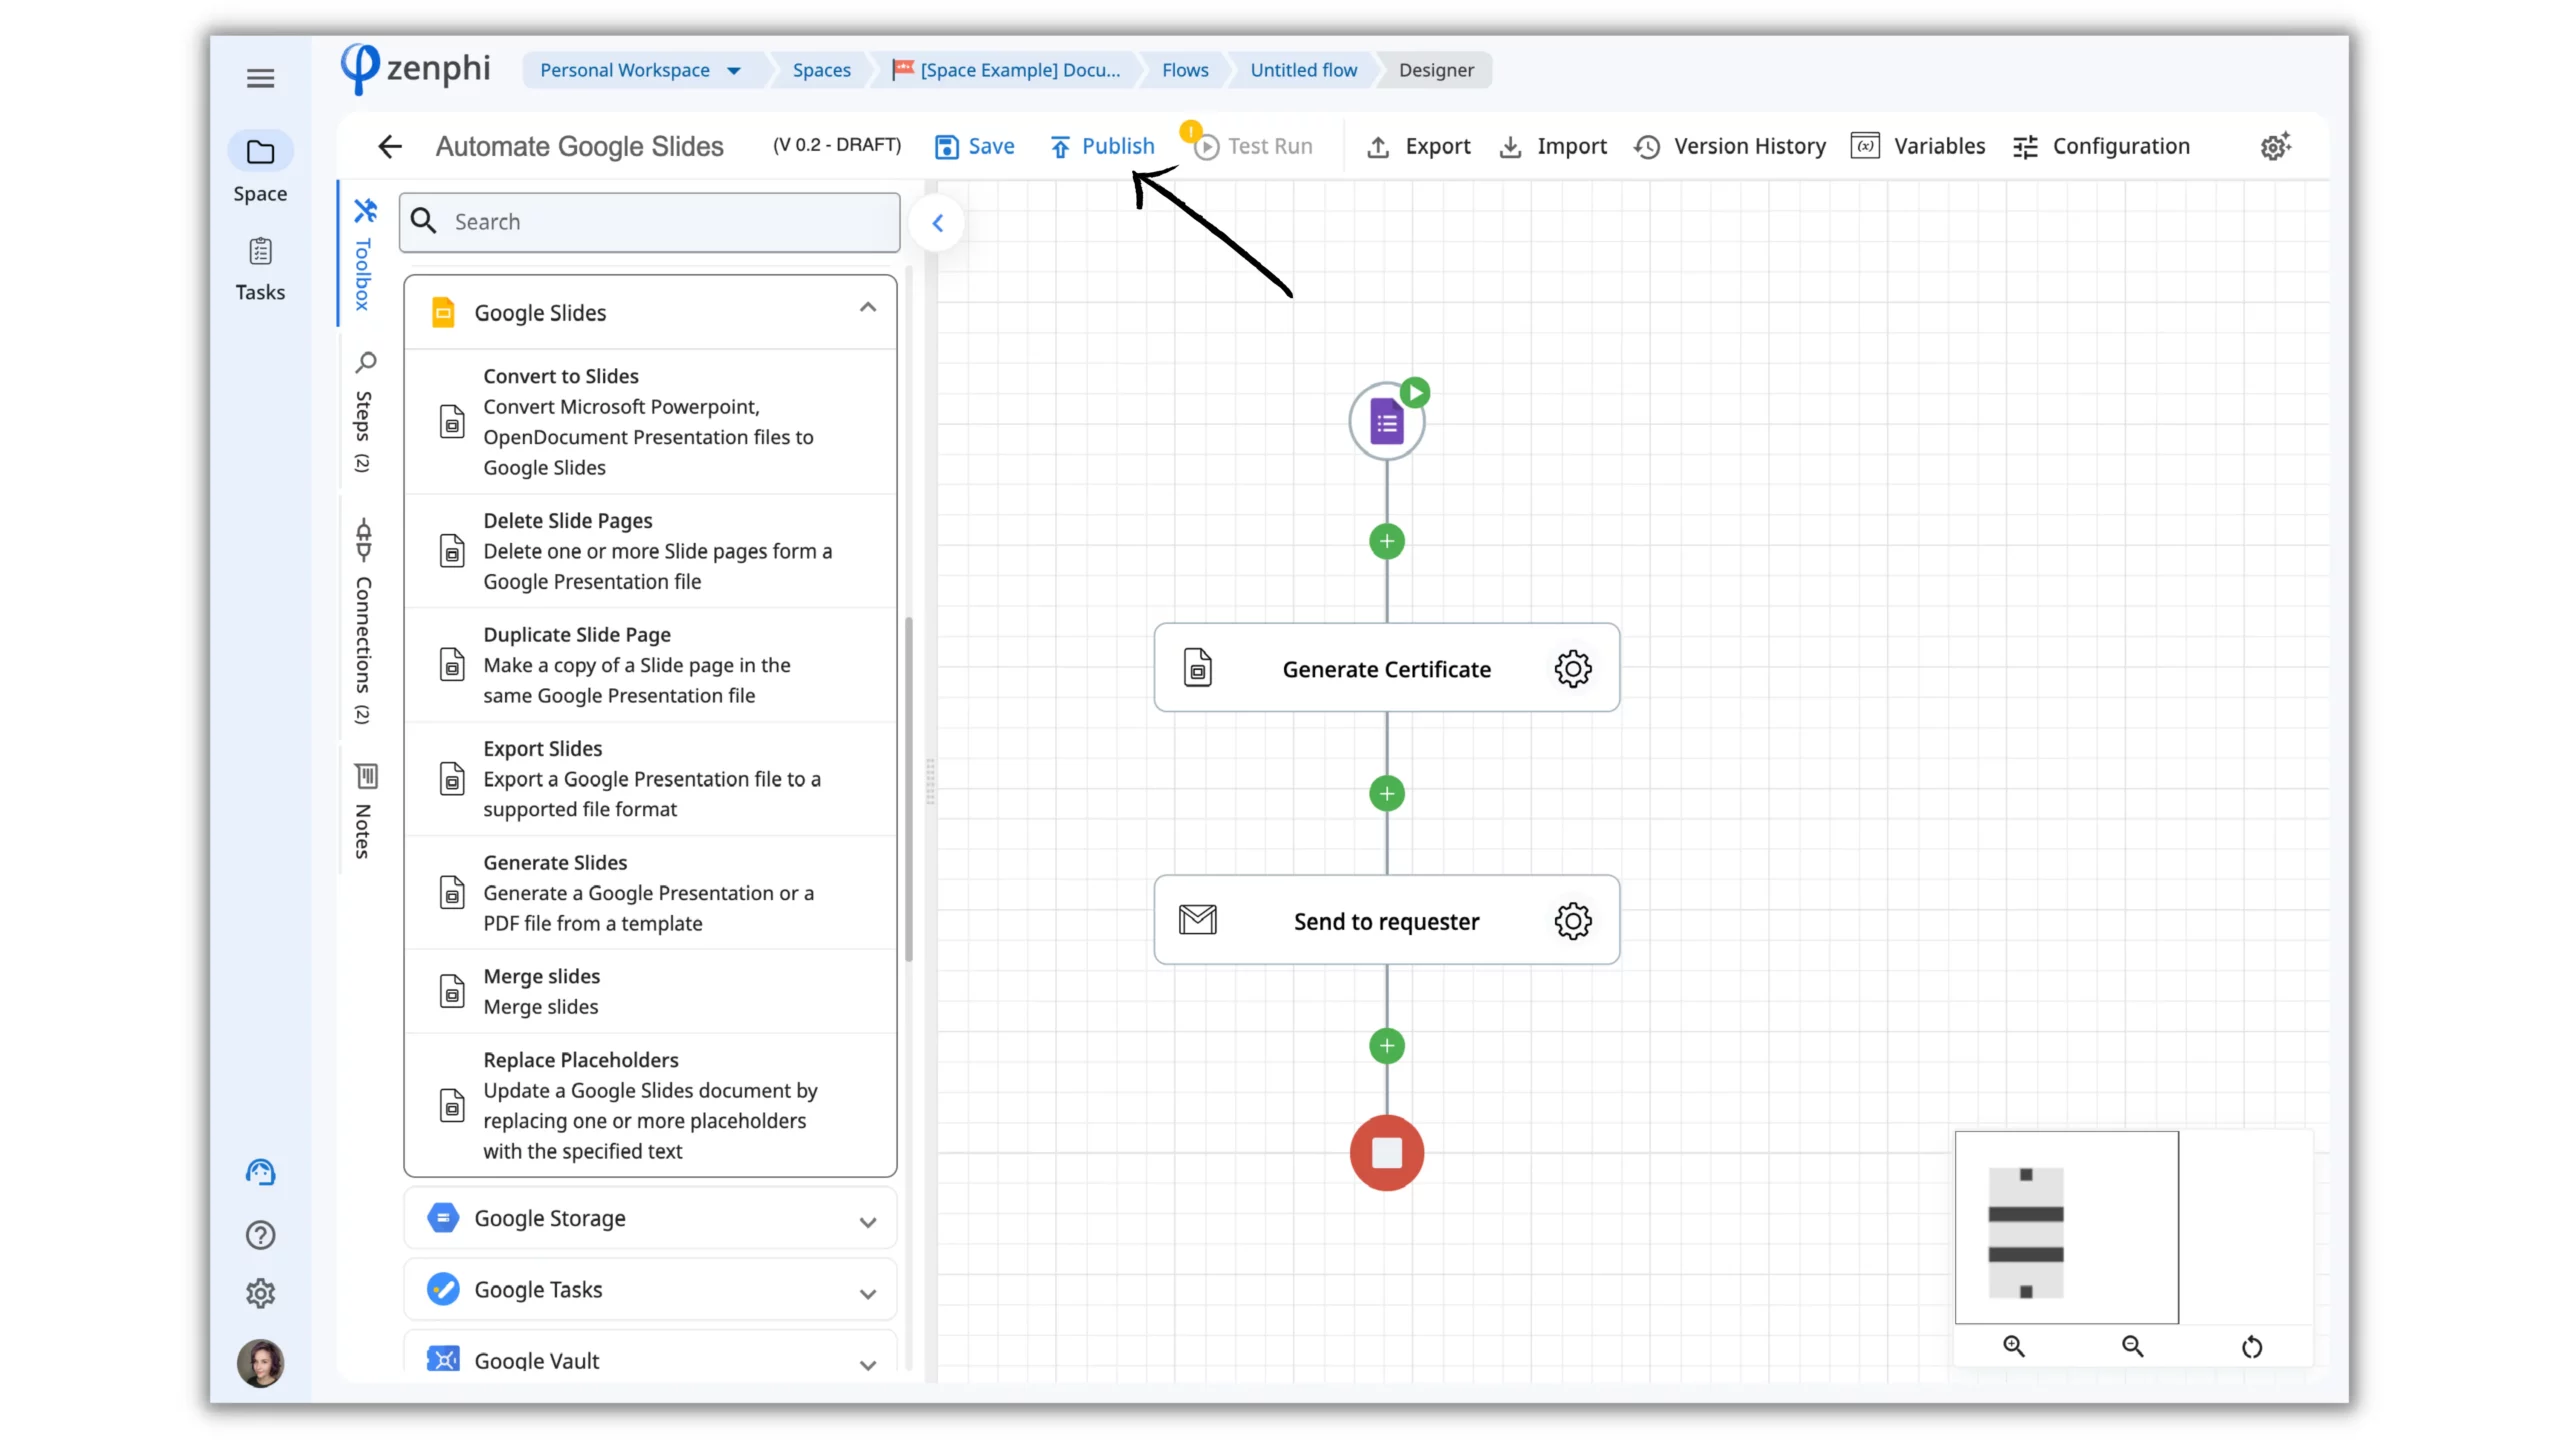
Moreover, you can easily create the same workflow starting from Typeform instead of Google Forms, for example.
2. Generate slides from Google Sheets data
If you have data in a Google Sheet that you want to turn into a presentation, you can use zenphi to automatically generate the slides for you. Create a workflow that pulls data from your Google Sheets and populates a pre-designed slide template with the information. It’s especially handy if you need to create a large number of unique slides. Watch this tutorial and learn how to set this up.
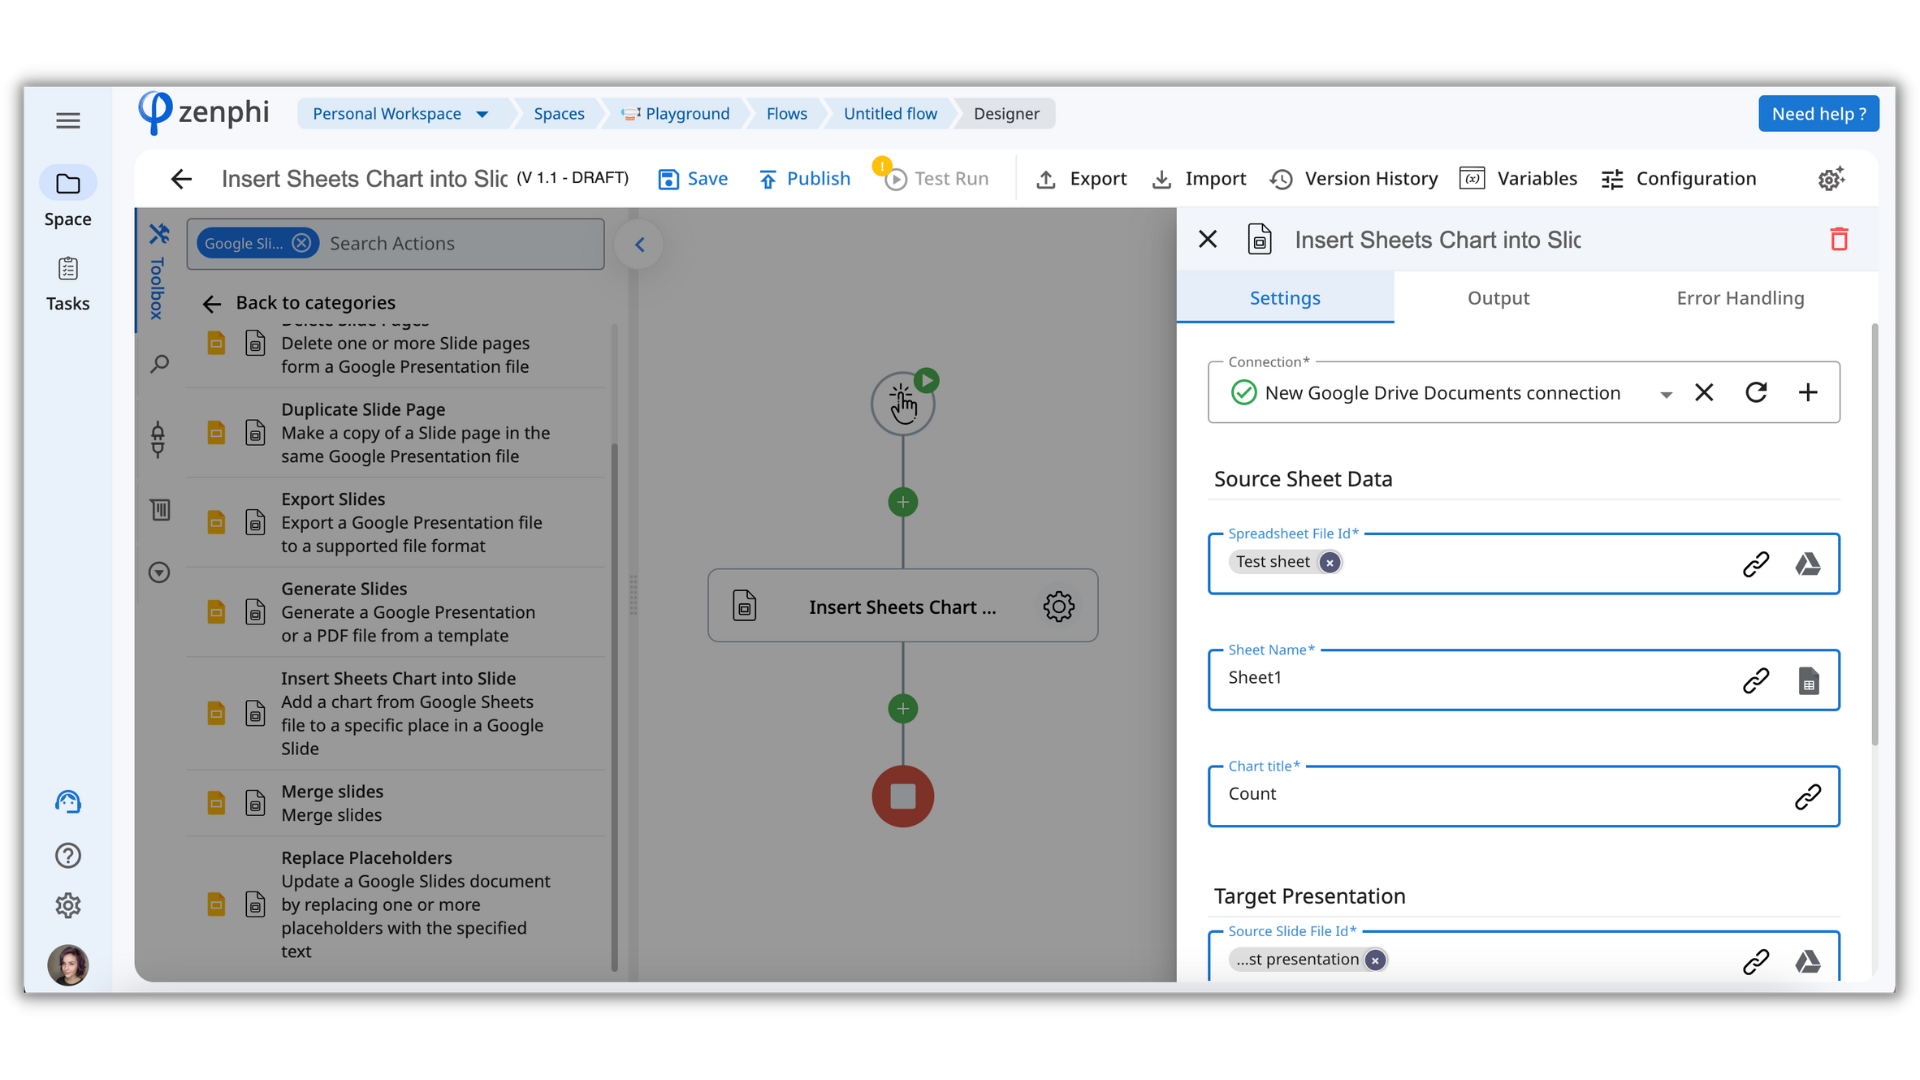
The good news is that you can easily include various types of data, including complete Charts, in your Google Slides presentation. Simply search for the “Insert Sheets Chart into Slide” action and follow the instructions outlined in this article to get started. With just a few clicks, your charts will be up and running seamlessly within your presentation.
3. Update slides based on data changes
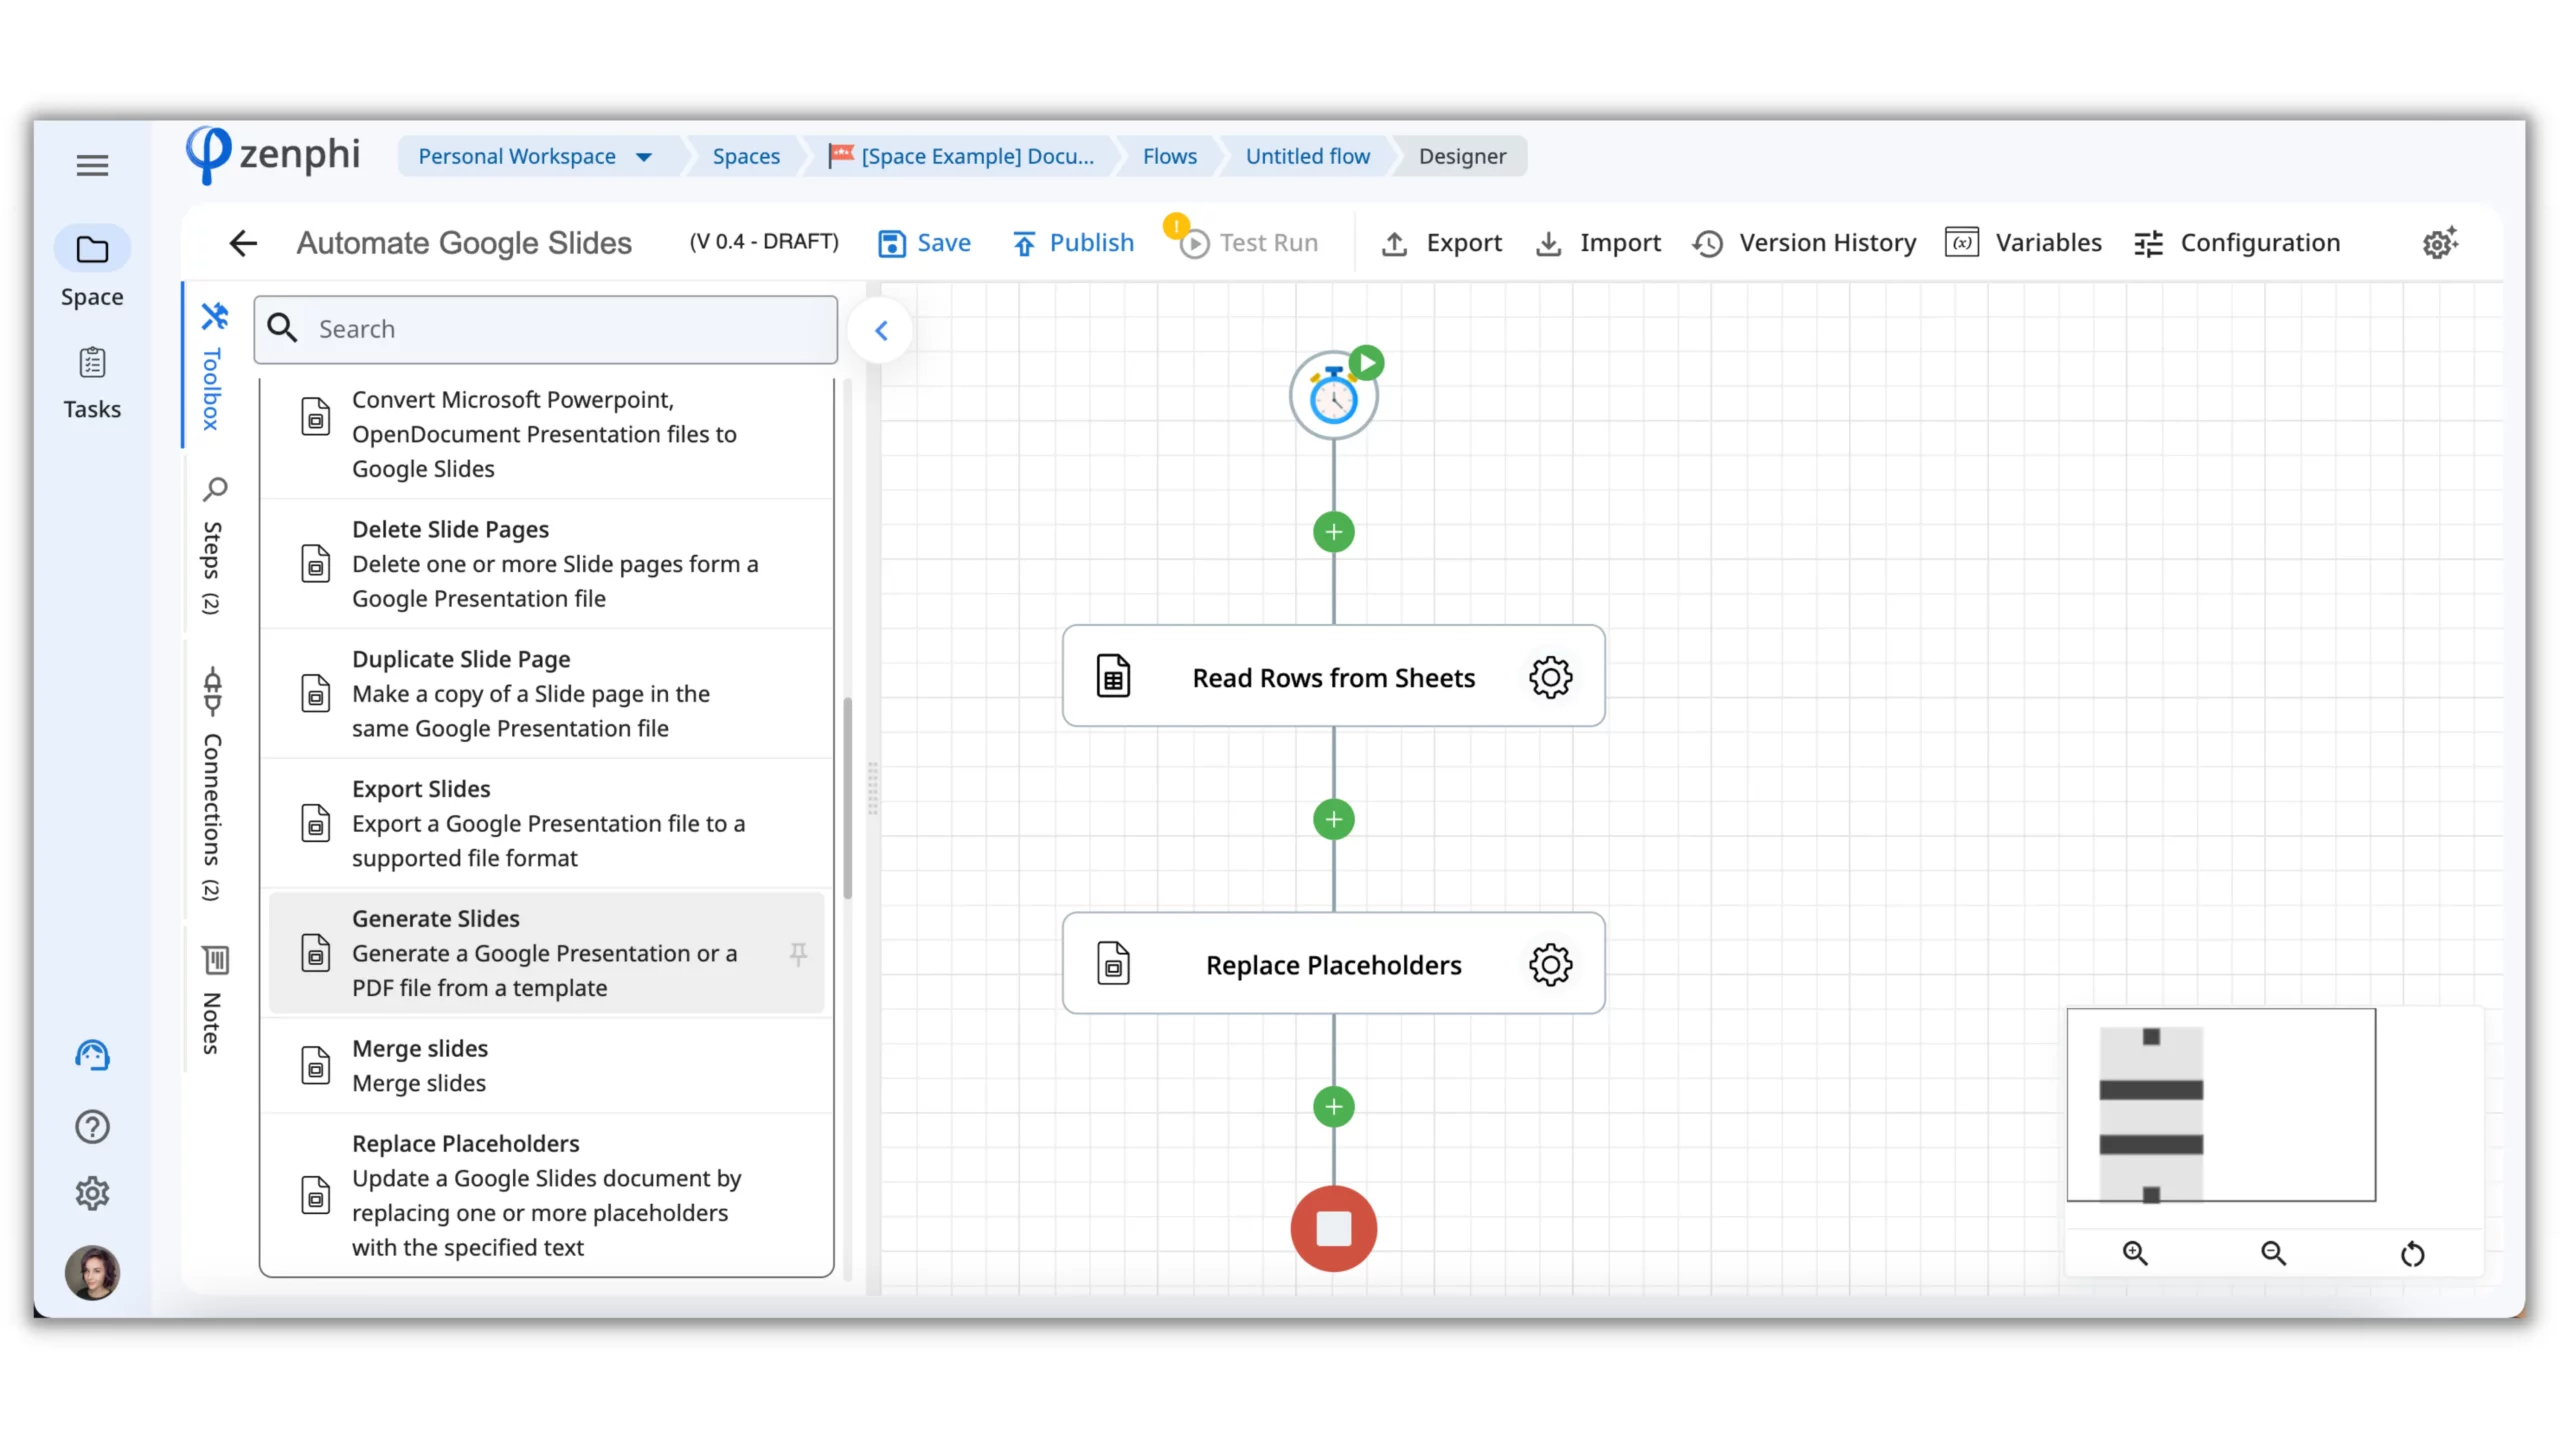
If you’re working with data that is constantly changing, such as sales figures or website traffic, you can use zenphi to automatically update your slides with the latest information. Set up a workflow that pulls data from a Google Sheet or other source on a specified schedule, and uses that data to update specific slides in your presentation. This ensures that your presentation is always up-to-date, without you having to manually make changes. Just mark the dynamic data inside your slide with the {{brackets}} and then use the “Replace Placeholders” action within your Flow.
4. Automate slide merging
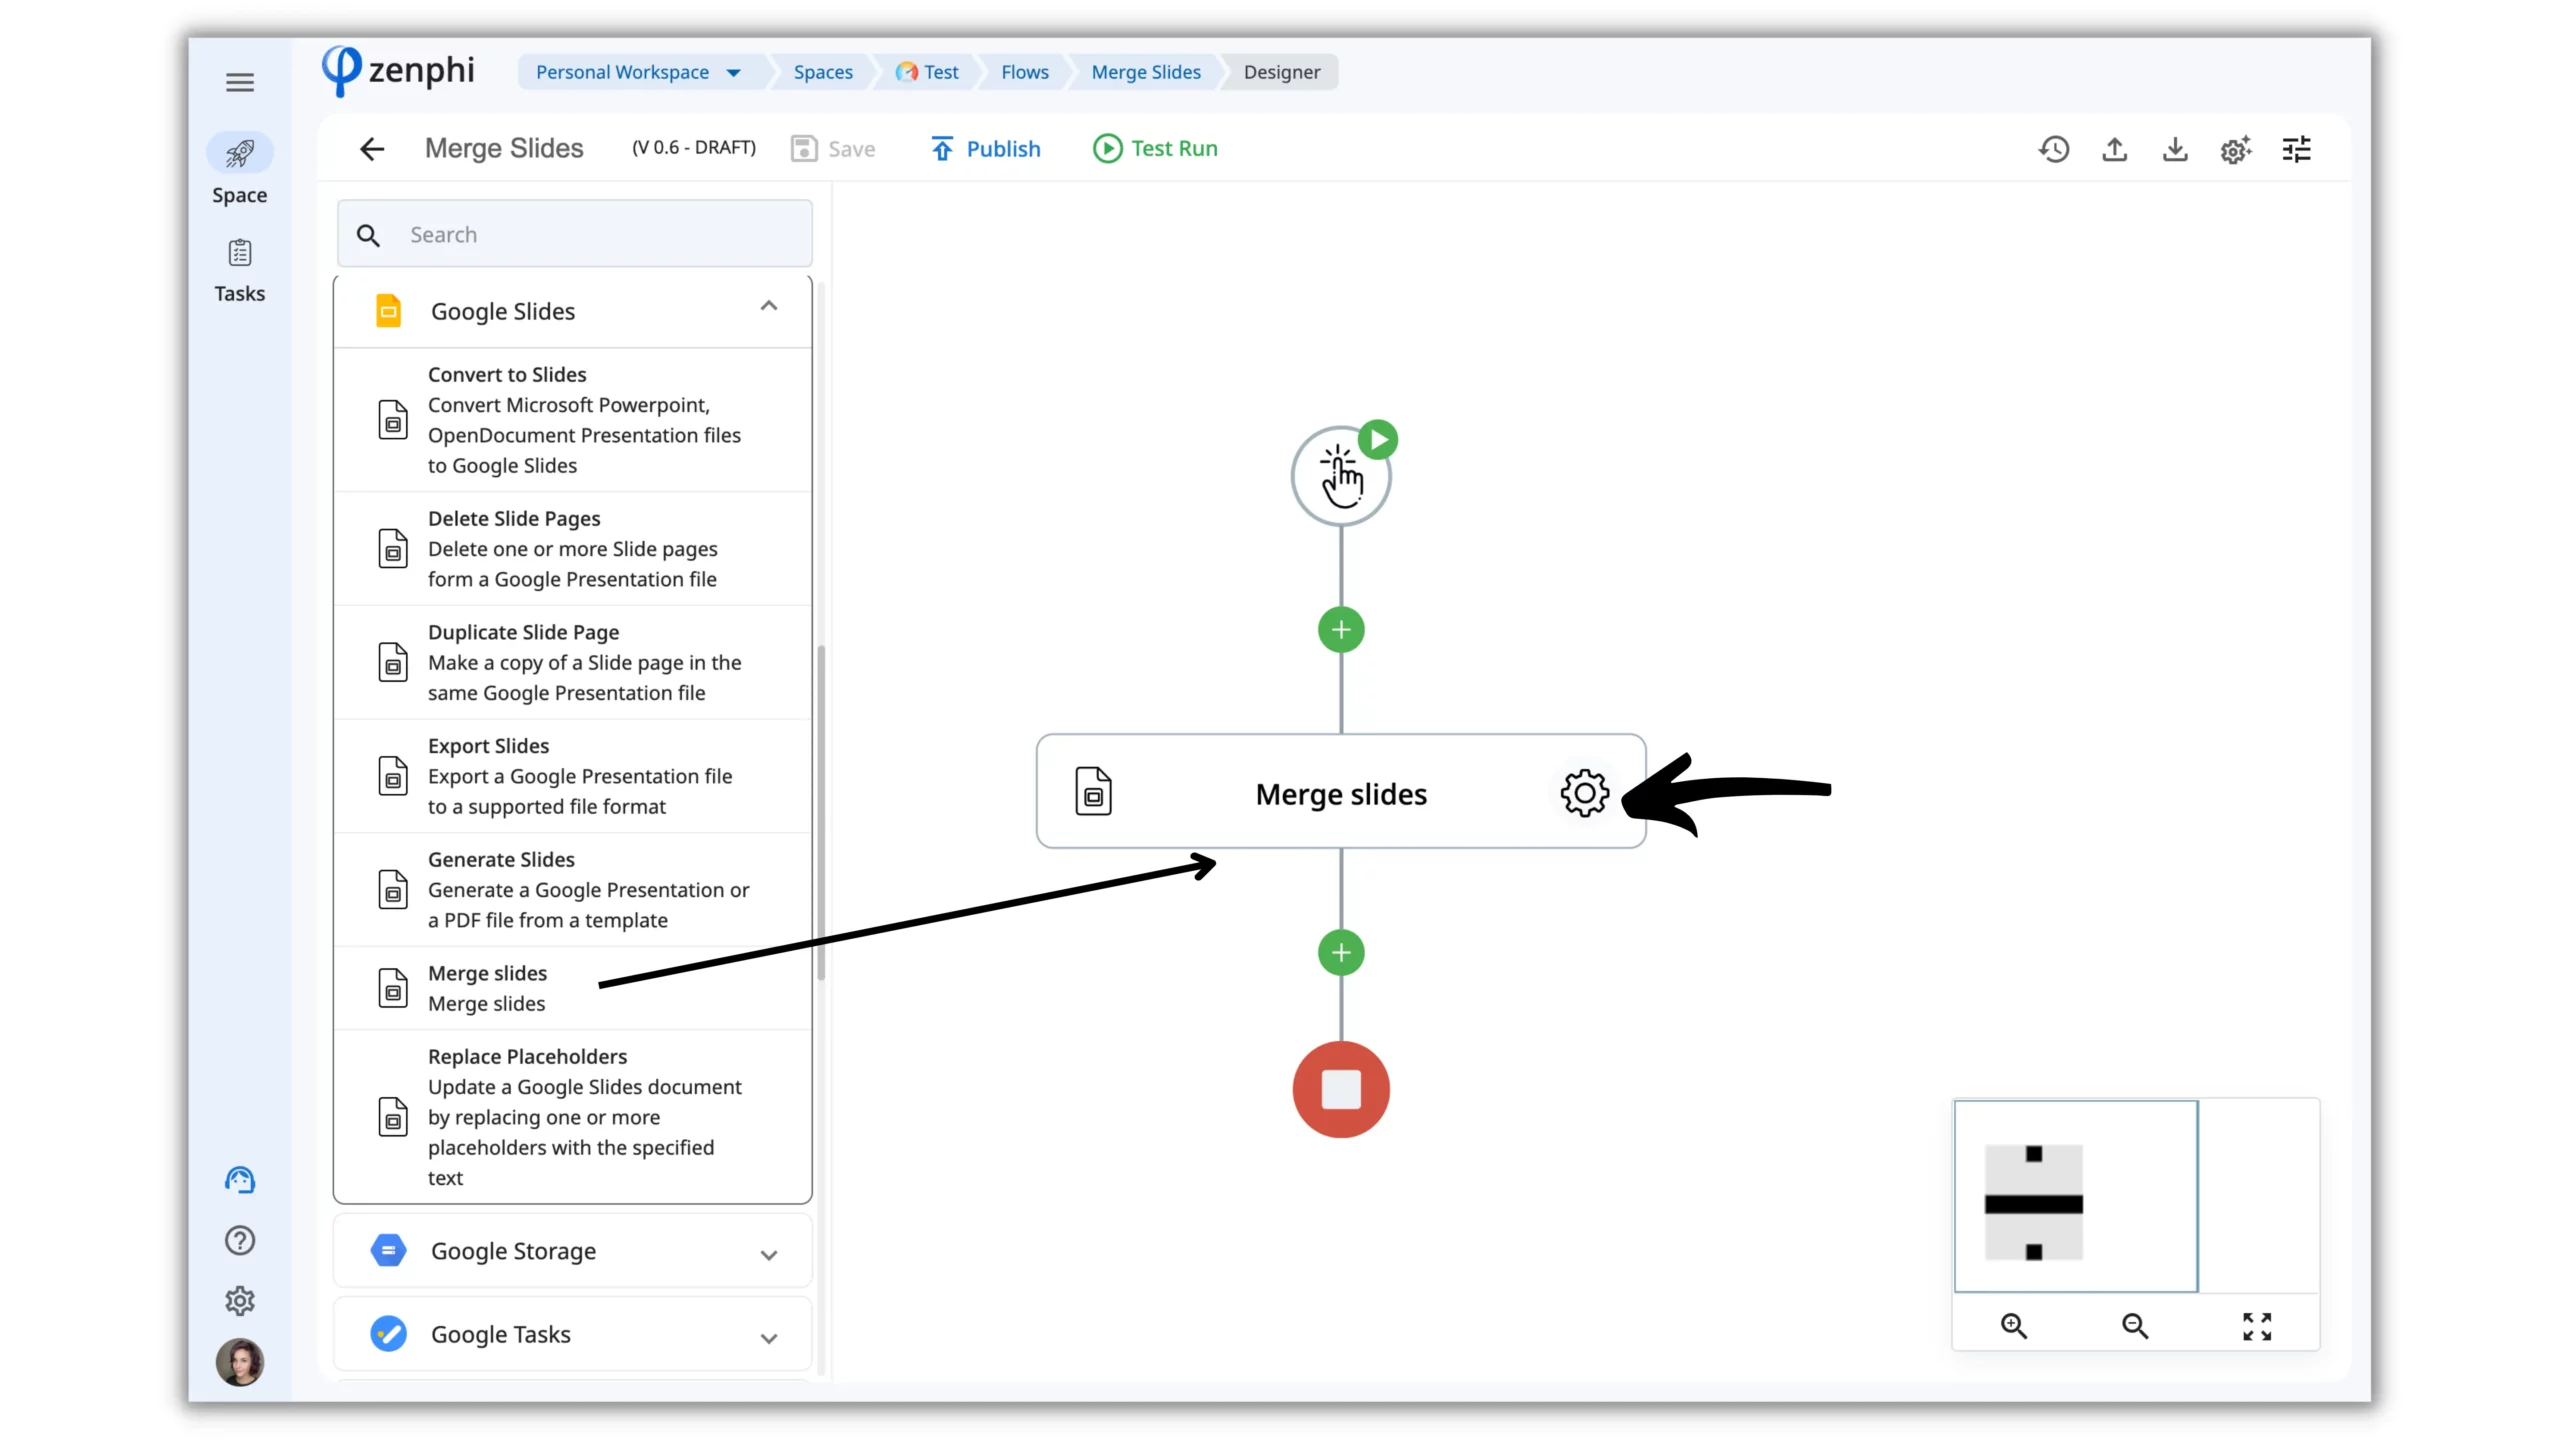
Another way to automate Google Slides with zenphi is by merging multiple presentations into one cohesive deck. This can be especially useful when working on group projects or when creating a master presentation from smaller ones. With zenphi, you can create a workflow that merges slides from multiple presentations into one master deck. You can also customize the order of the slides and remove any duplicates. This helps to streamline the process and ensures that the final presentation is consistent.
5. Automate Google Slides approval workflows
Automating your slides approval process with zenphi can help you streamline the workflow for creating Google Slides presentations. Imagine that you no longer need to manually send each presentation out for review, keep an eye on responses from stakeholders or team members, notify them, and resend the presentation repeatedly.
With zenphi automation in place, once you’ve created your presentation and triggered the automation Flow, all of it is handled behind-the-scenes so you simply need to monitor progress until it’s approved. This eliminates potential points of failure where someone might slip through the cracks while ensuring everyone involved has an opportunity to provide input into a project before publishing – saving precious time and eliminating stress when meeting deadlines.
Take your Google Slides automation to the next level
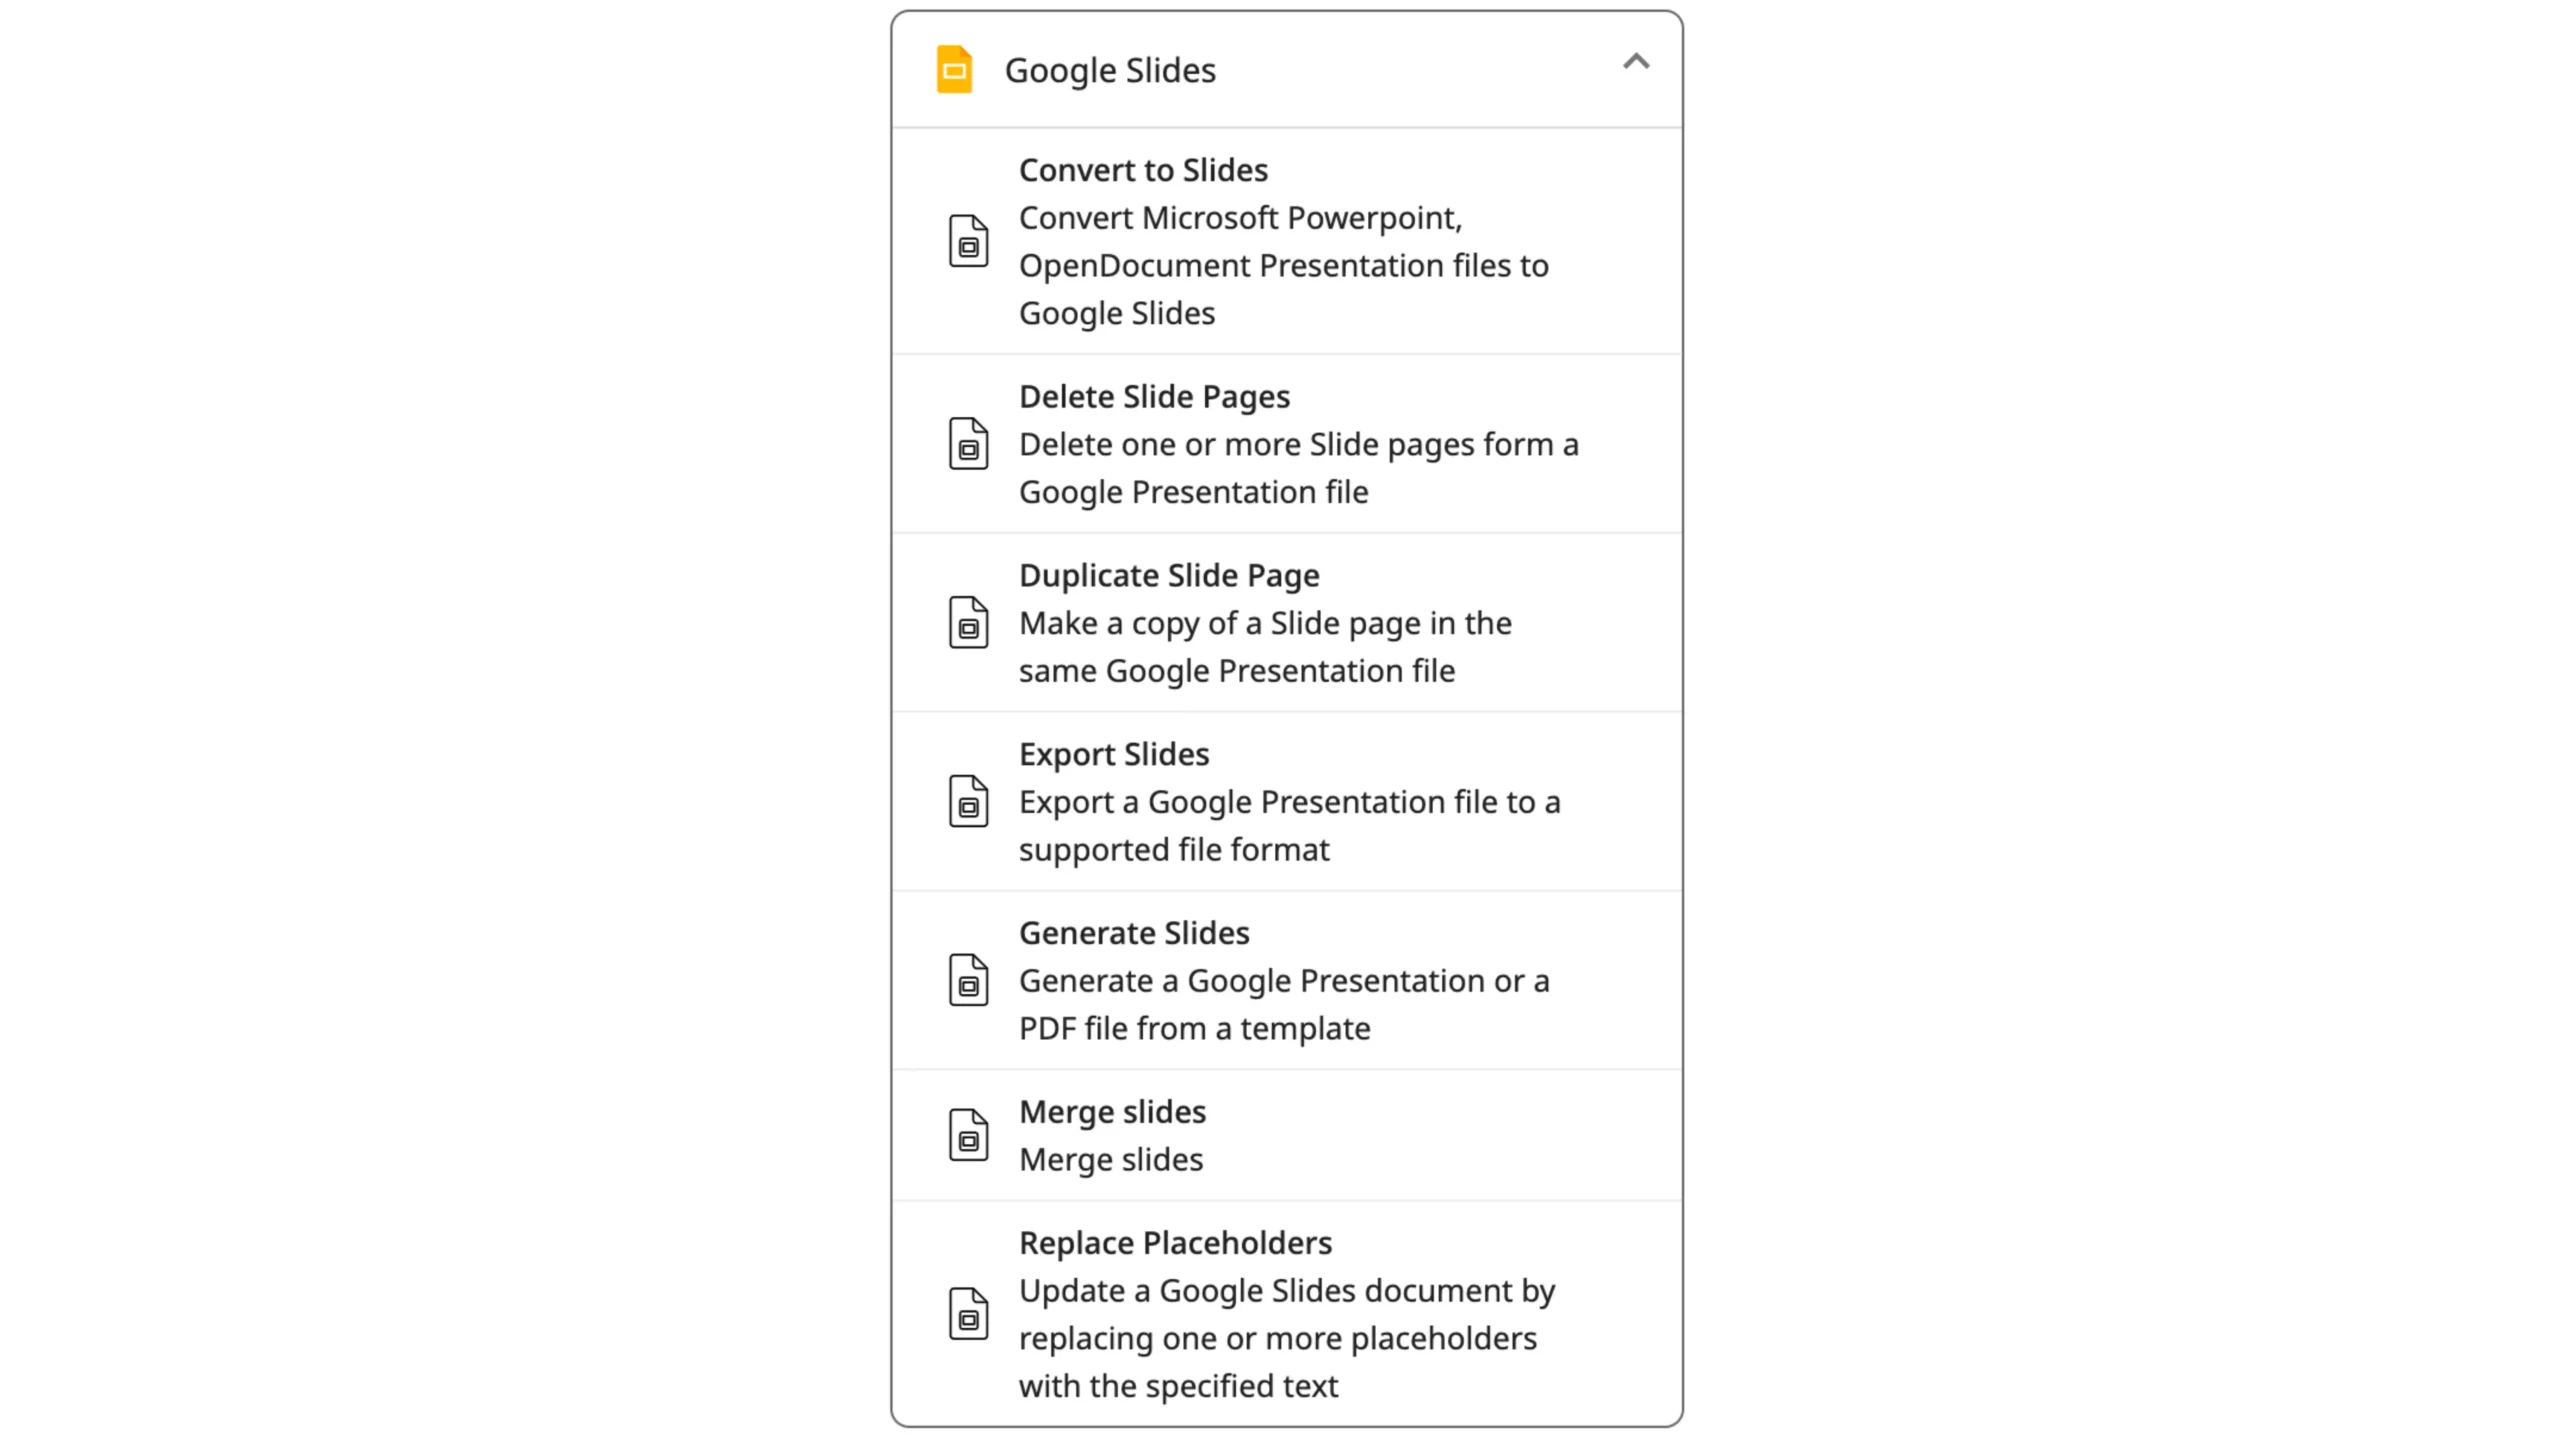
With zenphi, you unlock access to a much larger set of powerful features. For example, you can automatically convert Microsoft Powerpoint and OpenDocument files into Google Slides format for easy collaboration with colleagues or clients. In addition, it’s easy to delete, export, or duplicate slides at any stage – the possibilities are endless. So put your workflow on autopilot in no time!
Conclusion
In conclusion, zenphi can be a powerful tool for automating Google Slides workflows. By using zenphi to automate tedious tasks, you can save time and focus on the creative aspects of your presentation. Whether you’re creating a presentation from a Google Form or collaborating with team members, zenphi can help streamline the process and ensure that your presentation is the best it can be. Start automating yourself!

