Learn how how to build a fully automated approval workflow for onboarding vendors, using a tool as simple as Google Forms
Table of Contents
Why Automate Approval Workflow For Vendor Onboarding
Effective vendor onboarding is critical to establishing a successful and healthy relationship with your suppliers. A smooth, hassle-free onboarding process will attract reliable vendors to your business, while a disorganized approach could cause them to lose confidence from the outset. According to one survey, 73% of businesses faced a significant disruption caused by a third-party vendor in the previous three years, highlighting the importance of conducting thorough risk assessments before bringing on new suppliers.
In this guide, we’ll walk you through building a simple Vendor Onboarding Approval Workflow automation using Google Forms. If Google Workspace is your productivity environment, you can fully leverage the power of Google Apps by connecting it to Zenphi, the leading workflow automation platform for Google.
The process we’re about to describe will help you streamline the approval process within your and ensure you’re working with legitimate and compliant vendors, and allow you to build a solid document and workflow management system within your company. It will consist of 3 main steps: adding the information submitted to the backlog of all the vendor requests, sending the request for approval to the procurement team and finally notifying the company of the outcome. While small businesses might take around a month to onboard a new supplier, larger companies can take up to six months. Automation can drastically reduce this timeline, let’s get started!
Automated Approval Workflow For Vendor Onboarding: Step-By-Step
Set Up A Trigger
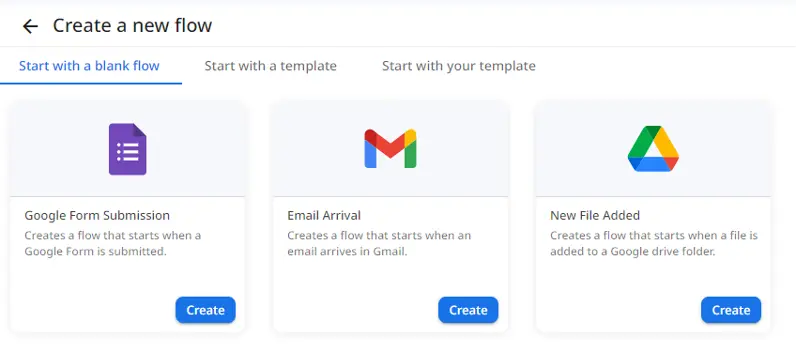
To begin, you’ll need to set up a Zenphi account if you haven’t already. You can create a free account here. Once you’ve created your account, it’s time to build your first automated flow. In Zenphi, a “flow” represents the entire automated process, made up of a trigger and a series of actions. The trigger is the action that starts your flow while the actions are the steps that make up the process.
For this workflow, we’ll use the Google Form Submission trigger. This means that whenever a vendor submits their onboarding form, your automated flow will kick off and start processing the vendor’s information.
Connecting Vendor Form Submission To Google Sheets
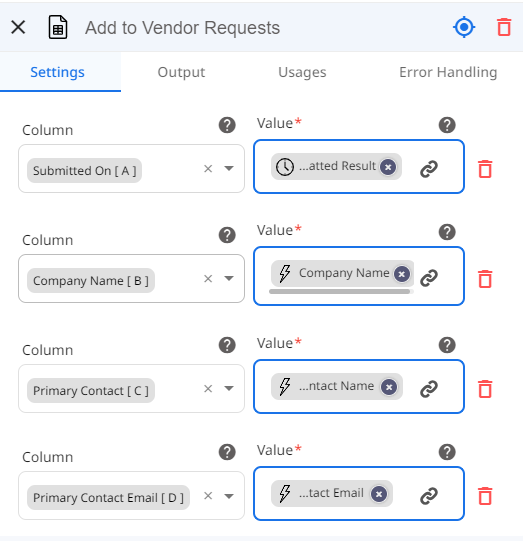
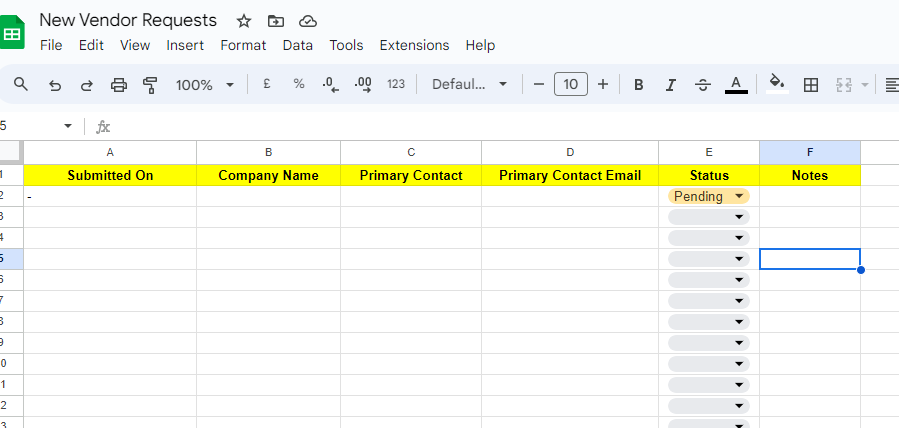
The first step in our flow is creating a Google Form to collect the necessary information from your vendors. You can ask for details such as their company website, main email address, billing information, and more. Once a vendor submits their form, the data will be sent to a Google Sheet for tracking purposes.
To do this, use the Add Row action in Zenphi to input the form data into specific columns in the Google Sheet. For added organization, you can also include a timestamp by using the Current Date/Time action to mark when the submission was made. To add their responses use Zenphi’s powerful Token Picker (represented by the chain icon) , it lets you dynamically insert data from the form into your flow.
Sending the Request for Approval
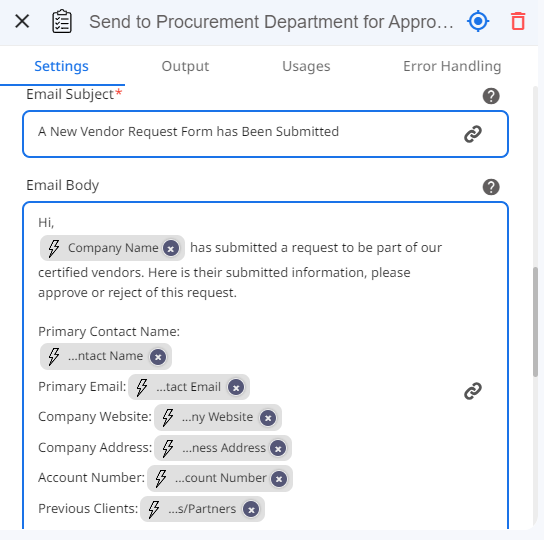
Next, we’ll send the submitted information to the department responsible for reviewing and approving vendor requests. The Assign Task action in Zenphi makes this easy. It lets you send an email to the approver, allowing them to approve or reject the vendor request. You can use the Token Picker to customize the email’s subject and body with dynamic content, making it more personalized and informative.
Then, use the “Get Item Information” action to retrieve the view link to the Google Sheet. This way, you can share it with whoever needs to view the file if manual review is required.
We’ve already helped hundreds of companies to automate approval workflows for IT, HR, Finance, Sales and Procurement departments within familiar Google Workspace environment. Book a call to learn how your organization can benefit from it.
Setting Conditions for Approval or Rejection
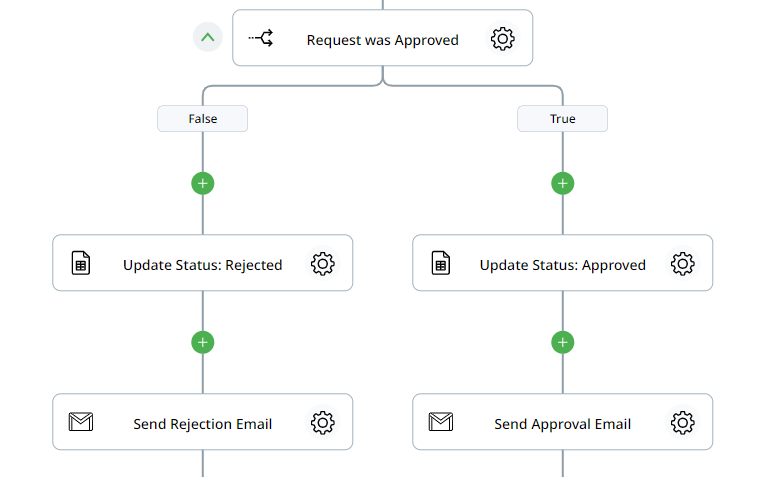
Depending on the approver’s response, the flow can take different paths. Using the If Condition action, you can define what happens if the vendor is approved or rejected. For both scenarios, we’ll update the Google Sheet status using the Update Row action. For approved vendors, the status will be updated to “Approved,” and for rejected vendors, it will be marked as “Rejected.”
Zenphi’s Assign Task action also allows approvers to add notes to their response. In the case of a rejection, these notes can be added to the Google Sheet to provide feedback on why the vendor was not approved.
Notifying the Vendor
For rejected requests, the final step is to notify the vendor via email using the Send Email action. You can customize the subject line and body of the email, and even attach the notes from the approval task so the vendor knows what needs to be corrected before resubmitting.
If the vendor is approved, the flow will not only send a confirmation email, but also automatically add the vendor’s details to the corresponding CRM using the Create Record action for HubSpot (or your preferred CRM). This allows you to keep track of your vendors easily.
Testing and Publishing your Flow
And it’s as easy as that! A simple but highly effective vendor onboarding flow. Remember, Zenphi allows you to add as many steps as needed to fit your process. Whether it’s sending contracts for signing or adding multiple approval steps before adding the vendor, you can easily drag and drop additional actions.
Once you’re happy with your flow, simply save and publish it. From then on, whenever a vendor submits an onboarding request, the entire process will be handled automatically. Zenphi also offers personalized help to get you started! If you’d like a free demo or assistance with your first flow, feel free to book a session with one of our experts here — no cost or commitment required.


